Miso fish summer rolls


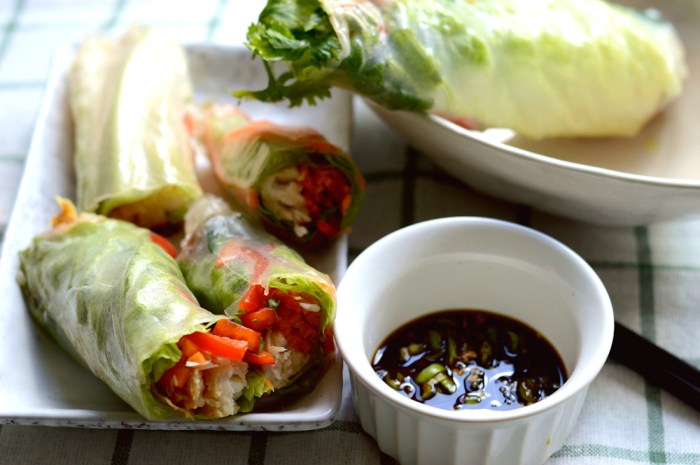
Rice paper rolls that are stuffed fat with savoury umami tastes of miso flavoured fish, lettuce and other vegetables to create something of a salad that offers crunch, twang of spice and zingy freshness that is much needed this summer.

The ingredients are rice paper, fish fillet, miso paste, lettuce, shredded carrots and peppers, mint leaves, coriander, soy sauce, vinegar (not pictured), red pepper flakes, garlic clove

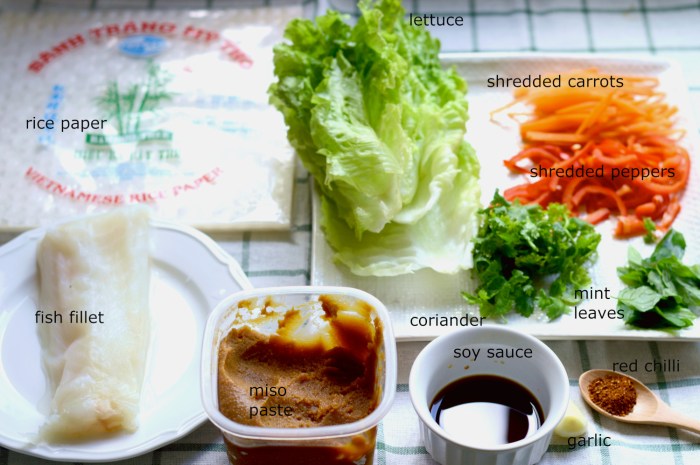
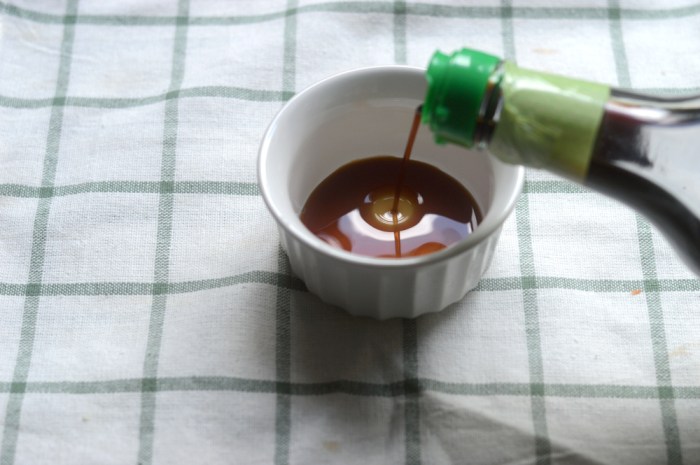
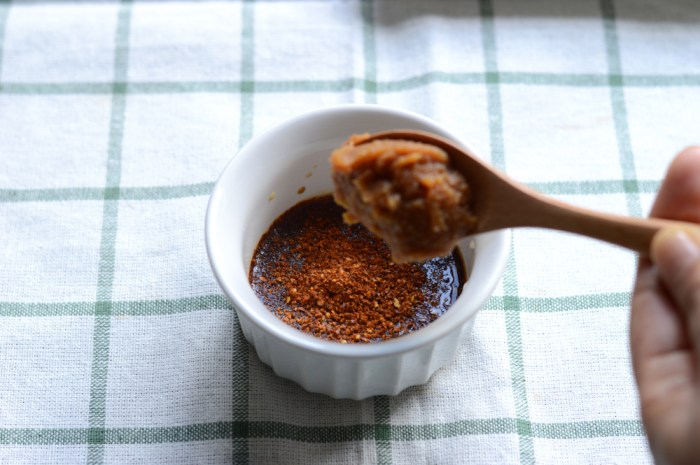
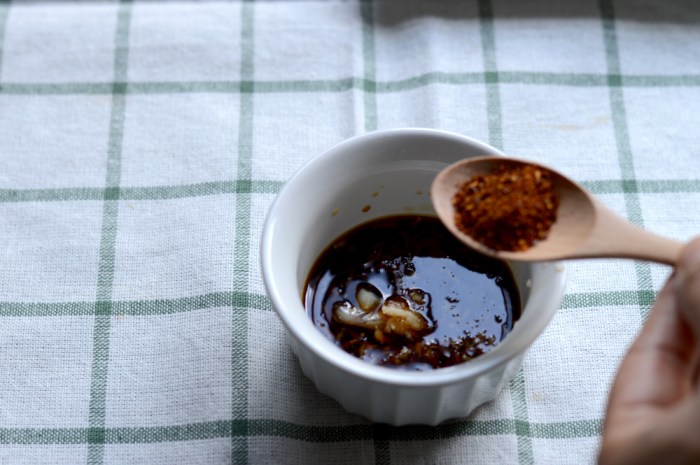
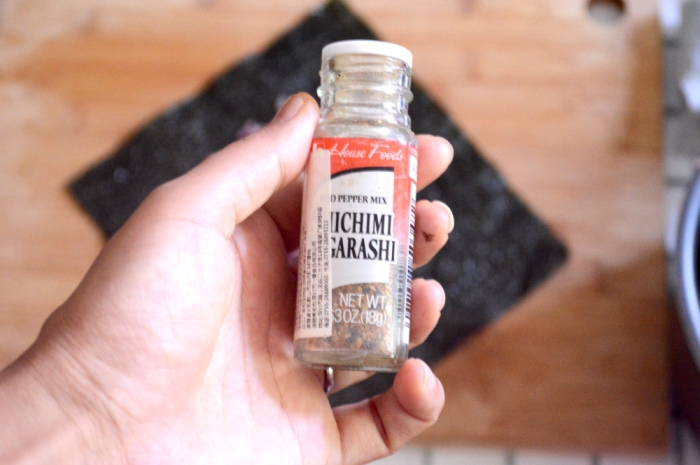
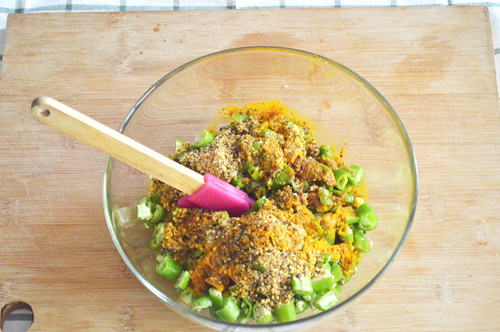
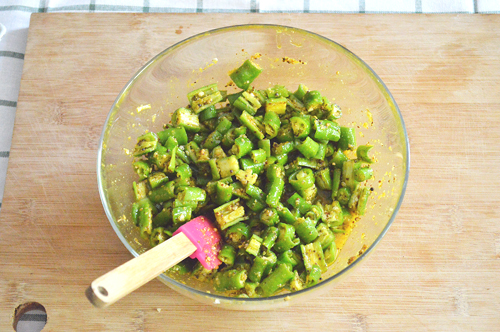
for the Miso marinade we mix together soy sauce, minced garlic, miso paste, vinegar and red pepper flakes. The marinade is quite salty and the fish comes out extremely flavourful and saltier than usual but we need it to be so to be able to balance the fresh blandness and crunch of the rice paper and the vegetables.

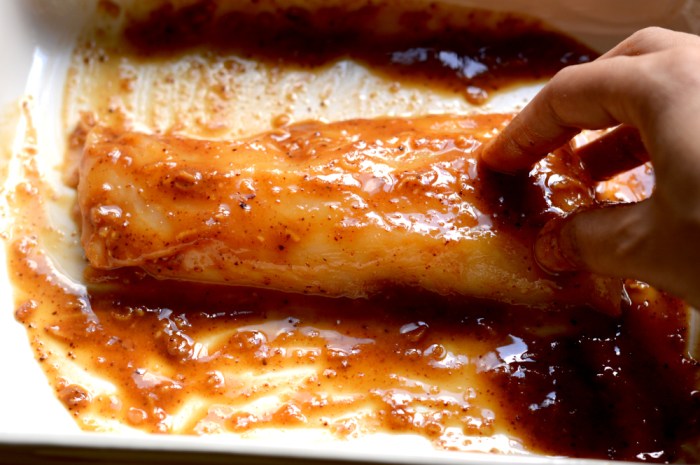
Slather the fish fillet generously with the marinade and bake at 190ºC for 15 minutes.

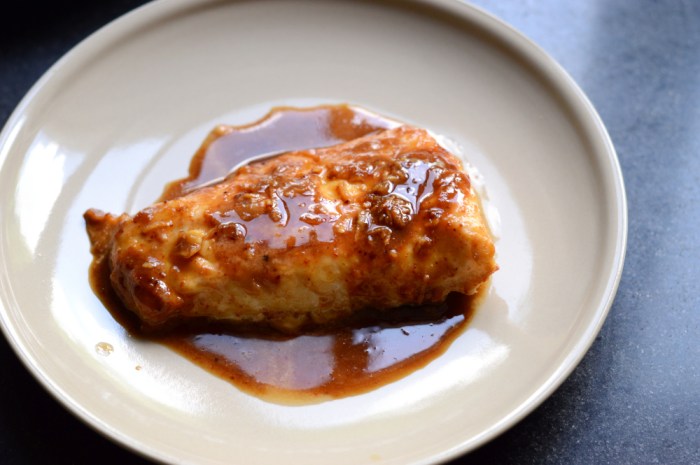
let the cooked fish cool for a few minutes before slicing or chopping. I have sliced it into 4 strips because I was making 4 salad rolls. They can be chopped up as well.

Wet the rice paper on both sides briefly before laying it down on a damp clean cloth. A minute later the translucent rice paper will turn into this transparent sheet of starch.

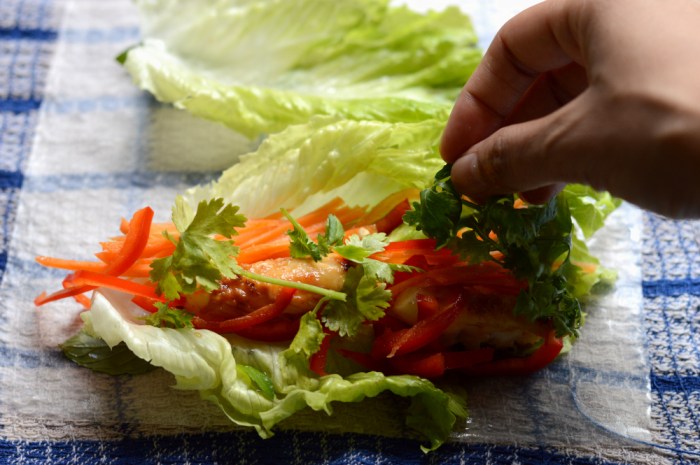
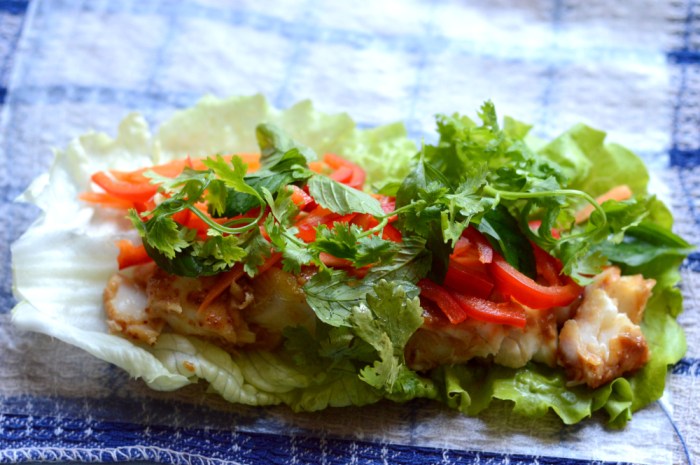
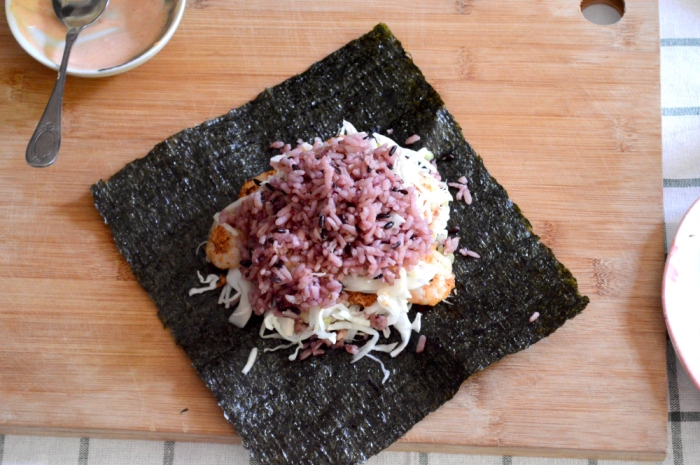
Here is the fun part. This is as much craft work as I will do this year. Layer some lettuce because it forms a sort of bottom for the rest of the vegetables and is easy to build up. Pile up the fish, carrots, mint and coriander

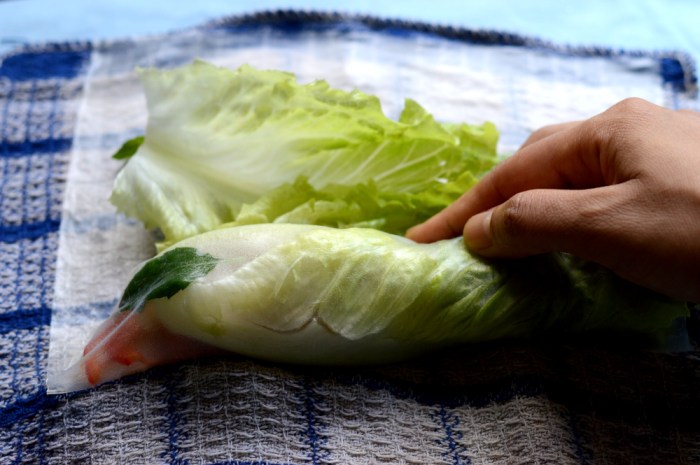
Roll it up, fold in both the sides and voila!

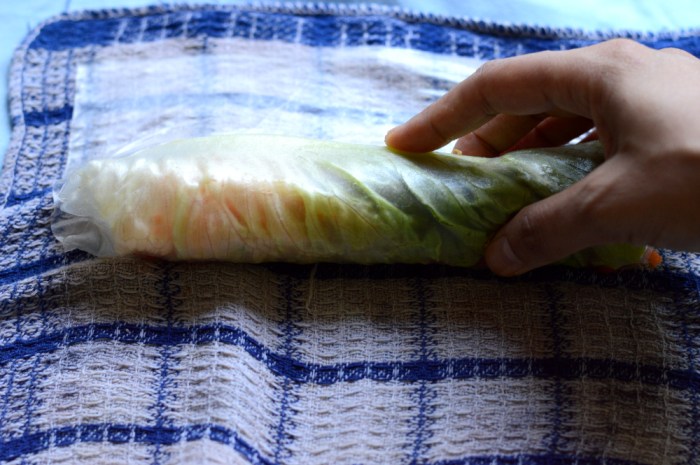
Okay this is fun. This time I added just a single layer of lettuce and rolled it by first pinching in the ends and then rolling it up.

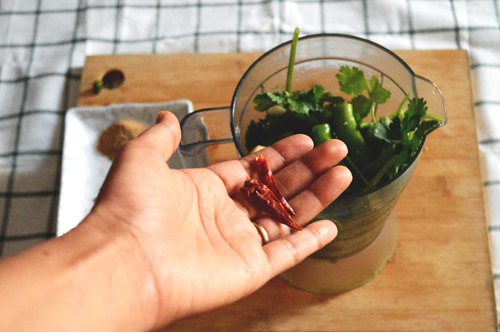
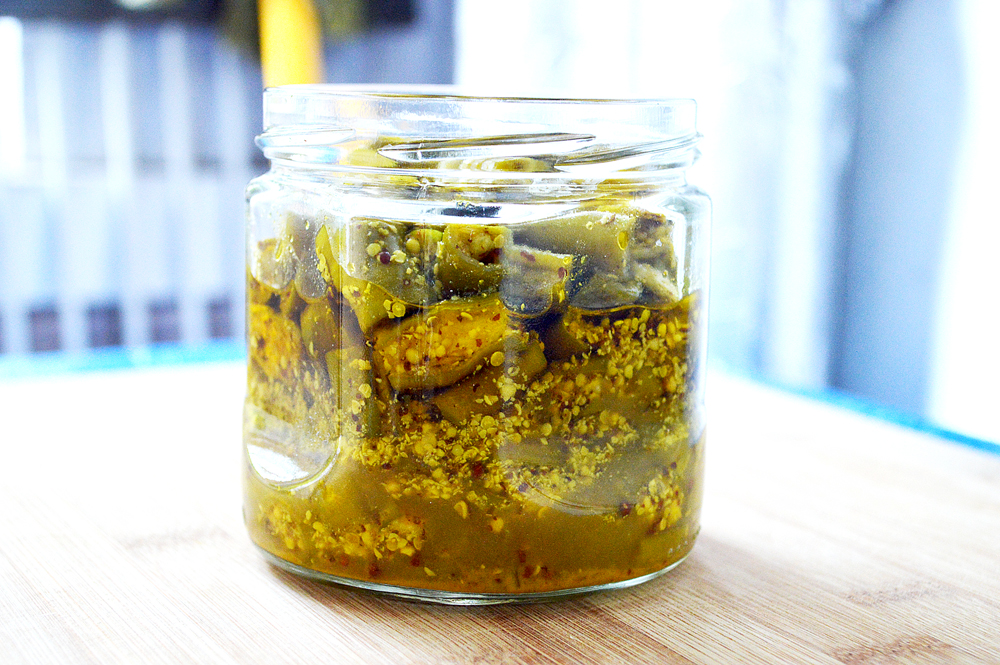
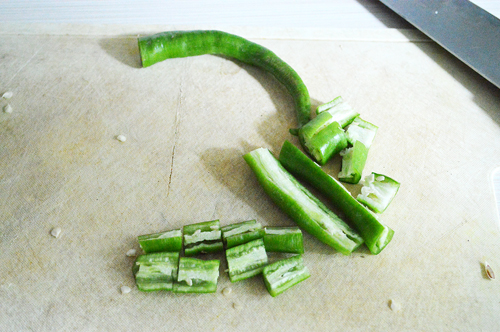
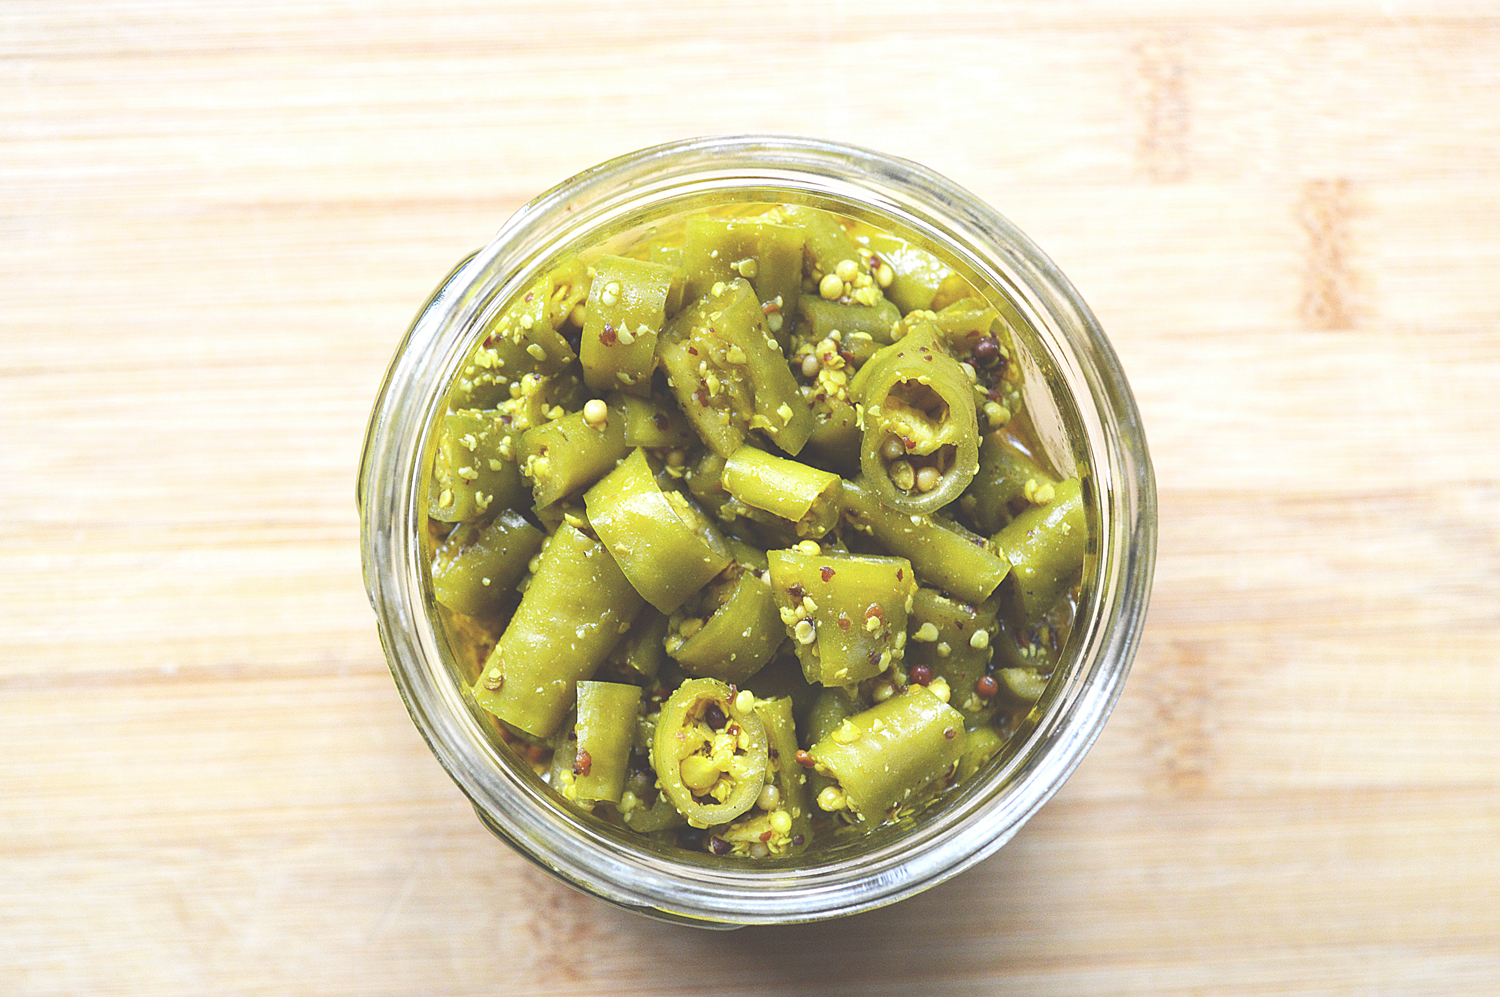
Also made some dipping sauce by mixing some green chillies in soy sauce, This is entirely optional but so good!!

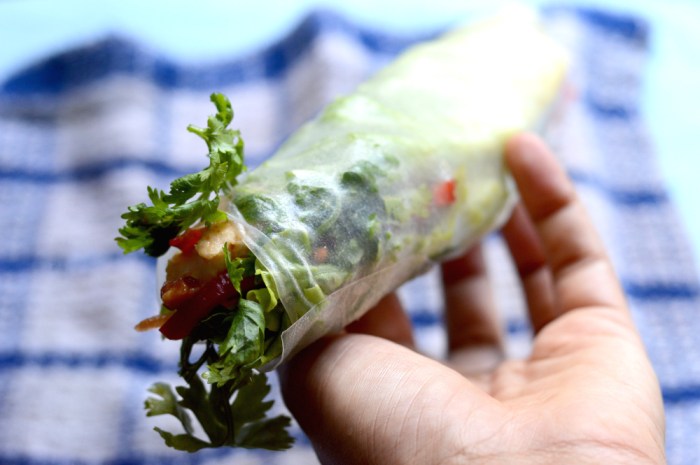
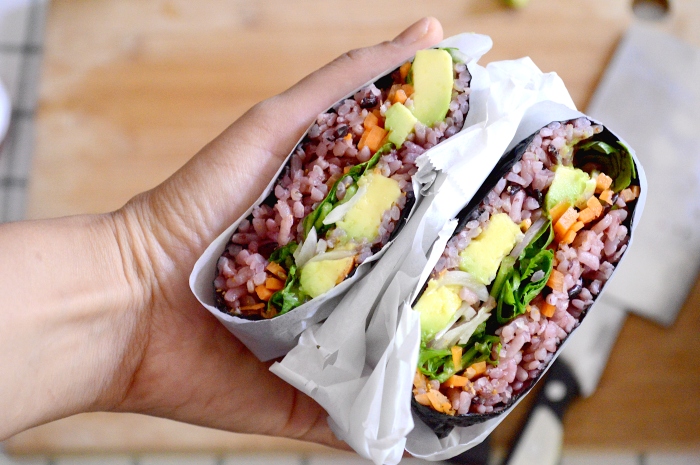
Mmm, delish I tell you. This is such a wonderful lunch. It’s a salad, its a roll it’s both!!


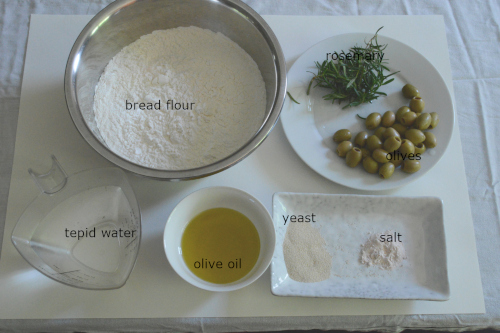
Miso fish summer rolls.

Recipe ingredients 

Rice papers- 3-4 nos
Miso - 2 tbsp
soy sauce- 2 tsp
Vinegar - 1 tsp
Red chilli flakes- 1 tsp
Garlic clove- 1
Sugar/honey/sweetener (optional)- 1 tsp
Boneless fish fillet- 150gms
vegetables of choice 
(lettuce, shredded carrots,peppers, coriander, mint)

Note: sweetener not needed if using a slightly sweet miso. You can use either light or dark miso. 

Recipe instructions – Make a marinade with the soy sauce, vinegar, miso, crushed garlic and chilli flakes. Coat the fish fillet generously and bake at 190ºC for 10-15 minutes or cook on a stove top.

Once cooked/baked let it cool before slicing or chopping.

Wet the rice paper on both sides before laying flat on a damp cloth. A few minutes after it has softened and become transparent start laying the fish and vegetables on the end closest to you before finally rolling to make a wrap. Pinch the opposite ends before to make a tighter closed roll.

Serve with some chilli infused soy sauce or sweet chilli sauce.

Enjoy!


Onigirazu two ways


crispy shrimp
avocado and veggies (vegan)

It looked like a magic trick the first time that I ever saw Onigirazu. It was a rice sandwich wrapped in nori that tasted like sushi from an alternative reality and what? how? dear god! was all I could exclaim.

Not only did it taste delicious but it looked so mind bending that I had to make it and just like a sandwich it can be created any number of ways to suit your mood and needs, which is why I have two kinds here. One is a crispy shrimp and the other a more sombered vegan option and they both turned out absolutely scrumptious.

The ingredients for these particular onigirazu are thinly sliced vegetables (cabbage, onions, coriander, carrots), avocado and shichimi (optional) for the vegan option. Shrimps, semolina and paprika, salt, pepper, minced garlic, cumin and oregano for the shrimp option. Also Nori sheets.

and cooked rice. I have cooked some black rice with white to get a purple. Who knew? The rice seasonings include, soy sauce, vinegar and sugar.

add the soy sauce, vinegar and sugar in with warm cooked rice

and mix

Add semolina and spices to the shrimp and mix well.

Cook on a hot skillet

until cooked and crispy. These shrimps have such an astounding flavour.

Now for the assembly which might look a bit intimidating but isn’t all that impossible. On the rough side of the nori sheet spread a layer of seasoned rice. Clamp it down well so it doesn’t dome and make this into anymore of a daunting task than it already is

Add a spread or sauce of choice. I went for the classic which is mayonnaise and ketchup mixed to primrose emulsion.

Top with cabbage or lettuce.

Followed by crispy shrimps.

Topped with some more cabbage

sauce

and rice. It starts with rice, it ends with rice.

And now it’s just a matter of folding everything into a pocket to form our onigirazu

Fold the opposite edges inwards so that they meet together and they’ll stick. Oh, they will stick. It’s magic.

Fold from the top and that there is our rather untidy pocket, but it’s there.

Now wrap it all in plastic wrap or butter paper as I used here because ugh, plastic! And that’s one done until we slice.

Same again for Onigirazu number 2. Start with rice and since the vegetables had no seasoning I went ahead with some shichimi, but you can use anything instead.

sliced carrots

Followed by coriander

avocado and more shichimi, which was then topped again with rice and folded.

and so here we have a cross section of both. Side by side. I topped the vegan onigirazu with a bit of sriracha

Ingredients

Cooked rice- 1 cup
Nori sheets: 2
Seasoning for rice
Soy sauce- 1tbsp
Vinegar- 1tsp
Sugar- 1 tsp

Vegetables
Carrots thinly sliced
Coriander
Cabbage thinly sliced
Avocado

Note: You can use any vegetables as per availability and preference.

Shichimi pepper for seasoning (optional)

For shrimp Onigirazu
Shrimp- 200g
Semolina- 1tbsp
paprika, pepper, oregano, cumin, minced garlic, salt -1/2 tsp each

Recipe instructions

Mix the soy sauce, vinegar and sugar with warm rice and keep aside.
Mix the spices, salt and semolina in with the shrimp until they're well coated.
On a hot skillet with a teaspoon of oil cook the shrimp on both sides until crispy.

Lay the nori sheet so that the rough side is facing you.
Top with a dollop of seasoned rice and flatten it.
Followed with shredded cabbage. Spread some sauce or spread of choice on and top with shrimp. keep them all in a single layer so that the filling doesn't dome.
Top again with shredded cabbage followed by sauce and finally another dollop of rice.
Keep clamping down the filling.
Fold the nori sheet from opposite sides so that all meet in the middle.
Form into a pocket and wrap in cling film or butter paper.

Repeat process with vegetable filling.

Note: You can use any vegetables and seasonings according to your preference.

Enjoy!

Olive rosemary focaccia


It’s been a while since everything and among other things that I love and crave, bread is definitely the frontrunner and not finding any upon opening the refrigerator can be a bit surprising, agitating and often tends to send me on a downward spiral of domestic crisis which is why and when I ended up with this coppery slab of carb heaven.

The thing about focaccia apart from creating your very own custom flavour is the straightforwardness of the whole process because there isn’t any particular shape that we need fret over and it’s all too easy to begin tearing into one the moment it’s out of the oven, moreover I like slicing stale focaccia into slivers and toasting it in the oven to make crispy crouton like sticks.

As all breads go, focaccia also begins life with flour and yeast and so here we have bread flour, tepid water, olive oil, yeast, salt, rosemary and olives.

Begin by adding yeast into the water which is just warm to the touch and let it sit until it foams. You need good, fresh yeast for that or else the dough won’t rise.

Once the yeast has nicely bubbled up, add it to the flour

along with half the olive oil, reserving the rest for later

add salt and mix it with a spoon until it forms a shaggy dough

Transfer to the countertop and knead until smooth and pliable adding more water a little at a time without making it sticky.

Let it rest in a warm place for a couple of hours until doubled in size. You can even leave it in the fridge overnight.

Once risen it is ready to be formed into bread.

Punch it to deflate. Not only because it’s important but also because it’s fun.

Prepare the baking pan by oiling it generously

Sprinkle some semolina. This is an optional step but helps in the crisping of the bottom.

Scrape the dough into the tray

and brush the top with reserved olive oil. Be generous with the oil here. It’s crucial to this bread making process.

Push the dough with fingertips until evenly distributed in the baking tray, also giving it the typical focaccia dimpled look.

Stuff the dimpled surface with rosemary and olives and push them right into the dough.

Cover and let rise for another hour before baking at 200ºC for 25-30 minutes or until the top is nicely browned and the bottom is slightly crisped up

Brush the just baked bread with olive oil and let it rest at least ten minutes before serving.

Here’s a cross section of this delicious focaccia. It’s soft, spongy and moist and deliciously satisfying.


Ingredients

  • Flour: 700g
  • Yeast: 2 tsp
  • Warm water: 300mls + more for kneading
  • Salt: 2 tsp
  • Olive oil: 50mls
  • Olives: 100g
  • Fresh rosemary: 10g
  • Semolina: 2 tsp

Recipe instructions

Add the yeast to warm water and let it bloom. Make sure the yeast is fresh and not expired or it will inhibit the rising of the dough.

Add the water to the dough along with olive oil and salt and mix with spoon until just combined to form a shaggy dough.

Transfer to countertop and knead to a smooth pliable dough. Add more water if need be but a little at a time to keep the dough from getting sticky.

Let the kneaded dough rest in a warm place for a couple hours or until doubled in size. You can even let it rest in the fridge overnight.

Once the dough had doubled in size, deflate by punching and scrape into a well oiled baking tray sprinkled with semolina.

Push the dough to fit into the tray with fingertips giving it the typical dimpled look and stuff the surface with rosemary and olives.

Cover and let rest for an hour before finally baking in a preheated oven at 200ºc for 25-30 minutes or until the top has bronzed and the bottom lightly crisped.

Brush with olive oil and let rest for at least ten minutes before serving.

Wholewheat bagels


Do you ever wake up and suddenly remember something delicious you had months ago and feel the sudden need to recreate that moment or eat something similar? I’d ordered a bagel sandwich while out for brunch and though the sandwich was pretty lacklustre, the bagel in question was extraordinary and so it stuck and one day I woke up craving a bagel.

Bagels aren’t as easily available where I live and so it’s better and more entertaining to make some yourself which is exactly what I did and these came out pretty good, though I do intend on tinkering and tweaking a bit more with the recipe.

Whole wheat bagels with absolutely everything on top, fluffy on the inside and chewy on the out!

The premises are the same as any leavened bread. Start with some risen whole wheat dough. Recipe here. You also need some sugar, baking soda, and a mixture of whatever seeds or toppings you’d like on the bagel. It could be as simple as salt and sugar or a mixture of poppy, sunflower, black and white sesame seeds as I have here.

Divide the dough into equal sized dough balls. I made a total of eight from a kilo of dough for medium sized bagels. Each dough ball is 125g. You can make larger fewer bagels or smaller.

Make even sized balls

and let rest covered for 25-30 minutes.

Once they’ve slightly risen poke a hole in the centre and stretch the dough around to create a doughnut shape which is essentially also the bagel shape.

Like so.

Bring some water to the boil and add in sugar and baking soda.

Once the water comes back to a boil slowly drop in the bagels

and let boil for a couple of minutes on each side

use a long spoon or chopstick to flip them over.

Fish them out of the boiling water once you see them floating, cover generously with the toppings and bake for 15-20 minutes at 200ºC until crisped and browned at the top.

Enjoy!


Ingredients and recipe instructions for whole wheat dough.
Ingredients for bagel

Wholewheat bread dough: 1 kilo
Sugar: 1tbsp
Baking soda: 2tsp
Poppy seeds: 1tsp
Black sesame seeds: 1tsp
White sesame seeds: 1 tsp
Sunflower seeds: 1tbsp


Recipe Instructions

Make the whole wheat dough a day before and let rise overnight in the fridge. Let rest at room temperature for an hour before dividing the dough into eight equal sized portions.

Roll each portion into a ball and let rest once again, covered, for 25-30 minutes.

Poke a hole in the middle of each dough ball and stretch around the hole to create a doughnut like shape.

Bring a large pot of water to a boil and add in the sugar and baking soda.

Once the water comes back to a boil slowly drop in the bagels carefully, not spilling any water. Let boil for a couple minutes on one side before carefully flipping using a chopstick or a long spoon and boiling on the other for the same time.

Fish out onto a baking tray and sprinkle over the toppings.

Bake at 200ºC for 15-20 minutes until the top has browned.

Let rest for 10-15 minutes before slicing. The outside should be chewy and the inside fluffy, and since these are whole wheat bagels the texture within will be a bit denser than the usual refined flour ones, but they will be just as delicious.

Green coriander chutney


DSC_1272

It’s an amplification of harmonious flavours put together in a way as to extract the maximum potency of their parent ingredients is what chutney I believe is and this recipe extracts, exaggerates and emboldens every flavour that found itself in the making of this luridly green almost viciously spicy and flavour festooned green chutney.

Chutneys are of course not meant as a solitary treat because of their main purpose in life as an enhancer, that is they upgrade any dish from their current pedestal and double as dips, dressings even spread and this particular coriander chutney especially works hard to earn its keep not least because it’s an old recipe using few readily available in season ingredients.

DSC_1262 copy

The spice levels on this depend on the creator but it’s good to have it on the not so mild side of the spectrum and keep them a bit on the more tear-jerking levels, not to be vulgar or anything but because that’s really how this stuff works and it’s meant to. Ingredients are few and simple. Coriander, green chillies, garlic, dried red chillies, salt, cumin seeds and dried mango powder.

DSC_1263

It’s just a question of blending everything together. So along with the coriander leaves and the stalks which contain most of the flavour

DSC_1264

add the garlic and chillies, halved or chopped to convenience

DSC_1265

the dried red chillies

DSC_1266

and the spices that are cumin, dried mango powder and salt and blend

DSC_1269

until you have a somewhat smooth paste. Make sure that all the ingredients have been incorporated and that there aren’t any large chunks left. Add a little water but not too much and use a spoon to clamp down the leaves and chillies to avoid too many air pockets.

And that’s it. Your green coriander chutney is ready.

I especially love it sandwiched between two slices of bread with lashings of butter and a dollop of this chutney. But really, over rice, in salads, as a dip for anything fried, this chutney is where it’s at!


Ingredients

Coriander: 100g

Chillies: 3-4 (use fewer for a milder taste)

Garlic cloves: 2-3

Cumin seeds: 1 heaped tsp

Salt: 1.5tsp (or to taste)

Dried red chillies: 2-3

Dried mango powder: 1tsp heaped


 Recipe instructions

Wash the coriander well and rinse under running water until no grit or dirt remains and add to a blender with green chillies, garlic cloves, salt, cumin powder, dried red chillies and dried mango powder.

Blend to form a smooth paste. Add a tablespoon of water if it feels too dry but do not add extra because it can make the resulting chutney watery. Clamp down with a spatula or spoon for even blending.

Remove to a clean container and store in the fridge. It will stay fresh for at least 3-4 days.

Enjoy.


Instant chilli pickle


DSC_1182

For when you want to add a little something-something to a dish that doesn’t taste just there yet or feels flat or maybe you just want a tiny spice kick and spicy texture to enhance and complement the food then this is the pickle of instant dreams because it adds that fresh zing and unique flavour that you could have been looking for but didn’t know where to find.

It’s quick in that it’s instant and depending on the chillies you put it can vary from anything naughtily mild to demonic hot.

DSC_1154 copy

Doesn’t hurt that it’s full of ingredients really good for you and how they come to marry in perfect harmony to form this delicious pickle.

DSC_1160

Chop and dice the green chillies into smaller than bite-sized pieces and remove any seeds if you want. These chillies though large in size are rather tame in taste, in fact, they’re almost sweet and so I didn’t much bother with deseeding them.

DSC_1158

Crush the yellow and black mustard seeds till some are fine dust and some still intact.

DSC_1164

Find a suitable bowl for mixing the pickle.

DSC_1168

Add crushed mustard seeds to the chopped chillies

DSC_1170

followed by salt and turmeric

DSC_1173

In with apple cider vinegar

DSC_1175

mustard oil

DSC_1176

and lemon

DSC_1177

give everything a thorough mix

DSC_1178

until spicily combined

DSC_1180

This is ready to be eaten immediately. Alternatively, you can cover and keep for a day for the flavours to mingle and mellow before transferring to a clean jar. This will keep well for several weeks or you can transfer to a fridge after a few days.

(Note: the flavours will intensify with each day and the mustard seeds lend a pungent spiciness of its own which is most desirable in such pickles.)

DSC_1185

You can add this to rice, slices of bread and anything you feel could do with a boost. I have tried mixing it with boiled pasta during days of lazy inactivity and loved every morsel of it.


Ingredients

Chillies: 250g

Lemon: 1

salt: 2tsp

Turmeric powder: 1tsp

Mustard seeds (crushed): 30g (you can use either all black or all yellow or a mixture of both)

Mustard oil: 70mls (or use olive oil if mustard oil is unavailable)

Apple cider vinegar: 60mls


Recipe instructions

Crush the mustard seeds until some are pulverized and some whole. Chop chillies into small pieces and add to a bowl.

Mix in the mustard seeds, turmeric, salt, oil, vinegar and lemon juice.

Cover and keep for a day or decant into a clean jar to be eaten immediately.

Note: The addition of vinegar increases its shelf life and this pickle can be stored for several weeks, however, you can store this in the refrigerator after a week as well.


Garam masala


DSC_1111

I know, I know, a garam masala recipe when you can just buy one in a pinch so why bother etc, but here’s the thing, this isn’t just any other garam masala. No sir! this is garam masala with its party hat on. It’s the kind of all-inclusive, multi-purpose, dangerously fragrant aromatic that should replace any scented candle inside your home. This deep earth coloured spice melange has a disco-like quality to it which makes each dish that it’s added to get up and sing in full swing and make your taste buds dance.

DSC_1096 copyDSC_1148

The ingredients list though long isn’t out of the ordinary to make something so extraordinary. Black and green cardamom pods, cinnamon, nutmeg, dried bay leaves, star anise, black peppercorns and cloves.

DSC_1101

Ordinarily, you’d only need put these spices in a processor and whizz to a powder but to amplify the flavours and have them announce themselves on a megaphone we need to roast these a bit, only until the oils of all the spices wake up and lose their subtlety. A few minutes on medium-low heat on a hot pan until the combined fragrance hits you. Steadily stir to keep them from catching.

DSC_1103

Once they’ve cooled down we can grind them to a fine powder. It’s best to do it in short burst of pulses.

DSC_1105

There shouldn’t be any lumps.

DSC_1107

Transfer to an airtight container.

DSC_1114

and add it to curries, gravies, roasts, cakes.


Ingredients

Cinnamon sticks: 8gms

Black cardamom pods: 5g

Star anise: 1 in nos

Dried bay leaves: 4-5 in nos

Nutmeg: 1/2 Tsp

Black peppercorns: 15gms

Green cardamom pods: 10gms

Cloves: 10gms


Recipe instructions

Roast the whole spices on a medium-low flame for a minute or two until fragrant. Keep stirring to avoid burning and let them cool.

Process to a fine powder and store in an airtight container.

This multipurpose spice blend can be used in many sweet and savoury dishes for a spicy kick.


Wholewheat hamburger Buns


DSC_1032

There’s no reason why you can’t just run to the nearest food store and buy a packet of perfectly decent soft burger buns but here is the difference between the store bought ones and the homemade ones, and that is you know exactly what goes in here and I’m not even talking about the bread softening chemicals; it’s the quality of the ingredients that you have the power to control, not to mention that these have whole wheat in them which does set them apart from the absolutely refined floured buns, and really it’s worth the effort, not least because it’s hardly an arduous task. Just a question of mixing and placing and baking. Talking of which..


DSC_0992 copy

The ingredients are few and pretty straightforward. We have strong bread flour, wholewheat flour, melted butter, salt, sugar, yeast and some lukewarm water. It could be argued that these wholewheat flour buns do have bread flour in them, but it’s not all refined flour, moreover, when made entirely of wholewheat the buns tend to get a bit too dense.

DSC_0993

Mix the flours and make a well in the centre.

DSC_0994

Add yeast, salt and sugar

DSC_0996

followed by water

DSC_0999

and the butter

DSC_1001

Give it a cursory mix with a spatula or spoon just so that everything is dispersed evenly before we begin to get our hands dirty.

DSC_1002

Form into a shaggy dough to feel if you need some more water and I did.

DSC_1004

Add water little by little, or teaspoon by teaspoon lest the dough gets too wet and sticky

DSC_1005

form a rough clump before you begin kneading when the moisture to flour ratio feels just right.

DSC_1008

Slap the dough on a large surface such as kitchen platform and get kneading. I use a simple technique wherein I flatten the dough then stretch and pull at one end

DSC_1007

before bringing it back to meet the opposite end, and repeat

DSC_1009

until the dough starts feelings soft and pliable under the fingers and palm. You really have to get a feel of this to understand because it’s a transformation and takes anywhere between 5-7 minutes.

DSC_1010

Once you’re happy with the dough, form into a ball

DSC_1012

transfer to a greased bowl. Oil the dough as well to prevent sticking

DSC_1013

cover with cling film and let rest for an hour or until doubled in size.

DSC_1014

like so..

DSC_1015

scrape out of the bowl on a well-floured surface

DSC_1016

and divide into two equal portions

DSC_1017

dividing each portion into four equals.

DSC_1019

before forming into rounds and placing on a well-oiled baking sheet

DSC_1020

to transform these dough balls into decently sized hamburger buns, gently press each until a bit flat, about 7-8 cms wide and roughly 2 cm’s thick; ensuring you don’t make them too flat or they’ll be something of a pita bread.

DSC_1021

Cover with a damp kitchen cloth and let rise for another hour until doubled in size.

DSC_1023

Once they’re nicely fluffed, brush the top with some water/milk/egg white. I brushed mine with water because it ensures that sesame seeds stick and do not budge

DSC_1024

Speaking of which, sprinkle the top liberally with some and bake at 200ºC for anywhere between 15-20 minutes, or until the top gets deliciously browned and the buns have cooked evenly.

DSC_1028

Like so..


Ingredients

Bread flour: 300g

Wholewheat flour: 200g

Water: 250 mls + more if needed

Yeast: 2tsp

Salt: 1 tsp

Sugar: 2 tbsps

Butter (melted): 80g


Recipe instructions: 

Mix the flours in a large bowl and make a well in the centre. Add yeast, salt, sugar, water and melted butter to the well and mix with a spatula or wooden spoon until it forms a shaggy dough.

If the mixture is too dry and not coming together add water a teaspoon at a time until the mixture forms a dough. Scrape onto a large surface or platform and knead until the dough becomes soft and pliable for about five to ten minutes and form into a ball.

Transfer to a large bowl and ensure it’s well greased to keep it from sticking.

Cover with cling film and let rest for an hour until doubled in size, after which scrape the risen dough on a well-floured surface and divide into two portions, further dividing each portion into four equal parts and form into balls.

Place formed balls on a greased baking sheet and gently press until they’re larger in size, ensuring that they’re at least 2 cms’ thick

Cover with damp cloth and let them rest for another hour until doubled in size.

Once they have nicely fluffed up, brush the tops with some water and sprinkle sesame seeds.

Bake at 200ºC for 15-20 minutes or until the buns are deliciously golden.


Homemade peanut butter in a blender


IMG_7383

This began as something of an experiment in search of peanut butter that I could enjoy without staring at the nutrition facts with guilt and wincing. I’d found myself swimming in wonderfully raw plump peanuts and decided to go ahead with making my version of homemade peanut butter that not only kept the ingredients to a minimum but also ensured that everything was easily available and immediately present at hand, which is why a blender works better than a food processor in this case because almost every house has a blender if not a processor.

IMG_7367 copy

The ingredients are few and wholesome which makes it so much better than shop bought ones which are jam-packed with hydrogenated fats, preservatives and stabilizers. Roasted peanuts, coconut sugar (or any sugar), salt and coconut oil (or any oil.)

IMG_7363

I began by roasting peanuts which I did on a baking tray in a very low oven at 110º for about 20 minutes.

IMG_7364

until they had changed colour from pale to rosily bronzed.


IMG_7368

The only hard part is removing their skins which is easily done by shaking them vigorously or just rubbing them between your palms. Decant peanuts into a blender of choice and add sugar.


IMG_7372

and salt. Give it a good whirr in pulses.


IMG_7373

It isn’t a matter of seconds, it will take time, but keep pulsing until some peanuts are crushed, some turned to rubble and some still intact. Using a spatula keep mixing it about to ensure that nothing is stuck to the blade.


IMG_7374

It might look like it’s not coming together, but it will. Keep mixing in long and short pulses, alternating with pushing and mixing the broken peanuts with the spatula until you see more crumbs than intact pieces of peanuts.


IMG_7375

Add the oil and blend again.


IMG_7376

You might get anxious because it doesn’t look like anything’s happening but suddenly the bottom part of the blender will show almost liquefied peanuts, and then you’ll know you’ve struck oil, except its butter and wonderfully delicious at that.


IMG_7377

keep blending until you reach the desired consistency. This was still sort of chunky and a few long pulses later..


IMG_7378

You’ll get a satiny smooth terracotta emulsion of warmth. All you need at this point is a clean jar to store this homemade peanut butter in.


IMG_7379

Once upon a life, there was honey in it. Now there’ll be peanut butter.

IMG_7385

Pour into a jar of choice and refrigerate. This turned out far more delicious than any store-bought ones and easy to boot, not to mention self-righteous and annoyingly healthy.


Ingredients

Peanuts: 370g (2 cups)

Coconut oil: 2tbsp

Coconut sugar: 1tbsp

Salt: 1tsp

Note-  The resulting peanut butter will have a mild underlying coconut flavour to it, which is on account of coconut oil. If you do not like it then use any other oil of choice. 


Recipe Instructions: Roast raw peanuts either on a gas stove or oven by placing in an oven tray and roasting at 110º for 20-25 minutes until they’re rosy and golden. Keep checking to see that they don’t burn.

Remove their skins and place in a blender along with sugar and salt and pulse for a few moments. Use a spatula to mix them in the blender to keep the peanuts from sticking to the bottom. Once most of them are crushed add coconut oil and blend again until desired peanut butter consistency is achieved. Pour into a clean jar and refrigerate.

Enjoy!


Woon mamuang


DSC_0200 These symmetrically gorgeous yellow and white pieces of soft squares are the stuff of dreams most soothing and calm. As lovely and mysterious as these are to look at, they taste almost as tranquil and smooth.

‘Woon mamuang’ as these are called in Thai are really mango mousse made with agar-agar, a sort of vegan gelatine so to say, that’s made of seaweed and thus vegan, vegetarian friendly. I first had them in Thailand and couldn’t get over the almost enigmatic texture of these tender squares. They’re not too wobbly, as one would expect regular jellies made of gelatine, yet softly yielding with a fresh fruity taste that almost feels like eating mangoes in a different form. There’s a sort of gentleness to their aspect that works really well as a light dessert, for it doesn’t fill you up, not to mention that their primary ingredients or rather the only ingredients are pureed mangoes and coconut milk, both of which form a kind of ethereal bond of mellow pleasantness.

I made these for the first time and learnt after a few errors the exact workings of agar agar, and will explain them in this post so you don’t make the same mistakes.


DSC_0146 copy
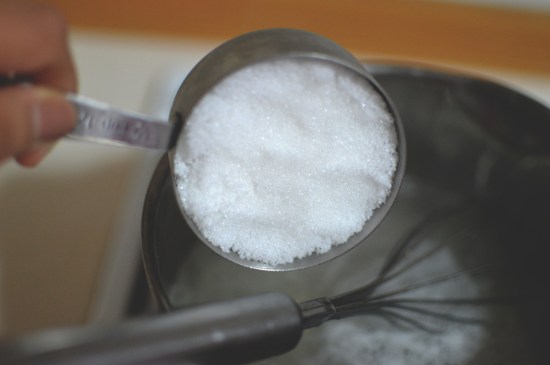
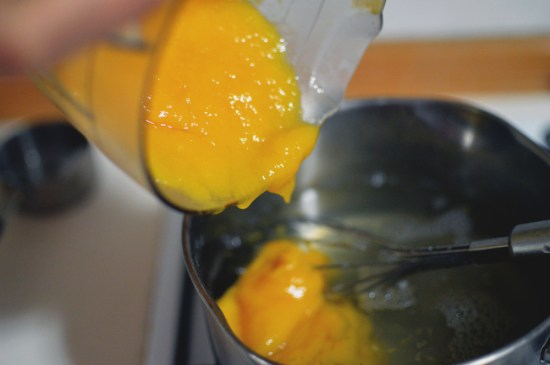
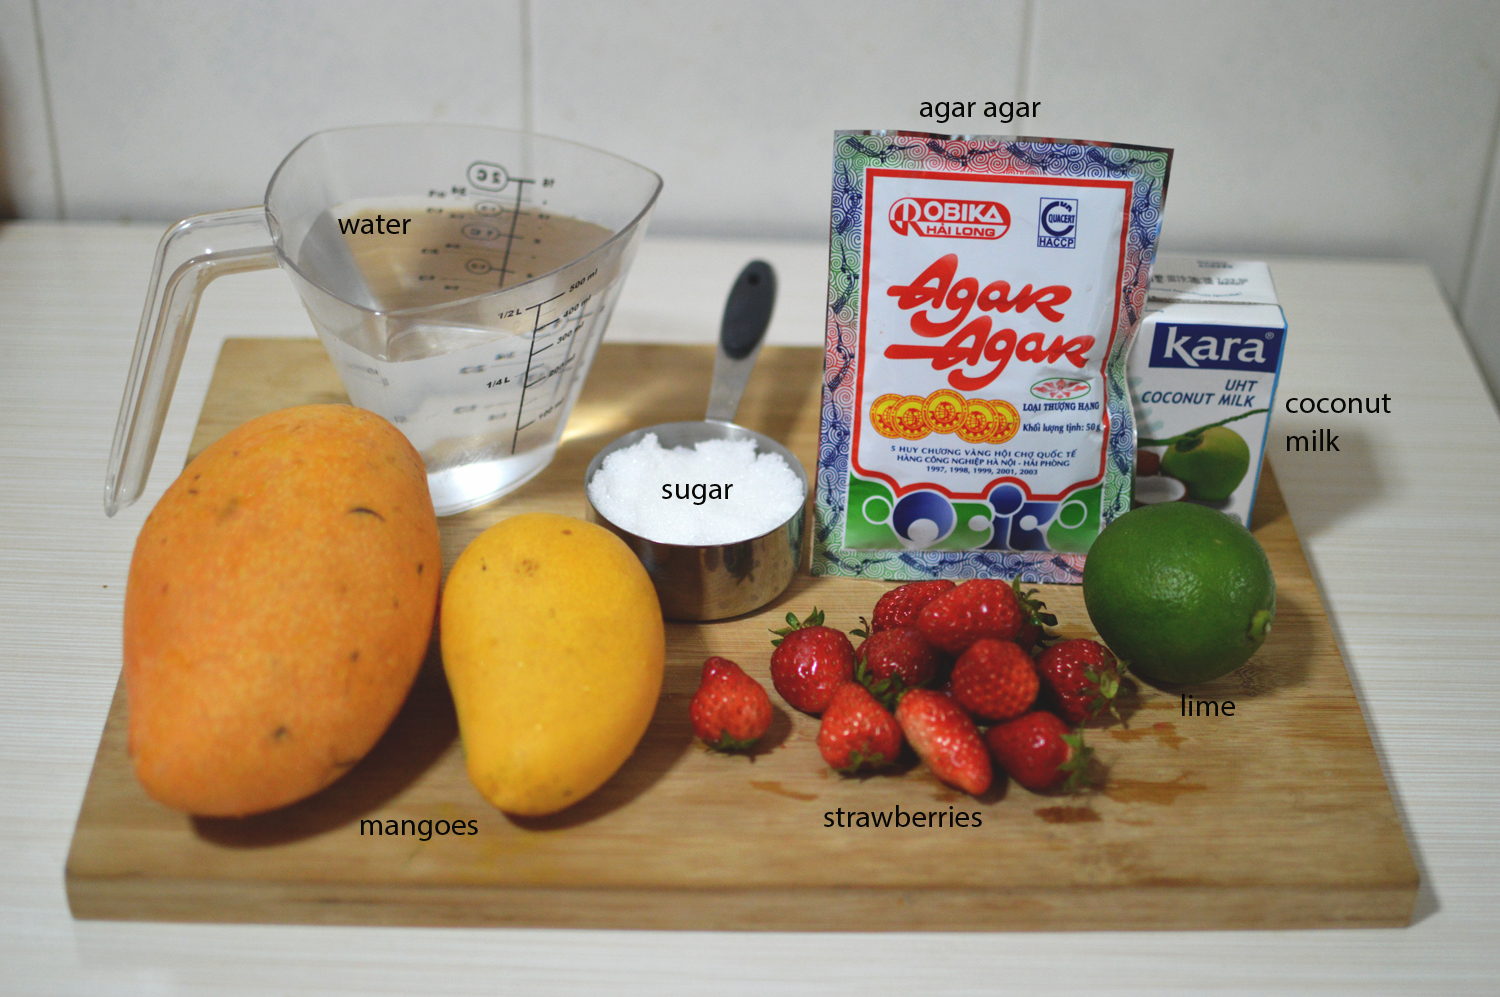
the ingredients are mangoes, sugar, lime, strawberries, coconut milk, water and agar agar.


DSC_0147

peel the mangoes


DSC_0150

and chop/cube them to be made into a puree.


DSC_0152

add in a squirt of lime juice to add just another dimension of flavours


DSC_0153

and blend to form a puree, making sure there are no lumps.


DSC_0155

water in a pot, don’t turn on the heat yet, because unlike gelatine agar agar will turn into something of a mess if dumped into hot water.


DSC_0156

add in agar agar and slowly start heating the water.


DSC_0157

stir water constantly or else the agar agar might settle at the bottom and clump together.

DSC_0158

keep stirring until agar agar is completely dissolved.


DSC_0161

once that is done, add in the sugar and let is dissolve


DSC_0163

add in mango puree


DSC_0164

and whisk until it’s mixed well and there are no lumps


DSC_0154

there are various ways to go about making woon mamuang. You can either make individual pieces in moulds or one big piece in a tray. I went with the latter option.


DSC_0167

Now the the thing with agar agar is that it begins to set soon after it starts cooling down and can set at room temperature as well, so we have to be a bit quick about things, but don’t get yourself in a frenzy as I did. Pour half the mango mixture to form the bottom layer.


DSC_0169

Add in chopped strawberries. you can even add mango cubes or coconut meat or nothing. I love the reds of strawberries with the yellows of mango.


DSC_0171

they look like rose petals.


DSC_0174

while that sets, we can get on with making the coconut milk layer. Start heating a pot of water with agar agar until it completely dissolves


DSC_0176

add sugar and coconut milk


DSC_0180

and pour the hot coconut milk mixture over the now set layer of mango layer and pop all the air bubbles or rather most of them using a toothpick.

Error: here’s the mistake I made. I checked the mango layer in corners of the pan and thought it to be set, whereas the middle part of the layer had not set at all, which is why some part of the coconut milk layer has floating strawberries on it. Therefore check that the bottom layer has almost completely set. It should be a little tacky, but shouldn’t stick to your fingers.


DSC_0182

once the coconut layer has set pour over the remaining mango mixture and let set completely and refrigerate for at least a few hours before serving.

Note: keep the remaining mango mixture warm while the coconut milk layer sets, because once it cools down it will begin to congeal.


DSC_0195
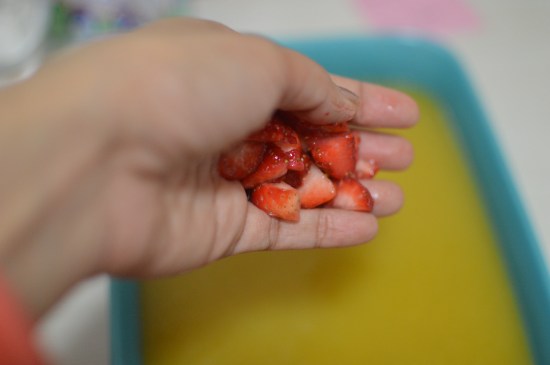
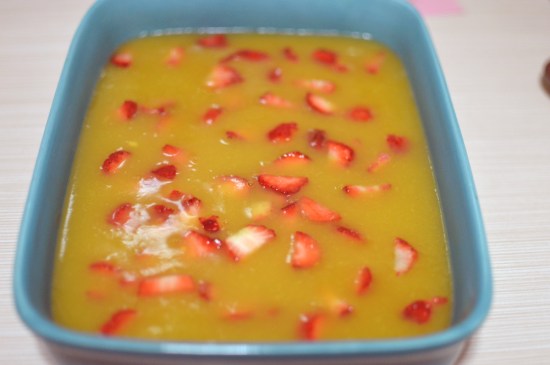
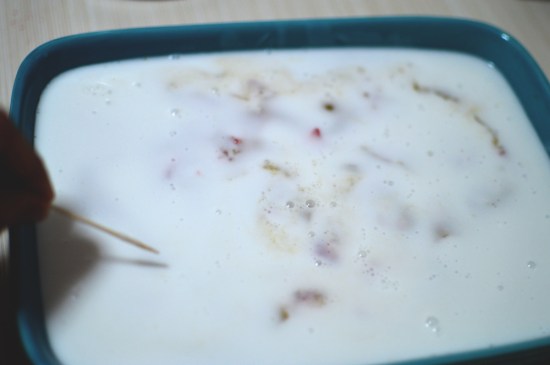
cut into squares and serve chilled.


Ingredients

For the mango layer

Mangoes: 430g (about 2 cups)

Water: 350 mls (1.5 cups)

Sugar: 100g (1/2 cup)

Agar agar: 2tsp

Lime juice: 1tsp

Strawberries: 80g (1/2 cup)

For the coconut milk layer

Coconut milk: 200mls (1 cup)

Water: 200 mls (3/4 cup)

Sugar: 4-5 tbsp

Agar agar: 1 tsp


Recipe instructions: Puree mangoes with lime juice, chop strawberries and keep aside.

Add agar agar to a pot of cold water and gently bring up to heat, stirring constantly until agar agar dissolves. Add sugar and pureed mangoes and whisk until sugar has dissolved and no lumps remain.

Gently pour half the mixture into moulds, making sure that no air bubbles are formed. Strew in chopped strawberries and allow this layer to set, while keeping the remaining mango mixture warm.

Make the coconut milk mixture by adding agar agar to water and slowly bringing to heat, stirring constantly until agar agar is completely dissolved. Add in coconut milk and sugar and once sugar is dissolved as well, pour the coconut milk mixture very gently over the now set mango mixture. To ensure that no air bubbles are formed you can even spoon this mixture.

In case any bubbles do get formed, pop them with a toothpick.

Once the coconut milk mixture had set gently pour the remaining mango puree over it and let it set completely and refrigerate before serving.


Few things to remember:  Do not let agar agar settle at the bottom of the pan while dissolving in water. Keep stirring constantly.

Check if the layers have set by gently tapping the middle area, it should be tacky to the touch but shouldn’t stick.

Do not let remainder mixture to cool down because it begins to set. Keep over low heat in case the temperatures are cool.