Vegetable pancake (plant-based, g.f)


These plant-based, gluten-free gems of nutrition that I call vegetable pancakes are popularly called ‘cheela or chilla’ in my country and serve as a popular breakfast item. Delicious and filling as they are, I have tried to make these go a little further with the addition of soaked mung beans that not only add to the fibre but also up the protein and they needn’t only be eaten as breakfast. I often bulk these babies up as I have done here with plenty of veg to make it a lot more filling and wholesome as proper lunch. These are quick, easy and most certainly something different to break from the same old.

The ingredients are chopped vegetables of choice. I have here some mint and coriander, tomatoes, onions and carrots with mung beans, chickpea flour, cumin, dried mango and coriander powder, asafetida, red chilli flakes and salt. You also need enough water to make a batter.

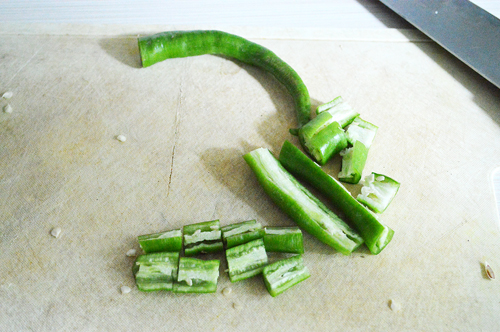
The stars of the show are chickpea flour which makes the base of this pancake, thus making it gluten-free and mung beans that work great if they are sprouted. Soaked overnight also work which is what I have here.

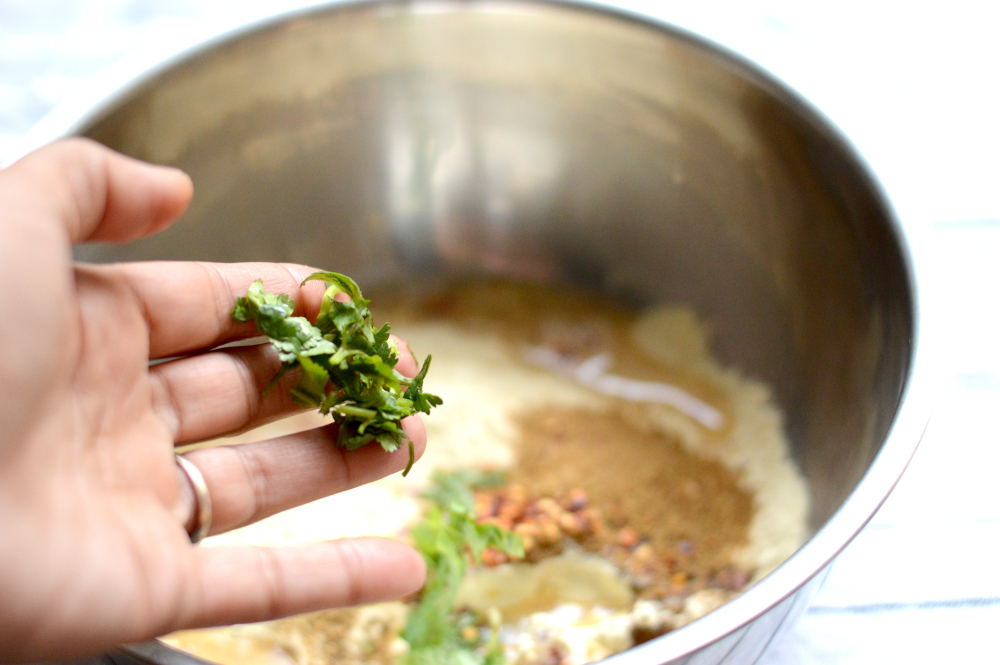
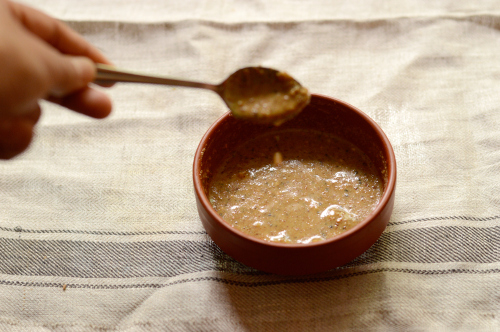
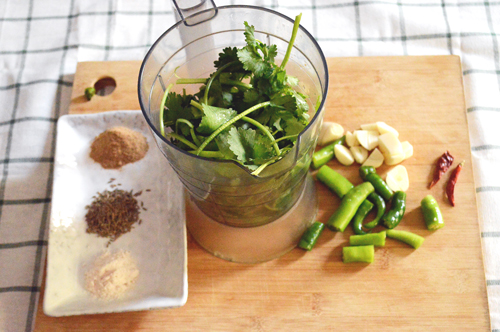
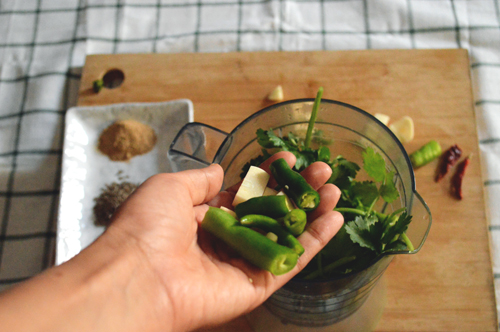
In a bowl add the flour with the spices and some chopped coriander. Pour in water and whisk to a smooth batter.

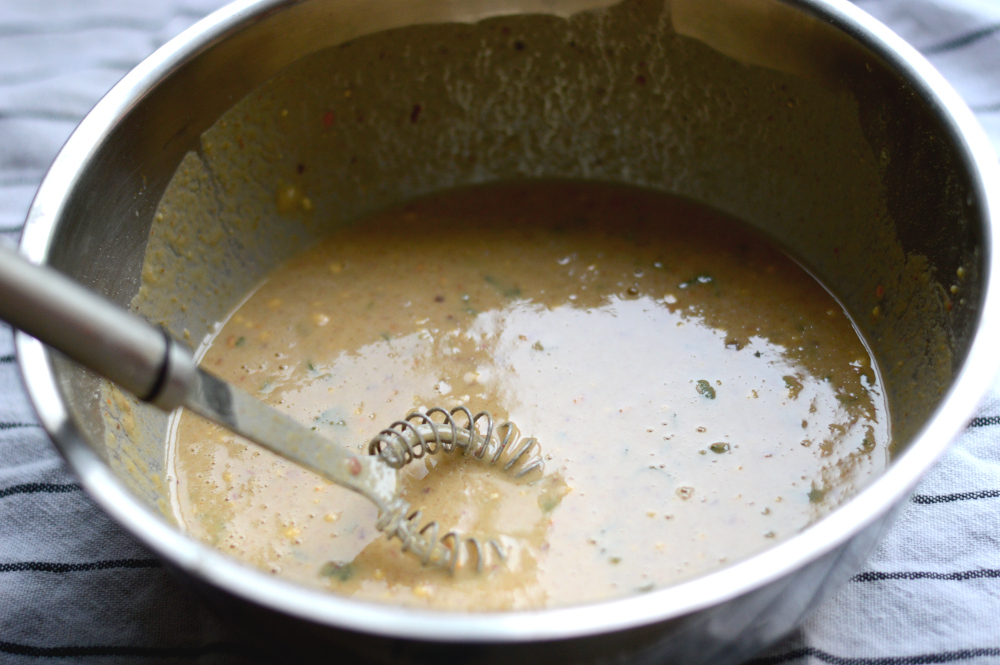
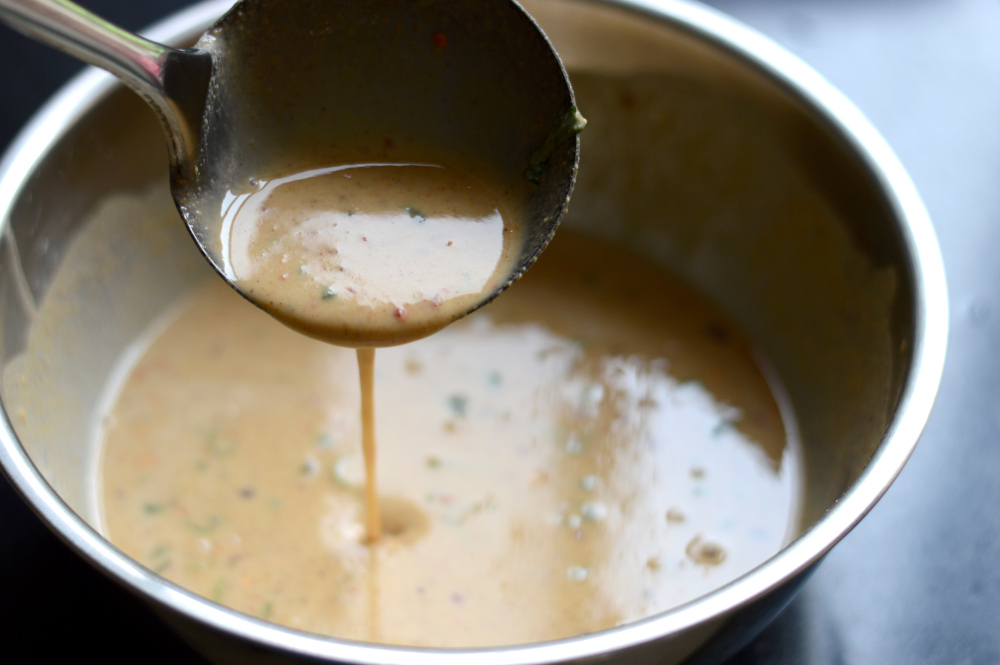
Mix well and ensure no lumps are formed. The batter should be of pouring consistency. Cover and leave it to rest for at least 15 minutes. This rest period is absolutely necessary for not only the flavours to absorb better but also for the chickpeas flour to absorb water and swell. If the batter thickens after the rest period, add more water to bring it back to pouring consistency.

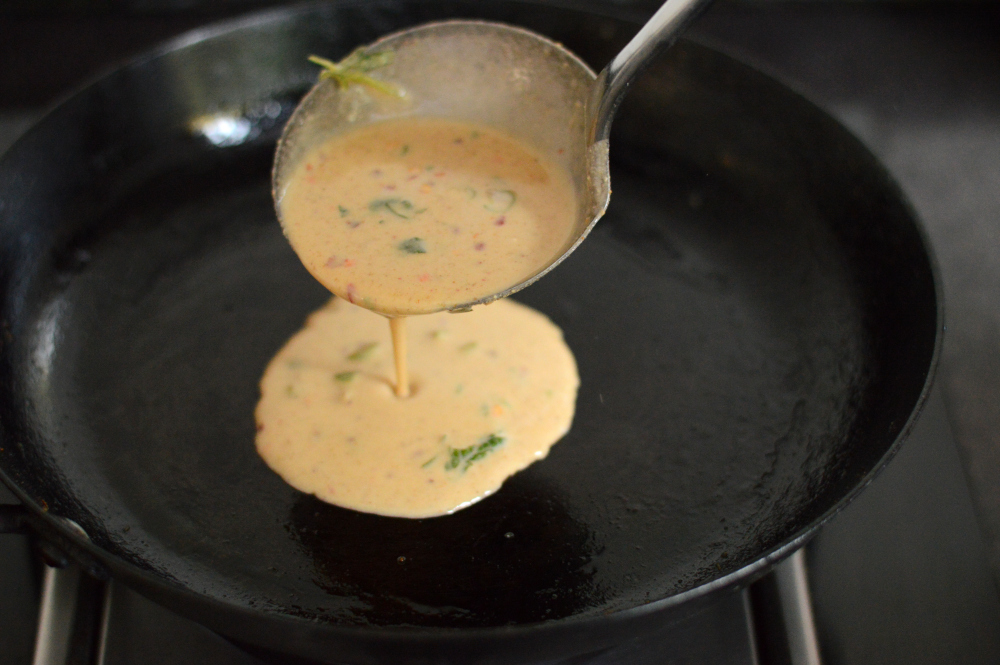
Add a couple teaspoons of oil to a hot pan and using a clean kitchen towel or paper spread around the pan. This will evenly coat the surface of the pan with oil while absorbing the excess. Ladle some batter on the pan. Make sure the pan isn’t too hot.

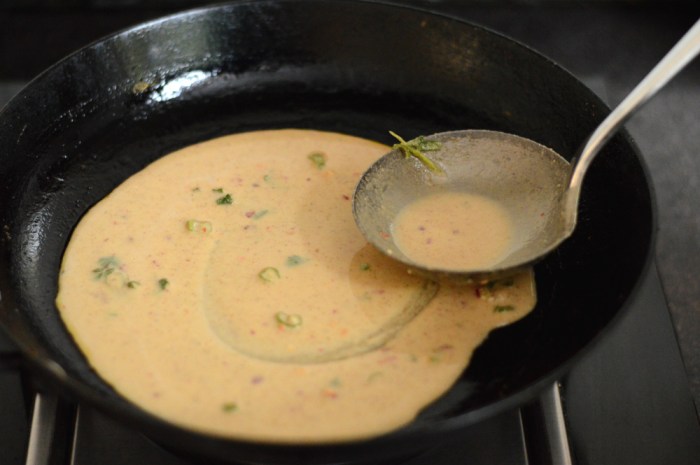
Spread the batter in circular motions using the back of the ladle.

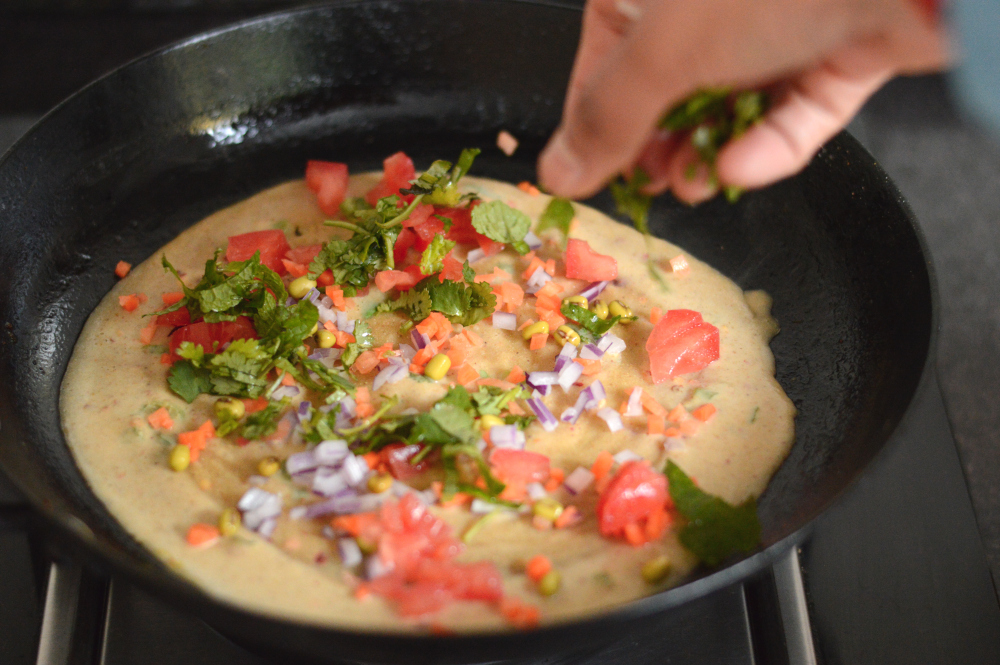
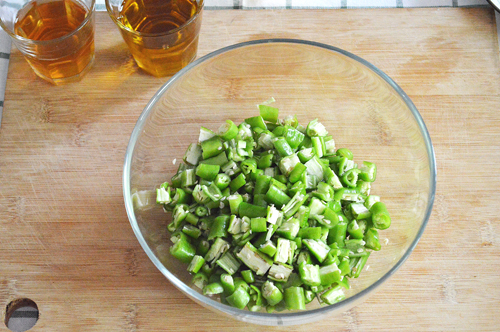
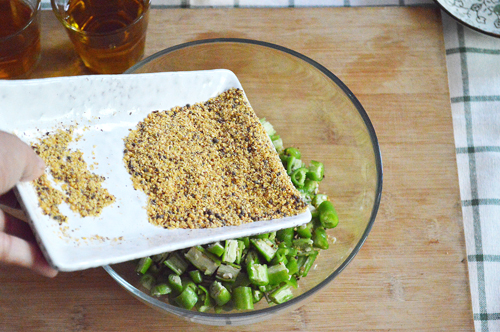
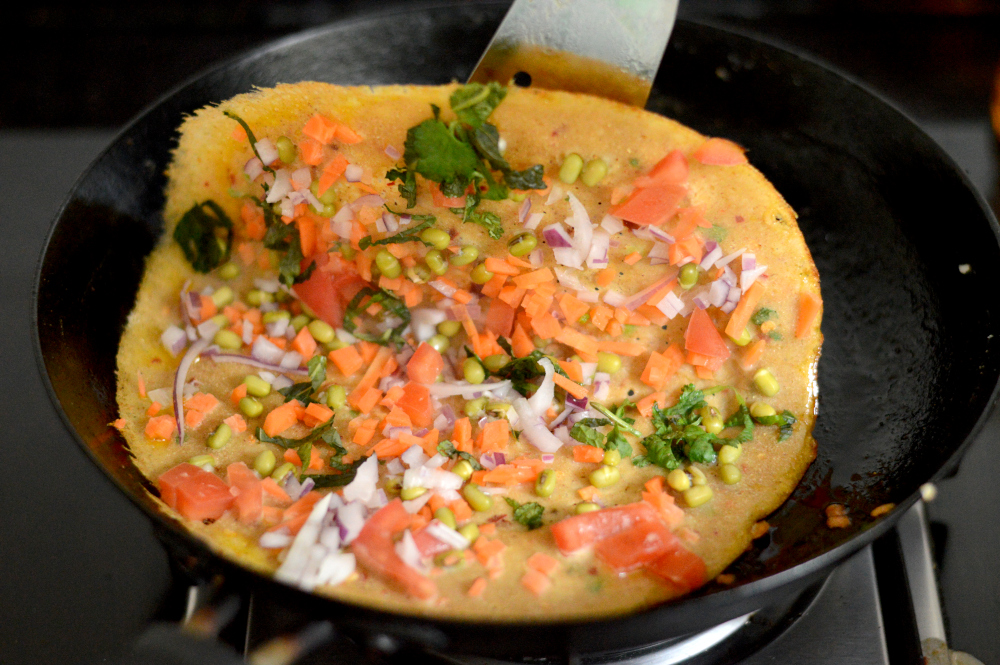
while the batter is still wet on the top add in the chopped vegetables and mung beans. Gently press into the batter to ensure they stick. Keep the heat on medium low.

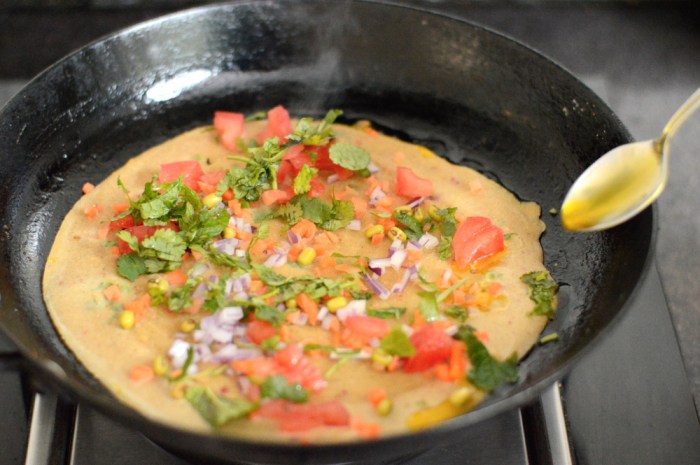
Spread some oil on the edges of the cooking batter to ensure that it doesn’t stick.

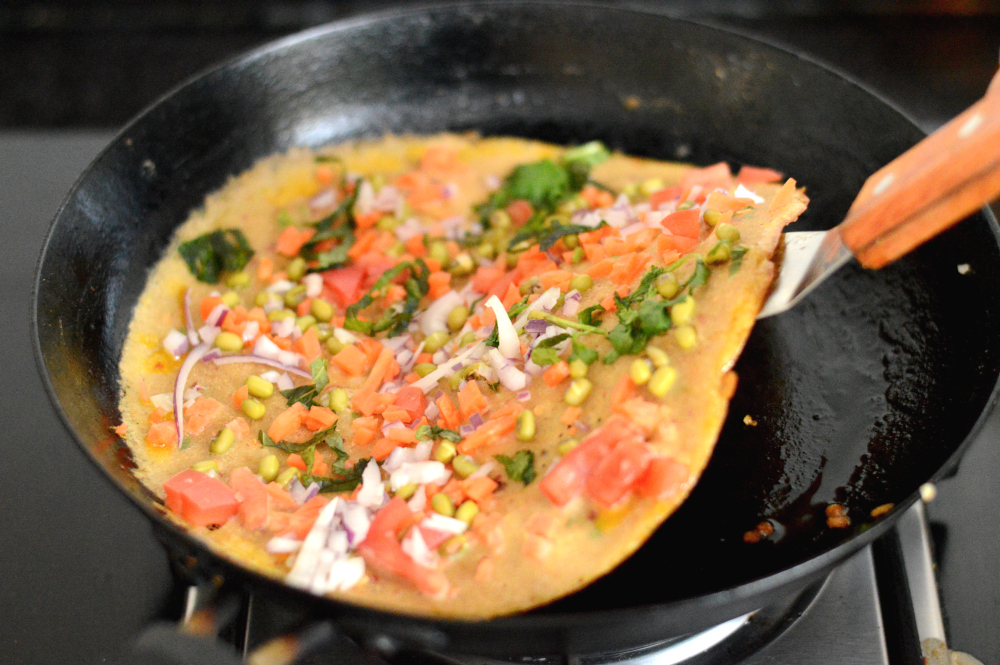
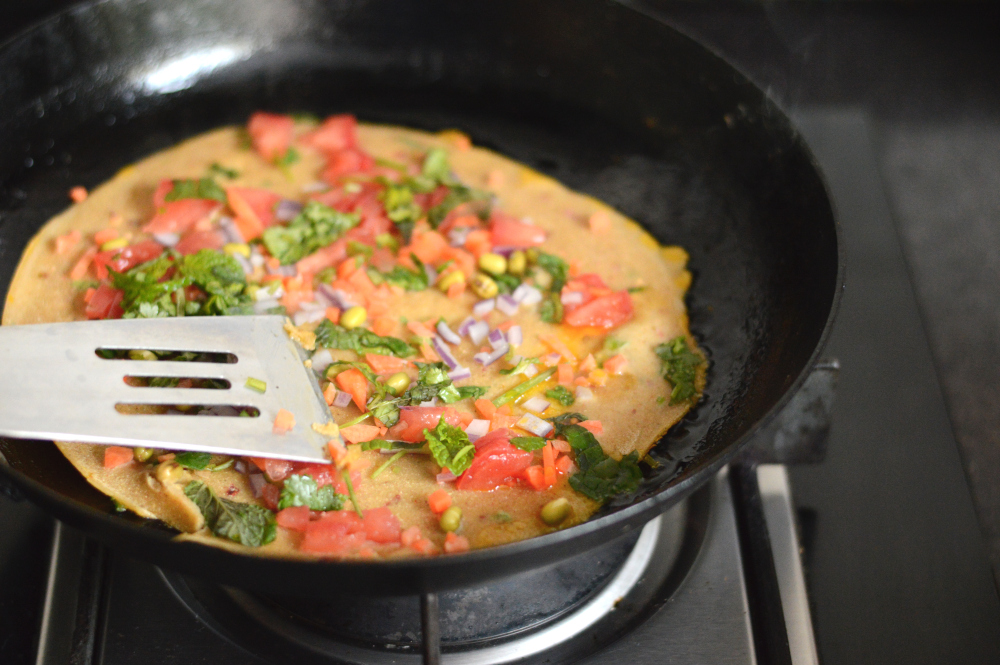
Slide a spatula along the sides to check the doneness of the pancakes. I like them a little crisp. These can either be flipped or folded.

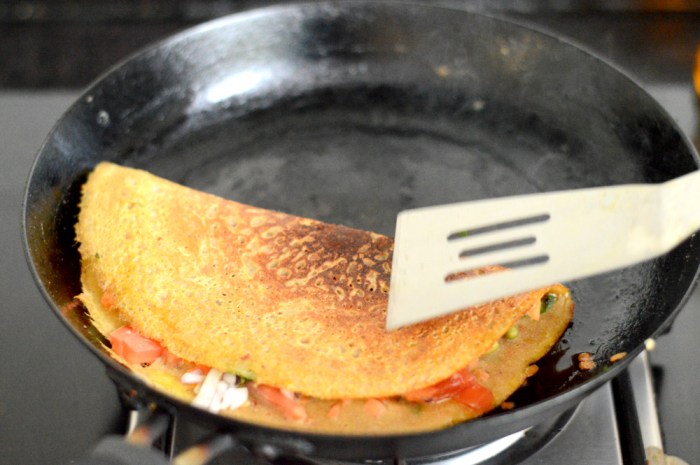
I prefer to fold them.

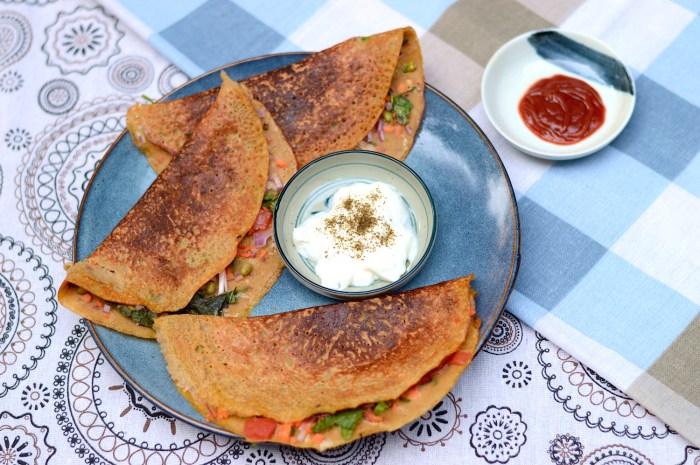
Serve hot with your favourite chutney or dips.


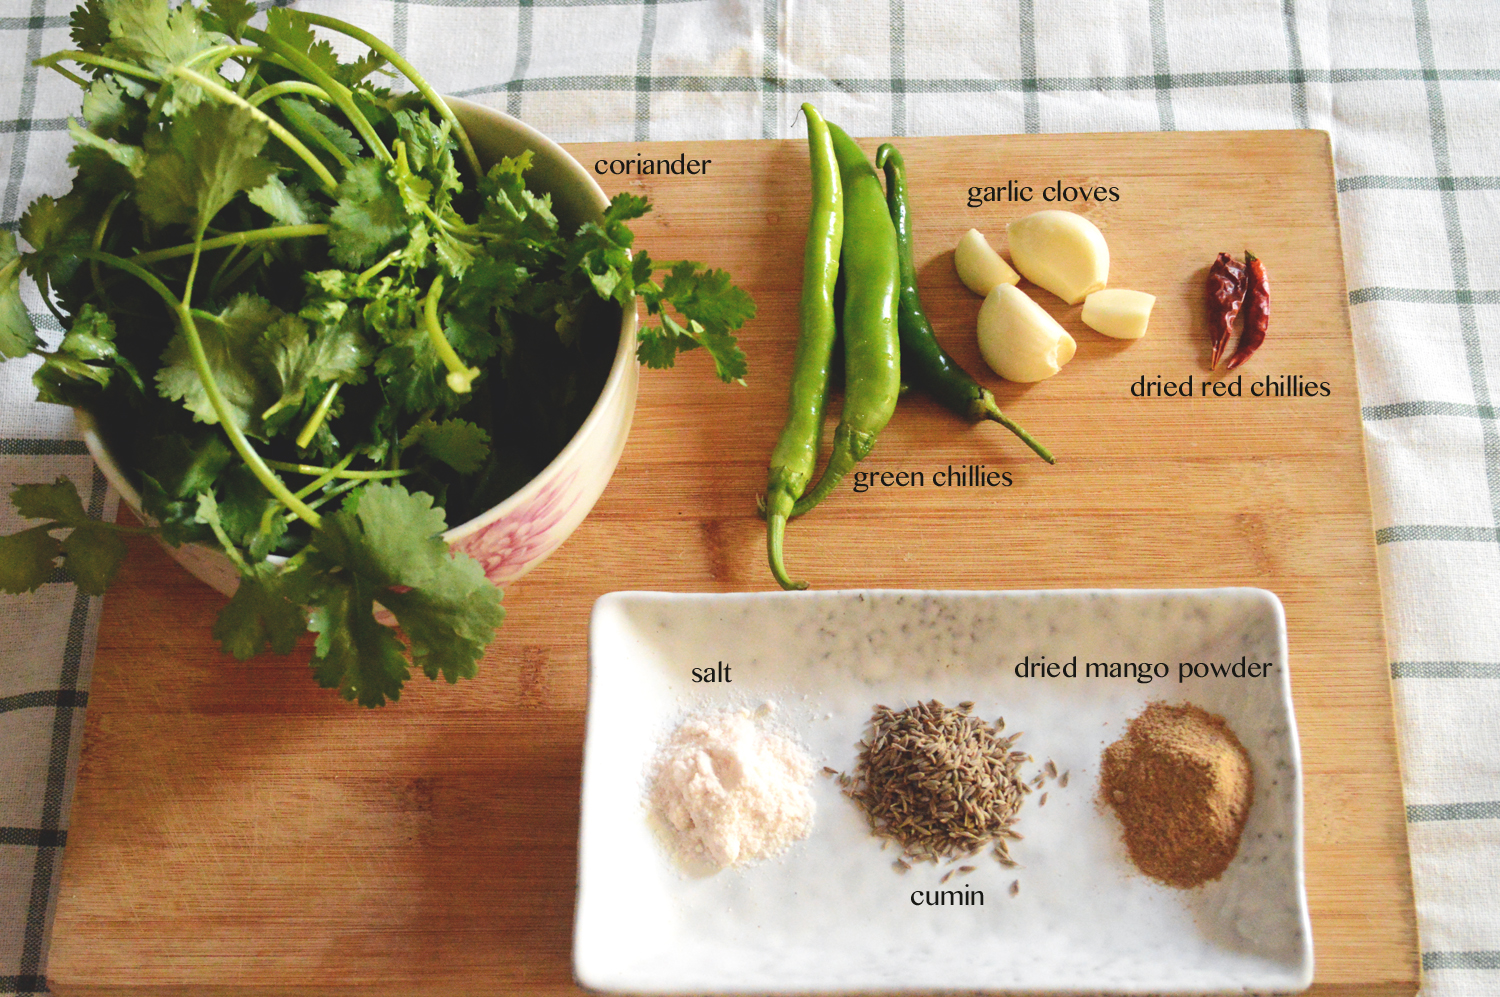
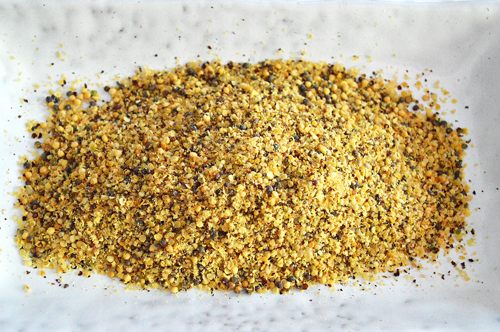
Recipe ingredients 

Chickpeas flour(besan)- 200gms
Cumin powder- 2 tsp
Red chilli flakes- 1 tsp
Coriander powder- 1 tsp
Dried mango powder- 1 tsp
Asafetida- a pinch
Salt to taste
Water as needed
Oil
Chopped vegetables of choice
Sprouted Mung beans- 100 gms  

Recipe instructions

In a clean bowl mix together the flour with spices, salt and enough water to make a pourable batter. Add some chopped coriander (optional) and whisk together to form a smooth batter with no lumps.

Cover the batter and let rest for at least 15 minutes.

Heat a pan on medium-low heat and spread some oil using a kitchen towel or paper to evenly coat the surface of the pan. Spread about half a ladleful of batter using the back of the ladle in an even circle.

Top the pancake with vegetables and mung beans and let it cook for a few minutes. Spread some oil around the edges of the pancake to ensure it doesn’t stick.

Using a spatula, lift the edges of the pancake to check for doneness and fold once cooked to liking. Serve hot.


Note*- the first couple pancakes might stick to the pan but the rest will not once you get the flow of it. Don’t let the pan get too hot or the pancakes will not evenly spread.

Sweet potato and orange chickpeas salad (plant based)


This sounds most odd, this flavour combination of oranges with chickpeas and sweet potato but I promise you it isn’t. Its taste falls somewhere between the realm of spicy and fruity, lightly sweet dusted with faint hues of exotic vibrance which comes in part with the addition of cinnamon and cumin powered with sweet citrusy tang brought together with a thin sesame dressing. This salad is fabulously different and makes for a lovey accompaniment to meals if not eaten as a meal in itself.

we need some sweet potatoes, boiled chickpeas, capsicum, an orange divided into two parts, sesame seeds, black pepper, cumin and cinnamon powder, mustard and some salt

Chop the sweet potatoes into bite sized pieces, add in the cumin and cinnamon powder with some salt and bake at 180ºC for 20-25 minutes until cooked.

Place the baked sweet potatoes into a large bowl and set aside.

Roast the sesame seeds and pound to a fine powder.

In a bowl mix together the powdered sesame seeds with juice of half an orange with some lemon

Add in some salt, pepper and mustard and mix well to make a dressing.

the dressing should be of thin consistency. Chop the peppers and deseed+skin and devein the remaining half of orange, slicing it into segments.

To the bowl of baked sweet potatoes add boiled chickpeas

Add in the chopped casicum and orange slices along with the sesame dressing. Mix well and serve.


Ingredients 

Sweet potatoes: 200 gms
Cooked chickpeas: 210 gms
Capsicum/Bell pepper: 1 small
Orange: 1/2 medium size
Salt : to taste
Cinnamon powder: 1 tsp
Cumin powder: 1.5 tsp
__________________________

For the dressing 

Orange juice: 1/2 orange 
Roasted sesame seeds: 2 tbsps
Mustard: 1 tsp
Lemon juice: 1 tsp
salt to taste
pepper: 1/2 tsp (or more according to taste)
Oil: 1/2 tsp (optional)

Recipe instructions : Cube the sweet potatoes and add salt, cumin powder and cinnamon powder. bake at 180ºC for 20-25 minutes or until fully cooked. Set aside.

Chop the capsicum and devein+segment the orange.

Make the dressing by pounding sesame seeds to a powder and mixing in it the freshly squeezed orange juice from the remaining orange with lemon juice, salt, pepper and mustard. Add in the oil if using and mix to form a thin dressing.

In a large mixing bowl toss together the sweet potatoes with chickpeas, chopped capsicum, orange and the dressing.

Enjoy!

Simple vegan chocolate cake


Do you want something absolutely chocolate without the fuss, without the beating around in a large bowl and whisking too much? If your answer is yes then perhaps this is the chocolate cake you’d want to try which is absolutely hassle free, easy to make with a fudgy rich center and takes barely moments to put together. The only waiting time is when it bakes and cools down and once that is done it’s ready to be eaten.

It’s something of a cross between a rich brownie and a simple tea time cake where all its chocolateness comes from the cocoa powder, which is why a good quality cocoa powder is a must for this recipe and of course it can be elaborated upon with icing or frosting and that’s why this cake is so perfect because its simple nature makes it so amiable to everything one could possible club it with.

The ingredients are few and basic. Flour, sugar, baking powder and soda, cocoa powder, instant coffee, oil, plant milk, vanilla and some salt.

In a large bowl mix in the flour

sugar

baking powder, salt, baking soda and coffee

and cocoa powder.

Mix it well together.

Now mix in all the wet ingredients. Vanilla, oil

Plant milk. I’ve used soy milk.

Mix it well. The batter will be a bit wet and that’s what makes the cake a very moist disc of chocolate goodness.

Scrape into a well greased baking dish of choice and bake at 180ºc for 40-45 minutes or until the cake starts to pull away from the sides and the center is baked. Check with a knife or toothpick.

Let cool for a bit before slicing.

This cake was deliriously simple and magical in how it tasted. Pair it with a dollop of ice cream of some cream or custard to make it into a richer dessert.

Enjoy!


Ingredients

Flour: 200g
Sugar: 180g
Cocoa powder: 30g
Coffee powder (instant): 1 tsp
Baking powder: 1 tsp
Baking soda: 1/2 tsp
Salt: 1/4 tsp
Oil: 70g (anything flavourless or coconut oil)
Plant milk: 220 mls
Vanilla extract: 1 tsp

Recipe instructions

Into a large bowl whisk together flour, sugar, baking powder, salt, baking soda and coffee powder. Mix well. Make sure there are no lumps.

Add in the vanilla, oil and milk and mix well. Scrape the sides of the bowl to ensure no dry flour is stuck to the edges.

Scrape into a well greased baking tin and bake at 180ºc for 40-45 minutesor until a knife inserted in the center comes out clean.

let rest for ten minutes before serving.


Vegan spring rolls


Wrapped in rice papers crammed with crunchy vegetables and piled with a delicious marinated tofu, these spring rolls which I do agree are a much larger almost dumpling sized kin to their fresh and slimmer relatives are a perfect treat either as a snack or even as a post workout meal when eaten in huge quantities since these are annoyingly delicious and guiltless and making them isn’t nearly as tedious as one would think.

Of course cooking anything in the kitchen requires a bit of work and these aren’t as much work as one would think and in fact they’re rather fun to make.

The filling is entirely personal and often depends on what’s present in the refrigerator; also a great way to use leftover vegetables.

The ingredients which I used were tofu, thinly sliced carrots, capsicum, avocado, cucumbers, coriander and leftover roasted asparagus. Like I said, the filling depends entirely up to you and the contents of your fridge.

You want to slice your carrots in a way that they’re almost julienned, so begin by slicing them lengthwise

and slice them lengthwise again to get matchsticks

also slice the rest of the veg as thin as manageable.

Slice firm tofu in long strips and the firmer the tofu the better its tenacity to not crumble.

we need flavour in these spring rolls since everything else is going to stay raw and crunchy with a play on textures, the tofu in question needs to have a punch and marinating it for a few minutes really does the trick.

Sizzle the marinated tofu on a very hot pan with a drizzle of oil.

let it char on both sides for a minute or so

Before finally adding the marinating liquid the tofu sat in. Let it cook and bubble and get absorbed.

And here you have it. What was once a rather pallid looking block of protein is now a bronzed vivacious looking filling for our spring rolls.

Now for the assembly which is where the fun begins. You need a large plate filled with water which can fit the rice papers, a clean damp kitchen towel and all the accoutrements sat neatly in front so the conveyor belt process can work.

Begin by immersing the rice papers in water on both sides for a few seconds until the entire surface is wet but not wilting.

Then transfer it to the damp paper towel

and begin layering the vegetables. I start with coriander first just so the rolls look pretty after getting rolled up, however because I stuffed them to spilling the final outcome wasn’t prettiness but greed and so the layering didn’t much matter but if you want to make them look presentable and dainty then maybe fill them a little less audaciously.

then came leftover asparagus. It’s absolutely optional. You can instead use cabbage, shredded lettuce or whatever you feel like.

next came in avocado

closely followed by capsicum and carrots

and finally tofu and cucumbers.

Next comes the rolling part where you gently but with purpose and intent enclose the vegetables in their transparent rice veil by folding the now very sticky rice paper over in a manner of wrapping.

and fold the two opposite ends to meet the first roll. Doesn’t matter if there are small tears in the paper or if all the vegetables don’t stay inside the first fold because we will roll it again.

Keeping the wrapping firm

Since the rice paper is sticky it will stay glued and the chances of making mistakes are few. Roll it up until it’s a roll.

something like this and there you have it. Giant spring rolls to stave off any hunger pangs.


Ingredients

Rice papers: 4 to 5
Firm tofu: 200g
Carrot: 1 small
Capsicum: 1 small or half a large
Coriander: 1 large bunch
Avocado: 1 half
Cucumber: 1 small
asparagus: 3-4 roasted and halved.

For the tofu marinade
Sesame oil: 2 tsp
Light soya sauce: 1 tbsp
Apple cider vinegar: 2 tsp
Sriracha or any chilly sauce: 2 tsp
Brown sugar: 2 tsp

Recipe Instructions

Slice vegetables into thin slices. Cut tofu into strips and marinate for 5-10 minutes. Heat some oil in a pan and gently place tofu strips until browned or lightly charred for a minute. Turn them over and after half a minute pour the marinting liquid in the pan. Let it bubble and thicken for another half a minute before turning off the heat. The tofu should be glossily bronzed on both sides.

Lay out all the ingredients for the rolls in front and fill up a large plate, big enough to fit the rice papers with water.

Dampen a clean kitchen towel and keep in front. Gently lower the rice paper in the plate with water and wet it on both side for a few seconds. Do not let it begin to soften. Transfer on the damp kitchen towel and begin layering the paper close to the edge near you to form into spring rolls.

Once the vegetables are stacked, fold over the now soft and sticky rice paper once. Fold the opposite ends on the sides to stick over the first fold and roll again to seal the edges.

Enjoy with some soy sauce or your favourite dip.

Olive rosemary focaccia


It’s been a while since everything and among other things that I love and crave, bread is definitely the frontrunner and not finding any upon opening the refrigerator can be a bit surprising, agitating and often tends to send me on a downward spiral of domestic crisis which is why and when I ended up with this coppery slab of carb heaven.

The thing about focaccia apart from creating your very own custom flavour is the straightforwardness of the whole process because there isn’t any particular shape that we need fret over and it’s all too easy to begin tearing into one the moment it’s out of the oven, moreover I like slicing stale focaccia into slivers and toasting it in the oven to make crispy crouton like sticks.

As all breads go, focaccia also begins life with flour and yeast and so here we have bread flour, tepid water, olive oil, yeast, salt, rosemary and olives.

Begin by adding yeast into the water which is just warm to the touch and let it sit until it foams. You need good, fresh yeast for that or else the dough won’t rise.

Once the yeast has nicely bubbled up, add it to the flour

along with half the olive oil, reserving the rest for later

add salt and mix it with a spoon until it forms a shaggy dough

Transfer to the countertop and knead until smooth and pliable adding more water a little at a time without making it sticky.

Let it rest in a warm place for a couple of hours until doubled in size. You can even leave it in the fridge overnight.

Once risen it is ready to be formed into bread.

Punch it to deflate. Not only because it’s important but also because it’s fun.

Prepare the baking pan by oiling it generously

Sprinkle some semolina. This is an optional step but helps in the crisping of the bottom.

Scrape the dough into the tray

and brush the top with reserved olive oil. Be generous with the oil here. It’s crucial to this bread making process.

Push the dough with fingertips until evenly distributed in the baking tray, also giving it the typical focaccia dimpled look.

Stuff the dimpled surface with rosemary and olives and push them right into the dough.

Cover and let rise for another hour before baking at 200ºC for 25-30 minutes or until the top is nicely browned and the bottom is slightly crisped up

Brush the just baked bread with olive oil and let it rest at least ten minutes before serving.

Here’s a cross section of this delicious focaccia. It’s soft, spongy and moist and deliciously satisfying.


Ingredients

  • Flour: 700g
  • Yeast: 2 tsp
  • Warm water: 300mls + more for kneading
  • Salt: 2 tsp
  • Olive oil: 50mls
  • Olives: 100g
  • Fresh rosemary: 10g
  • Semolina: 2 tsp

Recipe instructions

Add the yeast to warm water and let it bloom. Make sure the yeast is fresh and not expired or it will inhibit the rising of the dough.

Add the water to the dough along with olive oil and salt and mix with spoon until just combined to form a shaggy dough.

Transfer to countertop and knead to a smooth pliable dough. Add more water if need be but a little at a time to keep the dough from getting sticky.

Let the kneaded dough rest in a warm place for a couple hours or until doubled in size. You can even let it rest in the fridge overnight.

Once the dough had doubled in size, deflate by punching and scrape into a well oiled baking tray sprinkled with semolina.

Push the dough to fit into the tray with fingertips giving it the typical dimpled look and stuff the surface with rosemary and olives.

Cover and let rest for an hour before finally baking in a preheated oven at 200ºc for 25-30 minutes or until the top has bronzed and the bottom lightly crisped.

Brush with olive oil and let rest for at least ten minutes before serving.

Green coriander chutney


DSC_1272

It’s an amplification of harmonious flavours put together in a way as to extract the maximum potency of their parent ingredients is what chutney I believe is and this recipe extracts, exaggerates and emboldens every flavour that found itself in the making of this luridly green almost viciously spicy and flavour festooned green chutney.

Chutneys are of course not meant as a solitary treat because of their main purpose in life as an enhancer, that is they upgrade any dish from their current pedestal and double as dips, dressings even spread and this particular coriander chutney especially works hard to earn its keep not least because it’s an old recipe using few readily available in season ingredients.

DSC_1262 copy

The spice levels on this depend on the creator but it’s good to have it on the not so mild side of the spectrum and keep them a bit on the more tear-jerking levels, not to be vulgar or anything but because that’s really how this stuff works and it’s meant to. Ingredients are few and simple. Coriander, green chillies, garlic, dried red chillies, salt, cumin seeds and dried mango powder.

DSC_1263

It’s just a question of blending everything together. So along with the coriander leaves and the stalks which contain most of the flavour

DSC_1264

add the garlic and chillies, halved or chopped to convenience

DSC_1265

the dried red chillies

DSC_1266

and the spices that are cumin, dried mango powder and salt and blend

DSC_1269

until you have a somewhat smooth paste. Make sure that all the ingredients have been incorporated and that there aren’t any large chunks left. Add a little water but not too much and use a spoon to clamp down the leaves and chillies to avoid too many air pockets.

And that’s it. Your green coriander chutney is ready.

I especially love it sandwiched between two slices of bread with lashings of butter and a dollop of this chutney. But really, over rice, in salads, as a dip for anything fried, this chutney is where it’s at!


Ingredients

Coriander: 100g

Chillies: 3-4 (use fewer for a milder taste)

Garlic cloves: 2-3

Cumin seeds: 1 heaped tsp

Salt: 1.5tsp (or to taste)

Dried red chillies: 2-3

Dried mango powder: 1tsp heaped


 Recipe instructions

Wash the coriander well and rinse under running water until no grit or dirt remains and add to a blender with green chillies, garlic cloves, salt, cumin powder, dried red chillies and dried mango powder.

Blend to form a smooth paste. Add a tablespoon of water if it feels too dry but do not add extra because it can make the resulting chutney watery. Clamp down with a spatula or spoon for even blending.

Remove to a clean container and store in the fridge. It will stay fresh for at least 3-4 days.

Enjoy.


Pumpkin soup 2.0 (Vegan)


DSC_1248

Pumpkin soup has a special place in my repertoire and I’ve been dabbling with a lot of different recipes and ways to make this soup and not that I’m trying to be smug or anything but looks like I’ve finally perfected a recipe that I might sick to, and that it needs no pottering over a stove really does help.

The thing about soups and pumpkin soup, in general, is that it’s a very non-fussy way to create deliciousness from a rather humble looking vegetable and it’s versatile in a way that there’s never just the one way of cooking it just like there’s never one way of eating something and this particular recipe can be adapted to make pasta sauce, pizza sauce and curry base as well. Just a question of thinning or thickening it to your liking and I like it on the thicker more velvety side of things and that’s what I said and say.

Right, this blog is no stranger to pumpkin soups and in fact, I’m linking a previous pumpkin soup recipe here as well which is just as delicious but not nearly as quick and mad with flavours.

DSC_1228 copy

Did I mention it was simple as simple as can be? The taste and colour are amped up with spices and how much or how little you add is up to you but I like it very spicy especially in this weather and turmeric helps with the goldenness of it all. Like molten sunshine on a chilly afternoon. There’s pumpkin, onion, garlic, salt, turmeric, cinnamon, paprika, nutmeg and black pepper.

DSC_1229

Chop the vegetables to an almost equal sized thickness and add some oil. The amount of oil you want to add is up to you. It could be a drop, a drizzle or a glug. Did I mention this is an atrociously healthy recipe as well?

DSC_1230

Next, come the spices and this is really what maketh the soup. I’ve been known to add almost three times the amount of pepper I show here and so can you. The spiciness is really a personal choice and so is salt. No nutmeg at this stage. It comes in later.

DSC_1231

there you go. All in.

DSC_1232

Time to smoosh it all together. Coating the vegetables with spices and oil.

DSC_1234

Bake at 190º for 15-20 minutes until the pumpkin is almost falling apart and the onions and garlic have softened but not burnt.

DSC_1236

At this stage, you can modify it to how you’d want the final results to be. You can add stock, cream, coconut milk, regular milk or just plain water which is what I’m doing because it’s choke full of flavours but having said that I do add coconut milk to it on days when I’m in an altogether different mood.

DSC_1237

grate in a bit of nutmeg and add that as well. Not too much or it’ll overpower. Just enough to haunt the soup with a peripheral kiss of the exotic and blitz.

DSC_1242

Pulse until it’s all emulsified and you have glorious golden soup. Oh, how it glows. taste for seasoning and thickness and adjust by adding more of whatever is required.

DSC_1247

and lo and behold!


Ingredients

Pumpkin: 250g

Onion: 1 small

Garlic: 3-4 cloves

Turmeric: 1heaped tsp

Paprika: 1tsp

Black pepper: 1/2tsp

Salt to taste

Cinnamon: 1/2tsp

Nutmeg: 1/4tsp

Oil: 2tsp

Water: 200mls


Recipe instructions 

Chop the vegetables into equal sized portions and drizzle over oil and mix in the spices and salt except for nutmeg. Place in a baking tray and bake at 190º for 15-20 minutes or until the pumpkin is very tender and the other vegetables softened.

Add the vegetables to a mixer, grate in the nutmeg and add hot water and blend to a smooth puree.

Serve hot with bread or even rice.


Instant chilli pickle


DSC_1182

For when you want to add a little something-something to a dish that doesn’t taste just there yet or feels flat or maybe you just want a tiny spice kick and spicy texture to enhance and complement the food then this is the pickle of instant dreams because it adds that fresh zing and unique flavour that you could have been looking for but didn’t know where to find.

It’s quick in that it’s instant and depending on the chillies you put it can vary from anything naughtily mild to demonic hot.

DSC_1154 copy

Doesn’t hurt that it’s full of ingredients really good for you and how they come to marry in perfect harmony to form this delicious pickle.

DSC_1160

Chop and dice the green chillies into smaller than bite-sized pieces and remove any seeds if you want. These chillies though large in size are rather tame in taste, in fact, they’re almost sweet and so I didn’t much bother with deseeding them.

DSC_1158

Crush the yellow and black mustard seeds till some are fine dust and some still intact.

DSC_1164

Find a suitable bowl for mixing the pickle.

DSC_1168

Add crushed mustard seeds to the chopped chillies

DSC_1170

followed by salt and turmeric

DSC_1173

In with apple cider vinegar

DSC_1175

mustard oil

DSC_1176

and lemon

DSC_1177

give everything a thorough mix

DSC_1178

until spicily combined

DSC_1180

This is ready to be eaten immediately. Alternatively, you can cover and keep for a day for the flavours to mingle and mellow before transferring to a clean jar. This will keep well for several weeks or you can transfer to a fridge after a few days.

(Note: the flavours will intensify with each day and the mustard seeds lend a pungent spiciness of its own which is most desirable in such pickles.)

DSC_1185

You can add this to rice, slices of bread and anything you feel could do with a boost. I have tried mixing it with boiled pasta during days of lazy inactivity and loved every morsel of it.


Ingredients

Chillies: 250g

Lemon: 1

salt: 2tsp

Turmeric powder: 1tsp

Mustard seeds (crushed): 30g (you can use either all black or all yellow or a mixture of both)

Mustard oil: 70mls (or use olive oil if mustard oil is unavailable)

Apple cider vinegar: 60mls


Recipe instructions

Crush the mustard seeds until some are pulverized and some whole. Chop chillies into small pieces and add to a bowl.

Mix in the mustard seeds, turmeric, salt, oil, vinegar and lemon juice.

Cover and keep for a day or decant into a clean jar to be eaten immediately.

Note: The addition of vinegar increases its shelf life and this pickle can be stored for several weeks, however, you can store this in the refrigerator after a week as well.


Oxblood smoothie (Vegan)


DSC_1140

No animals were harmed in the creation of this idiotically vibrant pink smoothie that suffuses your insides with a similar blazing glow of health and wellness, not least because this delicious lambent drink is made in mere moments and serves as a fantastic post-workout snack or a cool supplement with any meal.

DSC_1117 copy

The ingredients can be easily substituted with what you have on hand and what kind of flavour profile you need in a particular smoothie. I gravitate towards resplendent reds and thusly red pitaya for the colour and nutrition boost along with bananas, strawberries, cashew nuts and soy milk.

DSC_1119

There’s just the one step to it that is blending all the ingredients.

DSC_1122

strawberries in with pitaya or dragonfruit as we call it and I have frozen strawberries here.

DSC_1124

in with cashew nuts

DSC_1128

banana and soy milk,

DSC_1129

a couple of pulses followed by a long whizz and there we have it. Luminous and bloody red.

(I have on previous occasions used boiled beetroot instead of pitaya with similar results.)

DSC_1133

Your daily nutrition boost with fruits and fixings.


Ingredients

Red Pitaya: 200g

Banana: 200g (2 small or 1 big)

Strawberries: 100g

Cashew nuts: 50g

Soy milk: 100mls


Recipe instructions:

Chop the fruits into smaller portions for even blending and blend along with cashew nuts and soy milk until smooth.

Feel free to add sweetener or a squirt of lemon to enhance the sweetness and tang.


Skinny energy bars (vegan)


DSC_0984

One could, if one wanted, call them superfood mega nutritious healthy chocolate energy bars but that would be too long a name for something so decidedly elegant and petite and so, skinny bars it is and these are skinny in both appearance and spirit and all too easy to eat not just as a nutritious dessert, but also as a post-workout snack or during that time of the day when you feel hungry or depressed.

DSC_0950

I might have mistakenly erased the photograph of ingredients assemblage which is why we begin with the recipe. Starting with a clean bowl and a spatula.

DSC_0951

in with coconut oil, always a good start.

DSC_0953

followed with an all natural sweetener in the form of mushed up, pitted dates

DSC_0954

mix them well to form a somewhat wet base for the rest of the ingredients

DSC_0956

rolled oats that I pulsed a couple times to somewhat break them

DSC_0958

followed by rice flour and cinnamon and vanilla extract

DSC_0959

give it all a mix to incorporate the wet ingredients well into the dry.

DSC_0963

and finally the dried fruits, nuts and seeds. Here I have some raisins, goji berries, chia seeds, chopped almonds as well as some black and white sesame seeds.

DSC_0964

Give all the ingredients a thorough mixture to slick them somewhat with the oil and dates mixture

DSC_0965

and prepare a baking tin by lining it with baking paper to prevent the oatmeal bars from sticking to the tray.

DSC_0967

Scrape the contents into the tray and flatten the top, making sure it’s even on all sides before baking it at 180ºC for 35-40 minutes.

DSC_0968

It will come out bronzed at the top and I realized the raisins had swollen a bit and protruded out. This is, at this stage, a tin full of delicious granola and to make them into skinny bars you have to let it cool completely.

DSC_0975

The final stage involves a bit of pouring and sprinkling and here I have some melted chocolate and a couple tablespoons of slivered pistachios. You can melt some vegan chocolate for this purpose but I have here some homemade chocolate, the recipe for which I’m still perfecting and perhaps I will upload it soon but for now some melted chocolate (any you prefer) would work.

DSC_0976

Sprinkle over the nuts while the chocolate is still liquid and keep it to set in the fridge for a couple hours or until you’re ready to unmould and slice after it’s set.

DSC_0977

The surface takes over a rather matt look accentuated with the vibrant greens of the slivered pistachio’s and tastes even better.

DSC_0980

Find a sharp knife and get carving. The size of the pieces you cut is entirely up to you. They can be shards, chunks, blocks, slivers or you can just chew on this entire thing whole.

DSC_0979

Just look at this glorious cross section. There’s a bit of everything.

DSC_0982

and another cross-section, if you’re into cross-sections. I mean, of course, you could make thicker chunkier bars by spreading it into a smaller baking tin but they’d still be skinny bars.

DSC_0987-1


Ingredients

Rolled oats: 250g

Rice flour: 80g

Coconut oil: 50mls

mashed dates: 170g  (Alternatively use maple syrup or any other syrup)

Nuts +seeds: 80g (I used almonds, chia, black and white sesame seeds)

dried berries and raisins: 60g (I used raisins and goji berries)

Cinnamon: 1 tsp

vanilla extracts: 1 tsp

melted Vegan chocolate: 150g

Slivered Pistachios: 2 tbsps


Recipe instructions

Pulse the oats in a food processor to break them as an optional step.

In a clean bowl mix together the dates and coconut oil until well combined. Tip in the oats, rice flour, cinnamon and vanilla extract and mix. Add the nuts, seeds, berries and raisins and mix until well combined.

Spread in a baking tin lined with baking sheet and flatten the surface evening out the layer and bake at 180ºC for 35-50 minutes or until the top is browned.

Let it cool completely before glazing with melted chocolate and sprinkling over slivered pistachio’s.

Refrigerate to set and cut into large pieces or smaller chunks.

Store in the refrigerator in an airtight container for best results. These keep for a couple weeks if well stored, though they are much too easily eaten before the weekend is over.

NOTE: use date/ maple/rice syrup or coconut sugar instead of mashed dates if you prefer and any other dried fruits, nuts and seeds of your choice.