Chicken tikka salad


This summer had me realizing all my salad dreams. I don’t know how it came to be but I found myself wanting to eat salad almost everyday for lunch and thusly creating all my favourite preparations into salad forms. Maybe it’s the crunch that I wanted or perhaps the effects of the extreme heatwave and unforgiving humidity had me needing all that was abundant and high in water content. Whatever the case maybe, I am delighted to have actually munched my way through hundreds of lettuce heads this year.

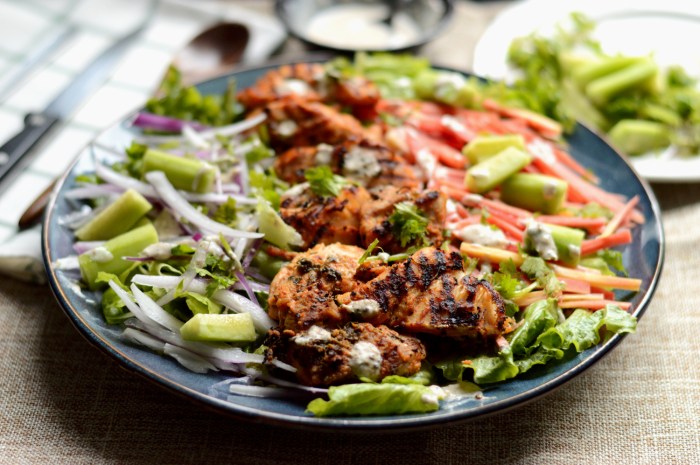
This chicken tikka salad is no different. Abundant with fantastical spices of a traditional tikka and light in its delivery, laid on a bed of raw vegetables, this salad has it all, that is the oomph of traditional flavours with a zingy dressing that won’t make you miss the naan.

Of course there are days when these succulent pieces of chicken wrapped in naan or stuffed between a couple slices of bread do the needful, but on days when you’re looking for something light and yet special this tikka salad is an uncompromising substitute.

the ingredients are simple. Chicken, yogurt, cumin, pepper, ginger and garlic paste, red chilly powder, fenugreek leaves, lemon. yogurt and your favourite vegetables for salad.

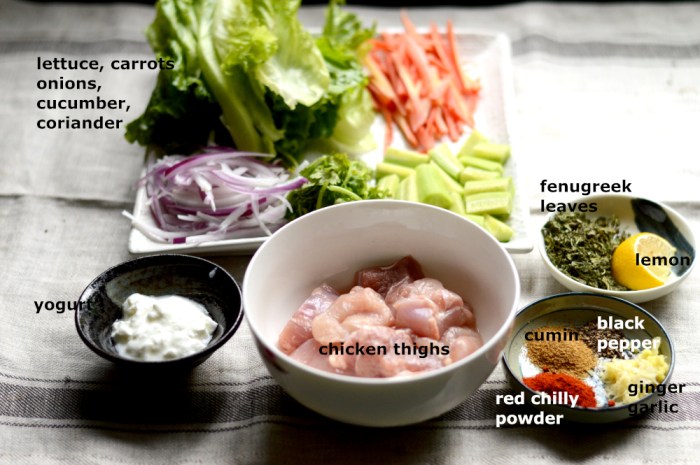
Slice the chicken into bite sized pieces. In a bowl marinade the chicken with lemon, fenugreek leaves, ginger garlic paste, cumin, pepper, red chilli powder and yogurt. Add some oil and mix.

Once mixed, cover and let rest for at least ten minutes before cooking.

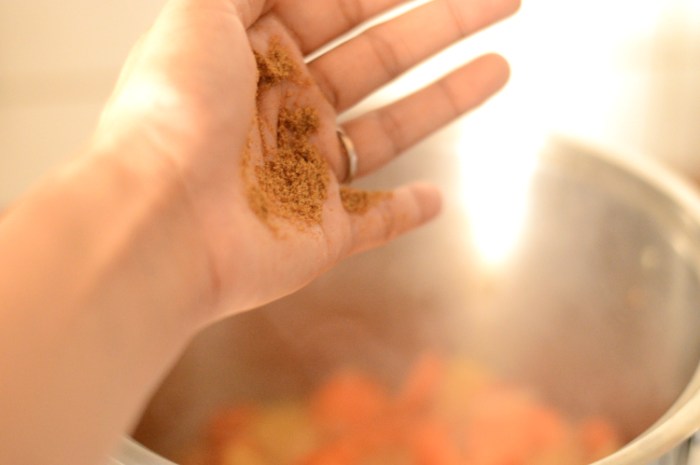
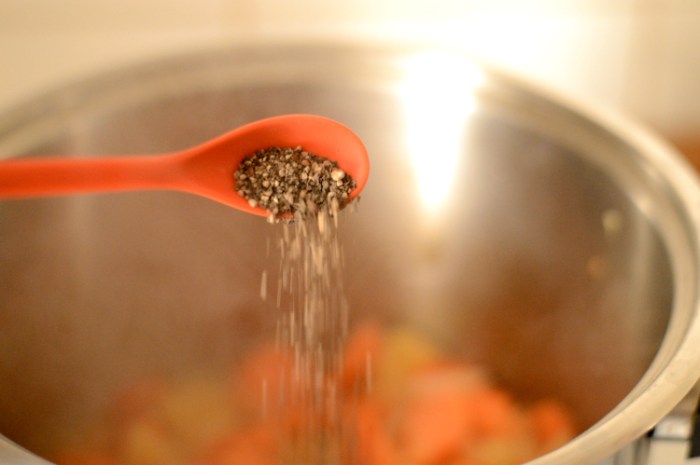
In the meantime we can make some dressing for the salad with some yogurt, black pepper, cumin powder, salt, garam masala and lemon.

Prep the vegetables for the salad by cleaning and chopping them into bite sized pieces. You can use whatever vegetables you like to eat raw.

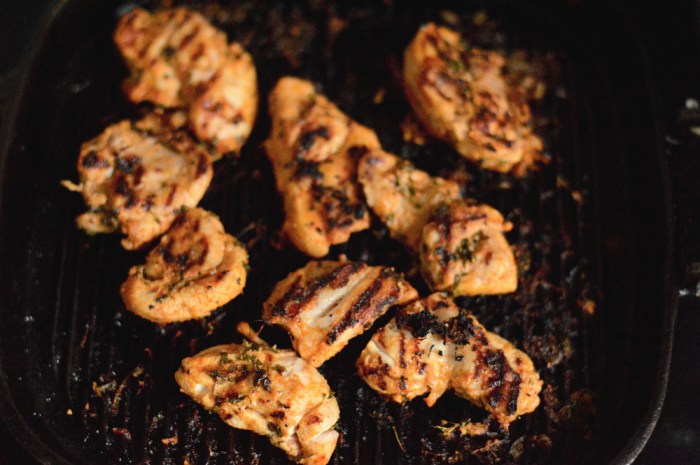
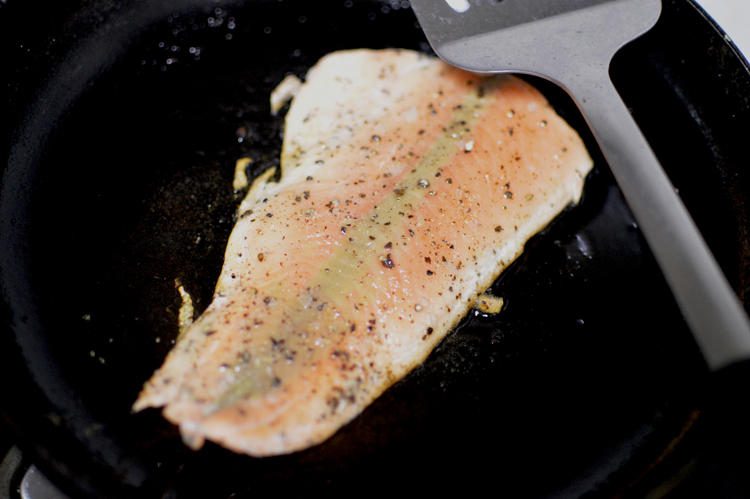
I like to grill the chicken for tikka only because I love the stripes but it’s not needed. A regular skillet works just as fine if not better. Cook the chicken on both sides until well cooked and slightly charred for the smoky resonance.

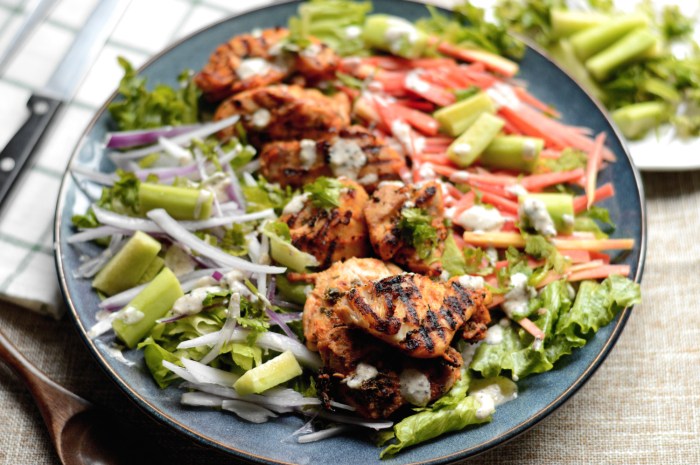
The vegetables I’ve used here are lettuce, onions, carrots and cucumber. It’s really up to individual preference here. I have tried substituting shredded cabbage for lettuce and it works just as well.

Drizzle the yogurt dressing on top and enjoy.

This is a simple recipe with such complex flavours that you’d never realize it took you barely thirty minutes to put together this fabulous meal.


Ingredients

Chicken - 200-350g
Yogurt- 50g
Fenugreek leaves- 2 tbsp
Red chilli powder- 1 tsp
Ginger garlic paste- 2 tsp
Salt to taste
Lemon- 2 tsp
Cumin powder- 1 tsp
Black pepper- 1 tsp
Oil-2 tsp

-----

For the dressing

Yogurt- 1 tbsp
Garam masala- 1/2 tsp
Cumin powder- 1/2 tsp
black pepper- 1/4 tsp
salt to taste
Lemon- 1/2 tsp

--
for the salad

lettuce- 1 head
carrots- 1 medium
Cucumber- 1 medium
Onion- 1 small
Coriander leaves

Recipe instructions

Chop the chicken into bite sized pieces and mix into a bowl with lemon, fenugreek leaves, dried spices, yogurt, ginger garlic paste, salt and oil. Mix well and let rest at room temperature for ten minutes.

In a small bowl mix together the yogurt, garam masala, cumin powder, black pepper, salt and lemon to prepare dressing. Refrigerate until ready to serve.

Wash, clean and prepare the vegetables by choppin into bite sized pieces.

Heat a grill or skillet and lay the marinated chicken pieces. Cook on both sides for at least 5 minutes or until completely cooked and slightly charred and smoky. Let cool for a few minutes before adding to the vegetables.

Lay the cooked chicken over vegetables and drizzle with the yogurt dressing.

Serve.


Lemongrass scented carrot and apple soup (vegan)


This isn’t just a soup but an absolute sensation, not least because it’s coloured very spring appropriate but also because it’s so fantastically delicious that you’d need excuses to make it over and over again. The earthy sweetness of carrots with the juiciness of apples which is offset every so gently with an undercurrent of lemongrass makes every spoonful a strange delight that though a bit familiar is also something of a mystery. Calming, comforting and almost too easy. This is a soup for all occasions.

the ingredients are apples, carrots, ginger, lemon, lemongrass, black pepper, soy sauce, cumin powder (not pictured), onion(not pictured)

Note: I have used lemongrass stalks here, if however you cannot find them or have no access to them then simply use 1 heaping tablespoonful of Thai yellow/red curry paste.

chop the apples and carrots into bite size pieces

Heat the coconut oil in a large pot and add in the chopped onions. (The onions aren’t pictured, but you need them)

add in the ginger and saute for a minute

before adding in some salt

and lemongrass. If you’re using curry paste then add it after the carrots and apples have cooked down slightly.

Mix in well and saute for a few minutes

finally add in the carrots and apples. Give them a quick turn in with the flavourings and this needs nothing more than cooking down to a soft mush.

The vegetable and fruit will leach out a lot of juice but I’m still adding a bit more water just to let everything simmer gently while I get on with laundry life.

cover the pot and let it cook on a low-medium flame. Keep checking occasionally, giving it a stir to coax the fruit and veg into softening.

After ten minutes of cooking the apples had softened to a pulp but the carrots still had a bite to them and we want to make everything smooth. If you’re using curry paste then this is the right time to add it.

While everything is still cooking and slowly becoming softer, add in the seasonings. Soy sauce

ground cumin. It was not pictured in the ingredients list but it’s an important part of this process.

and black pepper. Mix it all well and cover the pot again to let everything mix and soften. Add more water if needed.

FInally, after almost twenty minutes of cooking everything was as needed. Soft and mushy.

At this stage you can retrieve the lemongrass

and add more water to bring up the quantity that can make it easily blendable and soupy.

I am using a hand blender, but you can use a mixer or even a manual soup strainer as needed.

also add in a big squeeze of lemon.

depending on how you enjoy your soups, you can make it as smooth or as chunky. I like mine somewere in the middle.

and there you have it! Delicious, hearty and sweet with that unique fresh tang distinctly lemongrass which somehow turns into a soft hint of citric note, subtle and deep.


Ingredients

Carrots: 500g - 700g
Apples: 2 large or 3 medium
lemongrass: 2 stalks (if using curry paste then use 1 heaping tablespoon)
onion: 1 medium
Ginger: 1 inch piece
Cumin powder: 2 tsp
Black pepper: to taste
coconut oil: 2 tbsps
lemon juice: 1 tbsp
salt: to taste
water : 500mls + as needed 

Chop the vegetables and fruit into bite sized pieces. You can even grate the carrots for quicker cooking.

Recipe instructions: In a large pot heat the coconut oil and add in chopped onions and ginger. Saute for a minute and add in salt and lemongrass.

Give it a mix and cook for a minute before adding in chopped carrots and onions. Let cook until soft. (Add the curry paste if using once the carrots and apples have softened)

Add in soy sauce, pepper and cumin powder and stir together and let cook before completely softened into a mush.

Retrieve the lemongrass stalks. Add water and blend to form into a soup. Bring to a simmer before finally spritzing with lemon juice.

Serve hot

Skinny energy bars (vegan)


DSC_0984

One could, if one wanted, call them superfood mega nutritious healthy chocolate energy bars but that would be too long a name for something so decidedly elegant and petite and so, skinny bars it is and these are skinny in both appearance and spirit and all too easy to eat not just as a nutritious dessert, but also as a post-workout snack or during that time of the day when you feel hungry or depressed.

DSC_0950

I might have mistakenly erased the photograph of ingredients assemblage which is why we begin with the recipe. Starting with a clean bowl and a spatula.

DSC_0951

in with coconut oil, always a good start.

DSC_0953

followed with an all natural sweetener in the form of mushed up, pitted dates

DSC_0954

mix them well to form a somewhat wet base for the rest of the ingredients

DSC_0956

rolled oats that I pulsed a couple times to somewhat break them

DSC_0958

followed by rice flour and cinnamon and vanilla extract

DSC_0959

give it all a mix to incorporate the wet ingredients well into the dry.

DSC_0963

and finally the dried fruits, nuts and seeds. Here I have some raisins, goji berries, chia seeds, chopped almonds as well as some black and white sesame seeds.

DSC_0964

Give all the ingredients a thorough mixture to slick them somewhat with the oil and dates mixture

DSC_0965

and prepare a baking tin by lining it with baking paper to prevent the oatmeal bars from sticking to the tray.

DSC_0967

Scrape the contents into the tray and flatten the top, making sure it’s even on all sides before baking it at 180ºC for 35-40 minutes.

DSC_0968

It will come out bronzed at the top and I realized the raisins had swollen a bit and protruded out. This is, at this stage, a tin full of delicious granola and to make them into skinny bars you have to let it cool completely.

DSC_0975

The final stage involves a bit of pouring and sprinkling and here I have some melted chocolate and a couple tablespoons of slivered pistachios. You can melt some vegan chocolate for this purpose but I have here some homemade chocolate, the recipe for which I’m still perfecting and perhaps I will upload it soon but for now some melted chocolate (any you prefer) would work.

DSC_0976

Sprinkle over the nuts while the chocolate is still liquid and keep it to set in the fridge for a couple hours or until you’re ready to unmould and slice after it’s set.

DSC_0977

The surface takes over a rather matt look accentuated with the vibrant greens of the slivered pistachio’s and tastes even better.

DSC_0980

Find a sharp knife and get carving. The size of the pieces you cut is entirely up to you. They can be shards, chunks, blocks, slivers or you can just chew on this entire thing whole.

DSC_0979

Just look at this glorious cross section. There’s a bit of everything.

DSC_0982

and another cross-section, if you’re into cross-sections. I mean, of course, you could make thicker chunkier bars by spreading it into a smaller baking tin but they’d still be skinny bars.

DSC_0987-1


Ingredients

Rolled oats: 250g

Rice flour: 80g

Coconut oil: 50mls

mashed dates: 170g  (Alternatively use maple syrup or any other syrup)

Nuts +seeds: 80g (I used almonds, chia, black and white sesame seeds)

dried berries and raisins: 60g (I used raisins and goji berries)

Cinnamon: 1 tsp

vanilla extracts: 1 tsp

melted Vegan chocolate: 150g

Slivered Pistachios: 2 tbsps


Recipe instructions

Pulse the oats in a food processor to break them as an optional step.

In a clean bowl mix together the dates and coconut oil until well combined. Tip in the oats, rice flour, cinnamon and vanilla extract and mix. Add the nuts, seeds, berries and raisins and mix until well combined.

Spread in a baking tin lined with baking sheet and flatten the surface evening out the layer and bake at 180ºC for 35-50 minutes or until the top is browned.

Let it cool completely before glazing with melted chocolate and sprinkling over slivered pistachio’s.

Refrigerate to set and cut into large pieces or smaller chunks.

Store in the refrigerator in an airtight container for best results. These keep for a couple weeks if well stored, though they are much too easily eaten before the weekend is over.

NOTE: use date/ maple/rice syrup or coconut sugar instead of mashed dates if you prefer and any other dried fruits, nuts and seeds of your choice.


Vegan wraps


DSC_0511

If you’re out there looking for something healthy, mouthwatering and vegan with the ability to inoculate thy system with wholesome nutrition, healthy crunch and that which is choke full of so much goodness that you’d almost feel sick with health, except you won’t because healthy food makes no one sick and it’s time we embraced that fact, then this is the dish for you.

Also, as rare as it might be, often times nourishing food turns out to be just that much better than almost all the bad stuff that tastes divinely delicious, and this vegan wrap is the alpha and the omega of health and taste; alive here to work as a fantastic breakfast, packed lunch, picnic food or just a regular meal for a regular night, except it’s so damn tasty that it makes a very ordinary day into a stellar one, or at least till the time you’re eating this.

What’s more this recipe actually has two recipes, so that’s like a bonus, and one can’t have enough bonuses..so here we go.


DSC_0435 copy

These might look like a lot of usual suspects, but that’s only because we’re going to be making hummus from scratch, and not just any ol’ hummus but a roasted red pepper one, and here’s a recipe for a regular hummus and there’s a detailed ‘how to‘ on roasting red peppers as well, which you can find here.


DSC_0436

A bit of roasting action first, ensuring the pepper is nicely charred and softened

DSC_0444

after which we put it in a bowl because it needs to cool down and become easier to peel.

DSC_0440

cover securely to trap in the heat, that helps create moisture and loosen the skin and make it all sorts of juicy for at least 10-15 minutes


DSC_0446

After which time you can easily peel off the skin, not too fastidiously though

DSC_0449

a few charred bits still sticking to the skin only help impart a more smoky flavour to the hummus.

DSC_0450

get rid of the seeds and guts until only the juicy part of the skin remains.


DSC_0451

Now with the hummus. In a blender, or processor tip in the cooked chickpeas.

DSC_0452

and a couple cloves of garlic. I forgot to put them in the ingredients picture.

DSC_0453

add in the roasted red pepper

DSC_0455

tahini paste

DSC_0456

cumin powder

DSC_0457

salt

DSC_0459

olive oil

DSC_0463

and finally lime juice.


DSC_0466

blend or process into a paste like consistency

DSC_0467

something like this, or finer if you please. It should be easy to spread.


DSC_0441

Now a bit of chopping and here’s some onion in its very own shot because I forgot to include it in the ingredients picture


DSC_0443

here we have our veggies chopped. A bunch of mushrooms, half a tomato, half a capsicum and our lovely onion of course.


DSC_0469

cook onions and capsicum on a smoking hot pan with a bit of oil.


DSC_0472

I like using tongs for this particular step, because it’s easy and makes you look very efficient.


DSC_0475

once it begins to soften a bit, add a small pinch of salt.


DSC_0478

and keep cooking on high heat until it’s sweetly caramelized.


DSC_0480

remove veggies on a separate plate

DSC_0482

and in with the mushrooms. There’s a rogue capsicum in there was well.


DSC_0483

cook until softened and caramelized, like so.


DSC_0484

all needs remain is a bit of assembly work.


DSC_0486

Drape the wrap with vulgar amounts of hummus. Don’t be stingy with this spread. It’s delicious, it’s full of proteins and it’s the flavour base to our wrap.


DSC_0487

Begin by layering on 1/3rd part of the wrap so it’s easy to roll. First with the caramelized capsicum and onions.

DSC_0488

then mushrooms

DSC_0490

and finally the tomatoes.


DSC_0493

Roll ’em up.


DSC_0504

serve am as is, or if you feel fancy then add some gorgeous crispy baked potatoes on the side.


Vegan Wraps

Ingredients

For hummus

Cooked chickpeas: 200g (1cup)

Tahini: 40g (1/4 cup)

Red pepper: 1 in nos

Garlic cloves: 2 small

Salt: 1/2 tsp

Cumin powder: 1 tsp

Lime juice: 1 tsp

Olive oil: 1 tbsp

_____________________

For wraps

Whole Wheat wraps: 2 in nos

Onion: 1 medium sized

Capsicum : 1 medium size

Tomato: 1 small

Mushrooms: 8-10 small button mushrooms

Salt: a pinch

Oil: 2 tsp


Recipe instructions for Hummus: 

Roast red pepper on high flame, until all sides are charred and blackened. Cover and let rest for 10-15 minutes for the skin to loosen, after which gently peel away the charred skin and remove seeds.

Add all the hummus ingredients with the roasted red pepper in a blender or food processor and pulse until a thick paste is formed.

For the wraps

Thinly slice vegetables and de seed tomatoes.

Heat oil on high flame until smoking and add the sliced capsicum and onions with a pinch of salt until sweetly caramelized. Keep tossing to keep from burning.

Remove to a plate once cooked, and in the same pan add in sliced mushrooms and cook until browned and soft.

To form the wraps, spread hummus generously on whole wheat wrap and begin layering the vegetables on 1/3rd side without heaping on too high so as to enable easy rolling of the wrap.

Ejoy!


Mushroom noodle soup


DSC_0680
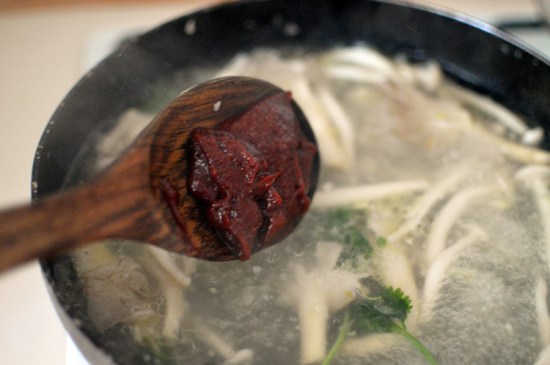
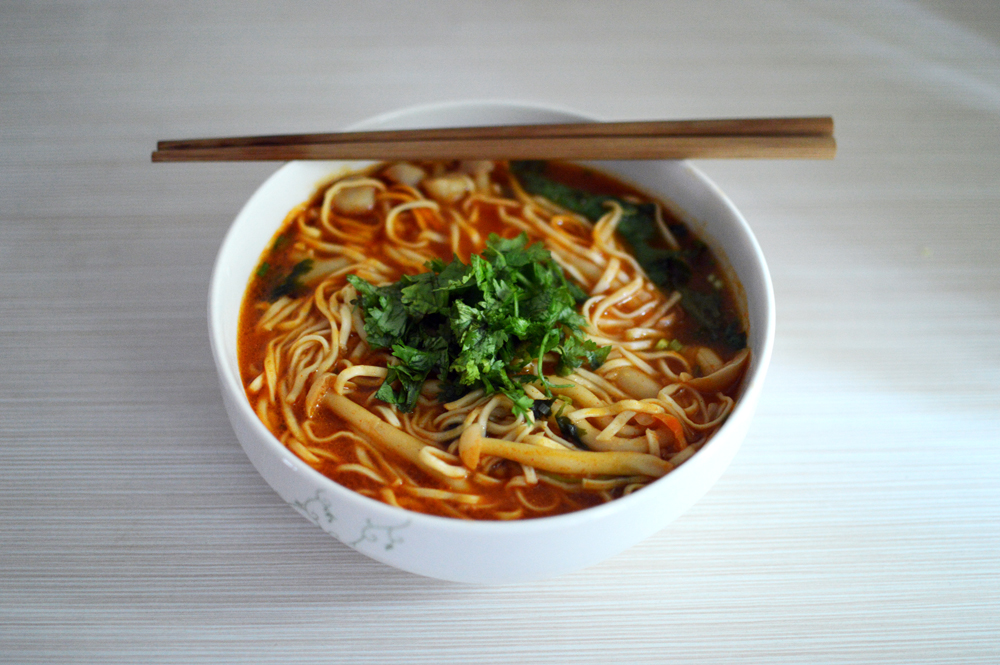
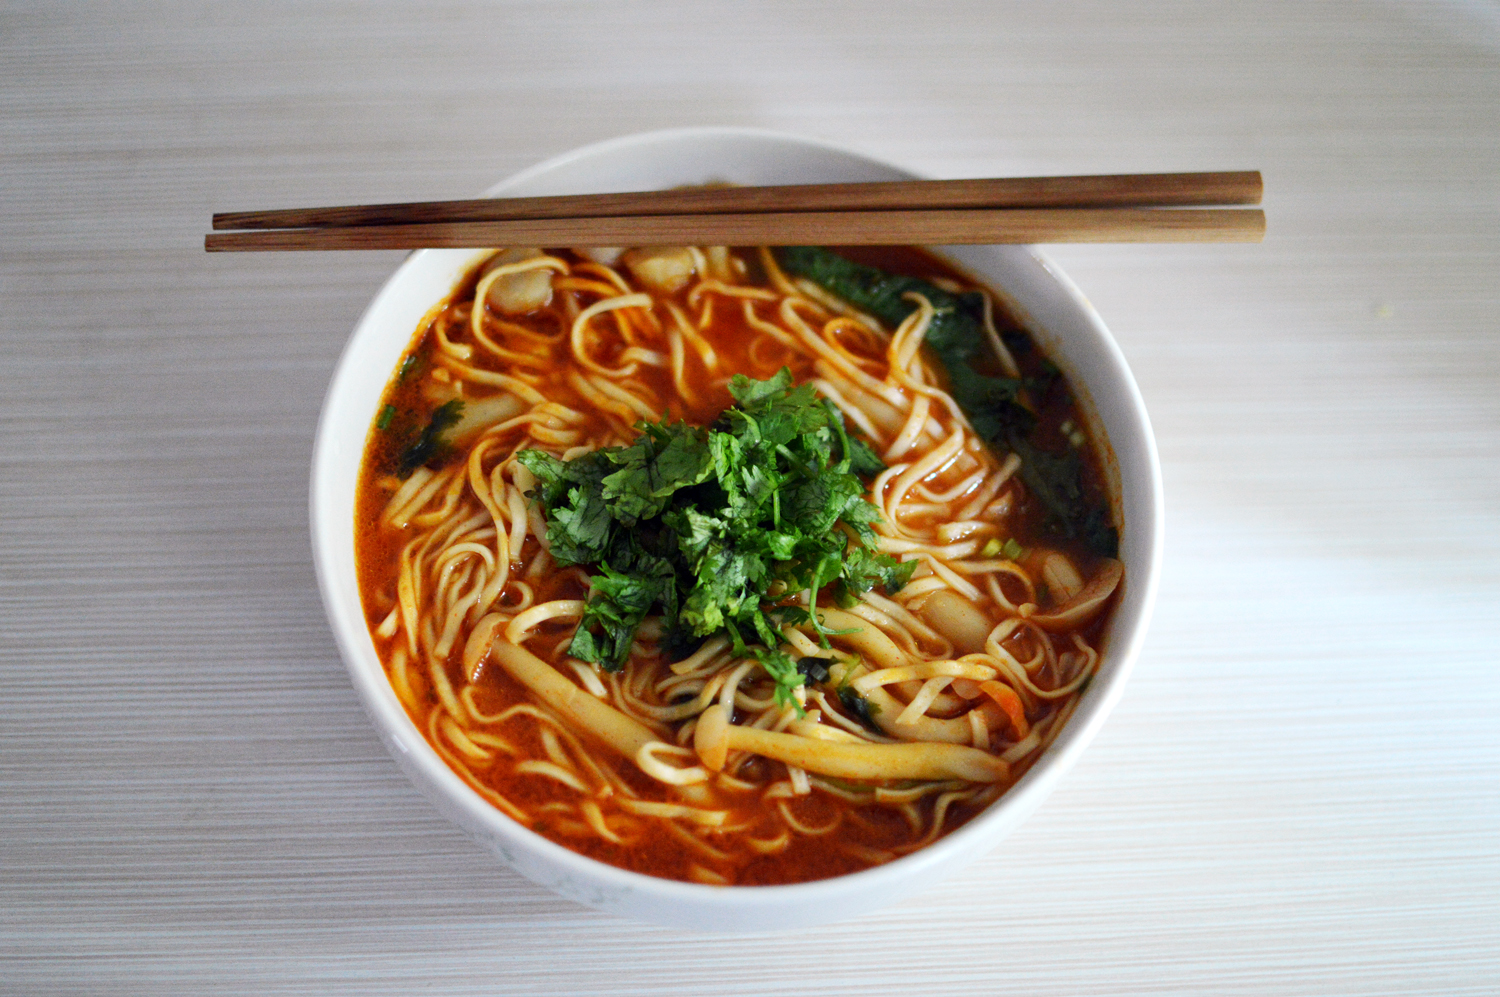
This isn’t the first noodle soup recipe on this blog, and most assuredly, not the last; this however is (as immodest as it may sound) the alpha and the omega of soupy noodle world. Meatless magic in all its crimson glory. The red blush that stains this fantastic broth is courtesy ‘Gochujang’; that vividly red Korean paste of hot peppers, easily available at your nearest Asian grocery store.

To stave off unwarranted hunger pangs at odd lunch hours, this soup is the way to your soul. Calm cooking, languorous eating, dangerously addictive. A big bowl of hearty sustenance and full bodied flavours , almost as piquant as you’d wish your dreams to be.


DSC_0639copy
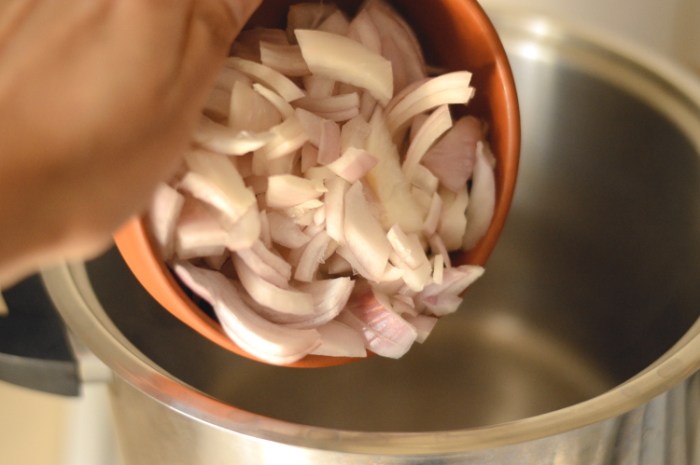
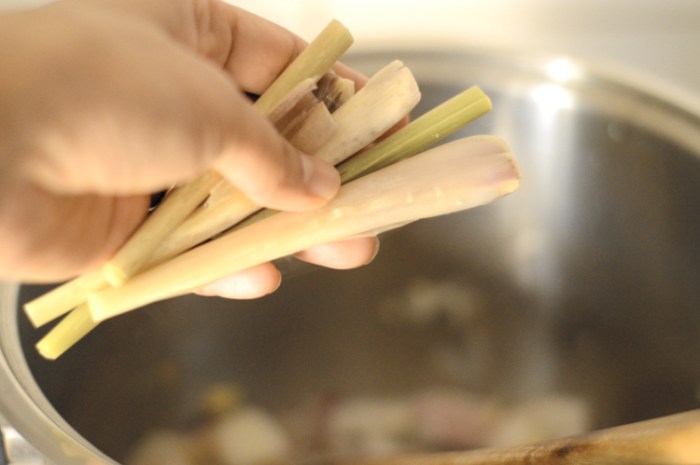
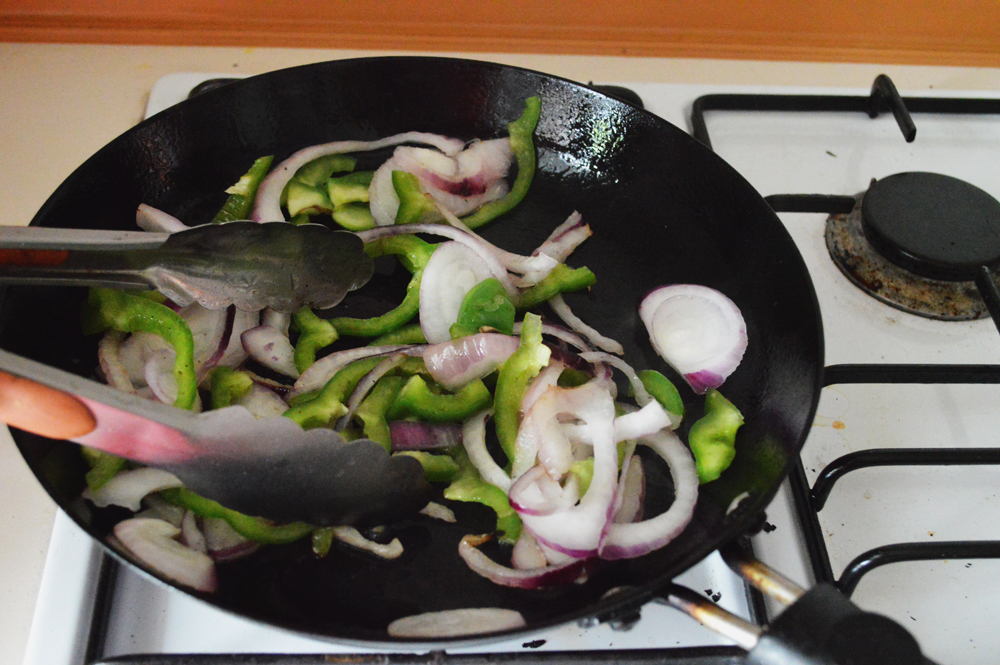
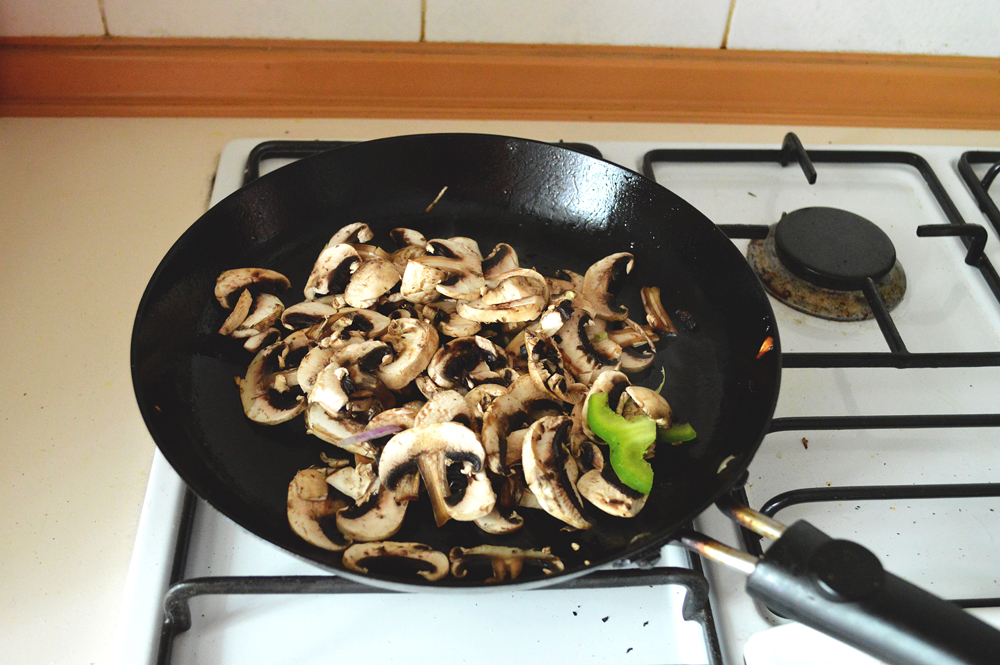
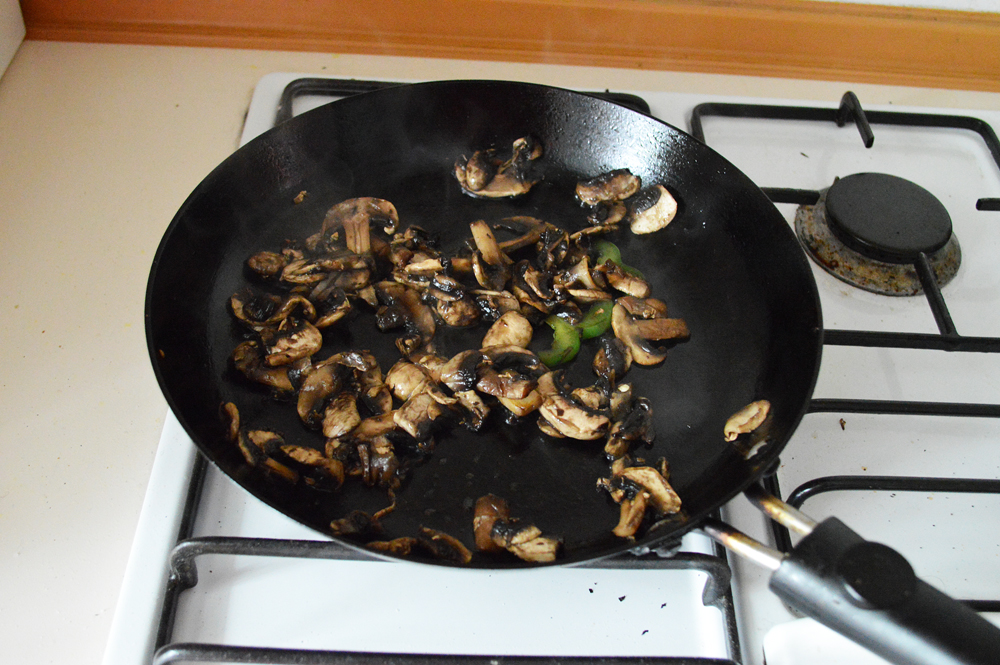
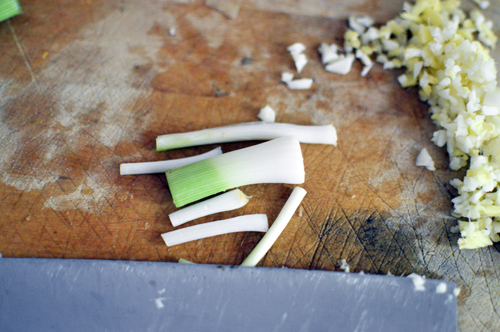
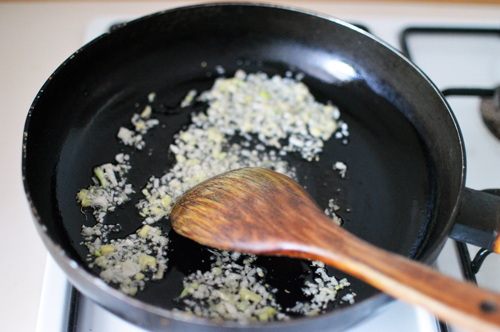
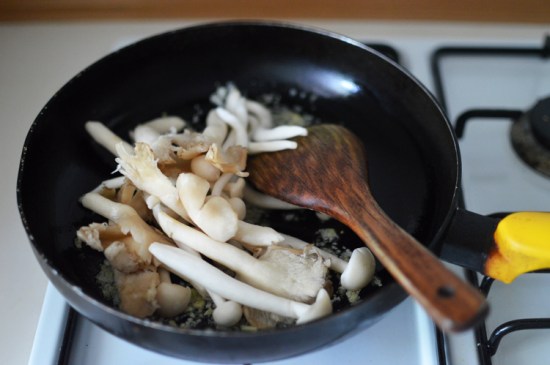
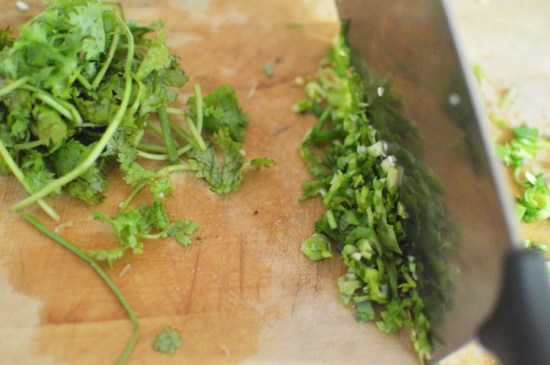
Greens of choice. I’m using Chinese lettuce here. Coriander, mushrooms, green onions, ginger and garlic, noodles, soy sauce and gochujang.
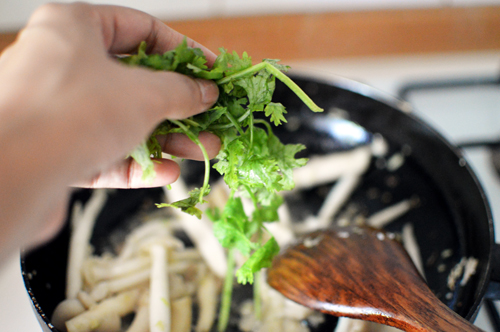
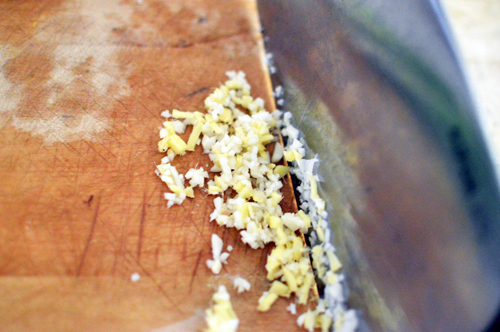
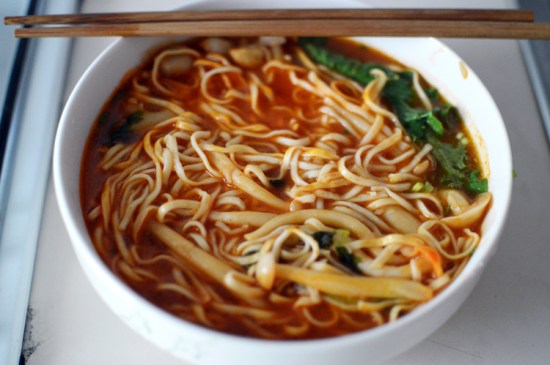
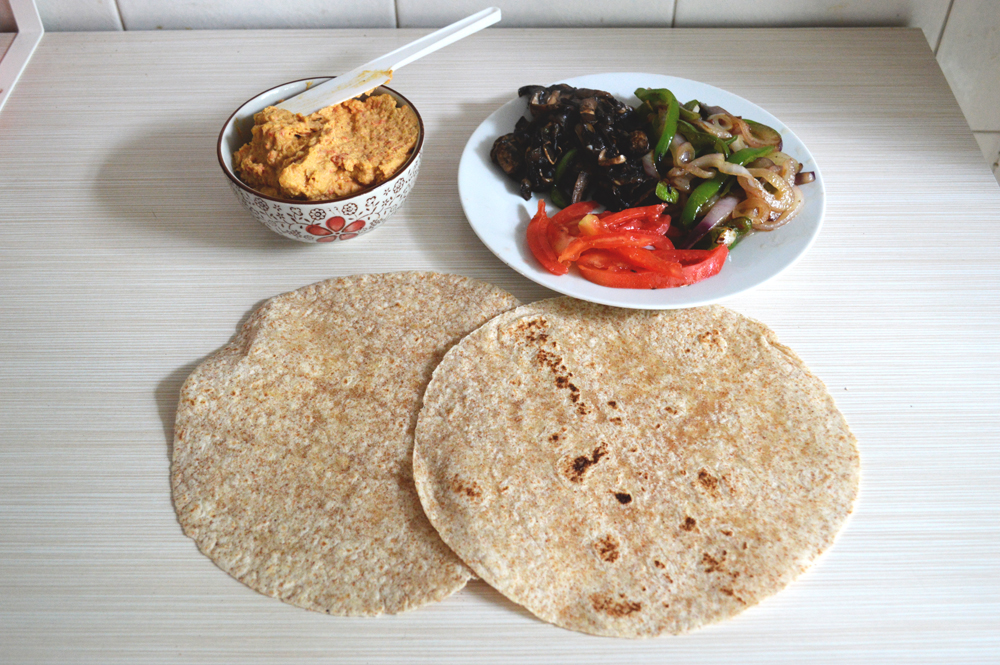
Use whatever mushrooms are handy. I’m using a mix of oysters and white beech mushrooms.


DSC_0641

Mince or chop together ginger and garlic


DSC_0643

as well as the white part of green onions. Save the green tails for later.


DSC_0646

In a pan or wok of choice, heat some oil and add the chopped/minced ginger+garlic+white part of green onions.


DSC_0647

cook until fragrant, or just about translucent


DSC_0648

add in the mushrooms

DSC_0649

and give it a good tossing about in the oil.


DSC_0650

add in a bunch of coriander into the pan with mushrooms. Save the rest for later.


DSC_0652

add water/stock to the pan.


DSC_0653

followed by a bit of salt. Only a bit.


DSC_0655

cover and let it come to a boil, letting it rapidly boil for 5 minutes.


DSC_0658

Chop the green ends of the spring onions


DSC_0659

and the coriander.


DSC_0660

add in an unapologetically fat glob of gochujang to the boiling mushroomy broth


DSC_0663

ah, the fierce redness. Let it come to a boil before adding in the noodles.


DSC_0666

cook noodles in the broth until they’re done.


DSC_0668

add the green ends of the green onions in the bottom of a serving bowl and douse liberally with soy sauce.


DSC_0670

layer on the lettuce


DSC_0674

upend the cooked contents of the pan. Broth and noodles.


DSC_0675

blanket the surface with chopped coriander


DSC_0680slurp hot!


Ingredients

stock/water: 750mls (3 cups)

mushrooms: 200g (2 cups)

green onions: 2

garlic: 1 clove

ginger: 2-3 cms piece

coriander: small bunch

gochujang: 60g (4tbsp)

soy sauce: 2tbsp

noodles: 1 nest

lettuce leaves: 3-4

salt to taste

*this recipe is a single serving big bowl.  Increase or decrease as per requirement


Recipe instructions

Heat two tbsp oil in a wok/pan and add in the chopped ginger, garlic and green onions. Cook until translucent and add in the mushrooms. Saute for a minute, add a few strands of coriander and add in water/stock. Sprinkle salt if needed.

Cover and let bubble for 5 minutes. Add in the gochujang paste and let it come to a boil before adding in the noodles. Let the noodles cook in the mushroomy broth.

Add to the serving bowl the chopped green onion tails and soy sauce. Layer with lettuce leaves and tip the contents of the cooked noodles in broth into the bowl.

Garnish with chopped coriander. Serve hot.

DSC_0681Enjoy!


Salmon fried rice


DSC_0265

This is just the kind of food you want to indulge in from keeping your waistline into an ever expanding universe. Healthy, nourishing, nutritious and all too tasty..how often do you even read all these adjectives in the same sentence?

Well my darlings, if you’re still on about healthy eating this year (why?), then this fantastic recipe is the one for you. Packed full on with flavours, yet strangely subtle. This bowl promises to comfort without making you fat. It’s sustenance and all too easy to scarf down in heaping abundance. No guilt, only pleasure. Your taste buds will thank you and your insides will give a content round of applause. It’s so easy and quick to put together that you’ll see yourself tottering in smug satisfaction as you lay this humble yet celestially righteous bowl of gratifying health for all to see and eat.

This does a superb double take as not only a solitary lunch but also as a quick meal for many.


DSC_0224 copy
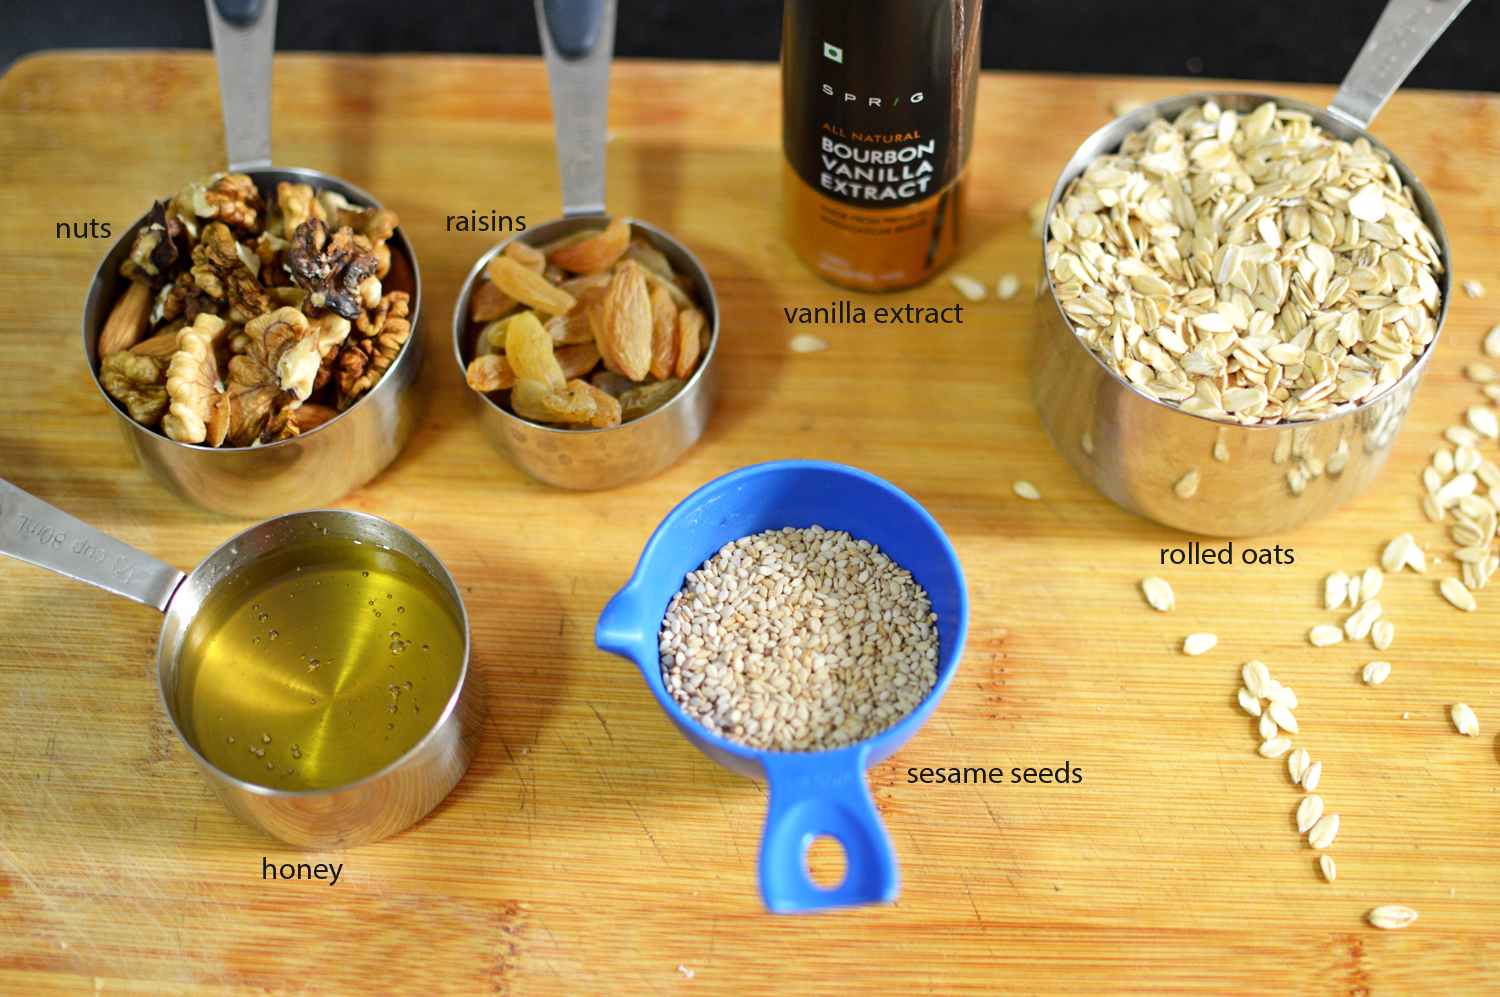
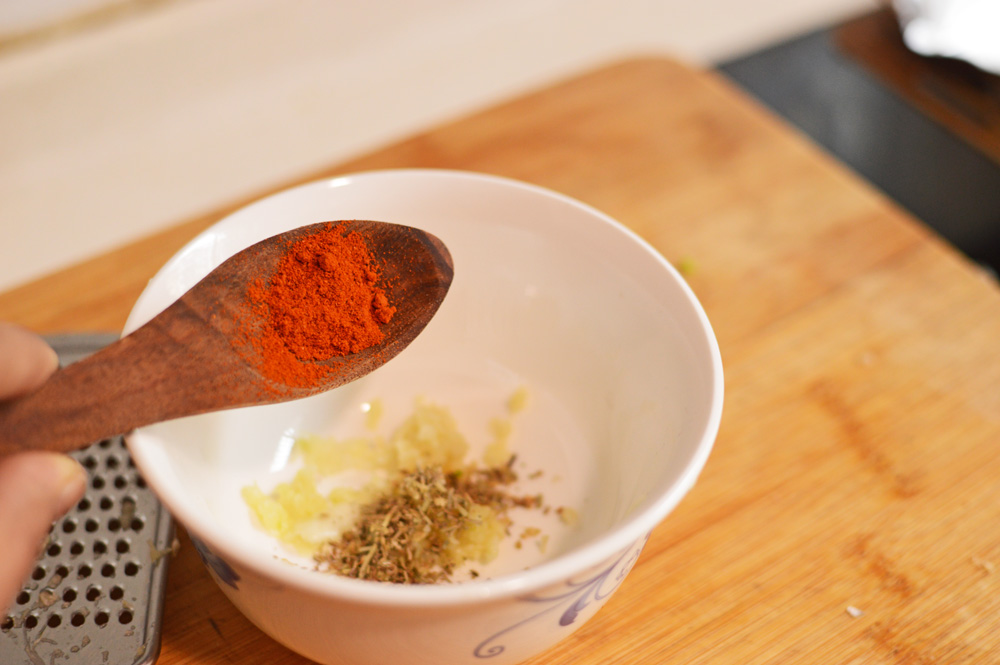
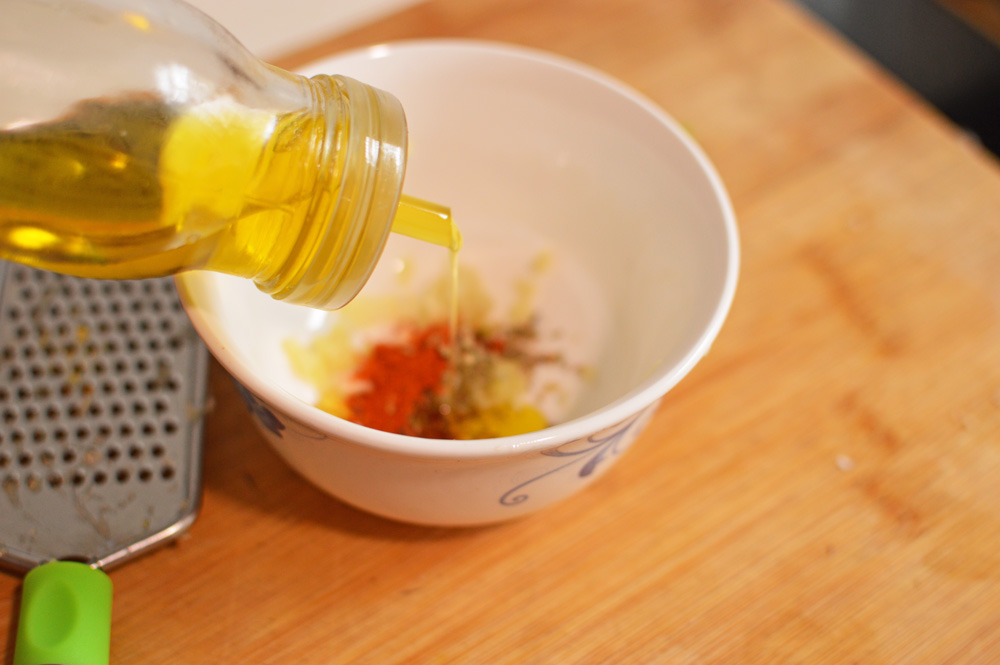
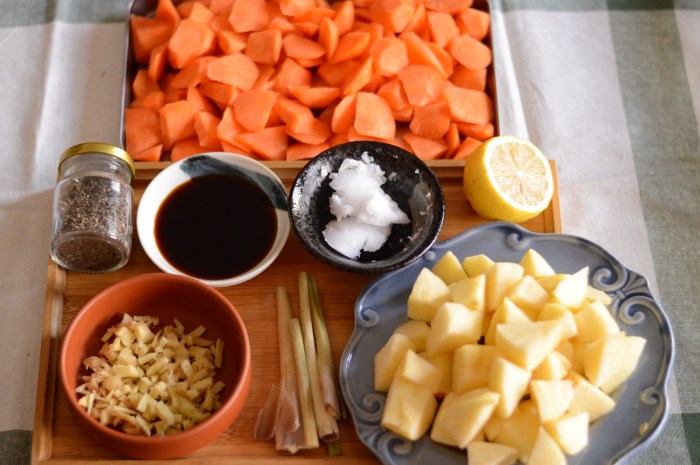
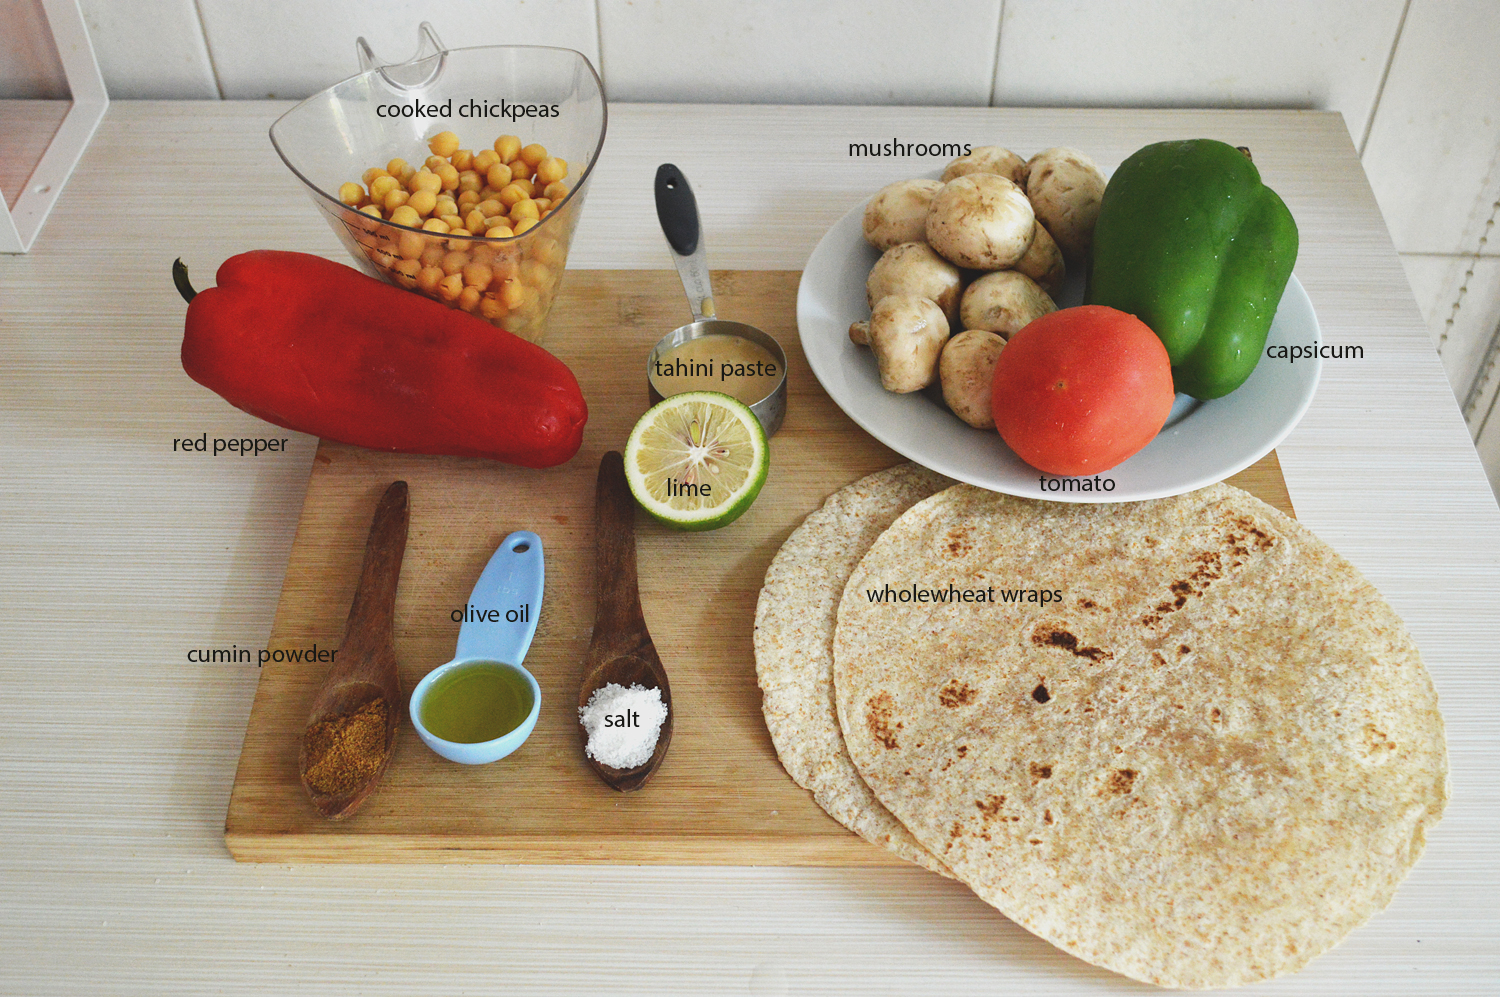
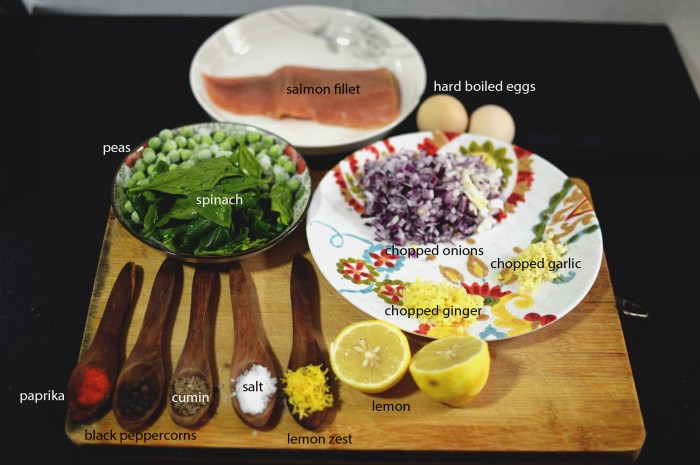
A bit many ingredients, but they’re not a whole lot.paprika, black peppercorns, cumin seeds, salt, lemon zest and lemon juice, chopped onions, ginger and garlic as the flavour base. Salmon, peas and spinach, hard boiled eggs and that’s really it. (psst. use any fish you have available)


DSC_0227
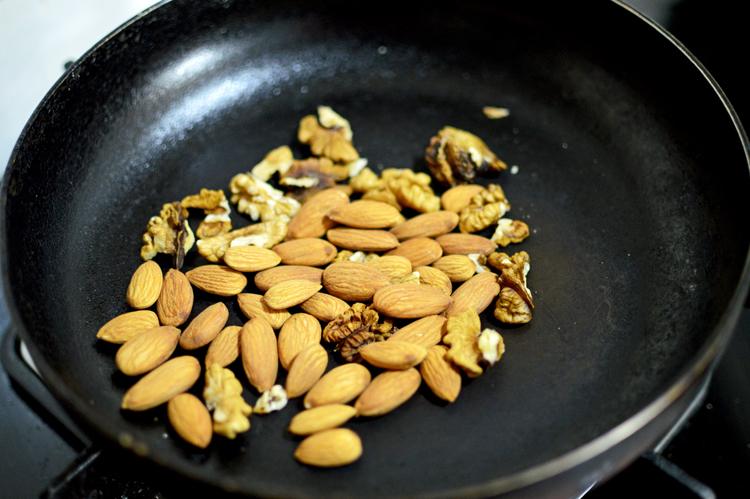
dry roast the cumin and peppercorns, until they’re just fragrant


DSC_0230
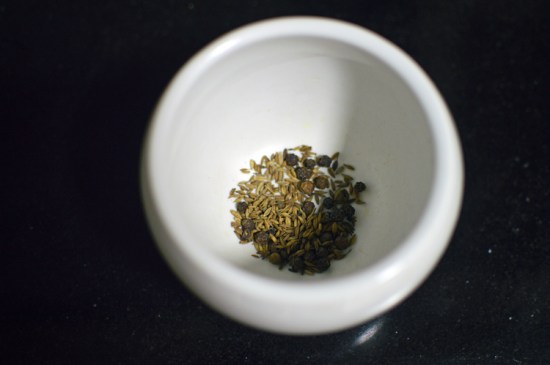
These need to be crushed along with other spices


DSC_0231

DSC_0232
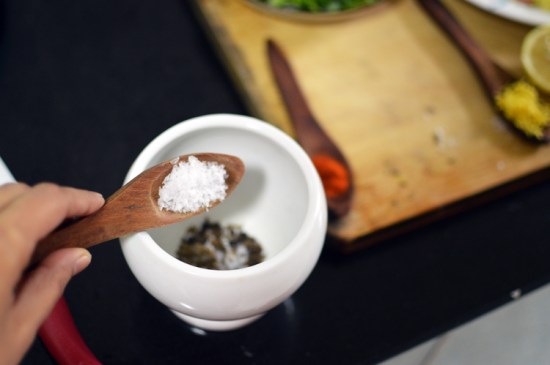
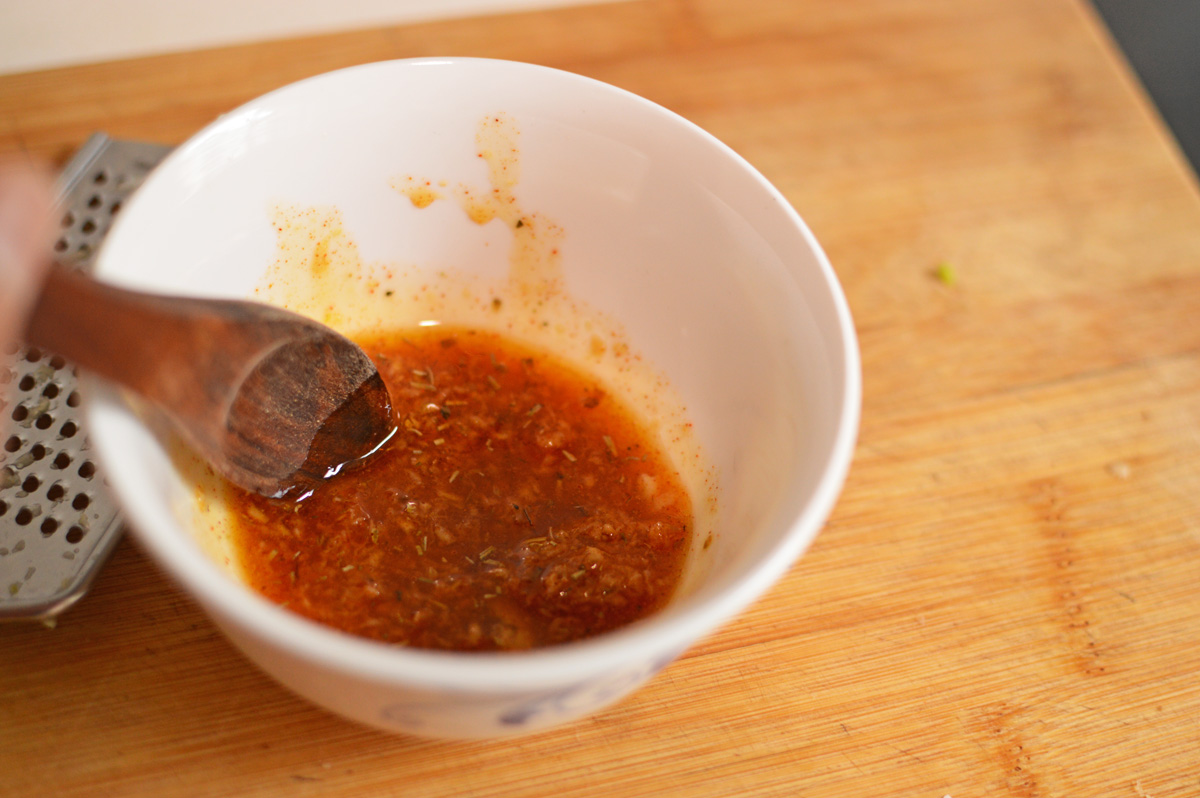
In with the salt and paprika


DSC_0233and you crush it within an inch of their existence, or until they’re nicely crushed
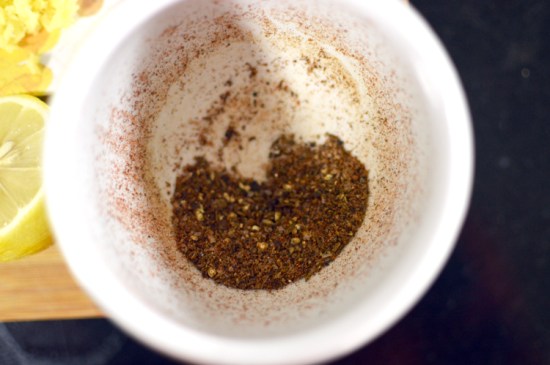
 

DSC_0235like so..


DSC_0236
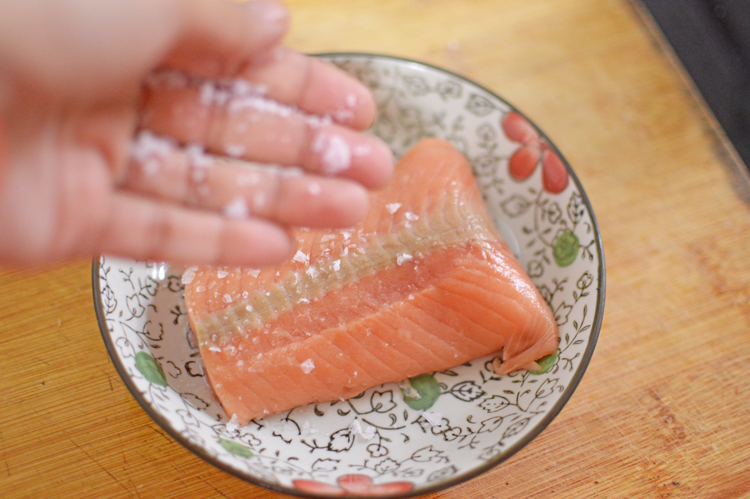
now for a gentle massage or rub..however you prefer


DSC_0238
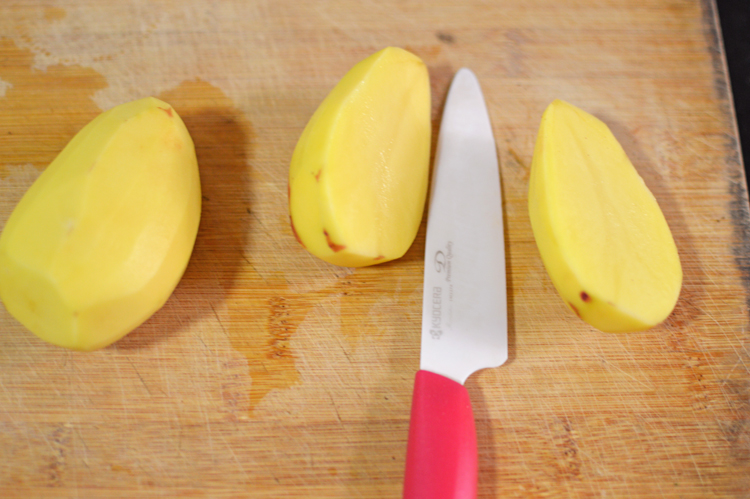
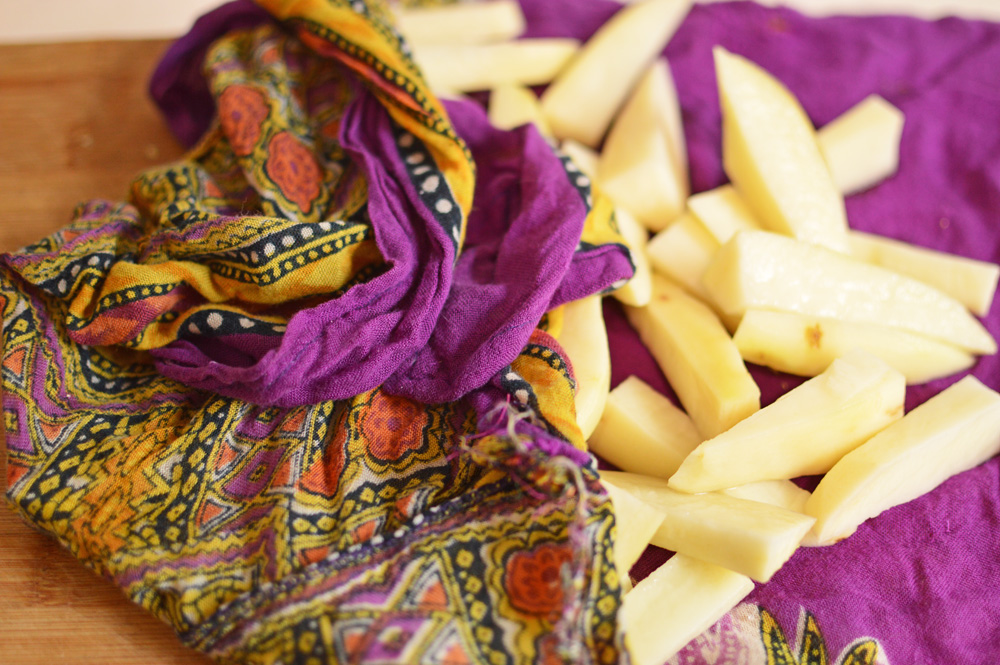
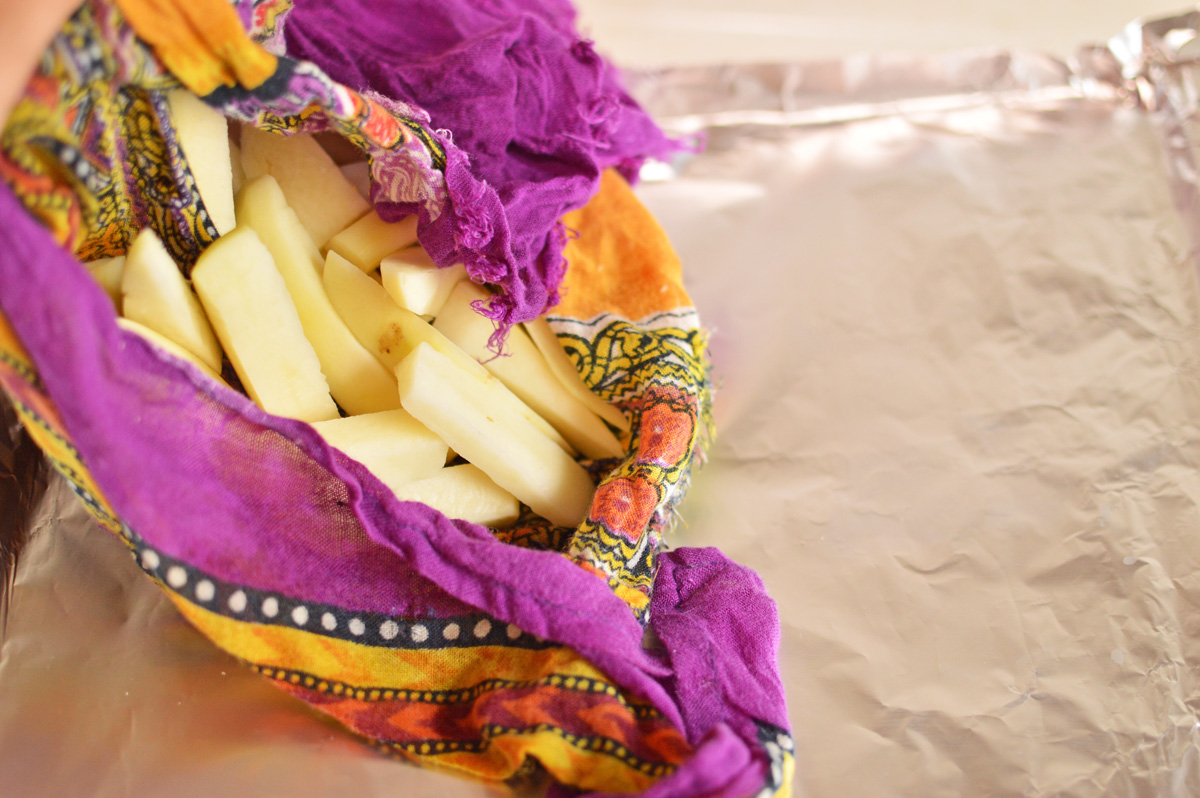
an now for a bit of tasteful dismemberment..or you can just cut in to chunks


DSC_0239
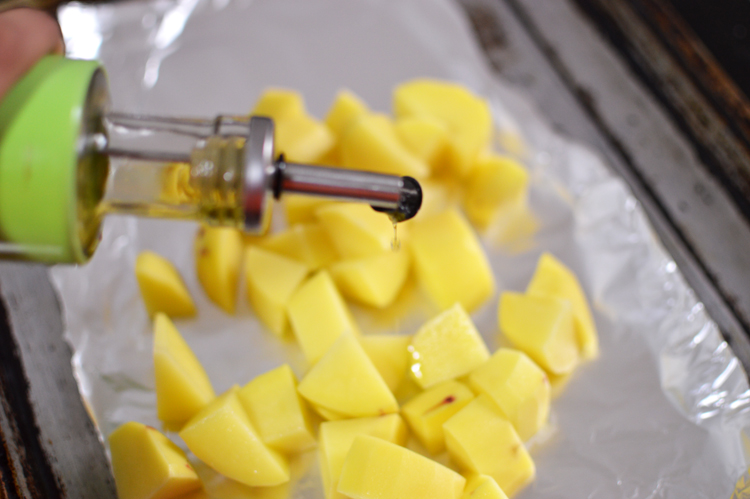
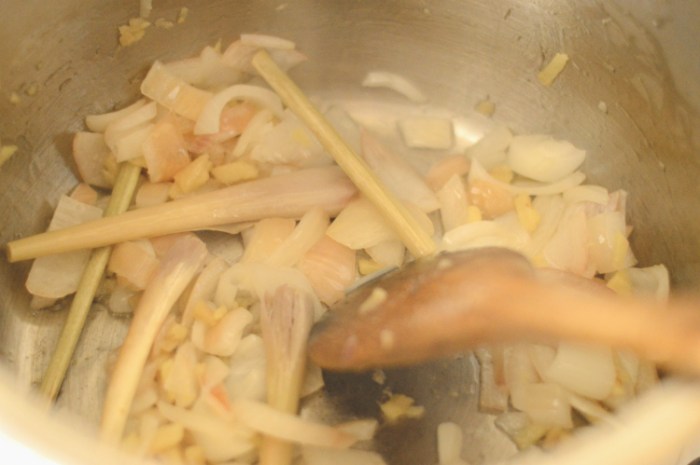
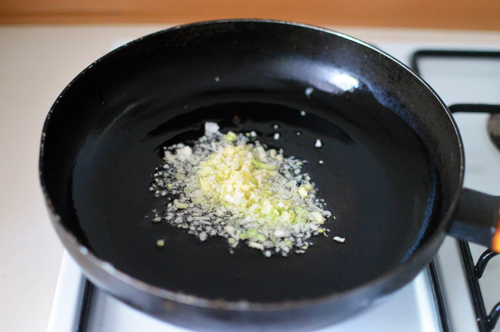
In a pot of choice, heat some oil and add in the chopped onions


DSC_0241casually throw in the chopped ginger


DSC_0244
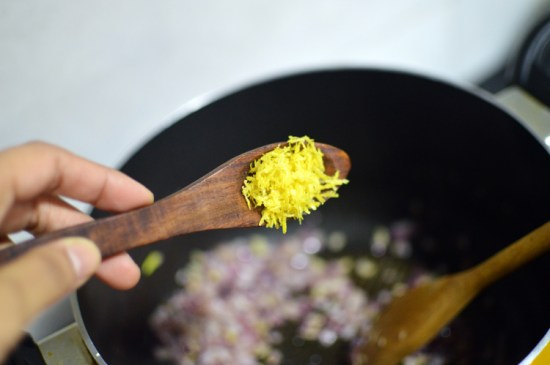
followed closely by lemon zest


DSC_0245
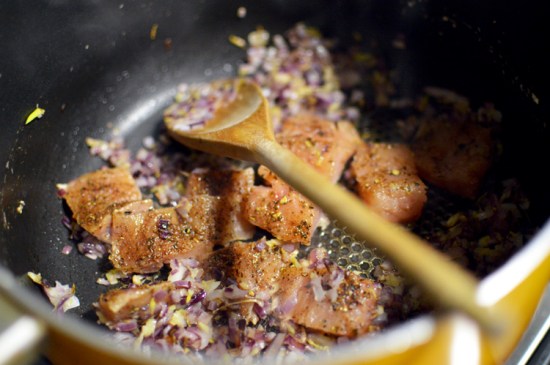
and in with the fish chunks. Cook for a few minutes, until the fish is more or less cooked.


DSC_0247
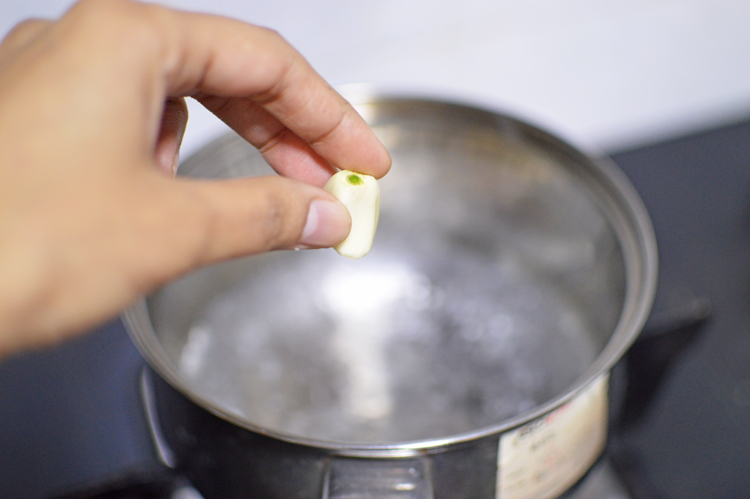
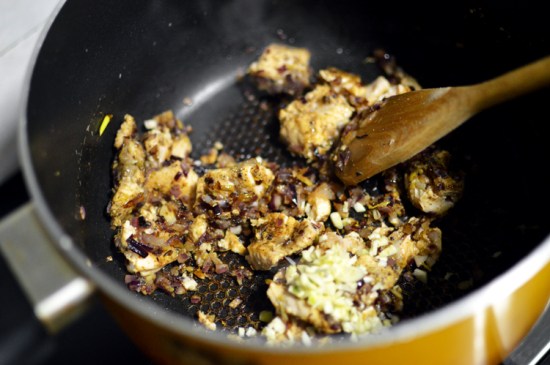
Add in the chopped garlic and stir for a minute more.


DSC_0248
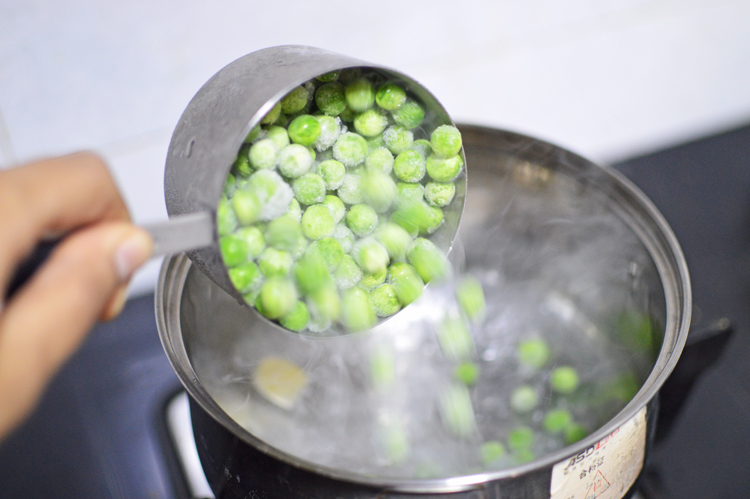
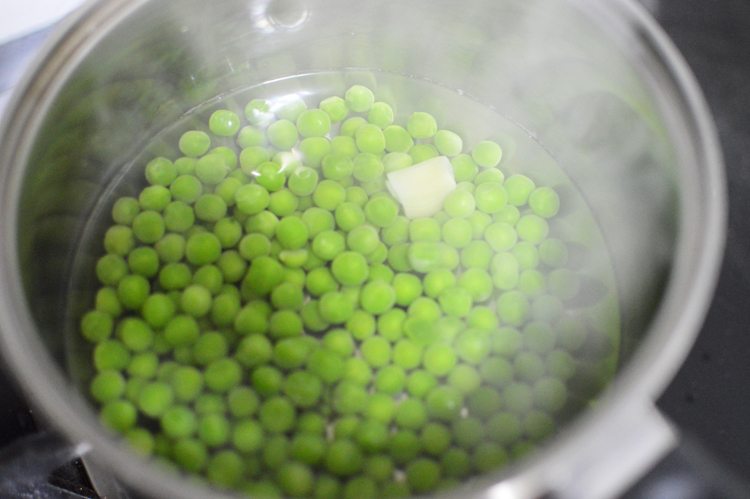
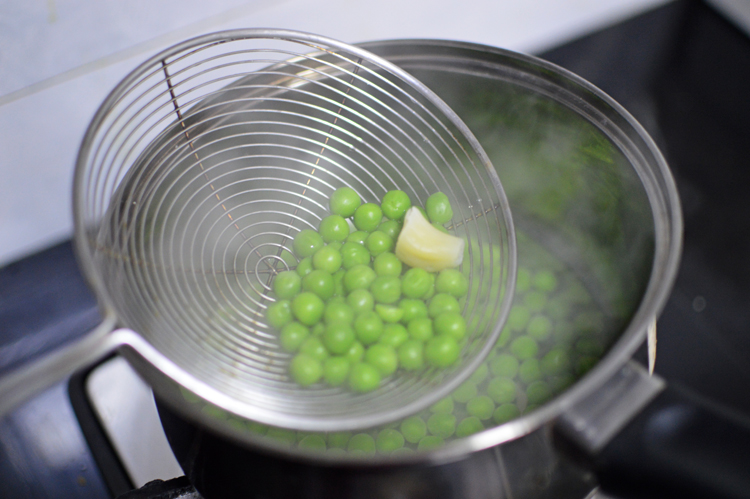
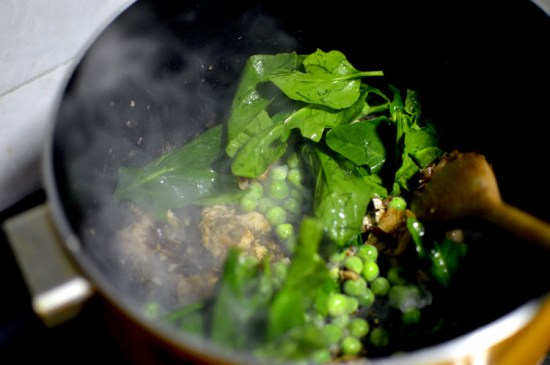
Plonk in all the vegetables (peas and spinach) and stir for just another minute until the spinach wilts. (I’m using frozen peas, so it takes just a minute for them to cook. If you’re using fresh peas, you might want to add them a bit earlier or pre cook them)


DSC_0251
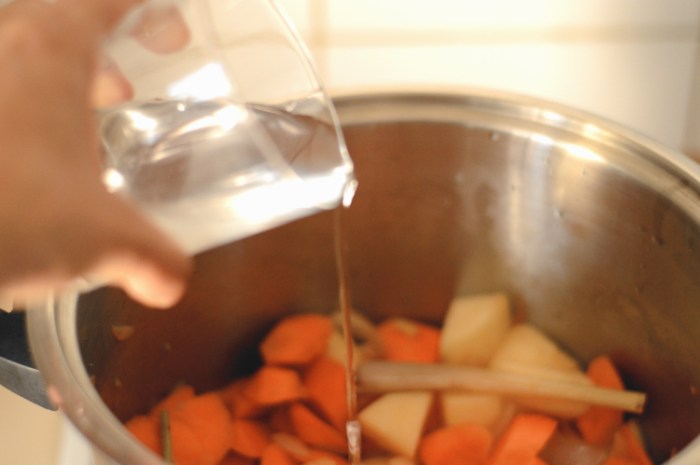
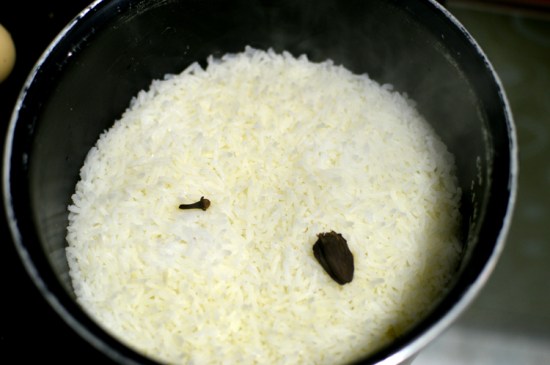
now for the rice. I used a rice cooker and steamed the rice with a clove and black cardamom pod (totally optional)


DSC_0252In they go


DSC_0253

mix it well and add in the lemon juice. taste for seasoning, you might want to add in a touch more salt.


DSC_0269
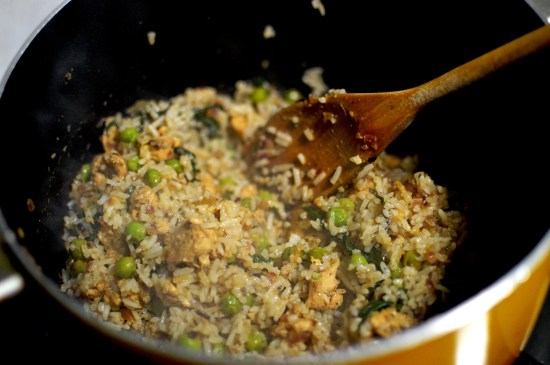
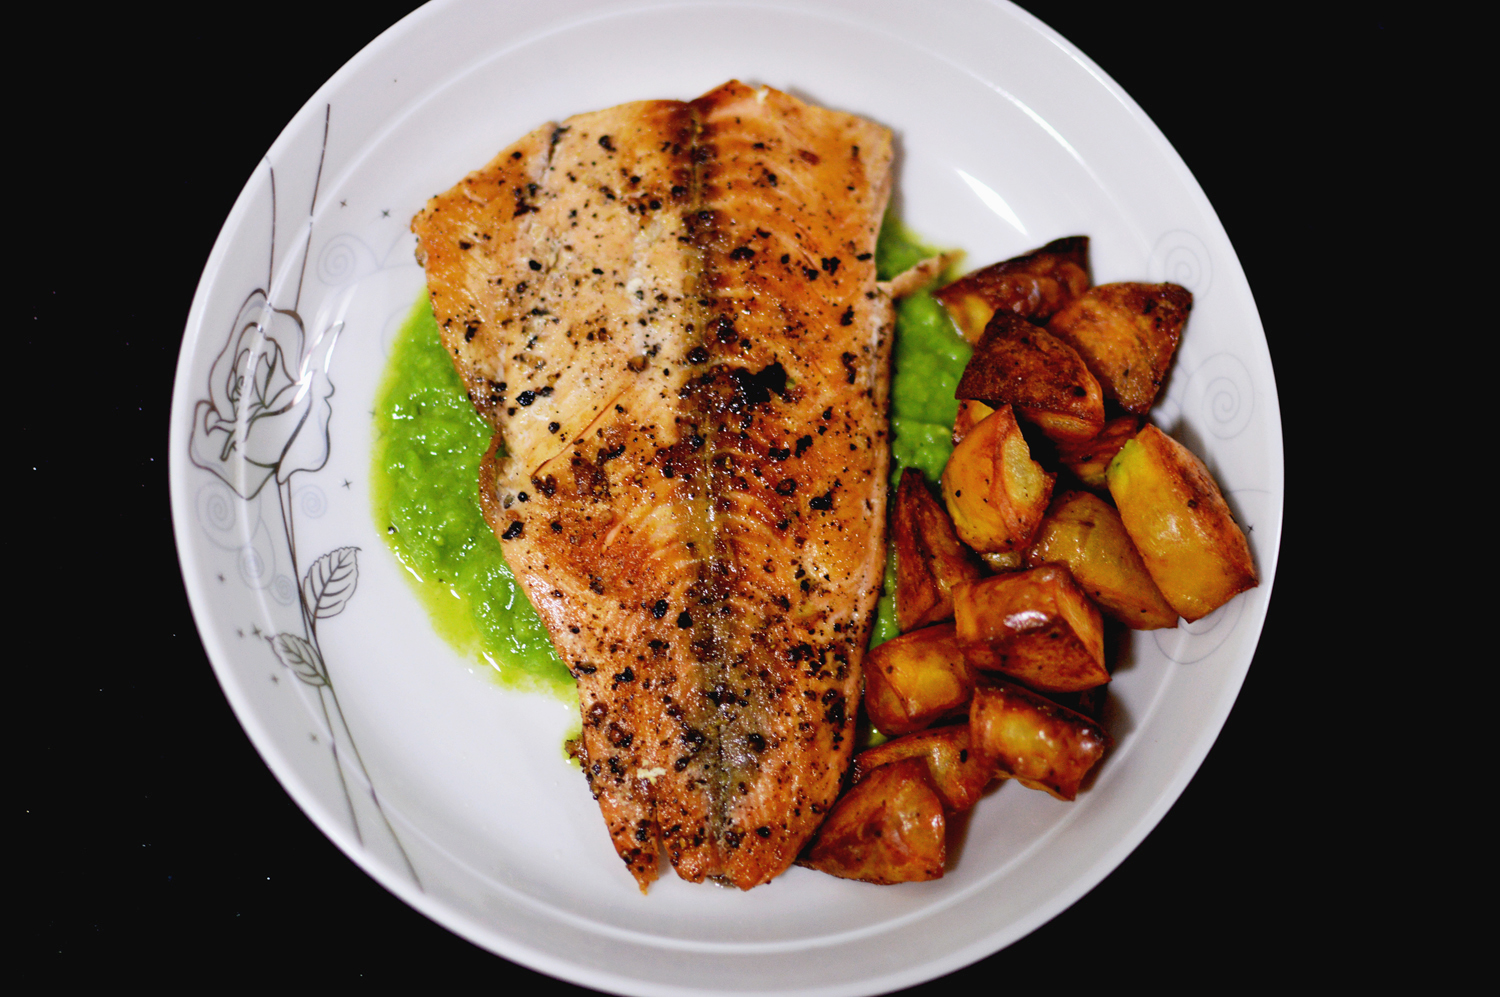
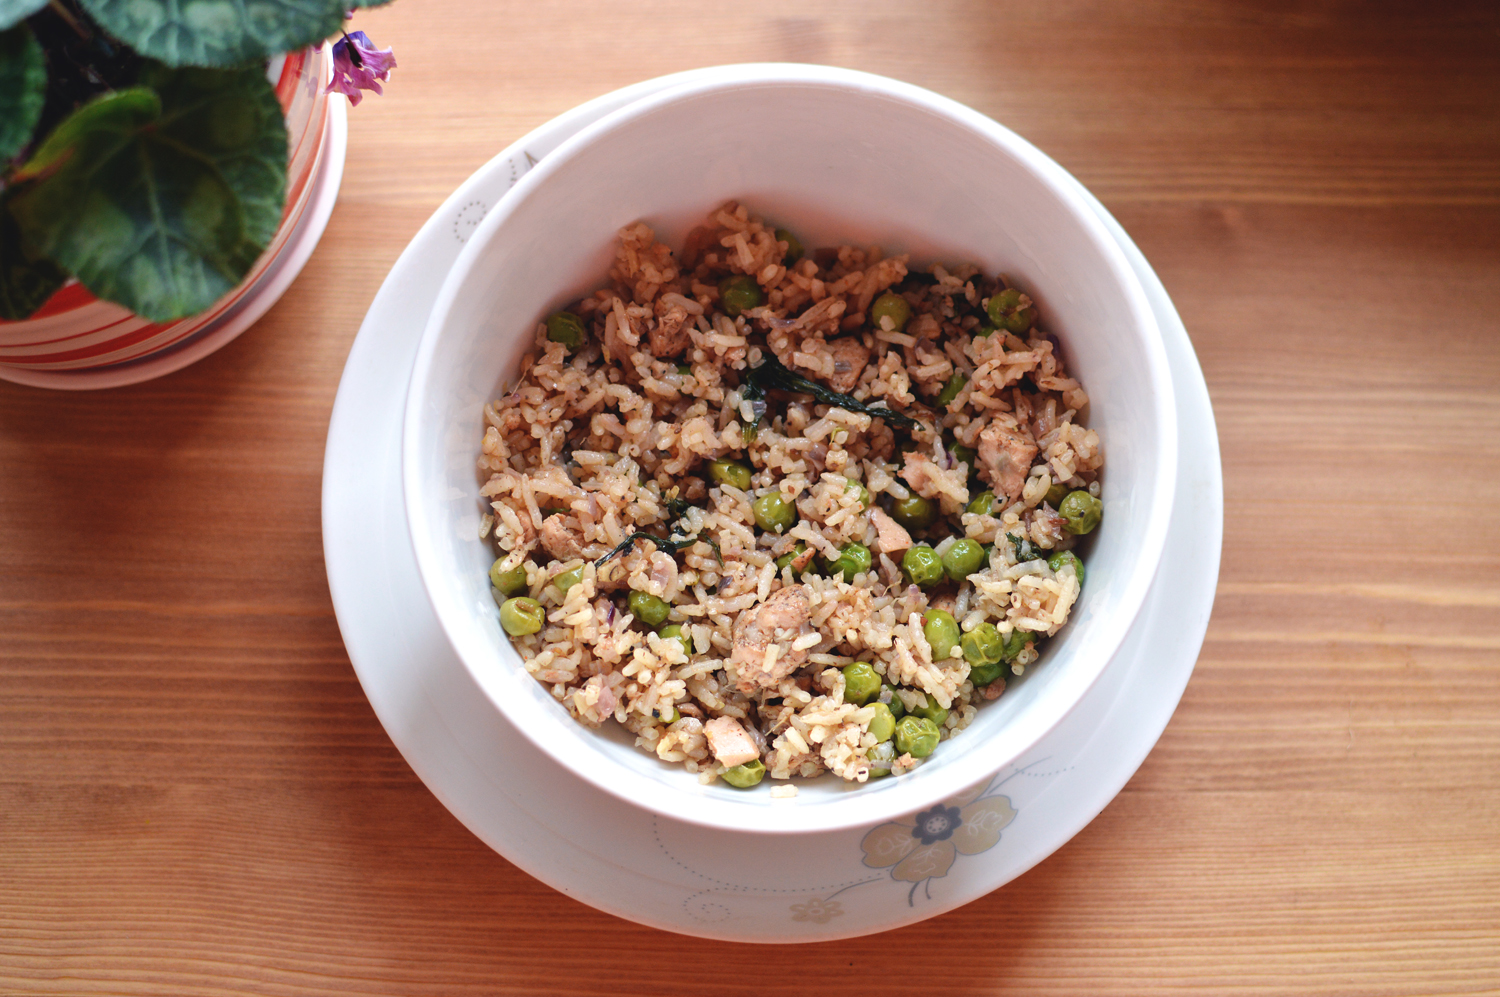
Embellish with eggs if you please. This recipe has real oomph and wow factor. It looks simple, and it is simple, but the flavours manage to hit all the right spots without jarring your senses.

_________________________________

Ingredients

Salmon fillet: 170g

Onion: 1 medium sized. finely chopped

Ginger: 1 inch stem finely chopped

Garlic-2-3 cloves finely chopped

Paprika: 1/2 tsp

Cumin seeds: 1 tsp

Black peppercorns: 1 tsp

lemon:1 (zest+juice)

salt: 1 tsp + more

Cooked rice: 150g-200g (about 1 cup)

Peas: 100g (1/2 cup)

Eggs (optional) : 1-2 (hardboiled or to your preferred doneness)

Spinach: big bunch (it wilts down to almost nothing when cooked. Use a lot if you really want to see it in your dish)

Salmon fillet or fish chunks: 150g

Oil to cook: 1 tbsp

—————————————

Recipe instructions: Dry roast the cumin seeds and black peppercorns for a minute or so and crush along with paprika and salt. Rub the salmon fillet on both sides with this dry mixture and cut into chunks.

In a large pot, heat some oil and add in the chopped onions and ginger. Cook for a few seconds until translucent and add in the lemon zest and stir fry for half a minute. Add in the fish and cook for a couple minutes until fish is almost done. Add in the garlic and stir together for a minute or so.

Add in the peas and spinach and cook for another minute, until the spinach is wilted and fish is completely cooked.

Add in the cooked rice and stir it all together, until all rice is well incorporated throughout the mixture and each grain is coated with flavour.

check for seasoning, add more salt if you prefer.

Finally squeeze in the lemon and briefly stir.

Serve hot, flecked with chunks of hard boiled eggs.

Enjoy!!


Salmon, baked potatoes & pea puree


DSC_0220

This might look like a chaotic blip of technicolour profusion, but I promise you it’s wholly edible, and not just edible, but lip smacking zen level scrumptious. Zen because it isn’t overloaded with fat or an orchestra of varied spices, and lip smacking because eating so many different colours will only infuse your insides with digestive rainbows, and since when did that become a bad thing?

If you’re still on the healthy eating bandwagon and haven’t budged yet from your new years resolution then as annoying as you might be, this is the perfect recipe for you. It’s fish, it’s potatoes and peas..just three simple instruments to serenade you into making a fantastical composition that looks good and tastes even better. You can make a solitary meal for one or fancy meal for many, either which way it’s just as easy and delicious.


DSC_0190 copyjust potatoes, peas (I use frozen), a clove of garlic, salmon fillet and olive oil.(salt and pepper not pictured)


DSC_0192let’s prep the potatoes first, since they will take the longest to bake. So peel ’em


DSC_0193halve them


DSC_0194half each half into half or quarter it as some might suggest


DSC_0195dice each quarter into equal pieces.


DSC_0197line on a baking sheet


DSC_0198drizzle oil


DSC_0201salt and peppa!


DSC_0202arrange and bake at 190°C for 30 minutes, or until they turn crisp and golden and gorgeous.


DSC_0203in the meanwhile as the potatoes bake, bring a pot of water to boil, and add a clove of garlic


DSC_0204followed by peas. I use frozen peas, but use whatever you have handy.


DSC_0205let ’em boil until the peas are fully cooked, not just tender but totally absolutely tender.


DSC_0206fish them out and puree them into a blender or food processor along with the now cooked garlic. Don’t make it into a soup, keep the nubbly texture..it should gloop off a spoon, not drip.


DSC_0207finally, salt and pepper on both sides of the fish. (I just have the salt one, but imagine there’s pepper in it too). Try and use a good salt if you can. I’m using Maldon salt.


DSC_0212cook on a very hot pan, about 3-4 minutes each side.


DSC_0213turn it over. Mine took about 3 minutes each side, but depending on the thickness of your fish you might have to decrease or increase the timings.


DSC_0214in the meantime let’s have a look at them potatoes.


DSC_0220plate it as you want. I like the pea puree to form the base for the fish to settle on and potatoes on the side. There isn’t much in terms of seasonings and flavourings, and that’s what makes this taste exactly how it should. The peas are sweet with the slightest hint of garlic, the salmon is light and flaky, just enough salt blending with peppery depth, and the potatoes work as a robust accompaniment to these delicate flavours. All in all, a great light meal for anytime of the day.

____________________________________________________

Ingredients

olive oil : 1-2 tbsp

garlic: 1 clove

potatoes: 2 medium

salmon fillet: 1 (150g)

peas: 150g (1 cup)

salt and pepper to taste

————————————

Cooking instructions:

peel and quarter your potatoes lengthwise. Cut each segment into equal parts. Line on a baking sheet, drizzle with olive oil, add salt and paper, mix well and bake at 190°C for 30 minutes or until crisp and nicely browned.

In a pot of boiling water add garlic and peas and cook until they’re tender. Blend into a nubbly puree.

salt and pepper the salmon on both sides and cook on a very hot lightly oiled pan for about 3-4 minutes until bothe sides are nicely browned and the fish is cooked through.

Arrange on a plate with peas and potatoes and Enjoy!.


Fat free granola


DSC_0127

This one’s for all you new year resolution junkies out there, those who think and believe that promising themselves to eat better for one whole year (gasp) will make them thinner. It will make you thinner if you eat better and healthier, but one whole year..who does that? and we all know these resolutions come with an expiry date, spanning anywhere between few hours to few weeks, so onto the bandwagon we go.. with health food for the new year.

Health food has such eew connotations, as it should and why not, but this fat free or almost fat free granola is really good. For starters it’s extremely easy, not to mention it’s also pretty tasty. So in case you’re a fridge/pantry pirate, looking for booty to snack on (that so didn’t come out right, but my new years resolution is to be wrong and not bother), then this granola is just the thing for you. easy on the waistline, high on the crunch and the best part is, you can fill it up with all your favourite nuts and dried fruits.

So here, we, Go!


DSC_0091 copy

easy peasy ingredients. almonds and walnuts (or nuts of your choice) raisins (or substitute with dry fruits..I tried to keep it fairly simple), vanilla extract, rolled oats (not instant oats), honey and sesame seeds.

  • please feel to use any seeds or nuts or fruits to your liking. You can use sunflower seeds, pumpkin seeds, chia seeds, melon seeds, dried apricots, dried blueberries etc. really up to you. This is the simpler easy to make version..also if you want absolutely no sugar in it, then use stevia instead of honey.

DSC_0095

DSC_0099into a very dry pan, roast the nuts and sesame seeds until the nuts and sesame seeds are just lightly browned and smell nuttier and sesamier (?)


DSC_0100then on a dry board, smash them with a weapon of choice, get rid of your daily stresses..no more tears..just smash these nuts to smithereens, you’ll feel better.


DSC_0101smash them until some is powder, some flakes and some chunks. We need texture.


DSC_0104

Into a large bowl of choice, add in the oats


DSC_0106and the sesame seeds


DSC_0107and the nuts


DSC_0109the raisins


DSC_0110honey


DSC_0111

and finally vanilla.


DSC_0112mix them all together. This will take a couple of minutes until each oat is coated with honeyed goodness.


DSC_0113

it will kind of clump together, maybe stick a bit but all for the greater good.


DSC_0114on a baking sheet lined with parchment paper or foil, spread them as evenly as you can.


DSC_0117something like this, and bake at 180°C for ten minutes


DSC_0119pull it out of the oven, and they’ll be very lightly scorched, but we’re not done.


DSC_0120turn them over as best as you can, and spread again evenly and bake at 180°C, again for ten minutes


DSC_0123you’ll know they’re done because the raisins will looks burnished and plumped up and the oats will assume a rosier hue, and of course your kitchen would be smelling divine. Leave these on the counter for at least ten minutes or until they’re completely cool, because when they’re hot they’ll be soft to the touch and you’d wonder what went wrong.


DSC_0126after they’ve rested, you can just scoop them out


DSC_0125and break into little chunks


DSC_0128and fill in your jars.

These make delicious health snacks, and once you’ve made them, you’d look for excuses to get healthier.

______________________________________________________________________________________

Ingredients

rolled oats: 1 cup

raisins: 1/4 cup

nuts: 1/2 cup

honey: 1/3 cup

sesame seeds: 1/4 cup

vanilla extract: 1/2 tsp

——————

Recipe instructions:

Put all the ingredients in a large bowl and mix together until throughly combined. Spread on a baking sheet lined with parchment paper or foil and bake at 180°C for ten minutes. Pull the tray out of the oven, and using a large spoon turn them over, and spread in an even layer again. Bake at 180°C for ten more minutes and leave them out to cool.

Once cooled, store in airtight containers.

DSC_0131keep a jar where you work, and snack on ’em all day. Enjoy!


Baked potato fries


DSC_0929

Potatoes!! Is there anything as comforting, as loving, as selfless, as versatile, as sexy, as sensuous as potatoes?? No, the answer is no!! Potatoes love you back they understand your feelings, they believe in giving and they care.

Sadly with modern times now, these beautiful spuds of love have been maligned as fattening food.. gasp! people are told to steer clear of them if they want to lose weight.. I say, what rot?? It’s not true. Potatoes aren’t bad for you, you’re bad for potatoes. Who thought of loading them with MSG and packing them into airy bags? you did! who thought of over salting them to the point of oblivion?? you did!! So please do not blame these humble vegetables for making you fat. Blame yourselves. Fried food WILL fatten you, it does not take a rocket scientist to know that, but when you bake these beauteous vegetables with the right amount of love, they love you back.

Case in point are these baked fries. They require no effort but give you all the love you need these winter months. Not only do they satisfy your spud cravings but they also don’t make you feel bad about it.

So for those moments of anguish when only a potato will do, bake these fries and get caught in the rapturous greed of smug satisfaction.

DSC_08521Just potatoes, garlic, olive oil (any oil really), mixed italian seasoning, paprika and sea salt.

DSC_0854before you start, line your baking sheet with foil.

DSC_0855wash and peel your potatoes. Remove any eyes and anything weird you don’t like seeing on your fries. You can keep the skin on the potatoes if you wish, just wash and scrub them really well.

DSC_0858Since my potatoes were not exactly equal in size, I cut mine to make three roughly equal sized potatoes. You don’t have to do this if your vegetables are symmetrically proportional.

DSC_0861I cut each potato segment into three, because I don’t exactly like very skinny fries, but if you do, please go ahead and make them as thin as you like.

DSC_0862So many potatoes.

DSC_0866I cut each segment in three’s.

DSC_0869I had almost equal sized fries, those which were a bit thick I cut them to size. Nobody messes with the size okay!

DSC_0870Into a pot of cold water to rinse away the starch. Let these be for a while now.

DSC_0871Now about their massage oil. Peel your cloves of garlic and mince them fairly well or chop, whatever you prefer.

DSC_0872add the seasoning mix. I’m using dry simply because It’s too cold and I have no fresh herbs left, but if you wish you could as easily use them fresh. Dried is just easier. These mixed Italian seasonings are pretty nifty.

DSC_0875in with the paprika. As little or as much as you like.

DSC_0876a glug of oil. This is about a tablespoon, but you could use more, you could use less.

DSC_0879stir with a spoon of choice until all is well combined.

DSC_0880Drain the potatoes and pat them dry with a kitchen towel or cloth of your choice.

DSC_0882give them a good pat. You want them completely dry.

DSC_0883tumble onto your lined baking sheet

DSC_0885make sure there isn’t a single wet spot. (snigger)

DSC_0887pour over the massage oil and this gets a little messy because you need to use your hands to evenly coat them

DSC_0888like so. Make sure the oil is distributed evenly and that every piece is well bathed.

DSC_0889sprinkle on the salt and into the oven at 200℃ for 35-40 minutes.

DSC_0906this is what they looked after 30 minutes of baking and the kitchen was smelling so divine. Garlic infused herbal incense. I was mesmerized and hungry.

DSC_0914

like this at 38 minutes of baking, and I turned on the broiler for about 2 minutes because I was getting impatient and I love it when they turn golden and crisp on the top.

DSC_0924like so!!

How were they? what can I say? see for yourself. They were beautiful, they were crispy on the outside and fluffy on the inside. I gave them a final sprinkling of salt before I served them.

DSC_0929A flask of masala tea and potato fries.. what more can I ask this winter?

Ingredients

Potatoes (as many as you want)

Garlic- 2 to 3 cloves

Italian seasoning – 1 teaspoon

Paprika – 1 teaspoon

Salt to taste ( I used 1 1/2 teaspoon of sea salt)

Olive oil/any vegetable oil – 1 to 2 tablespoon

RECIPE: Line a baking tray with aluminium foil. Wash and peel your potatoes and cut each into 3 segments and each segment into two or three fries, depending on how thick or thin you want them. Soak them into a bowl of cold water to remove excess starch.

Into a separate bowl, mince your garlic, add in the Italian seasoning, paprika and oil and mix well.

Drain the potatoes and dry thoroughly.

Tip them on your aluminium lined baking tray and pour over the prepared oil mixture and coat every fry with the mixture, making sure they’re all evenly coated.

bake at 200℃ for 35-40 minutes until deeply golden. Depending on your oven the baking time will vary. In some ovens it might take longer in some lesser, so keep an eye.

Enjoy!!


Minestrone di zucca aka Pumpkin Soup


DSC02336


Well, I think it sounds better in Italian than a plain old pumpkin soup…If you’re freezing your butt in your part of the world as well, then I think this is the best recipe to salvation.  Apparently !!!! this freezing weather has sort of motivated us to hit the gym more frequently than ever, simply because piles of warm clothing can’t act as a ruse forever..winters act as a catalyst to pile on the pounds as well.. which is why I came under a lot of pressure to cook something tasty and healthy.. we all know if it’s healthy it ain’t gonna be very tasty.. come on admit it.. So anyways.. I was going through all my recipe’s, my cook books and the internet looking for all the healthy/tasty recipe’s, which is when I stumbled on this recipe for ‘pumpkin soup’ by Ritu Dalmia. It’s in her cook book ‘Italian Khana’ and well, I gave it a try…… to a roaring success.. My husband couldn’t get enough of it, and since that day I’ve made this more than a dozen times.. You have to make this to believe it..

DSC02330


bwahaha..okay let’s be serious..

Ingredients

adapted from Minestrone di zucca | Pumpkin soup |Verona | – Ritu Dalmia’s Italian Khana

500 gms pumpkin peeled and cubed

1 large onion chopped

1 clove garlic minced

1 lt chicken stock/vegetable stock or just plain ol’ water

1 tbsp olive oil (the original recipe calls for 75 gms butter, but I adapted this to make a healthier version)

300 mls low-fat milk (use whole milk if you like)

1 pinch grated nutmeg

grated parmesan (optional)

salt & pepper to season

1/2 tsp paprika & 1/4 tsp chilly flakes (my addition. leave them out if you want)

Season the pumpkin cubes with salt, drizzle a bit of olive oil, place in a baking tray and roast in preheated oven at 200℃ for 20-25 minutes.

In a large saucepan, heat the oil and cook the onions till pink and add the garlic. and cook for another minute. Add the roasted pumpkin and stock or water and cook for another 10 minutes. Remove from heat and let the mixture cool a little.

In a blender puree the soup till it’s all reached a smooth consistency.

Pout back into the pan with the milk and heat again, seasoning with salt pepper, nutmeg and chillies if you’re using..

Ennjjjooyyy !!!!!

DSC02340

Okay, here’s another picture..