Tomato chutney (vegan, g.f)


This multi faceted chutney almost deserves to be a side dish because that’s how utterly good and useful it is. If you’re not using it to enhance everyday foods to oomph their taste then perhaps try using it as a spread on toasts, as a topping on boiled rice, as a dip for your chips or fries or even frittatas. This chutney works wth everything and keeps well for a week in the fridge and I love to have an abundance of it because how delicious is every savoury snack eaten with this chutney? It is a revelation indeed.

The ingredients are tomatoes, tamarind pulp, green chillies, cashews, garlic, ginger, asafetida, dried red chillies, curry leaves, mustard seeds and cumin seeds.

The chutney needs to be cooked and the ingredients are simple and not as excessive as they might appear here.

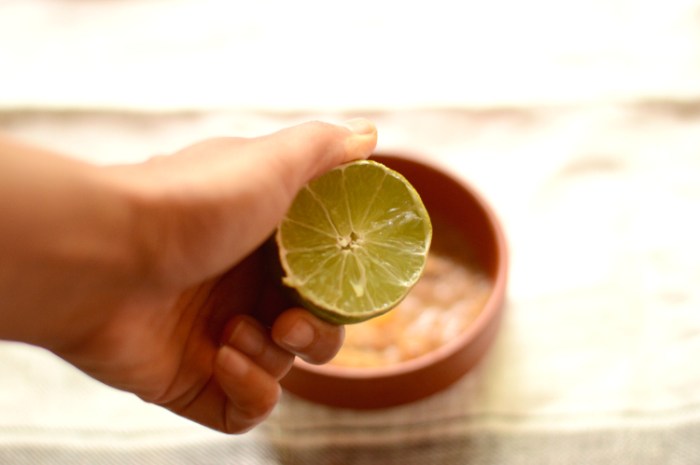
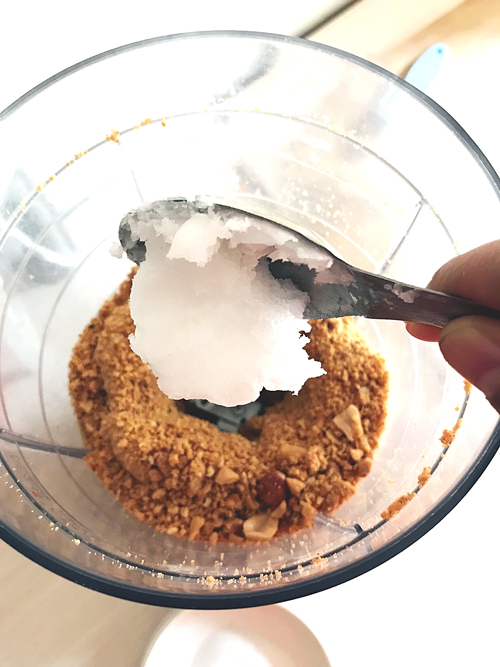
If you’re using ready to use tamarind pulp out of a packet then use it just as.

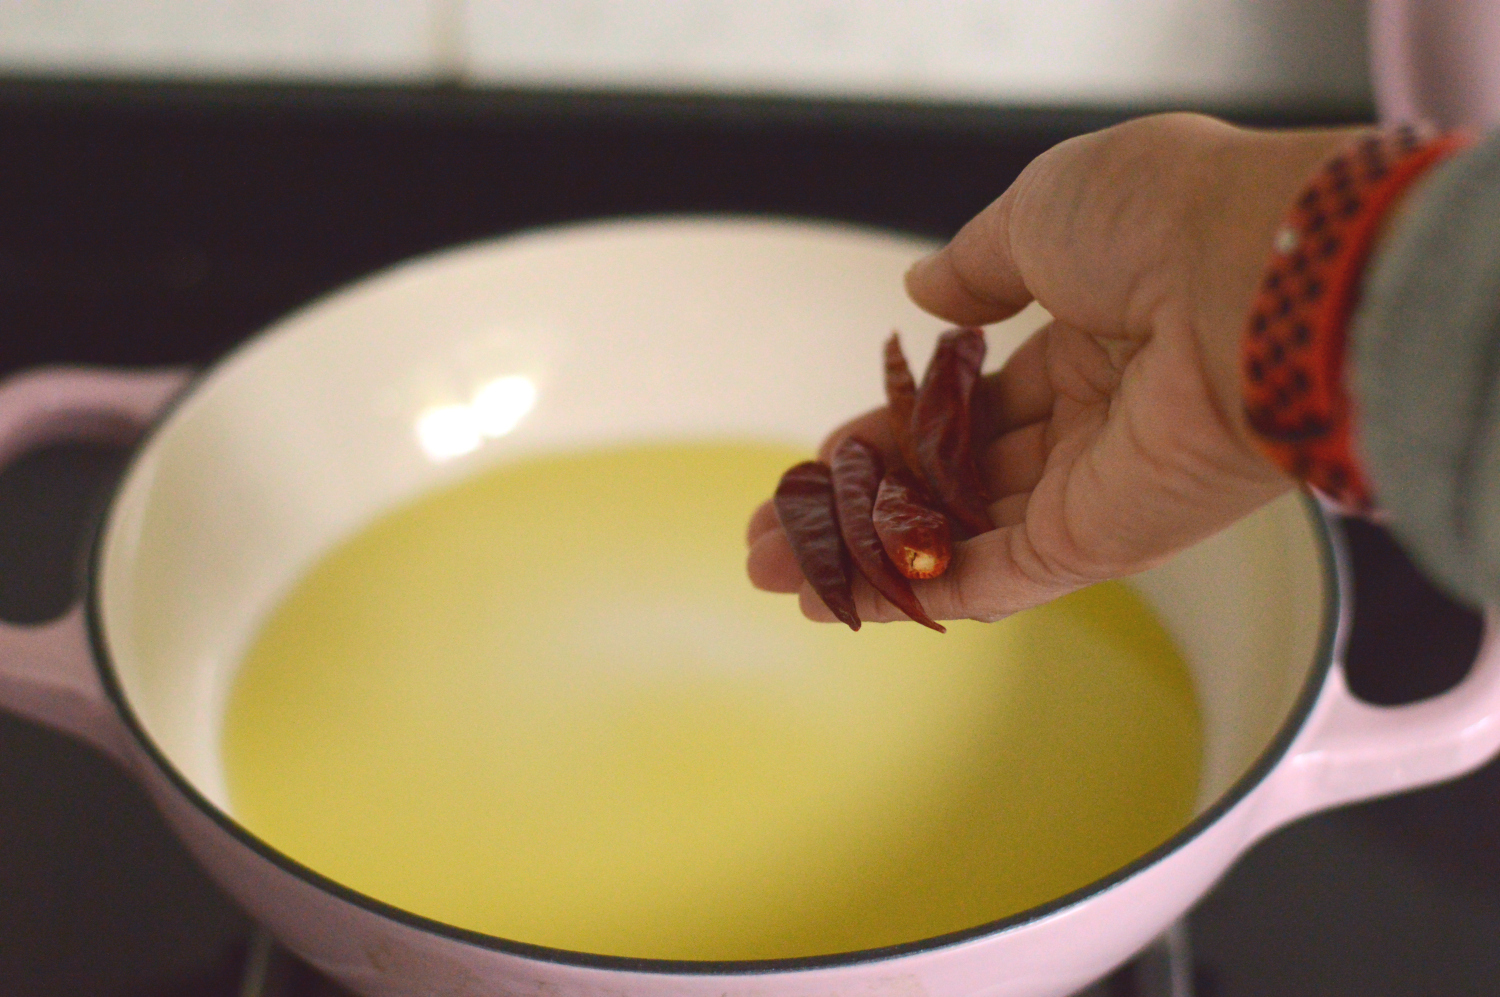
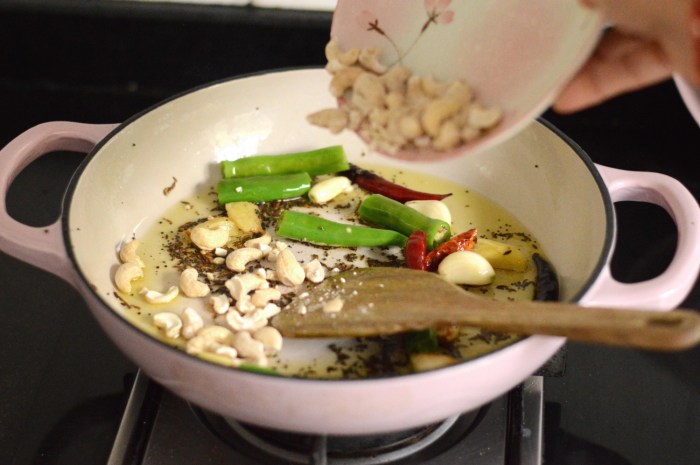
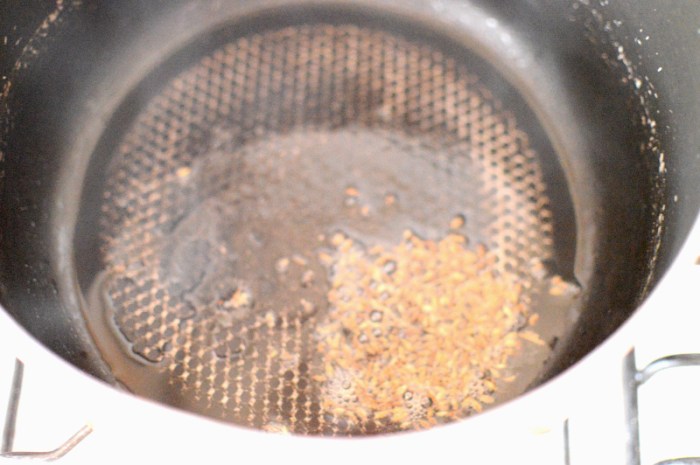
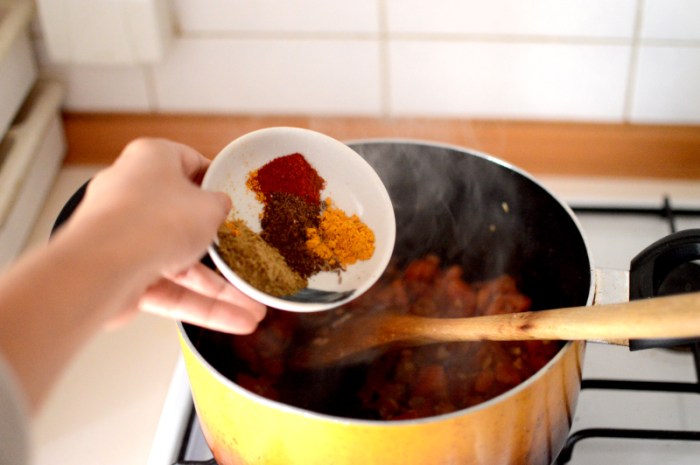
Heat 2 tbsps oil and add in the dried red chillies with cumin and mustard seeds. Stir around and let them come to a splutter.

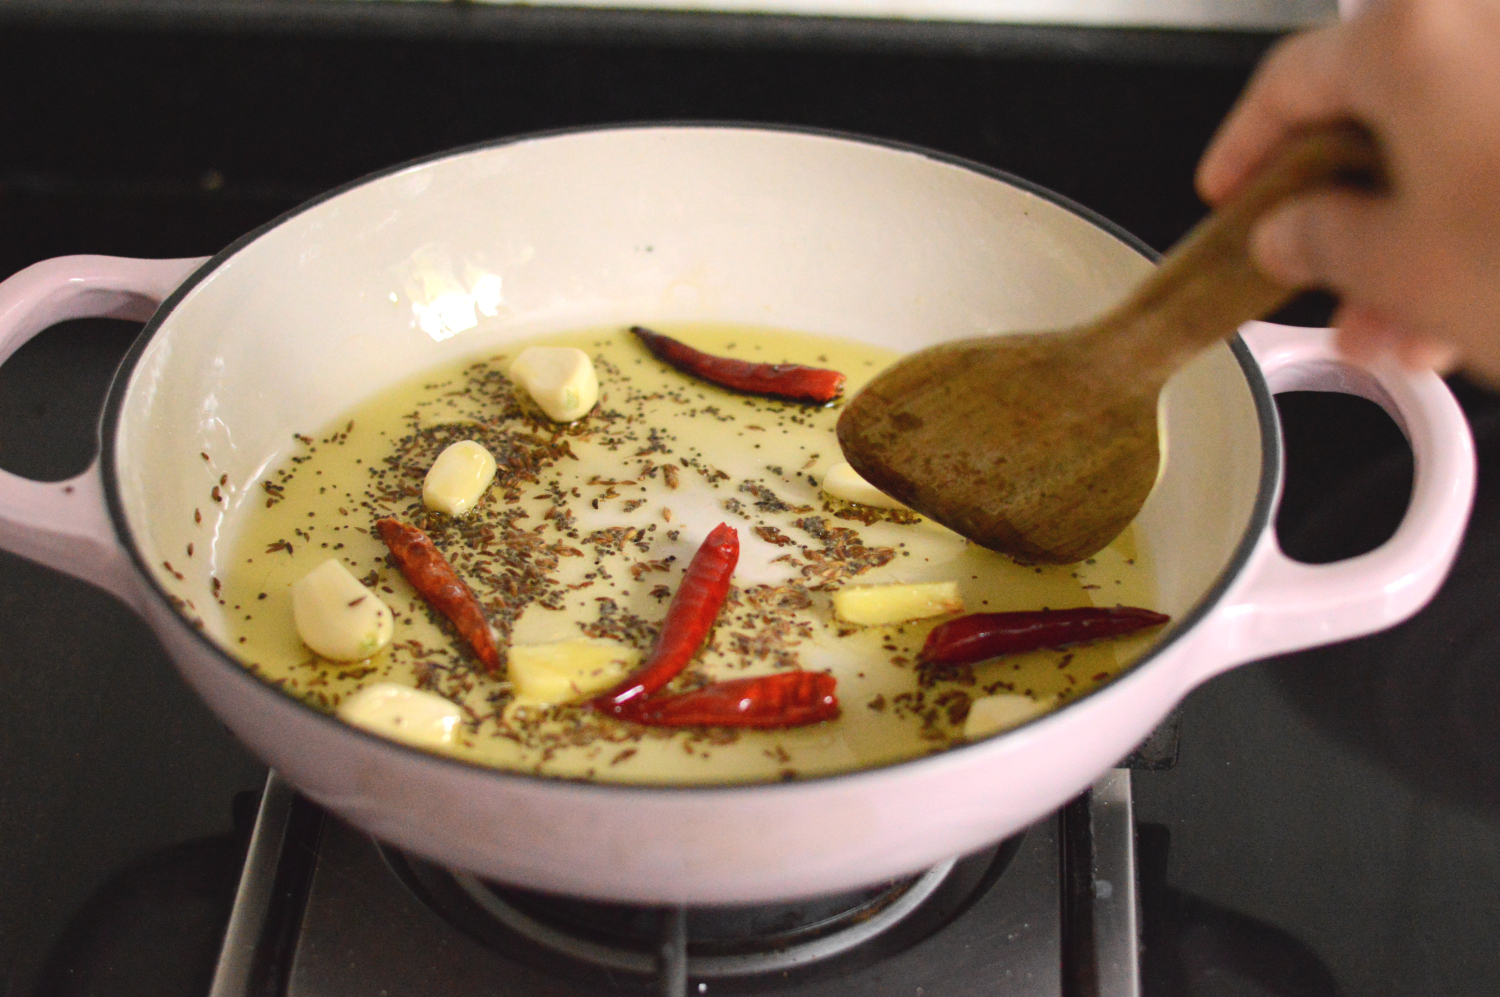
Once the seeds gets cracking add in the ginger and garlic, green chillies, cashews and the tamarind pulp.

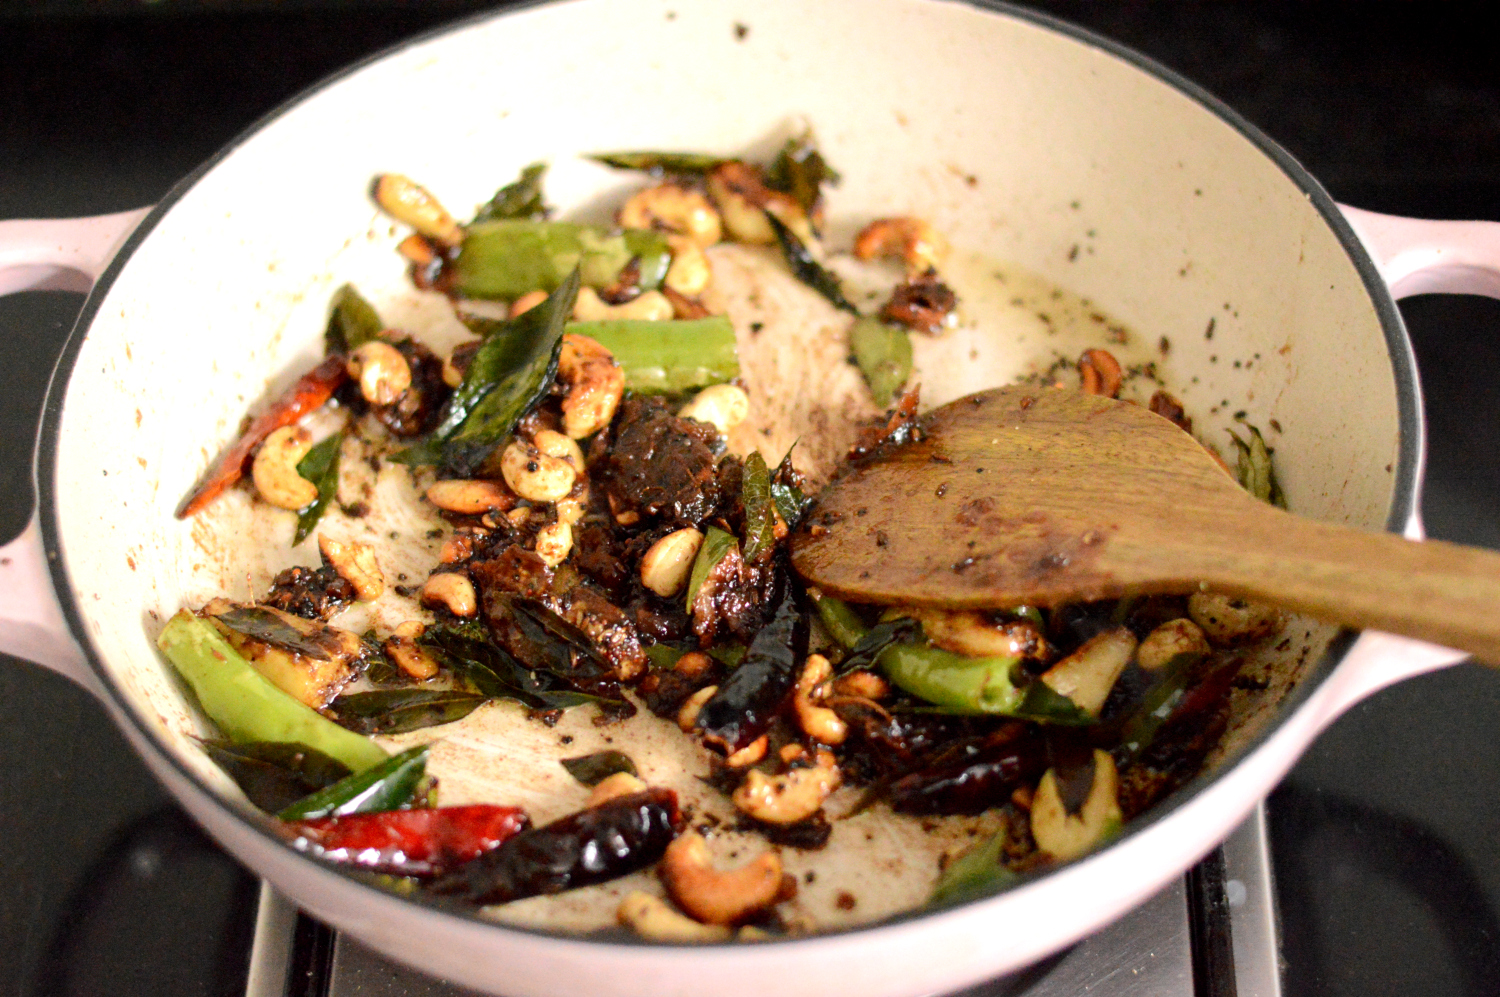
Stir around until well mixed. Add in the curry leaves and let eveything get a slight bit of colour.

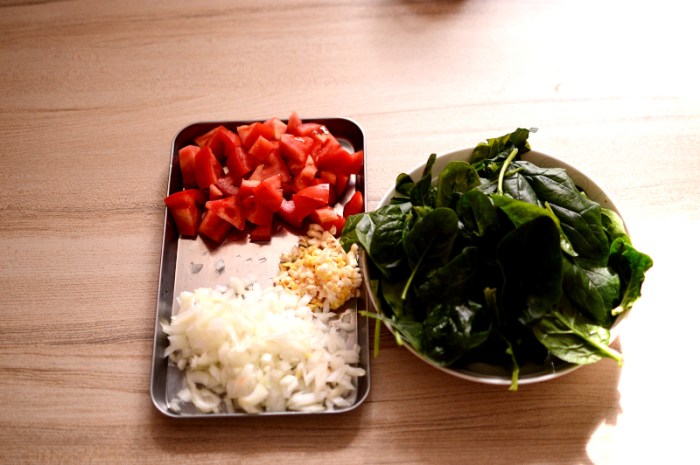
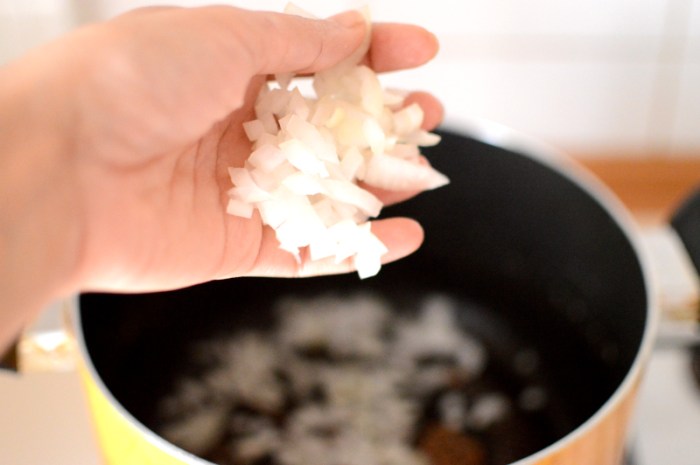
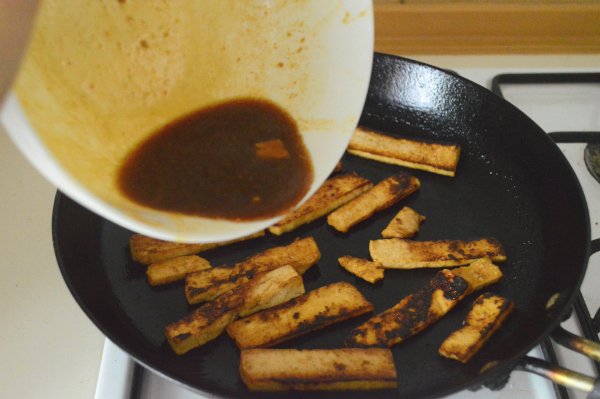
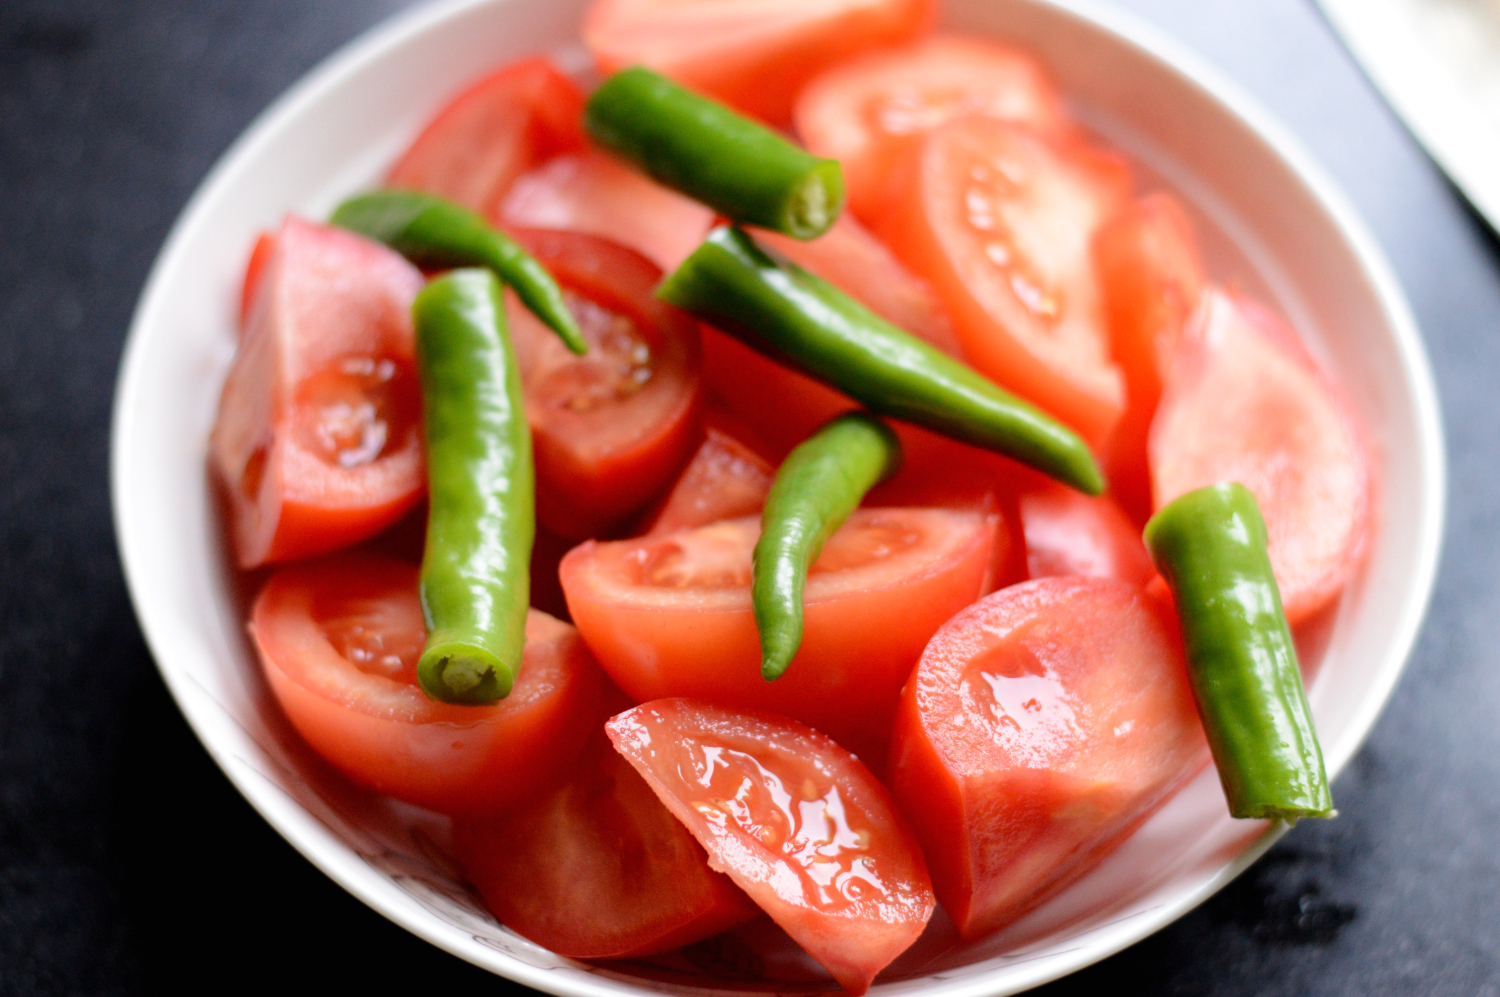
Tumble in the tomatoes

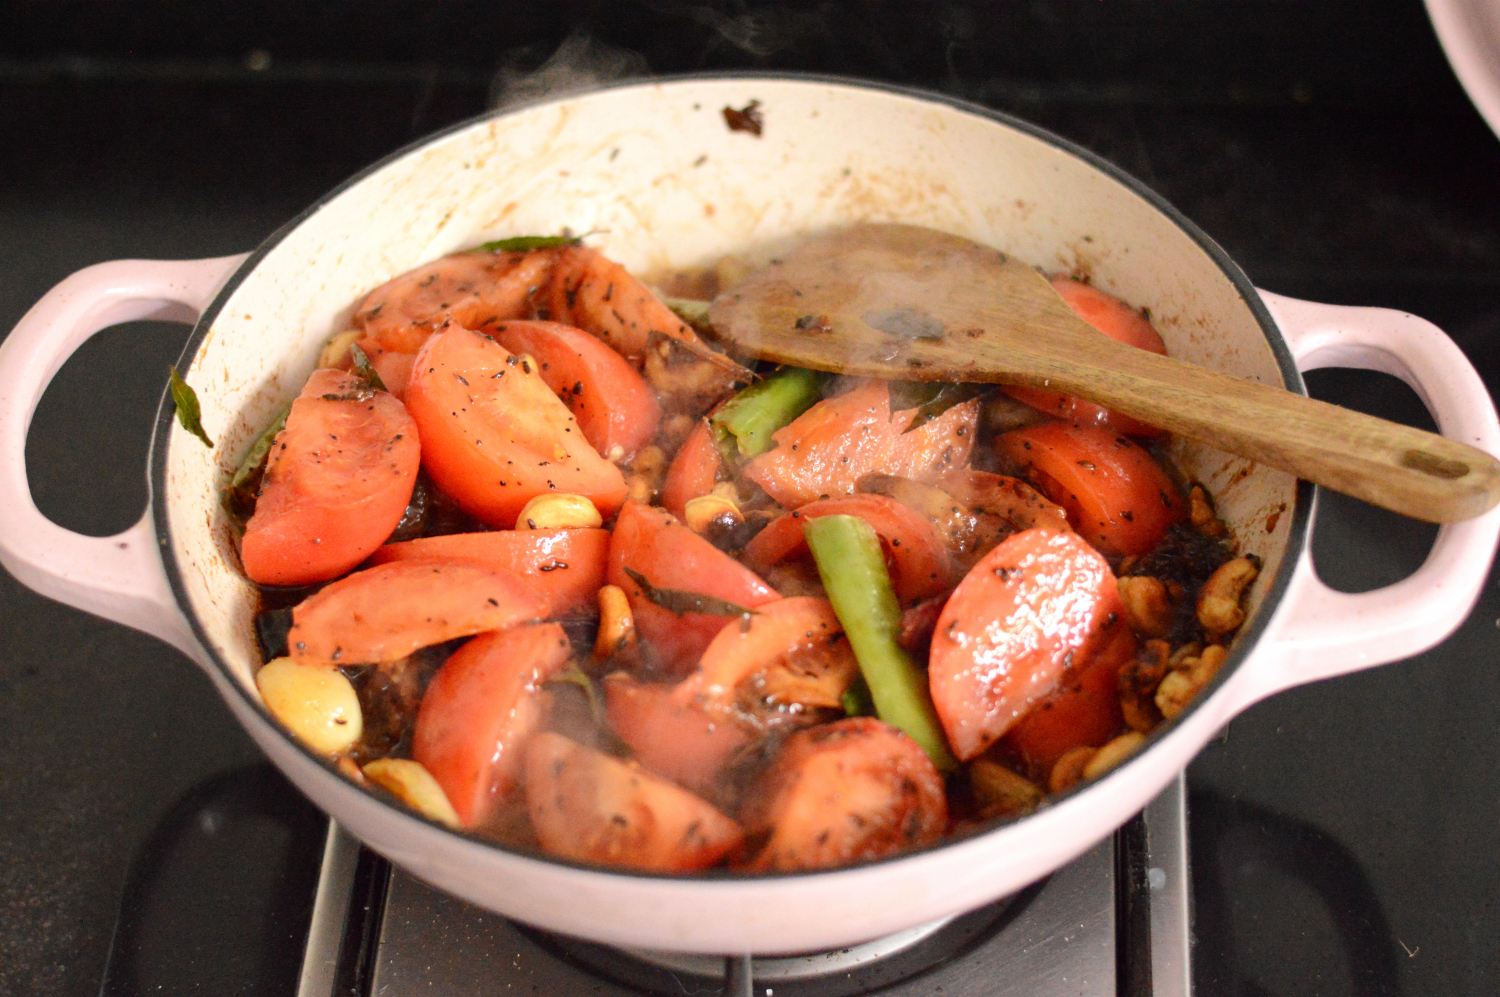
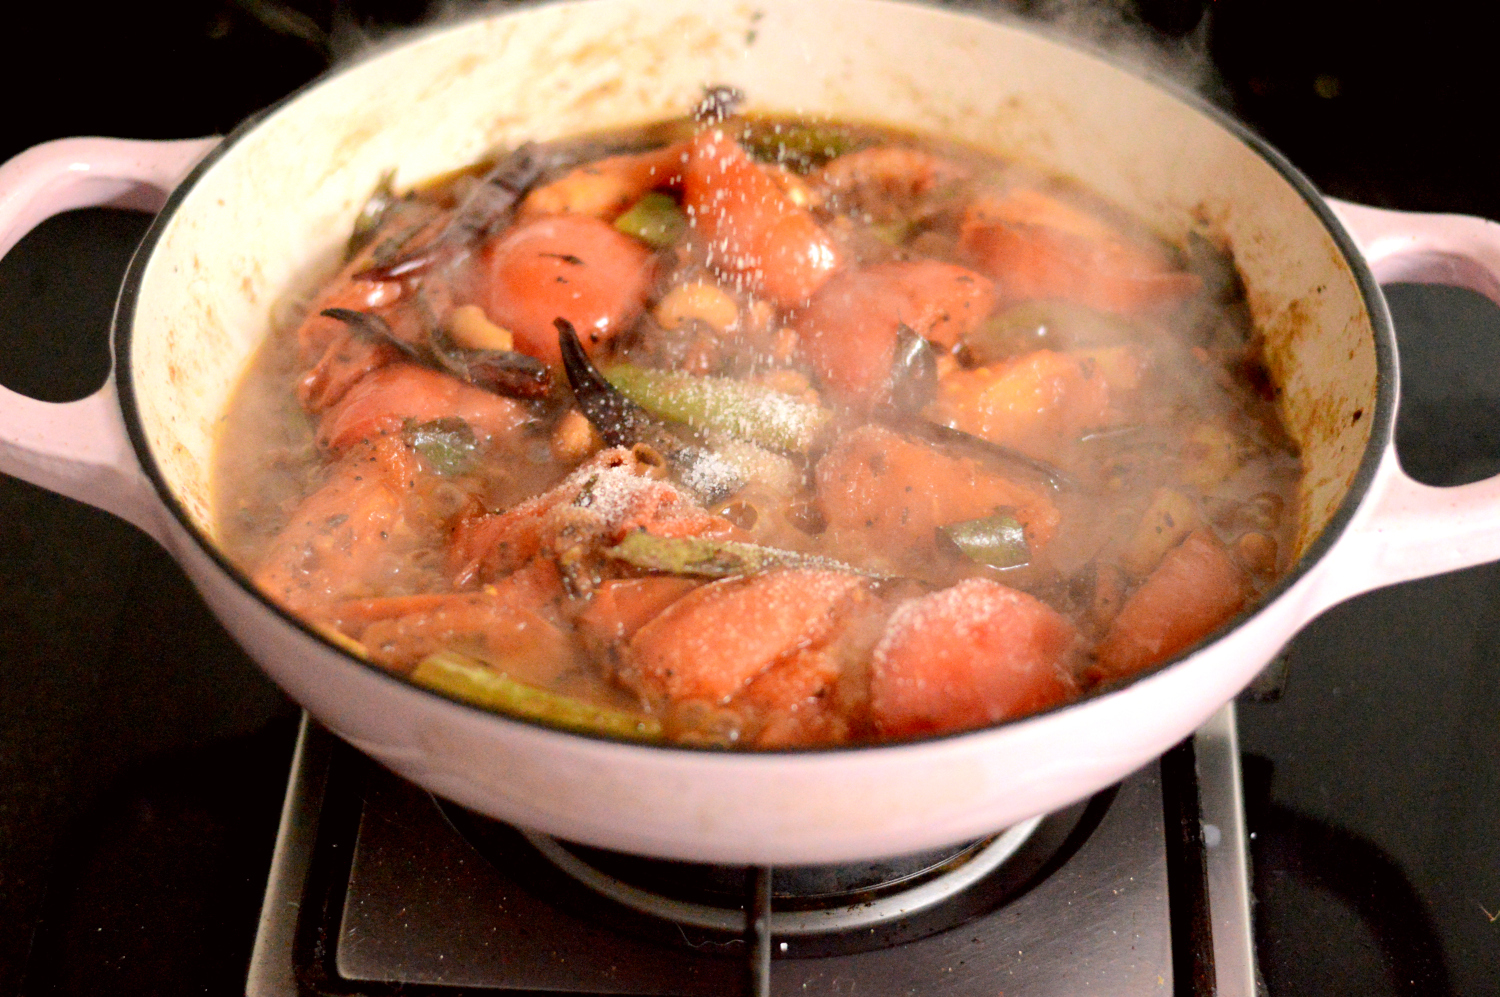
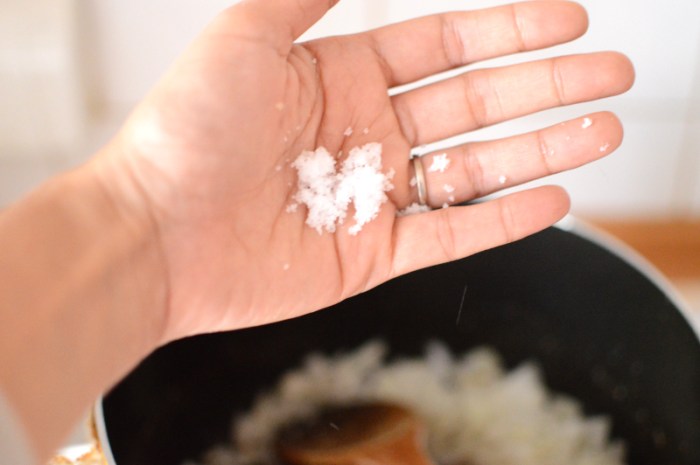
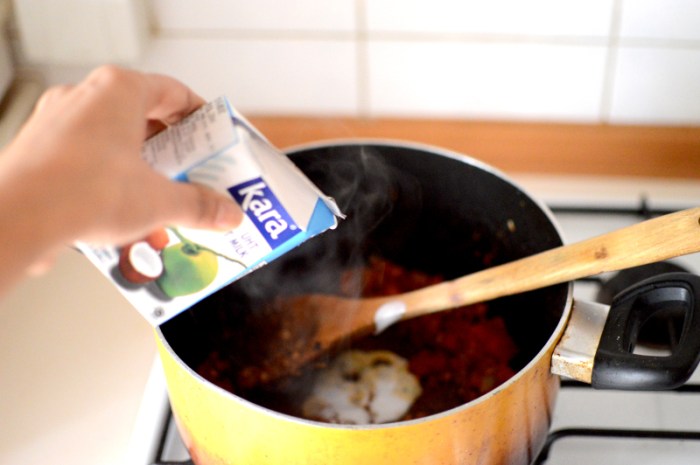
Stir, add salt and let them cook until they’ve reduced. If the mixture feels dry, add in some water, I added half a cup of water to help the tomates turn into a mush, because a mush is what we need.

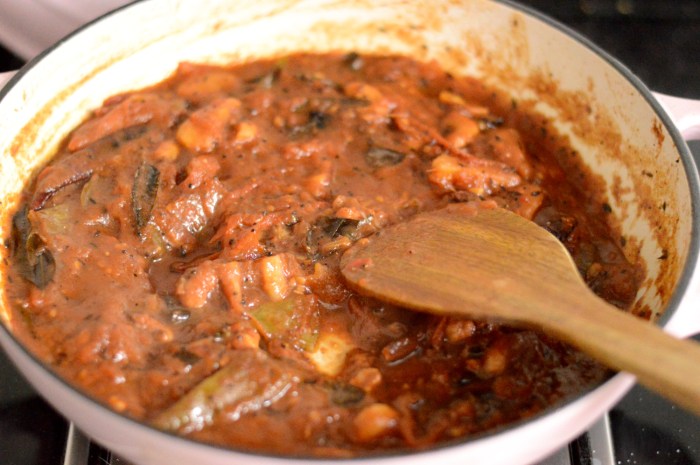
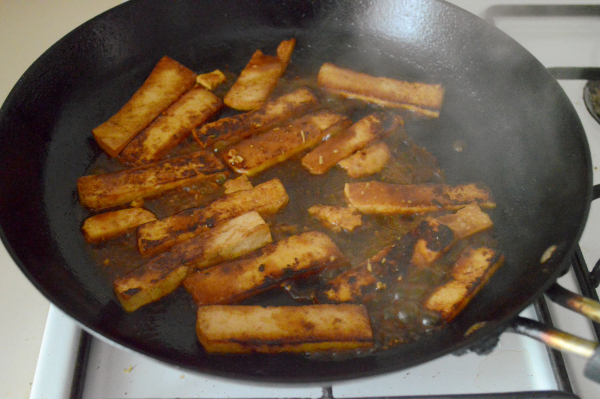
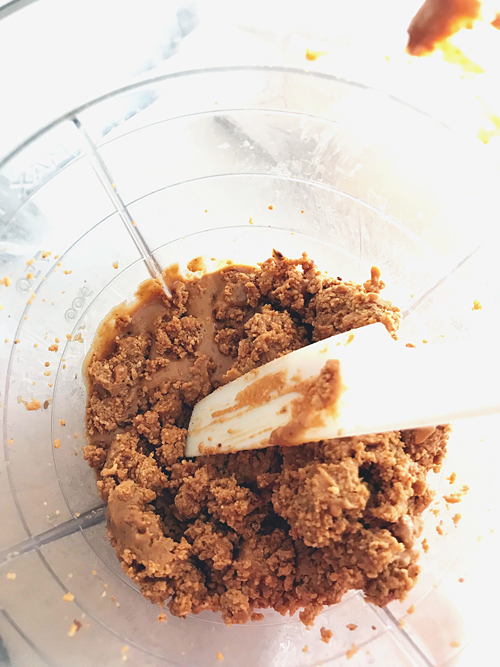
Let the tomatoes cook down and disintegrate completely before finally turning this tomato stew into a chutney. You can let this cook for longer to get a more enhanced taste. I let mine cook for about 10 more minutes.

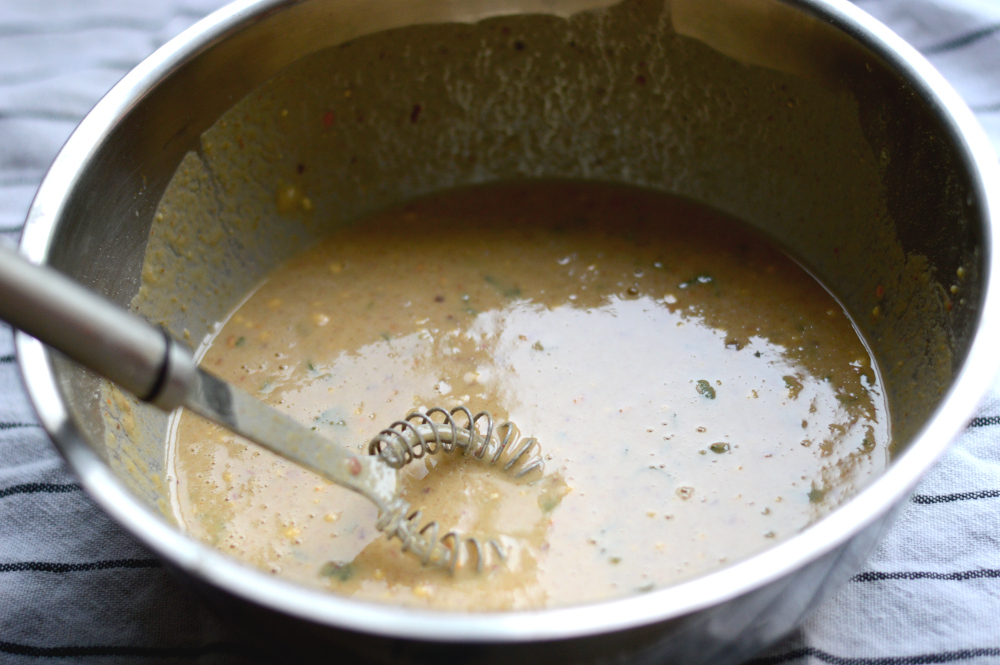
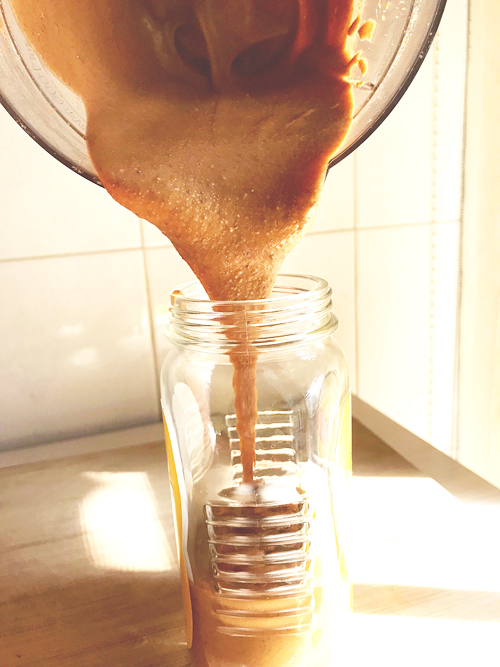
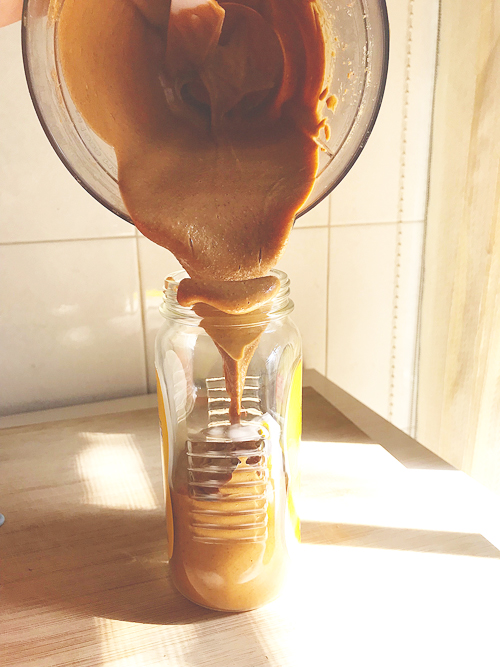
Let the cooked tomatoes rest until not very hot, and blend.

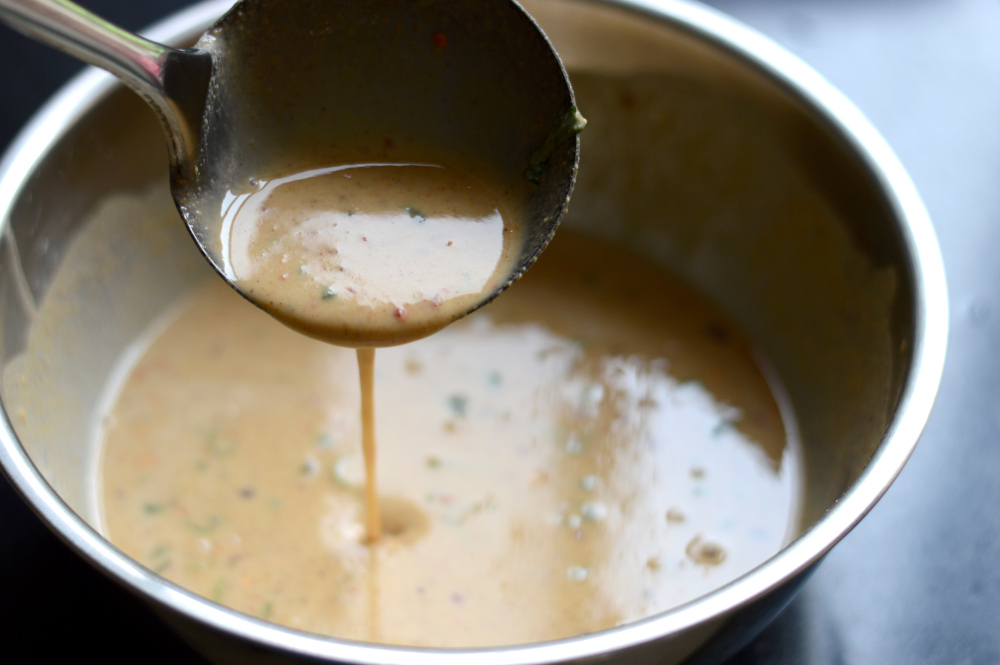
And finaly here we are!
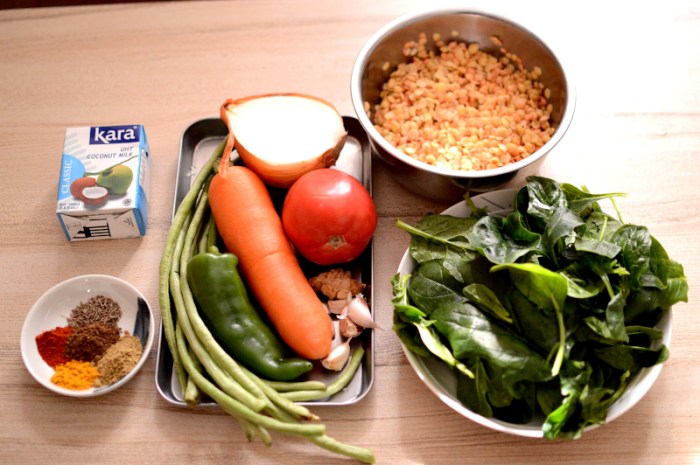
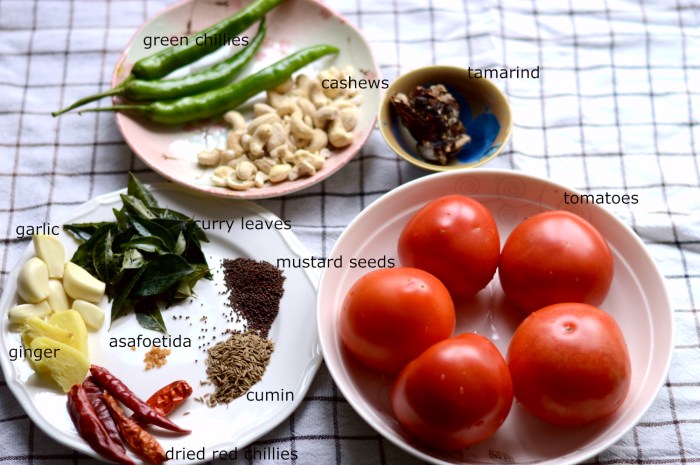

Recipe ingredients

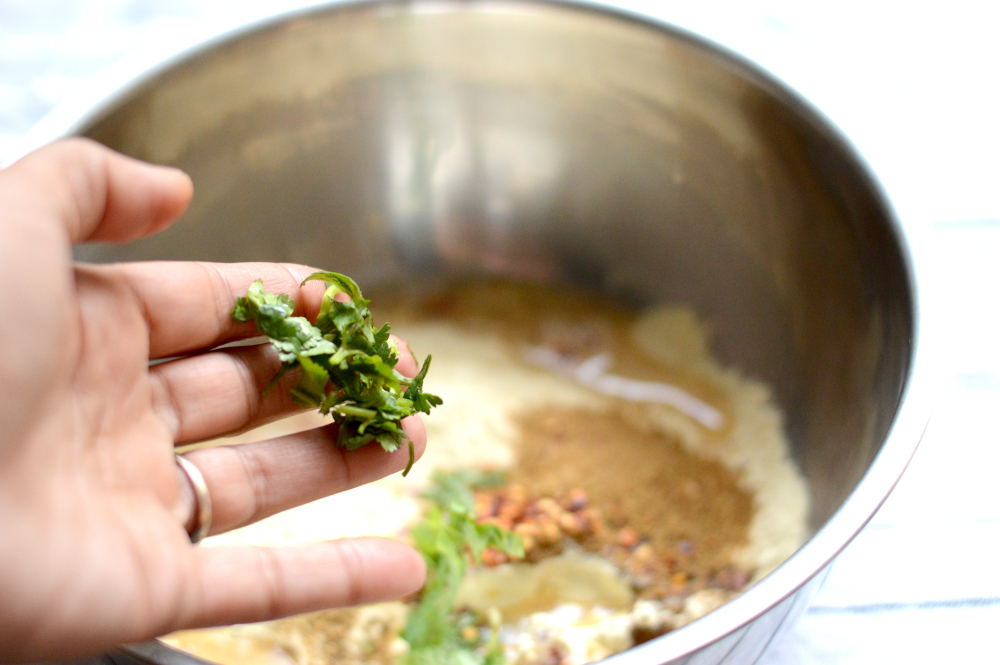
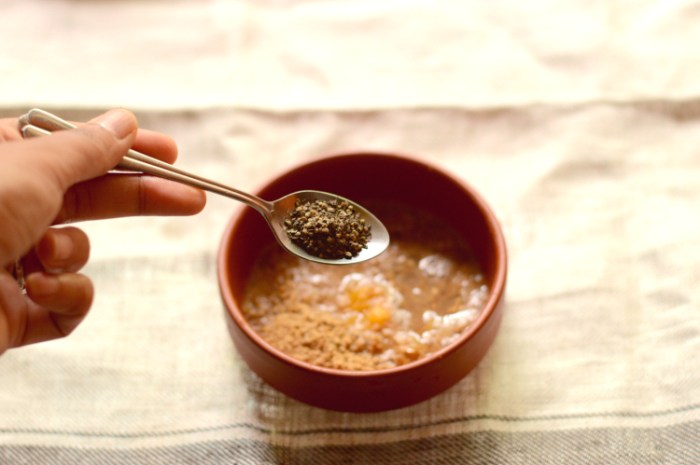
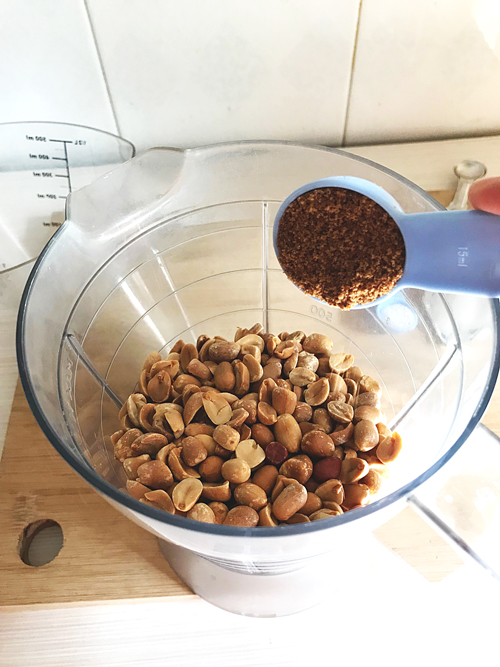
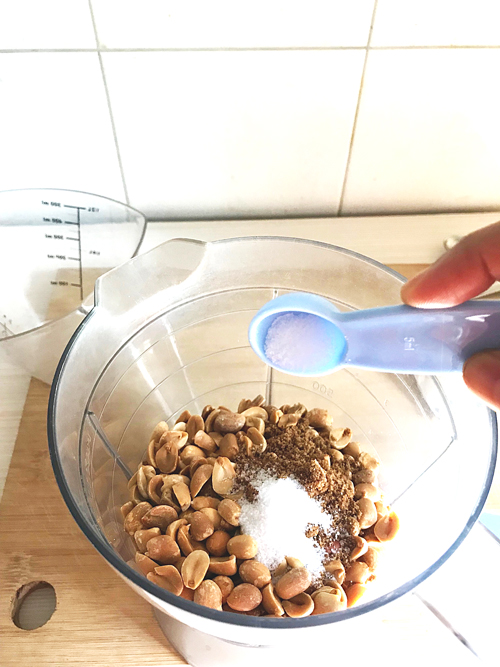
Tomatoes: 4 to 5 medium sized
Nuts: (cashews or almonds) 30-40g
Cumin seeds: 2 tsp
Asafetida: 1/4 tsp
Mustard seeds: 2tsp
Curry leaves: a handful
Garlic: 6-8 cloves
Ginger: 2 inch piece
Green chillies: 2 to 3
Dried red chillies: 2-4
Oil: 2 tbsp
Salt: to taste (I used about 3 tsp)
Tamarind pulp: 50g
Water: 100mls (if needed)

Recipe Instructions

Heat oil in a pan and add in the dried red chillies, mustard and cumin seeds until spluttering. Immediatey add ginger and garlic along with green chillies and stir around. Add the nuts along with the tamarind pulp and curry leaves and let it all cook together for a few minutes until fragarant. Tumble in the chopped tomatoes, add salt and cook until all the tomatoes have turned to a mush. Add some water if the mixture feels dry.

Once the tomatoes have cooked down, cover the pot and let cook for another ten minutes before turning off the flame and letting the mixture rest for a few minutes before blending into a chutney.

Once completely cool, store in an airtight jar. It will keep well for a week, if it lasts that long.


Vegetable pancake (plant-based, g.f)


These plant-based, gluten-free gems of nutrition that I call vegetable pancakes are popularly called ‘cheela or chilla’ in my country and serve as a popular breakfast item. Delicious and filling as they are, I have tried to make these go a little further with the addition of soaked mung beans that not only add to the fibre but also up the protein and they needn’t only be eaten as breakfast. I often bulk these babies up as I have done here with plenty of veg to make it a lot more filling and wholesome as proper lunch. These are quick, easy and most certainly something different to break from the same old.

The ingredients are chopped vegetables of choice. I have here some mint and coriander, tomatoes, onions and carrots with mung beans, chickpea flour, cumin, dried mango and coriander powder, asafetida, red chilli flakes and salt. You also need enough water to make a batter.

The stars of the show are chickpea flour which makes the base of this pancake, thus making it gluten-free and mung beans that work great if they are sprouted. Soaked overnight also work which is what I have here.

In a bowl add the flour with the spices and some chopped coriander. Pour in water and whisk to a smooth batter.

Mix well and ensure no lumps are formed. The batter should be of pouring consistency. Cover and leave it to rest for at least 15 minutes. This rest period is absolutely necessary for not only the flavours to absorb better but also for the chickpeas flour to absorb water and swell. If the batter thickens after the rest period, add more water to bring it back to pouring consistency.

Add a couple teaspoons of oil to a hot pan and using a clean kitchen towel or paper spread around the pan. This will evenly coat the surface of the pan with oil while absorbing the excess. Ladle some batter on the pan. Make sure the pan isn’t too hot.

Spread the batter in circular motions using the back of the ladle.

while the batter is still wet on the top add in the chopped vegetables and mung beans. Gently press into the batter to ensure they stick. Keep the heat on medium low.

Spread some oil on the edges of the cooking batter to ensure that it doesn’t stick.

Slide a spatula along the sides to check the doneness of the pancakes. I like them a little crisp. These can either be flipped or folded.

I prefer to fold them.

Serve hot with your favourite chutney or dips.


Recipe ingredients 

Chickpeas flour(besan)- 200gms
Cumin powder- 2 tsp
Red chilli flakes- 1 tsp
Coriander powder- 1 tsp
Dried mango powder- 1 tsp
Asafetida- a pinch
Salt to taste
Water as needed
Oil
Chopped vegetables of choice
Sprouted Mung beans- 100 gms  

Recipe instructions

In a clean bowl mix together the flour with spices, salt and enough water to make a pourable batter. Add some chopped coriander (optional) and whisk together to form a smooth batter with no lumps.

Cover the batter and let rest for at least 15 minutes.

Heat a pan on medium-low heat and spread some oil using a kitchen towel or paper to evenly coat the surface of the pan. Spread about half a ladleful of batter using the back of the ladle in an even circle.

Top the pancake with vegetables and mung beans and let it cook for a few minutes. Spread some oil around the edges of the pancake to ensure it doesn’t stick.

Using a spatula, lift the edges of the pancake to check for doneness and fold once cooked to liking. Serve hot.


Note*- the first couple pancakes might stick to the pan but the rest will not once you get the flow of it. Don’t let the pan get too hot or the pancakes will not evenly spread.

Sweet potato and orange chickpeas salad (plant based)


This sounds most odd, this flavour combination of oranges with chickpeas and sweet potato but I promise you it isn’t. Its taste falls somewhere between the realm of spicy and fruity, lightly sweet dusted with faint hues of exotic vibrance which comes in part with the addition of cinnamon and cumin powered with sweet citrusy tang brought together with a thin sesame dressing. This salad is fabulously different and makes for a lovey accompaniment to meals if not eaten as a meal in itself.

we need some sweet potatoes, boiled chickpeas, capsicum, an orange divided into two parts, sesame seeds, black pepper, cumin and cinnamon powder, mustard and some salt

Chop the sweet potatoes into bite sized pieces, add in the cumin and cinnamon powder with some salt and bake at 180ºC for 20-25 minutes until cooked.

Place the baked sweet potatoes into a large bowl and set aside.

Roast the sesame seeds and pound to a fine powder.

In a bowl mix together the powdered sesame seeds with juice of half an orange with some lemon

Add in some salt, pepper and mustard and mix well to make a dressing.

the dressing should be of thin consistency. Chop the peppers and deseed+skin and devein the remaining half of orange, slicing it into segments.

To the bowl of baked sweet potatoes add boiled chickpeas

Add in the chopped casicum and orange slices along with the sesame dressing. Mix well and serve.


Ingredients 

Sweet potatoes: 200 gms
Cooked chickpeas: 210 gms
Capsicum/Bell pepper: 1 small
Orange: 1/2 medium size
Salt : to taste
Cinnamon powder: 1 tsp
Cumin powder: 1.5 tsp
__________________________

For the dressing 

Orange juice: 1/2 orange 
Roasted sesame seeds: 2 tbsps
Mustard: 1 tsp
Lemon juice: 1 tsp
salt to taste
pepper: 1/2 tsp (or more according to taste)
Oil: 1/2 tsp (optional)

Recipe instructions : Cube the sweet potatoes and add salt, cumin powder and cinnamon powder. bake at 180ºC for 20-25 minutes or until fully cooked. Set aside.

Chop the capsicum and devein+segment the orange.

Make the dressing by pounding sesame seeds to a powder and mixing in it the freshly squeezed orange juice from the remaining orange with lemon juice, salt, pepper and mustard. Add in the oil if using and mix to form a thin dressing.

In a large mixing bowl toss together the sweet potatoes with chickpeas, chopped capsicum, orange and the dressing.

Enjoy!

Lemongrass scented carrot and apple soup (vegan)


This isn’t just a soup but an absolute sensation, not least because it’s coloured very spring appropriate but also because it’s so fantastically delicious that you’d need excuses to make it over and over again. The earthy sweetness of carrots with the juiciness of apples which is offset every so gently with an undercurrent of lemongrass makes every spoonful a strange delight that though a bit familiar is also something of a mystery. Calming, comforting and almost too easy. This is a soup for all occasions.

the ingredients are apples, carrots, ginger, lemon, lemongrass, black pepper, soy sauce, cumin powder (not pictured), onion(not pictured)

Note: I have used lemongrass stalks here, if however you cannot find them or have no access to them then simply use 1 heaping tablespoonful of Thai yellow/red curry paste.

chop the apples and carrots into bite size pieces

Heat the coconut oil in a large pot and add in the chopped onions. (The onions aren’t pictured, but you need them)

add in the ginger and saute for a minute

before adding in some salt

and lemongrass. If you’re using curry paste then add it after the carrots and apples have cooked down slightly.

Mix in well and saute for a few minutes

finally add in the carrots and apples. Give them a quick turn in with the flavourings and this needs nothing more than cooking down to a soft mush.

The vegetable and fruit will leach out a lot of juice but I’m still adding a bit more water just to let everything simmer gently while I get on with laundry life.

cover the pot and let it cook on a low-medium flame. Keep checking occasionally, giving it a stir to coax the fruit and veg into softening.

After ten minutes of cooking the apples had softened to a pulp but the carrots still had a bite to them and we want to make everything smooth. If you’re using curry paste then this is the right time to add it.

While everything is still cooking and slowly becoming softer, add in the seasonings. Soy sauce

ground cumin. It was not pictured in the ingredients list but it’s an important part of this process.

and black pepper. Mix it all well and cover the pot again to let everything mix and soften. Add more water if needed.

FInally, after almost twenty minutes of cooking everything was as needed. Soft and mushy.

At this stage you can retrieve the lemongrass

and add more water to bring up the quantity that can make it easily blendable and soupy.

I am using a hand blender, but you can use a mixer or even a manual soup strainer as needed.

also add in a big squeeze of lemon.

depending on how you enjoy your soups, you can make it as smooth or as chunky. I like mine somewere in the middle.

and there you have it! Delicious, hearty and sweet with that unique fresh tang distinctly lemongrass which somehow turns into a soft hint of citric note, subtle and deep.


Ingredients

Carrots: 500g - 700g
Apples: 2 large or 3 medium
lemongrass: 2 stalks (if using curry paste then use 1 heaping tablespoon)
onion: 1 medium
Ginger: 1 inch piece
Cumin powder: 2 tsp
Black pepper: to taste
coconut oil: 2 tbsps
lemon juice: 1 tbsp
salt: to taste
water : 500mls + as needed 

Chop the vegetables and fruit into bite sized pieces. You can even grate the carrots for quicker cooking.

Recipe instructions: In a large pot heat the coconut oil and add in chopped onions and ginger. Saute for a minute and add in salt and lemongrass.

Give it a mix and cook for a minute before adding in chopped carrots and onions. Let cook until soft. (Add the curry paste if using once the carrots and apples have softened)

Add in soy sauce, pepper and cumin powder and stir together and let cook before completely softened into a mush.

Retrieve the lemongrass stalks. Add water and blend to form into a soup. Bring to a simmer before finally spritzing with lemon juice.

Serve hot

Vegetable lentil coconut curry (vegan)


This bowl of lentil curry which is bit of a twist on traditional dahl makes for such a cozy and filling weekday dinner that can be enjoyed both with rice or just as soup and is not only comforting but also nutritious and easy, not to mention completely plant based and unbelievably delicious.

This can be tailor made to suit your taste buds. It can be made spicier or more sombre and is a great way to clear the crisper drawer of any lingering forgotten vegetables.

All you need are some vegetables of choice and here I have beans, carrots, spinach and pepper along with the very essential flavour base that’s made of onions, ginger, garlic and tomatoes. Also soaked lentils, coconut milk and turmeric, coriander powder, garam masala, red chilli powder and cumin seeds.

chop the vegetables into bite sized pieces and boil with soaked lentils until the lentils and vegetables are soft. Do not boil spinach along with the veg and lentils.

Chop the tomatoes, onions, ginger and garlic and keep aside.

In a large pan heat some coconut oil

Add in the cumin seeds and let them splutter

add the onions

with some salt and cook until golden brown.

add the ginger and garlic

and cook until it no longer smells of raw garlic.

Now add the tomatoes followed by spices that are coriander powder, turmeric, garam masala and red chilli powder.

Stir well to combine and keep stirring until the tomatoes are cooked.

Now add the coconut milk and bring to a boil

and add in the spinach if using.

The curry at this stage will be quite thick and you might need to add water.

Let it simmer and come to a boil and this will really draw out the flavour from the coconut milk.

Add the cooked lentil and veg. I might have cooked mine too long but that’s fine.

Add some salt because the curry will need it.

I also ended up adding some more chilli powder because I like this curry a bit spicy.

Let it simmer for a few minutes before turning off the flame and putting a lid on to let it rest for a few minutes before serving.

Depending on how thick or thin you want this curry water can be added.

Serve hot with flatbreads or rice or just help yourself to a large bowl and let it nourish and heal you this winter.


Ingredients

Red lentils : 60g
Yellow lentils: 100g
Coconut milk: 250g
Tomatoes : 200g (2 medium)
Onion: 150g (1 medium)
garlic and ginger chopped: 1 tbsp each
Chopped veg: 350-400g
Coconut oil: 1 tbsp
Water: 700mls
Spinach: 100g (optional)
Salt to taste

Spices
Cumin seeds, red chilli powder, turmeric : 1 tsp
Coriander powder, garam masala: 2 tsp

Recipe instructions:

Soak the lentils overnight or at least 3-4 hours before cooking. Add the chopped vegetables to the lentils and cook until softened. Leave out the spinach if using.

For the flavour base dice the tomatoes, onions, ginger and garlic and keep aside.

In a large pan heat some coconut oil and add the cumin seeds until they splutter. Add chopped onions and some salt and cook until the onions are golden brown in colour. Add ginger and garlic and cook until the garlic no longer smells raw. (roughly a minute). Add in the chopped tomatoes along with the spices and cook until the tomatoes have softened.

Pour in the coconut milk and let it simmer before finally adding in the spinach if using. Add some water to thin out the curry and some more salt.

Let it come to a bubble before finally adding in the cooked lentils and vegetables.

Put a lid on the pan and let it gently simmer for a few minutes.

Lastly check for seasonings and add more salt or other spices as needed.

If it’s too thick then you can add some water but let it come to a boil again after that.

Serve hot.

Simple vegan chocolate cake


Do you want something absolutely chocolate without the fuss, without the beating around in a large bowl and whisking too much? If your answer is yes then perhaps this is the chocolate cake you’d want to try which is absolutely hassle free, easy to make with a fudgy rich center and takes barely moments to put together. The only waiting time is when it bakes and cools down and once that is done it’s ready to be eaten.

It’s something of a cross between a rich brownie and a simple tea time cake where all its chocolateness comes from the cocoa powder, which is why a good quality cocoa powder is a must for this recipe and of course it can be elaborated upon with icing or frosting and that’s why this cake is so perfect because its simple nature makes it so amiable to everything one could possible club it with.

The ingredients are few and basic. Flour, sugar, baking powder and soda, cocoa powder, instant coffee, oil, plant milk, vanilla and some salt.

In a large bowl mix in the flour

sugar

baking powder, salt, baking soda and coffee

and cocoa powder.

Mix it well together.

Now mix in all the wet ingredients. Vanilla, oil

Plant milk. I’ve used soy milk.

Mix it well. The batter will be a bit wet and that’s what makes the cake a very moist disc of chocolate goodness.

Scrape into a well greased baking dish of choice and bake at 180ºc for 40-45 minutes or until the cake starts to pull away from the sides and the center is baked. Check with a knife or toothpick.

Let cool for a bit before slicing.

This cake was deliriously simple and magical in how it tasted. Pair it with a dollop of ice cream of some cream or custard to make it into a richer dessert.

Enjoy!


Ingredients

Flour: 200g
Sugar: 180g
Cocoa powder: 30g
Coffee powder (instant): 1 tsp
Baking powder: 1 tsp
Baking soda: 1/2 tsp
Salt: 1/4 tsp
Oil: 70g (anything flavourless or coconut oil)
Plant milk: 220 mls
Vanilla extract: 1 tsp

Recipe instructions

Into a large bowl whisk together flour, sugar, baking powder, salt, baking soda and coffee powder. Mix well. Make sure there are no lumps.

Add in the vanilla, oil and milk and mix well. Scrape the sides of the bowl to ensure no dry flour is stuck to the edges.

Scrape into a well greased baking tin and bake at 180ºc for 40-45 minutesor until a knife inserted in the center comes out clean.

let rest for ten minutes before serving.


Vegan spring rolls


Wrapped in rice papers crammed with crunchy vegetables and piled with a delicious marinated tofu, these spring rolls which I do agree are a much larger almost dumpling sized kin to their fresh and slimmer relatives are a perfect treat either as a snack or even as a post workout meal when eaten in huge quantities since these are annoyingly delicious and guiltless and making them isn’t nearly as tedious as one would think.

Of course cooking anything in the kitchen requires a bit of work and these aren’t as much work as one would think and in fact they’re rather fun to make.

The filling is entirely personal and often depends on what’s present in the refrigerator; also a great way to use leftover vegetables.

The ingredients which I used were tofu, thinly sliced carrots, capsicum, avocado, cucumbers, coriander and leftover roasted asparagus. Like I said, the filling depends entirely up to you and the contents of your fridge.

You want to slice your carrots in a way that they’re almost julienned, so begin by slicing them lengthwise

and slice them lengthwise again to get matchsticks

also slice the rest of the veg as thin as manageable.

Slice firm tofu in long strips and the firmer the tofu the better its tenacity to not crumble.

we need flavour in these spring rolls since everything else is going to stay raw and crunchy with a play on textures, the tofu in question needs to have a punch and marinating it for a few minutes really does the trick.

Sizzle the marinated tofu on a very hot pan with a drizzle of oil.

let it char on both sides for a minute or so

Before finally adding the marinating liquid the tofu sat in. Let it cook and bubble and get absorbed.

And here you have it. What was once a rather pallid looking block of protein is now a bronzed vivacious looking filling for our spring rolls.

Now for the assembly which is where the fun begins. You need a large plate filled with water which can fit the rice papers, a clean damp kitchen towel and all the accoutrements sat neatly in front so the conveyor belt process can work.

Begin by immersing the rice papers in water on both sides for a few seconds until the entire surface is wet but not wilting.

Then transfer it to the damp paper towel

and begin layering the vegetables. I start with coriander first just so the rolls look pretty after getting rolled up, however because I stuffed them to spilling the final outcome wasn’t prettiness but greed and so the layering didn’t much matter but if you want to make them look presentable and dainty then maybe fill them a little less audaciously.

then came leftover asparagus. It’s absolutely optional. You can instead use cabbage, shredded lettuce or whatever you feel like.

next came in avocado

closely followed by capsicum and carrots

and finally tofu and cucumbers.

Next comes the rolling part where you gently but with purpose and intent enclose the vegetables in their transparent rice veil by folding the now very sticky rice paper over in a manner of wrapping.

and fold the two opposite ends to meet the first roll. Doesn’t matter if there are small tears in the paper or if all the vegetables don’t stay inside the first fold because we will roll it again.

Keeping the wrapping firm

Since the rice paper is sticky it will stay glued and the chances of making mistakes are few. Roll it up until it’s a roll.

something like this and there you have it. Giant spring rolls to stave off any hunger pangs.


Ingredients

Rice papers: 4 to 5
Firm tofu: 200g
Carrot: 1 small
Capsicum: 1 small or half a large
Coriander: 1 large bunch
Avocado: 1 half
Cucumber: 1 small
asparagus: 3-4 roasted and halved.

For the tofu marinade
Sesame oil: 2 tsp
Light soya sauce: 1 tbsp
Apple cider vinegar: 2 tsp
Sriracha or any chilly sauce: 2 tsp
Brown sugar: 2 tsp

Recipe Instructions

Slice vegetables into thin slices. Cut tofu into strips and marinate for 5-10 minutes. Heat some oil in a pan and gently place tofu strips until browned or lightly charred for a minute. Turn them over and after half a minute pour the marinting liquid in the pan. Let it bubble and thicken for another half a minute before turning off the heat. The tofu should be glossily bronzed on both sides.

Lay out all the ingredients for the rolls in front and fill up a large plate, big enough to fit the rice papers with water.

Dampen a clean kitchen towel and keep in front. Gently lower the rice paper in the plate with water and wet it on both side for a few seconds. Do not let it begin to soften. Transfer on the damp kitchen towel and begin layering the paper close to the edge near you to form into spring rolls.

Once the vegetables are stacked, fold over the now soft and sticky rice paper once. Fold the opposite ends on the sides to stick over the first fold and roll again to seal the edges.

Enjoy with some soy sauce or your favourite dip.

Oxblood smoothie (Vegan)


DSC_1140

No animals were harmed in the creation of this idiotically vibrant pink smoothie that suffuses your insides with a similar blazing glow of health and wellness, not least because this delicious lambent drink is made in mere moments and serves as a fantastic post-workout snack or a cool supplement with any meal.

DSC_1117 copy

The ingredients can be easily substituted with what you have on hand and what kind of flavour profile you need in a particular smoothie. I gravitate towards resplendent reds and thusly red pitaya for the colour and nutrition boost along with bananas, strawberries, cashew nuts and soy milk.

DSC_1119

There’s just the one step to it that is blending all the ingredients.

DSC_1122

strawberries in with pitaya or dragonfruit as we call it and I have frozen strawberries here.

DSC_1124

in with cashew nuts

DSC_1128

banana and soy milk,

DSC_1129

a couple of pulses followed by a long whizz and there we have it. Luminous and bloody red.

(I have on previous occasions used boiled beetroot instead of pitaya with similar results.)

DSC_1133

Your daily nutrition boost with fruits and fixings.


Ingredients

Red Pitaya: 200g

Banana: 200g (2 small or 1 big)

Strawberries: 100g

Cashew nuts: 50g

Soy milk: 100mls


Recipe instructions:

Chop the fruits into smaller portions for even blending and blend along with cashew nuts and soy milk until smooth.

Feel free to add sweetener or a squirt of lemon to enhance the sweetness and tang.


Super smoothie (Vegan)


If you’re looking for a quick, healthy, delicious post-workout recovery snack/drink or even just a nutritious little something to go with your daily blah then look no further because have I got a smoothie for you.

It’s gratifyingly enjoyable in a way that post-workout drinks should be, easy to put together with simple ingredients that can be mixed up to suit your tastes.

If you’re used to keeping a stocked larder with superfoods or just interested in knowing the different ways to use up those seeds and berries you can’t seem to finish then this might just be what you’re looking for and it’s pink.

DSC_0820 copy

A great smoothie needs a banana and it’s one of those definite fruits that does wonders for your body and system. It’s easily accessible, cheap and sweet. Apart from some strawberries (you could use any easily blendable fruit or berry of choice), goji berries to oomph the superbness of this smoothie what with all the antioxidants and vitamins and minerals, chia seeds for the overall goodness of the omega 3, protein, antioxidants and fibre and some milk.

It’s pretty straightforward really. You bung everything in a blender and blend, but I will demonstrate still.


DSC_0824

awkwardly add milk and banana to a blender

DSC_0825

followed by strawberries, still keeping with the odd hand angle

DSC_0827

in with goji berries

DSC_0829

and chia seeds. Whirr to blend everything together.


DSC_0880

until you get a prettily pink drink, stippled with nutritious black dots, like so.

Stick a straw in and drink before you sweat or after or even if you don’t sweat at all. This will not disappoint your health.


Ingredients 

Banana: 1

Strawberries: 40-50g (1/2 cup)

Goji berries: 1 heaped tbsp

Chia seeds: 1 tbsp

Soy milk: 150mls (1/2 cup)


Recipe instructions

Add all the ingredients in a blender and blend at high.

Note: you can use soaked chia seeds in this recipe.


Homemade peanut butter in a blender


IMG_7383

This began as something of an experiment in search of peanut butter that I could enjoy without staring at the nutrition facts with guilt and wincing. I’d found myself swimming in wonderfully raw plump peanuts and decided to go ahead with making my version of homemade peanut butter that not only kept the ingredients to a minimum but also ensured that everything was easily available and immediately present at hand, which is why a blender works better than a food processor in this case because almost every house has a blender if not a processor.

IMG_7367 copy

The ingredients are few and wholesome which makes it so much better than shop bought ones which are jam-packed with hydrogenated fats, preservatives and stabilizers. Roasted peanuts, coconut sugar (or any sugar), salt and coconut oil (or any oil.)

IMG_7363

I began by roasting peanuts which I did on a baking tray in a very low oven at 110º for about 20 minutes.

IMG_7364

until they had changed colour from pale to rosily bronzed.


IMG_7368

The only hard part is removing their skins which is easily done by shaking them vigorously or just rubbing them between your palms. Decant peanuts into a blender of choice and add sugar.


IMG_7372

and salt. Give it a good whirr in pulses.


IMG_7373

It isn’t a matter of seconds, it will take time, but keep pulsing until some peanuts are crushed, some turned to rubble and some still intact. Using a spatula keep mixing it about to ensure that nothing is stuck to the blade.


IMG_7374

It might look like it’s not coming together, but it will. Keep mixing in long and short pulses, alternating with pushing and mixing the broken peanuts with the spatula until you see more crumbs than intact pieces of peanuts.


IMG_7375

Add the oil and blend again.


IMG_7376

You might get anxious because it doesn’t look like anything’s happening but suddenly the bottom part of the blender will show almost liquefied peanuts, and then you’ll know you’ve struck oil, except its butter and wonderfully delicious at that.


IMG_7377

keep blending until you reach the desired consistency. This was still sort of chunky and a few long pulses later..


IMG_7378

You’ll get a satiny smooth terracotta emulsion of warmth. All you need at this point is a clean jar to store this homemade peanut butter in.


IMG_7379

Once upon a life, there was honey in it. Now there’ll be peanut butter.

IMG_7385

Pour into a jar of choice and refrigerate. This turned out far more delicious than any store-bought ones and easy to boot, not to mention self-righteous and annoyingly healthy.


Ingredients

Peanuts: 370g (2 cups)

Coconut oil: 2tbsp

Coconut sugar: 1tbsp

Salt: 1tsp

Note-  The resulting peanut butter will have a mild underlying coconut flavour to it, which is on account of coconut oil. If you do not like it then use any other oil of choice. 


Recipe Instructions: Roast raw peanuts either on a gas stove or oven by placing in an oven tray and roasting at 110º for 20-25 minutes until they’re rosy and golden. Keep checking to see that they don’t burn.

Remove their skins and place in a blender along with sugar and salt and pulse for a few moments. Use a spatula to mix them in the blender to keep the peanuts from sticking to the bottom. Once most of them are crushed add coconut oil and blend again until desired peanut butter consistency is achieved. Pour into a clean jar and refrigerate.

Enjoy!