Vegan spring rolls


Wrapped in rice papers crammed with crunchy vegetables and piled with a delicious marinated tofu, these spring rolls which I do agree are a much larger almost dumpling sized kin to their fresh and slimmer relatives are a perfect treat either as a snack or even as a post workout meal when eaten in huge quantities since these are annoyingly delicious and guiltless and making them isn’t nearly as tedious as one would think.

Of course cooking anything in the kitchen requires a bit of work and these aren’t as much work as one would think and in fact they’re rather fun to make.

The filling is entirely personal and often depends on what’s present in the refrigerator; also a great way to use leftover vegetables.

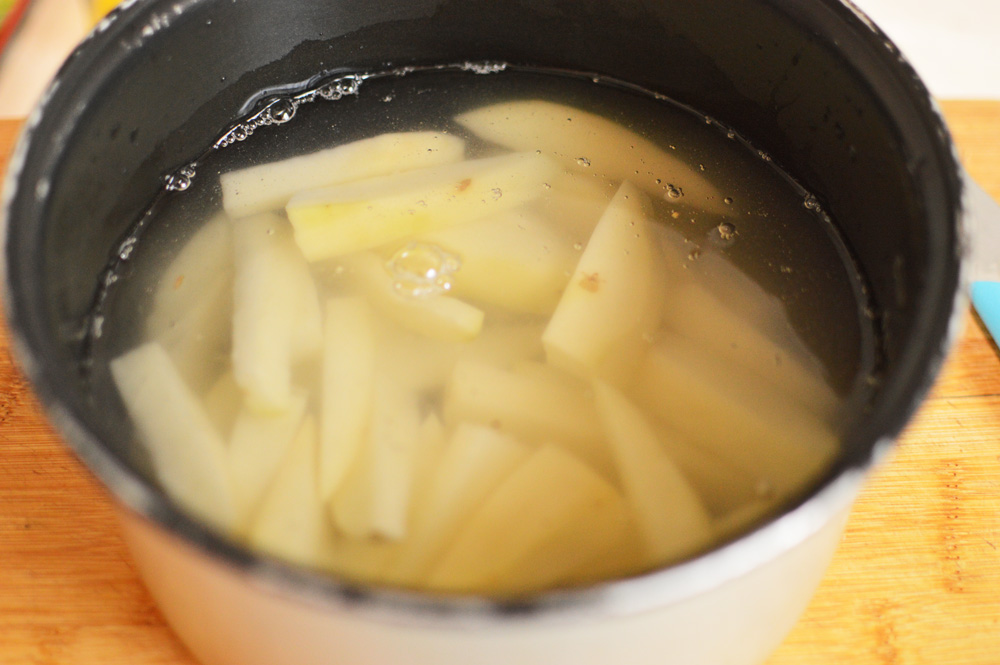
The ingredients which I used were tofu, thinly sliced carrots, capsicum, avocado, cucumbers, coriander and leftover roasted asparagus. Like I said, the filling depends entirely up to you and the contents of your fridge.

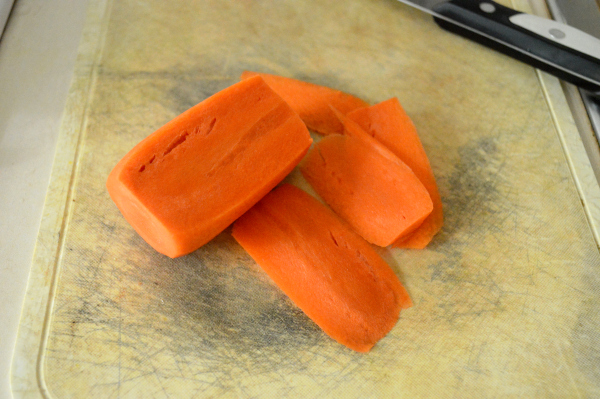
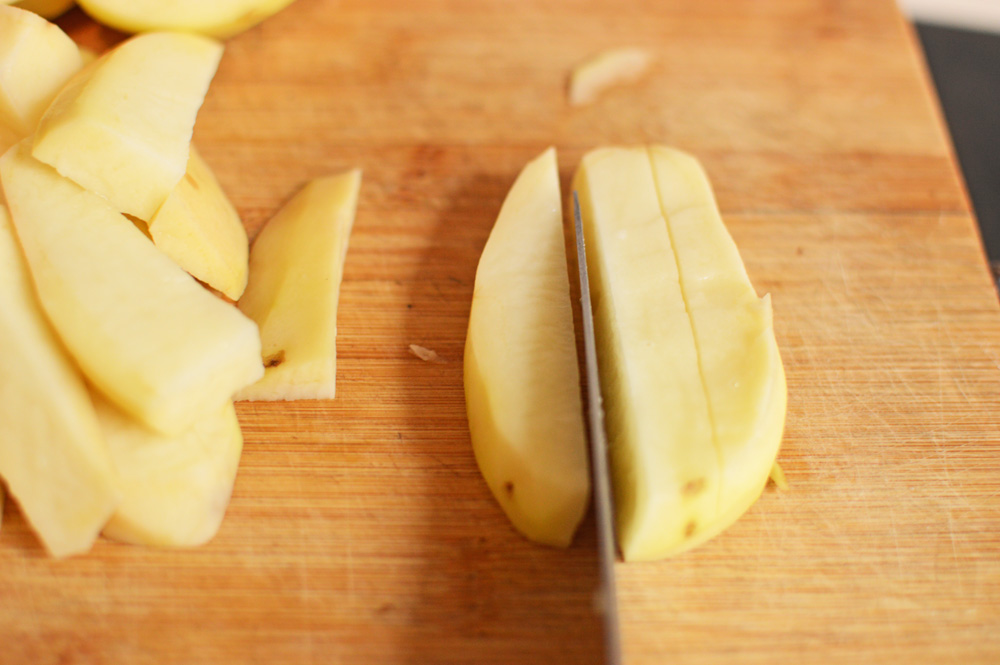
You want to slice your carrots in a way that they’re almost julienned, so begin by slicing them lengthwise

and slice them lengthwise again to get matchsticks

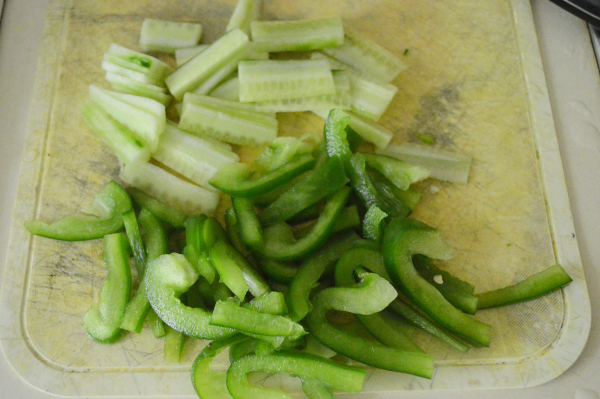
also slice the rest of the veg as thin as manageable.

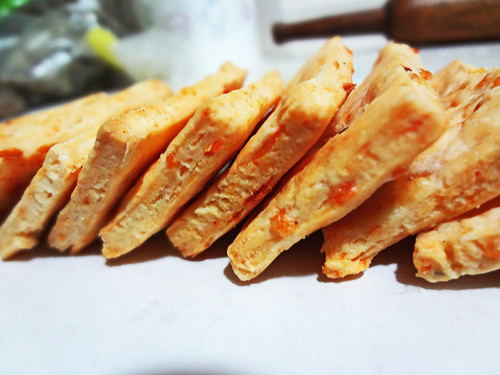
Slice firm tofu in long strips and the firmer the tofu the better its tenacity to not crumble.

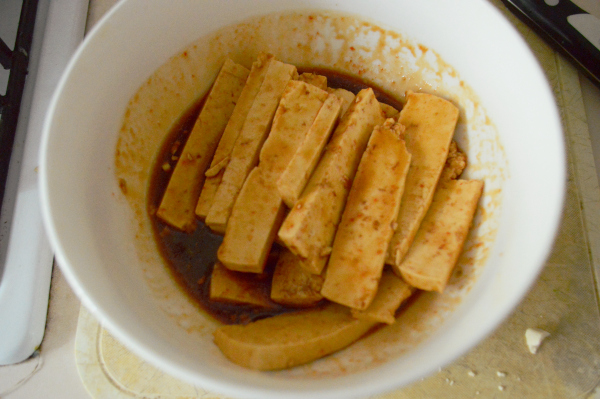
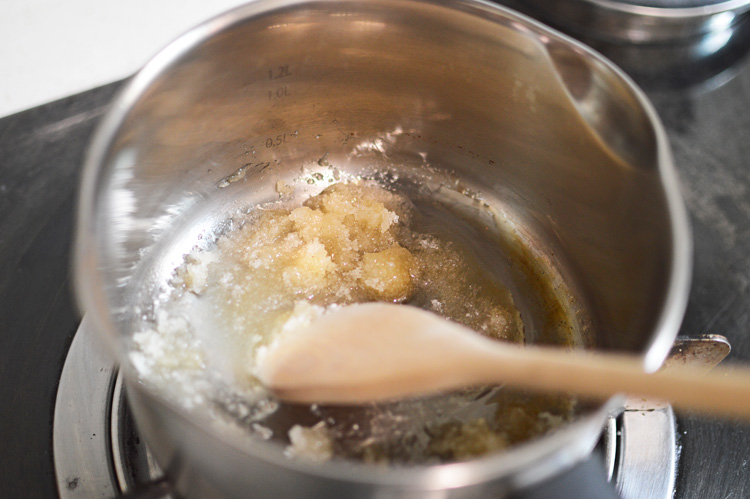
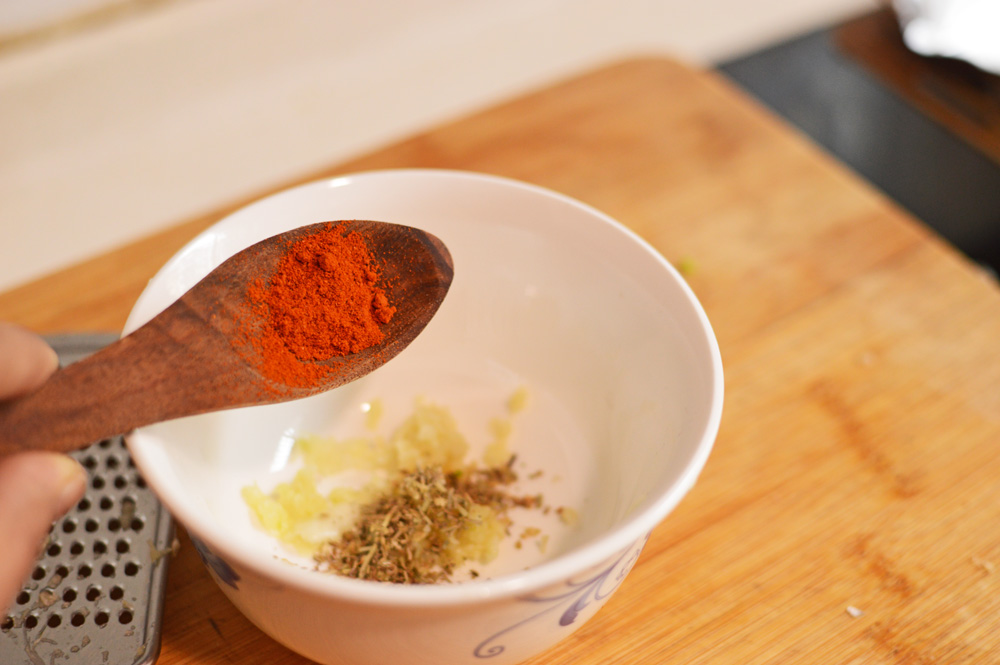
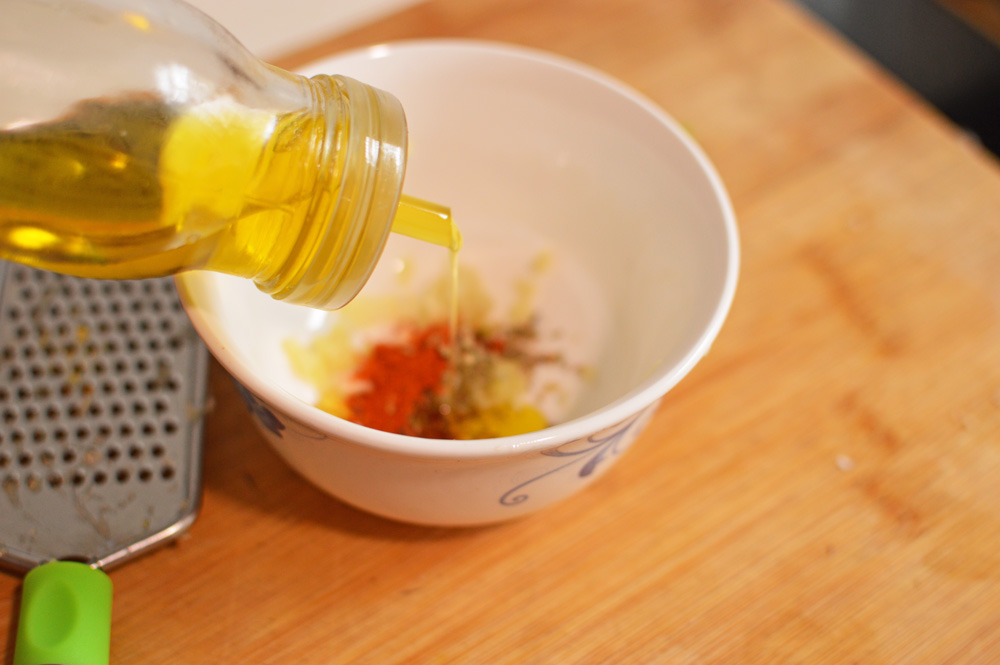
we need flavour in these spring rolls since everything else is going to stay raw and crunchy with a play on textures, the tofu in question needs to have a punch and marinating it for a few minutes really does the trick.

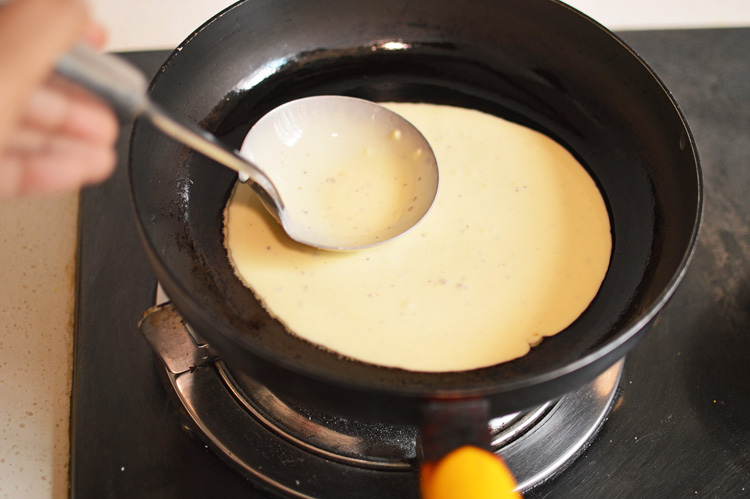
Sizzle the marinated tofu on a very hot pan with a drizzle of oil.

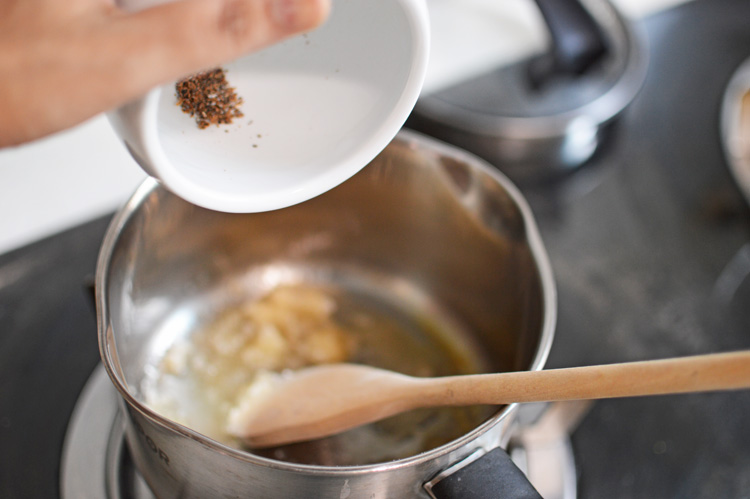
let it char on both sides for a minute or so

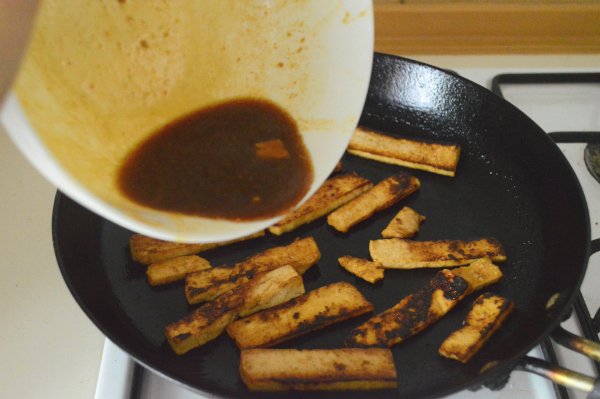
Before finally adding the marinating liquid the tofu sat in. Let it cook and bubble and get absorbed.

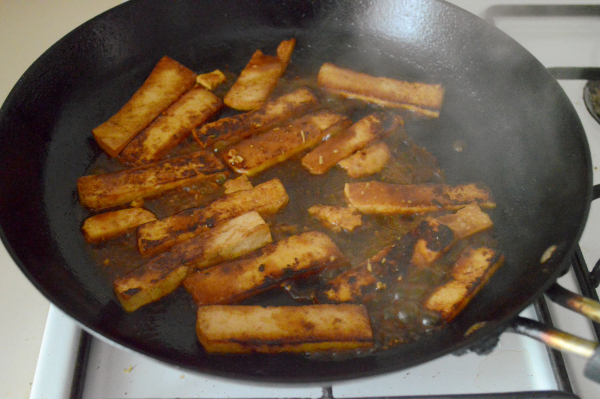
And here you have it. What was once a rather pallid looking block of protein is now a bronzed vivacious looking filling for our spring rolls.

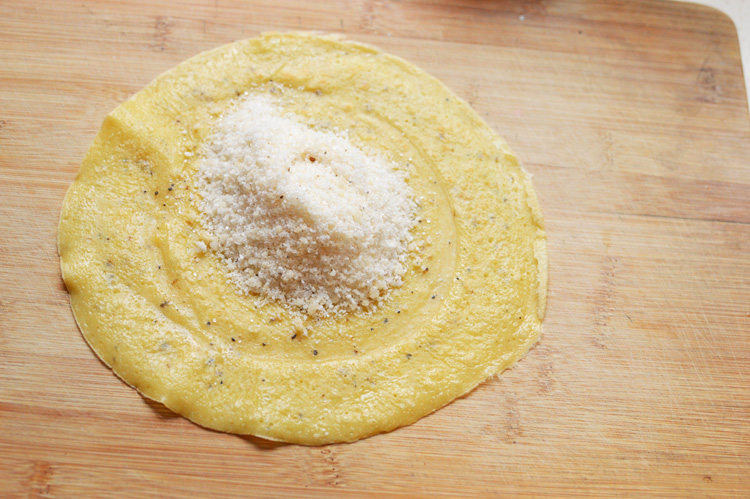
Now for the assembly which is where the fun begins. You need a large plate filled with water which can fit the rice papers, a clean damp kitchen towel and all the accoutrements sat neatly in front so the conveyor belt process can work.

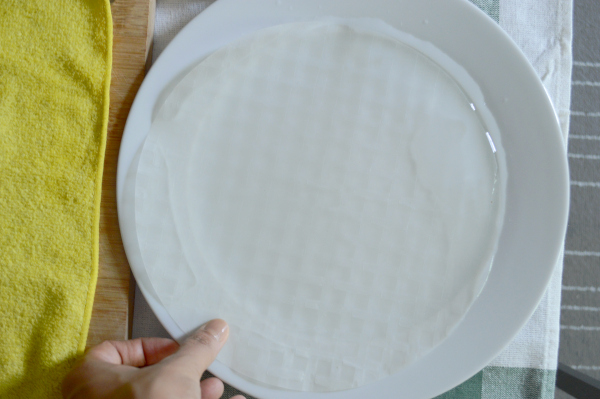
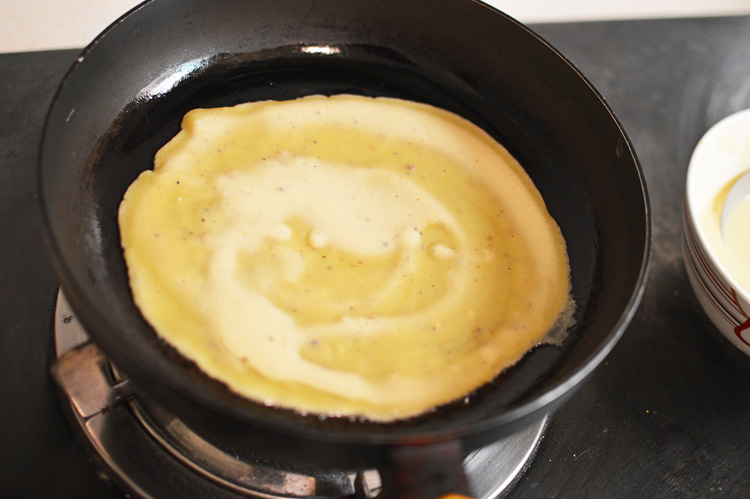
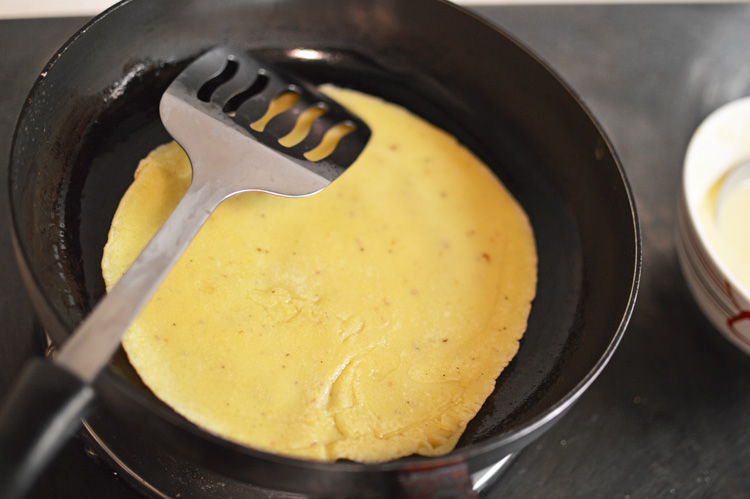
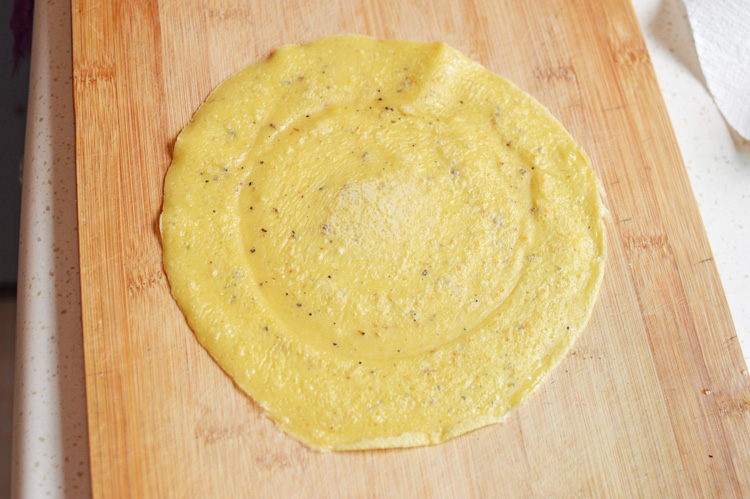
Begin by immersing the rice papers in water on both sides for a few seconds until the entire surface is wet but not wilting.

Then transfer it to the damp paper towel

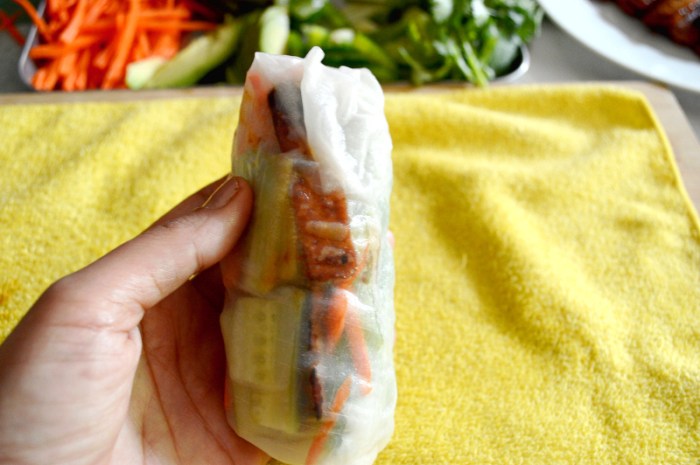
and begin layering the vegetables. I start with coriander first just so the rolls look pretty after getting rolled up, however because I stuffed them to spilling the final outcome wasn’t prettiness but greed and so the layering didn’t much matter but if you want to make them look presentable and dainty then maybe fill them a little less audaciously.

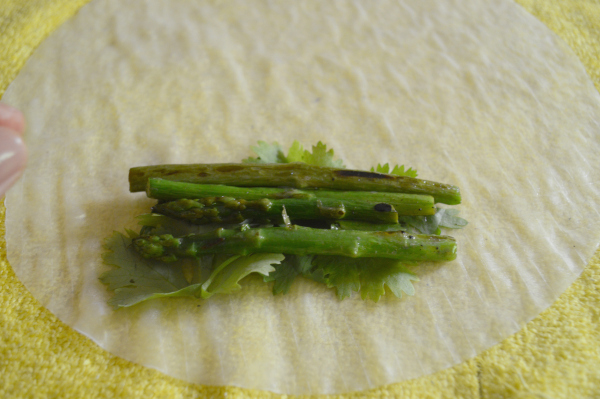
then came leftover asparagus. It’s absolutely optional. You can instead use cabbage, shredded lettuce or whatever you feel like.

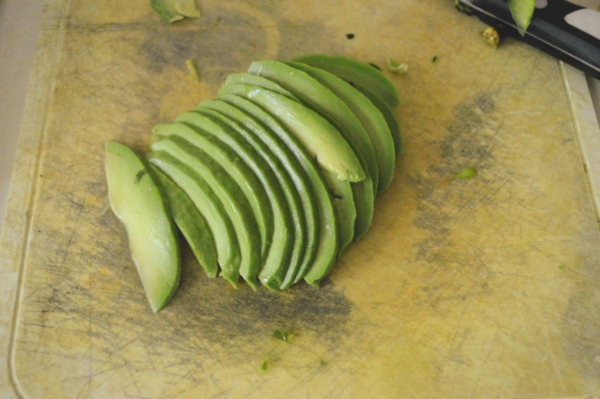
next came in avocado

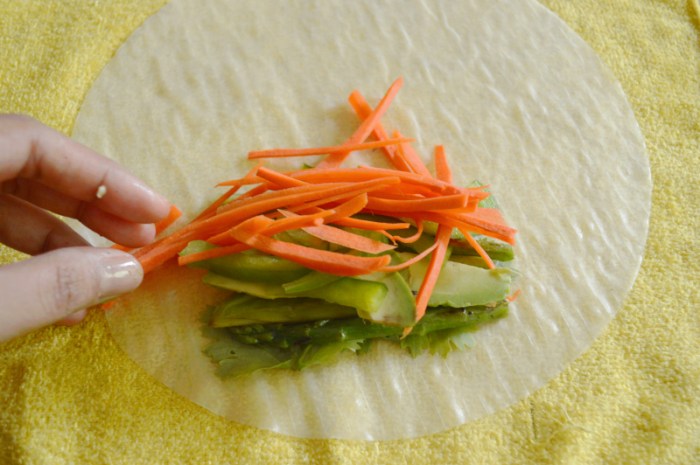
closely followed by capsicum and carrots

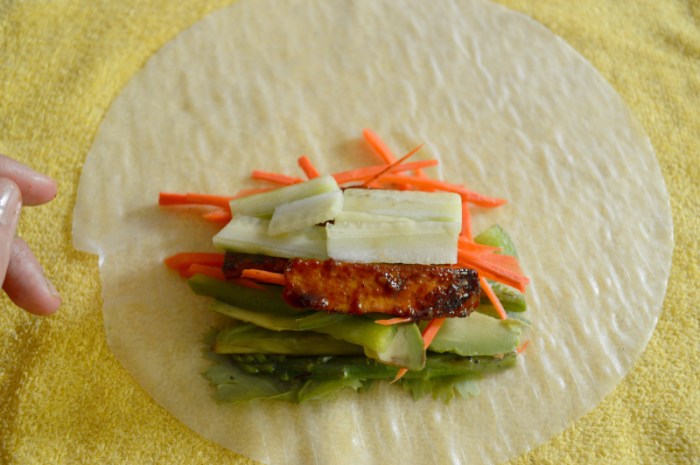
and finally tofu and cucumbers.

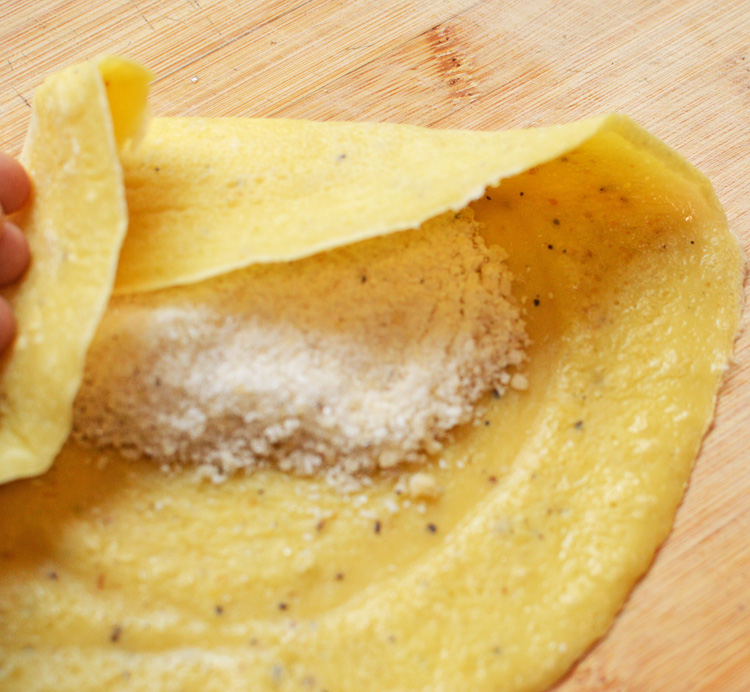
Next comes the rolling part where you gently but with purpose and intent enclose the vegetables in their transparent rice veil by folding the now very sticky rice paper over in a manner of wrapping.

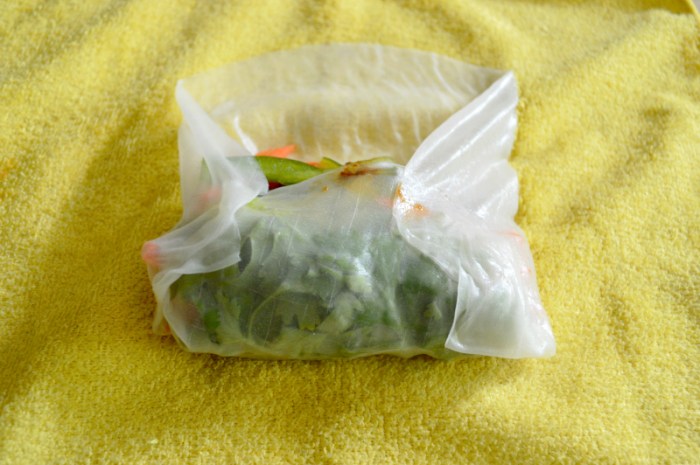
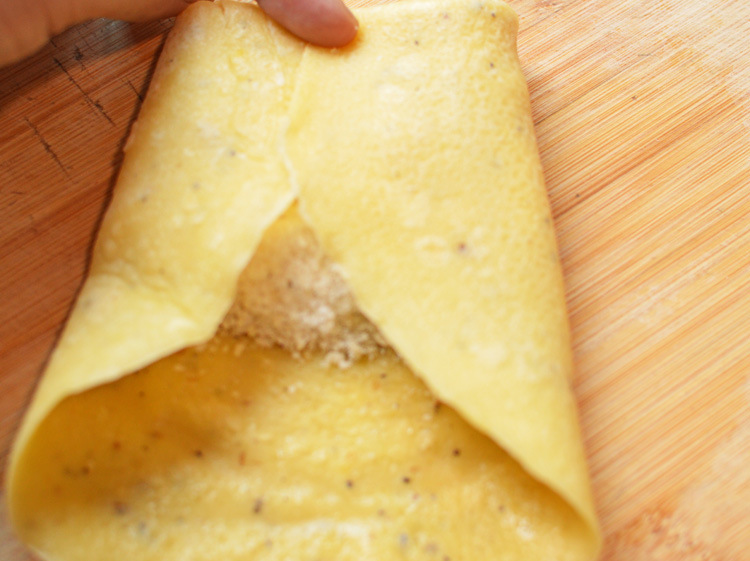
and fold the two opposite ends to meet the first roll. Doesn’t matter if there are small tears in the paper or if all the vegetables don’t stay inside the first fold because we will roll it again.

Keeping the wrapping firm

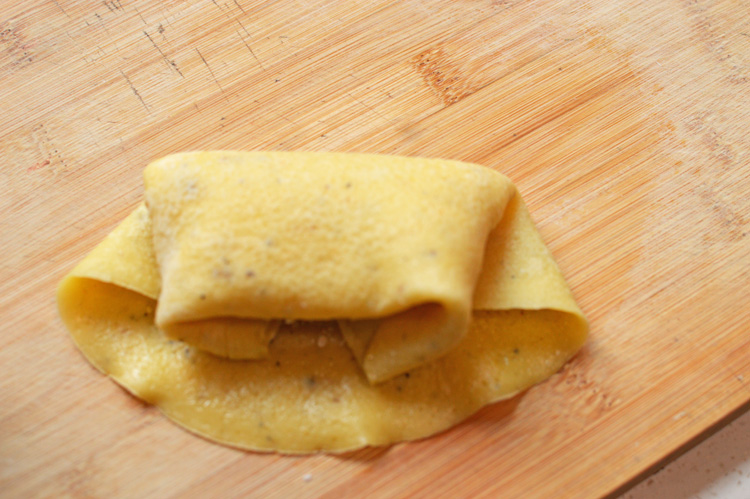
Since the rice paper is sticky it will stay glued and the chances of making mistakes are few. Roll it up until it’s a roll.

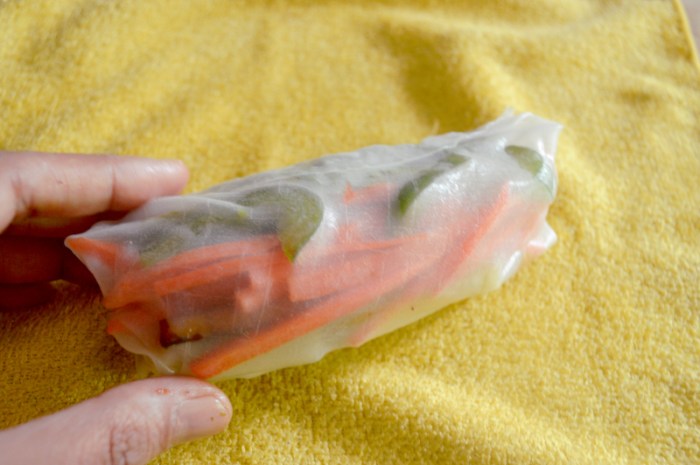
something like this and there you have it. Giant spring rolls to stave off any hunger pangs.


Ingredients

Rice papers: 4 to 5
Firm tofu: 200g
Carrot: 1 small
Capsicum: 1 small or half a large
Coriander: 1 large bunch
Avocado: 1 half
Cucumber: 1 small
asparagus: 3-4 roasted and halved.

For the tofu marinade
Sesame oil: 2 tsp
Light soya sauce: 1 tbsp
Apple cider vinegar: 2 tsp
Sriracha or any chilly sauce: 2 tsp
Brown sugar: 2 tsp

Recipe Instructions

Slice vegetables into thin slices. Cut tofu into strips and marinate for 5-10 minutes. Heat some oil in a pan and gently place tofu strips until browned or lightly charred for a minute. Turn them over and after half a minute pour the marinting liquid in the pan. Let it bubble and thicken for another half a minute before turning off the heat. The tofu should be glossily bronzed on both sides.

Lay out all the ingredients for the rolls in front and fill up a large plate, big enough to fit the rice papers with water.

Dampen a clean kitchen towel and keep in front. Gently lower the rice paper in the plate with water and wet it on both side for a few seconds. Do not let it begin to soften. Transfer on the damp kitchen towel and begin layering the paper close to the edge near you to form into spring rolls.

Once the vegetables are stacked, fold over the now soft and sticky rice paper once. Fold the opposite ends on the sides to stick over the first fold and roll again to seal the edges.

Enjoy with some soy sauce or your favourite dip.

Love letters.


DSC_0923How could you ever go wrong eating something so melodiously lyrical and so dramatically picturesque? These bountiful babies are rather romantically called love letters, and why not! Gracefully golden and poetically charged as they are, these fattened cigars are also tastefully sublime.

These happen to be a very popular Keralan tea time snack, of which rather embarrassingly though, I got to know of very recently through a dear friend I met on twitter called Febin Mathew, who also happens to be a fantastic writer and runs a wonderfully whimsical blog called (epicfaildotcom.wordpress.com) or you can check out his writings here

Love letters, as gorgeous as they sound are really just thin crepes that are filled in with coconuts and sugar.

DSC_0879m copythe ingredients are simple enough. Sugar, desiccated coconut. flour, egg and cardamom pods.

DSC_0881this recipe requires cardamom powder and its a good practice to make some from scratch rather than buying the dried up bottled stuff. All you really need is a mortar and pestle.

DSC_0882to make a somewhat fine powder.

DSC_0883into a bowl, dump in your flour

DSC_0884crack in the egg and get mixing.

DSC_0885somewhere here I realized I should have used a bigger bowl, but a bit of mess never hurt anyone. we need a thin batter and an egg alone won’t thin it.

DSC_0886add in water, a little at a time to make a thin consistency. I ended up adding about 100mls of water, that is about 6-7 tablespoons

DSC_0889this is the consistency we are looking for. It should be thin and pourable, with no visible lumps.

DSC_0894add in about 3/4ths of the cardamom powder. Mix well and keep aside.

DSC_0895now this step is entirely optional and not a part of the authentic recipe, but I like to do it. Take a good heaping tablepsoon of vanilla sugar.

DSC_0896and half the sugar of this recipe and put it in a pot over slow flame.

DSC_0899until it very lightly caramelizes and just starts turning golden.

DSC_0900at which point we add in the remaining cardamom powder.

DSC_0901and all the desiccated coconut

DSC_0902turn off the flame and stir it all in. Put this mixture in a grinder and grind it for a couple of seconds.

DSC_0905and you’ll get this. It’ll have faint whiffs of caramel, vanilla and cardamom.

DSC_0906mix in the remaining sugar and reserve for stuffing.

DSC_0907put your pan on a low medium flame and add a dollop of butter/ghee. I’ve added ghee as per the recipe.

DSC_0908tilt it well to coat evenly.

DSC_0909take a ladle full of your batter.

DSC_0910gently on to the pan

DSC_0911spread as thinly as possible.

DSC_0912it will start cooking the moment it touches the surface

DSC_0913flip to cook the other side.

DSC_0916filling these crepes is fairly simple.

DSC_0917put a good heaping mound in the middle

DSC_0918fold over from the top and from the sides, like so

DSC_0919and like so.

DSC_0920and finally fold over to make neat little packages.

DSC_0922arrange on platter of choice.

DSC_0924sprinkle on some castor sugar and sigh a little, because this might be your only chance at receiving any love letters, and devour them with milk, coffee, tea or just plain.

DSC_0929this is what the insides look like.

Ingredients

all purpose flour : 100g or 3/4 cup

cardamom powder: 2 teaspoons

sugar: 80g or 1/3 cup + 1 tablespoon vanilla sugar

desiccated coconut: 100g

water: 100mls about 1/2 cup

butter/ghee: 1 tablespoon

Preparation instructions:  make a thin batter from flour, egg and milk. Add in 3/4ths the cardamom powder and reserve.

In a saucepan, lightly caramelize the vanilla sugar and half of the sugar from the recipe. Just as it starts melting and turns light golden, turn off the flame and in remaining cardamom powder, and the desiccated coconut and mix. Grind this mixture and reserve.

In a non stick pan, melt the butter/ghee over a low medium flame and pour a ladle full of the prepared batter. Spread evenly to form a thin crepe and flip to cook the other side.

For filling, lay out the crepe and put a heaping mound in the middle. Fold over 1/4 of the top, then fold from both sides to pack and finally fold over from the top again to make a roll.

Sprinkle with castor sugar and serve warm.

DSC_0923enjoy!


Breakfast quesadilla


feat picThese beautiful mounded beauties that you feast your eyes on, are my put together in a jiffy breakfast quesadillas. There’s a certain delicious hum to the word ‘Quesadilla’, like uttering an exotic mantra for a cheesy sandwich. Well, that’s what it really is..it’s cheese in a tortilla and while I confess these are not completely authentic or remotely Mexican, I assure you that these are delightfully tasty to eat and offensively easy to put together. This is the kind of dish that requires minimum efforts with maximum rewards.

This dish belongs to the ‘lazy day special archives’. It happened simply becauseI was in no mood for chopping, cutting, baking, cooking or even lingering around the stove. I just wanted to settle with a bag of chips when I saw some leftovers, cheese, and ham in the fridge and it was nothing short of a divine revelation when I decided to myself that this is SPARTAAA!! no not really though! I just decided that I’d make meself some quesadilla. This is how it began..

DSC_0678pwholewheat tortilla, pepper, mozzarella and parmesan cheese, ham, leftover sauteed mushrooms and some leftover chopped onions and dijon mustard.

Before I begin, let me tell you that you can substitute these ingredients with whatever you fancy, or whatever leftovers you have in the fridge. Fried eggs, baked potatoes, leftover chicken, crispy bacon are all good. Anything that suits your mood or your appetite can be turned into this quesadilla. Just raid your fridge and go nuts.

DSC_0679a good heap of dijon mustard, for what would be life without this goodness?

DSC_0680spread it liberally. I might have gone overboard but you know how you like it.

DSC_0681Mozarella

DSC_0682leftover sauteed mushrooms and onions and a sprinkling of pepper.

DSC_0683cover with some more cheese, in this case parmesan.

DSC_0686fold over the plain side on the fillings to form a half moon.

DSC_0687on a hot dry pan (you don’t need any oil) let it cook for a couple of minutes and flip once it’s browned a bit.

DSC_0689In the meantime lets build another quesadilla..Again with some cheese

DSC_0691hap hazard placement of ham

DSC_0692leftovers of leftovers

DSC_0693finally some cheese, form into half moon and on a hot pan.

DSC_0694let brown on both sides and this is pretty much done.

DSC_0703I like to slice them into three wedges

DSC_0704like so

DSC_0696to form something like this

DSC_0698oooh this melting hot cheese. This is sandwich heaven right here.

DSC_0697this cheese!! can you see all the melting richness?

DSC_0695these are so unbelievably gorgeous. It’s the breakfast to end all breakfasts. The quesadillas of oomph!! This took me about 10 minutes to make. Couched with a flask of hot tea, this breakfast made in moments was also one of the most satisfying ever.

Ingredients: this doesn’t have any set of ingredients or measures, since it’s something you just put together according to your own tastes and what you have available in the fridge..however,

Tortilla : 2 wholewheat (or use any you have handy)

pepper: 1 teaspoon

Mozarella: 50 g (3-4 tablespoons)

parmesan: 30g(2 tablespoon)

ham: 2 slices

sauteed mushrooms: 50 g (3-4 tablespoons)

chopped onions: 2 tablespoons

dijon mustard: 1 tablespoon

How to: Lay out the tortilla and spread some mustard. On one side layer the cheese, the vegetables, sprinkle some pepper and add some more cheese. Fold to form half moon and transfer on a hot pan to brown and melt the cheese. Cut into 3 wedges and serve.

Repeat the same steps and add ham either cut into thinner strips or just as whole slices. If you wish you can add the remaining vegetables and transfer on a hot pan to let cheese melt and tortillas brown and crisp.

This is just an interesting idea to prepare a feast like breakfast without any effort. Of course by all means, eat it any time of the day and it’d still taste as delicious.

DSC_0705Enjoy!!


Baked potato fries


DSC_0929

Potatoes!! Is there anything as comforting, as loving, as selfless, as versatile, as sexy, as sensuous as potatoes?? No, the answer is no!! Potatoes love you back they understand your feelings, they believe in giving and they care.

Sadly with modern times now, these beautiful spuds of love have been maligned as fattening food.. gasp! people are told to steer clear of them if they want to lose weight.. I say, what rot?? It’s not true. Potatoes aren’t bad for you, you’re bad for potatoes. Who thought of loading them with MSG and packing them into airy bags? you did! who thought of over salting them to the point of oblivion?? you did!! So please do not blame these humble vegetables for making you fat. Blame yourselves. Fried food WILL fatten you, it does not take a rocket scientist to know that, but when you bake these beauteous vegetables with the right amount of love, they love you back.

Case in point are these baked fries. They require no effort but give you all the love you need these winter months. Not only do they satisfy your spud cravings but they also don’t make you feel bad about it.

So for those moments of anguish when only a potato will do, bake these fries and get caught in the rapturous greed of smug satisfaction.

DSC_08521Just potatoes, garlic, olive oil (any oil really), mixed italian seasoning, paprika and sea salt.

DSC_0854before you start, line your baking sheet with foil.

DSC_0855wash and peel your potatoes. Remove any eyes and anything weird you don’t like seeing on your fries. You can keep the skin on the potatoes if you wish, just wash and scrub them really well.

DSC_0858Since my potatoes were not exactly equal in size, I cut mine to make three roughly equal sized potatoes. You don’t have to do this if your vegetables are symmetrically proportional.

DSC_0861I cut each potato segment into three, because I don’t exactly like very skinny fries, but if you do, please go ahead and make them as thin as you like.

DSC_0862So many potatoes.

DSC_0866I cut each segment in three’s.

DSC_0869I had almost equal sized fries, those which were a bit thick I cut them to size. Nobody messes with the size okay!

DSC_0870Into a pot of cold water to rinse away the starch. Let these be for a while now.

DSC_0871Now about their massage oil. Peel your cloves of garlic and mince them fairly well or chop, whatever you prefer.

DSC_0872add the seasoning mix. I’m using dry simply because It’s too cold and I have no fresh herbs left, but if you wish you could as easily use them fresh. Dried is just easier. These mixed Italian seasonings are pretty nifty.

DSC_0875in with the paprika. As little or as much as you like.

DSC_0876a glug of oil. This is about a tablespoon, but you could use more, you could use less.

DSC_0879stir with a spoon of choice until all is well combined.

DSC_0880Drain the potatoes and pat them dry with a kitchen towel or cloth of your choice.

DSC_0882give them a good pat. You want them completely dry.

DSC_0883tumble onto your lined baking sheet

DSC_0885make sure there isn’t a single wet spot. (snigger)

DSC_0887pour over the massage oil and this gets a little messy because you need to use your hands to evenly coat them

DSC_0888like so. Make sure the oil is distributed evenly and that every piece is well bathed.

DSC_0889sprinkle on the salt and into the oven at 200℃ for 35-40 minutes.

DSC_0906this is what they looked after 30 minutes of baking and the kitchen was smelling so divine. Garlic infused herbal incense. I was mesmerized and hungry.

DSC_0914

like this at 38 minutes of baking, and I turned on the broiler for about 2 minutes because I was getting impatient and I love it when they turn golden and crisp on the top.

DSC_0924like so!!

How were they? what can I say? see for yourself. They were beautiful, they were crispy on the outside and fluffy on the inside. I gave them a final sprinkling of salt before I served them.

DSC_0929A flask of masala tea and potato fries.. what more can I ask this winter?

Ingredients

Potatoes (as many as you want)

Garlic- 2 to 3 cloves

Italian seasoning – 1 teaspoon

Paprika – 1 teaspoon

Salt to taste ( I used 1 1/2 teaspoon of sea salt)

Olive oil/any vegetable oil – 1 to 2 tablespoon

RECIPE: Line a baking tray with aluminium foil. Wash and peel your potatoes and cut each into 3 segments and each segment into two or three fries, depending on how thick or thin you want them. Soak them into a bowl of cold water to remove excess starch.

Into a separate bowl, mince your garlic, add in the Italian seasoning, paprika and oil and mix well.

Drain the potatoes and dry thoroughly.

Tip them on your aluminium lined baking tray and pour over the prepared oil mixture and coat every fry with the mixture, making sure they’re all evenly coated.

bake at 200℃ for 35-40 minutes until deeply golden. Depending on your oven the baking time will vary. In some ovens it might take longer in some lesser, so keep an eye.

Enjoy!!


Roasted Red Peppers : How to


DSC_0654What can I say about roasted peppers, except that they are divine. They’re the equivalent of a food poetry. They bring to life anything they are added in. Their subtlety of flavour livens up even something as meagre as a stale slice of bread. It’s like the rhyming word which makes a verse all the more interesting.

The slightly smoky, charred flavour is harmonious with almost everything.You can add this to a sandwich, throw it in a bowl of pasta, puree into a soup or just drizzle it with olive oil and serve as a side dish. This is guaranteed to brighten your table, your mood and your food. Also it’s really easy, and you could do this in a matter of minutes.

You don’t need a whole list of ingredients, except perhaps some peppers. You can roast any pepper of your choice, I’m doing red peppers, but you can go ahead with whatever suits your preference and your colour of the day. yellow, orange, green.. whatever coloured pepper is available.

I’m a stove top girl, when it comes to roasting peppers. You could just as easily pop this in a hot oven, but for me, this technique is better suited since it’s charred and burnt evenly on all sides.

DSC_0637Place the pepper on stove top like so. The flame should be high enough to not only roast it but blacken it.

DSC_0638Time for tong action!! You really do need a tong for this. keep rotating on all sides until it’s seriously blackened. Leave no side even a bit coloured, including the tip. You really need to blacken up these babies.

DSC_0642Once it’s coal-black, lose no time and put the peppers in a ziplock bag and seal it. This step makes it easier to take the skins off, and makes these peppers juicy. Let them be in the ziplock for at least 15 minutes, and you can get on with your life till then.

DSC_0651See!! I wasn’t kidding about roasting them to a nice shade of Hellish black. These peppers have had their 15 minutes in the ziplock, and it’s time to reveal the divinely delicious peppers that have metamorphosed into food poetry.

DSC_0653You need to get your hands dirty, and you won’t even complain. Just peel the skins and they will come off real easy. I do not like to be too fastidious with the skinning process, since a bit of charred remain is desirable, as it’s the bits of charred skin that gives these peppers their characteristic smoky flavour.

DSC_0656This is what I as talking about. Lipstick red but tastier, aromatic, jewel bright and oh so delicious. Just de-seed them before serving, also a few seeds don’t hurt nobody..

There are millions of serving suggestions:

-tear into shreds, drizzle some olive oil, crumble some feta and eat.

-tear them and throw into a bowl spaghetti lightly drizzled with olive oil and parmesan

– add it to your sandwich and watch the flavour go up a hundred notch

– puree along with some sour cream, salt and garlic and make a delightful pasta sauce.

– add it to your hummus, and make an electric red coloured bowl of greed.

Once you’ve made these at home, you wouldn’t want to buy an expensive jar of roasted peppers. It’s an easy process and it’s so much better when you do it yourself.

—–

Recipe: On a medium high flame of your stove top place the peppers and keep turning them every 30-40 seconds until they are all evenly charred. Make sure to roast the tip as well.

Once you’re satisfied with the colour, place in a ziplock bag and seal it. Let these peppers sit for 10-15 minutes.

Finally just peel off the charred skin, making sure some skin remains to ensure a smoky flavour.

De-seed before serving.

Enjoy!!!!

Spicy masala cookies


CSC_4925


For some reason these harsh winters have put me in a cookie mode. I’ve been buying, eating and baking cookies. But aha.. these are not sweet cookies but salty spicy ones.. well not spiky salty like chips or crisps but very mildly saltish to the taste with a twang of spice. The spices being rather mellow, subtly biting and very addictive.

I had no recipe to start these cookies with so I was just trying and testing in the kitchen but accidentally or rather Fortunately these cookies turned out excellent. They tasted exactly how I wanted them to and I penned down the recipe and I’m sticking to it. I am !!!

Since these were just testing I didn’t bother with making a huge batch. You can easily double or triple the amount. These cookies are not thick and big, but dainty and petite which makes them all too easy to eat.

CSC_4917


see !! not fat at all..

Ingredients 

70 gms butter (you can also use salted butter for these cookies)

1 egg

1 tbsp sugar

2 tsp salt

125 gms flour

SPICES

1 tsp cumin seeds

1 tsp mustard seeds

4-5 curry leaves

1/4 tsp freshly ground pepper

1/4 tsp chilly flakes

RECIPE

In a dry pan fry the spices (except pepper and chili flakes) for a couple of minutes until browned. The mustard seeds will starts spluttering and you will get the most heavenly spiced aroma. Make sure the pan is dry. You don’t need to add any oil.

Once the spices are browned and giving off their aromatics take the pan off the heat and crush the spices. You can do these win a mortar & pestle. I used my rolling-pin. Keep these aside.

In a large bowl beat the butter with the sugar and salt for a minute or so. add in the egg and beat again.

Now add the crushed spices along with the pepper and chili flakes and beat until the spices have turned your beautiful yellow butter to tarnished brackish spiced goodness.  Add in the flour, and at this moment its best to use your spatula or wooden spoon to incorporate everything together.

Once it has formed a sort of dough and you can see the flecks of spices dotting your mixture, believe me it only gets better now.

Roll this cookie dough on a lightly floured surface. You can make these cookies fat or thin, depends how you like them. I roll them out quite thin perhaps 1 cm or less (you can see in the picture above)

Once they’re rolled out you can use any shaped cookie cutter and stamp out shapes. You can make them round or just basic square.

Place them on a sheet. These cookies don’t spread, so you can space them close.

bake in a pre heated oven at 180℃ for about 12-15 minutes, or until the edges have browned slightly. It also helps me to rotate the cookie sheet after 8 minutes or so.

Let them cool slightly and they are ready to eat.

You can either eat them on their on as they are or even use some dip or salsa or even this hummus

CSC_4913


Another picture to inspire you to make these immediately..

Enjoy !!!

Hummus


CSC_4927Yes!!! I love ze hummus. I love hummus on bread, on crackers, on everything that can be dipped. I love absolutely love hummus. Thank you Middle East for giving us the gift of hummus.

What I don’t love is the hummus you find in jars. Ewww.. its everything thats hummus shouldn’t be. Making your own hummus will give you an air of smugness and a feeling most satisfying.. You’re creating hummus.. at home.!!!!

After many try outs, recipes, and taste tests, I finally figured a hummus recipe which is loved in my house. Easily devoured and makes a decent quantity. It’s just a bread away from being a supper in it’s entirety. Works fabulously as a crowd pleaser and a party piece. Just put this on a table with torn pieces of  breads, and you’ve got yourself a fantastic appetizer..

CSC_4933


Chickpeas, garlic cloves. tahini paste,Extra virgin olive oil, salt and coriander powder.

I don’t use canned chickpeas, though if you wish you can use those. I soak the chickpeas for 6-10 hours. Overnight works best and boil them till they are tender.

CSC_4931


Dump everything together in a food processer, you can use a blender of you wish. for me this ferocious little chopper works best.

DSC_4832


Add in the extra virgin olive oil and whizz to a paste. If you feel it’s too dry you can add a bit of water, though this won’t happen if you dont go too easy on the oil.

Garnish with some more lovely green olive oil and paprika..

CSC_4929


such miraculous, gratifying results.. This is the kind of hummus you just can’t go wrong with. Of course there isn’t a set recipe for anything. It’s always to your taste, so play with it. Adjust quantities and seasonings to your liking and the results are highly rewarding…….. Enjoy !!

Ingredients

150 gms chickpeas (cooked and drained)

4 garlic cloves

25 gms tahini paste

1/2 tsp coriander powder

1 tsp salt (adjust to taste)

75 mls extra virgin olive oil + more for drizzling before serving

1/2 tsp paprika (optional) for sprinkling before serving.

additionally you can also use some lemon juice about 1 tsp if you wish

Recipe:- In a food processer or a blender process together the chickpeas, garlic, tahini, salt and coriander powder with the olive oil. If it’s too dry or thick add in 1 tsp water or olive oil until you get the consistency you want. Keep tasting for salt. It should be according to your taste.

To serve drizzle some olive oil and some paprika for a burst of colours. Serve with pita, baguette or even crackers..


Cheddar & cream cheese crackers


cheesy crackers

Yes these are crackers full of cheese and yes they are fattening, which is why you don’t make too many of these and eat them all at once. I made that mistake, you don’t have to.. but if you don’t then you’ve not lived.

These are crackery, as in crispy and have faint hits of paprika and cheesy.. yes cheesy. The worst part is that they’re all too easy to make and sinfully addictive.

Ingredients

1 cup flour

4 tbsp cold butter

150 gms grated cheddar cheese

75 gms cold cream cheese

1 tsp paprika

1/4 tsp freshly ground pepper

1/2 tsp baking powder

3-4 tbsp cold water.

In a processor mix all these ingredients until they’re just about to clump. In case you don’t have a processor just cut the cheeses and the butter into the flour mixture much like you do while making a pastry, you can use a pastry cutter, fork or your finger tips. Once the flour mixture resembles a coarse oat meal mixture, combine using water forming into a rough ball.

Wrap in plastic and chill in the fridge for about 25 minutes.

Once its slightly cooler roll it out to about 1/8th of an inch and cut into any shapes you want.

I was lazy, so I just took a knife and scale and made 2cm X 4cm rectangles.

Make a hole in the middle of your crackers before baking.

Bake at 180℃ for 12-15 minutes.

Let cool before popping one in your mouth..

You can eat these just as they are, or with your favorite dips, drinks.. etc etc..

cheddar & cream cheese crackers

Feast ye eyes on another picture..

Enjoy !!!!

Spicy green Coriander Chutney


This Technicolour green, diabolically spicy chutney is one of my mom’s recipe’s, and I have adopted this with absolutely no changes. If it ain’t broke, don’t fix it, and if it’s magnificent then just blindly follow it.

So this post, is in fact a tribute to my mother’s food, and the colours she brings out in it and the fact that all I know is all from her.

To this day, this chutney hasn’t tasted as glorious as my mother’s,but still to the naked eye it’s pretty darn good.

Now before I start its recipe, I just need to tell you that this is great with anything. Eat it with mashed potatoes, grilled chicken, omelette, parantha, as a salad dressing (make it mild in which case), as a dip for chips, fritters etc etc.. but my absolute favourite way to eating this is, slathered over a buttered toast. Oh how it brings out the flavours..

Anyways.. I haven’t any step by step pictures because I forgot.. but anyway…

Ingredients

coriander a whole bunch- washed and De stalked with just the leaves. (hard to tell the weight cuz its just leaves and really how many were they. I think mine was around 1/2 cup about 20 gms. a bunch is a better specification)

3 fat cloves of garlic

2 tsps cumin seeds

2 green chillies- the smaller more evil ones.

2 dried red chillies (also incidentally the name of my blog)

1 tsp salt (to your taste actually- but not under salted please)

1.5 tsp dried mango powder

1 tbsp water

Yes, you’re wondering why so many chillies..it’s spicy coriander chutney isn’t it?  but seriously if you’re a bit worried about so much evil deliciousness, by all means reduce the chillies.

The rest is easy.. just put all the ingredients in your mixer jar and whizz for a couple of minutes on high till all’s combined and green. Make sure the garlic cloves are all minced in and not a speck of anything identifiable remains.

That’s all folks.. this can be refrigerated for a few days and tastes best when fresh out of a jar, though once you’ve tasted it it;s hard to stop eating.  Eat it with whatever you wish, but seriously try it on a butter toast.. magnifique..


Crustless cup Quiche


There’s always this time, usually on a Tuesday (at least for me).. when I want to eat something spectacular and beyond belief, but I don’t want to cook it.. or I don’t want to spend hours in the kitchen and cut something, or cook something or spend time hovering in front of the stove..

This was a brainwave or should I say the lazy Tuesday special, which was AMAZING !!!!!!!!!! it really was.. come on look at it.. it’s so pretty and so freaking EASY.. I have no steps for this, no pictures except for these shimmering golden tops..

Ingredients

2 eggs

30 mls milk

2 heaped tsp flour

1 tsp salt

1/2 tsp black pepper

1/4 tsp baking powder

1/4 tsp dried basil

Grab a bowl.. Mix in all the above ingredients.. pour into cupcake molds & bake at 200℃ for 15 minutes.. pull out and eat. This was sooooooo awesome.. i made three of these little monsters and wolfed them down like there was no tomorrow.. these are so tasty and tender and every possible adjective for awesome.

Here’s another picture.. look at it and drool and make them asap..