Olive rosemary focaccia


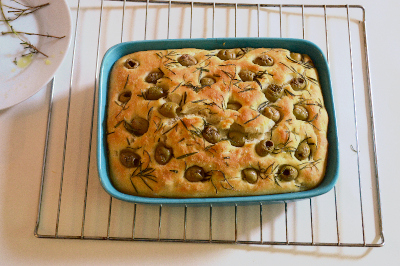
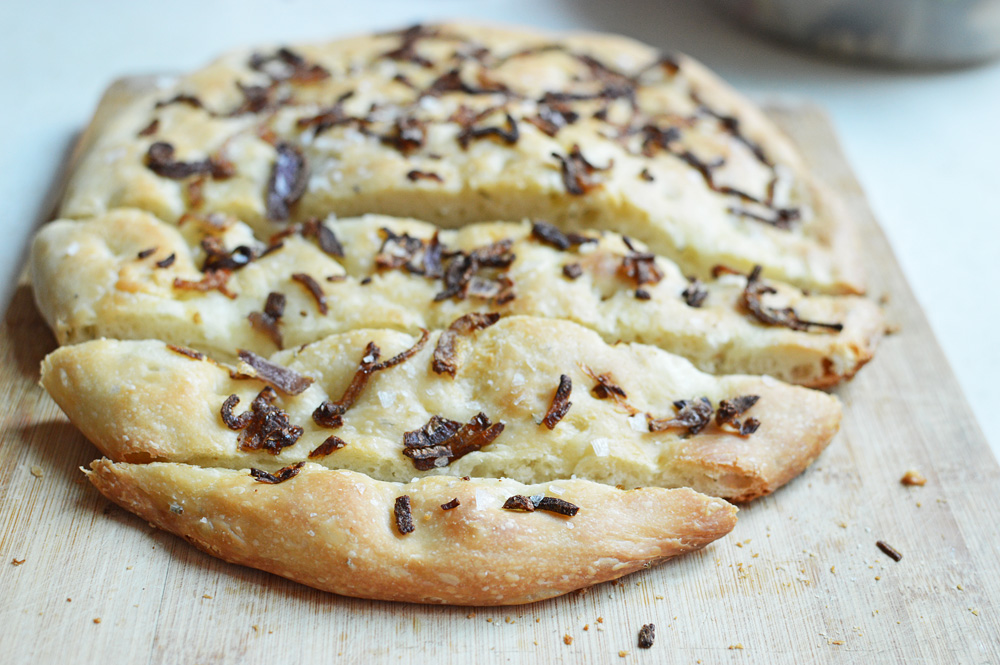
It’s been a while since everything and among other things that I love and crave, bread is definitely the frontrunner and not finding any upon opening the refrigerator can be a bit surprising, agitating and often tends to send me on a downward spiral of domestic crisis which is why and when I ended up with this coppery slab of carb heaven.

The thing about focaccia apart from creating your very own custom flavour is the straightforwardness of the whole process because there isn’t any particular shape that we need fret over and it’s all too easy to begin tearing into one the moment it’s out of the oven, moreover I like slicing stale focaccia into slivers and toasting it in the oven to make crispy crouton like sticks.

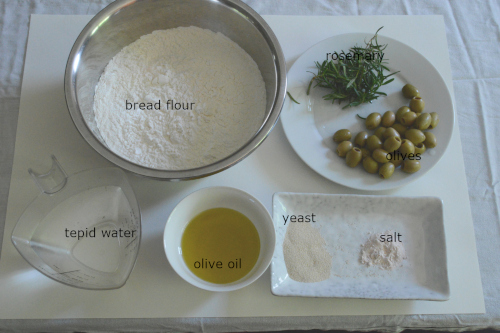
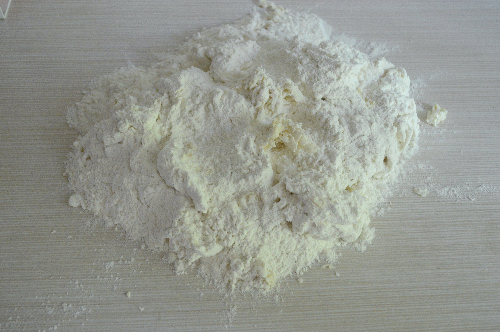
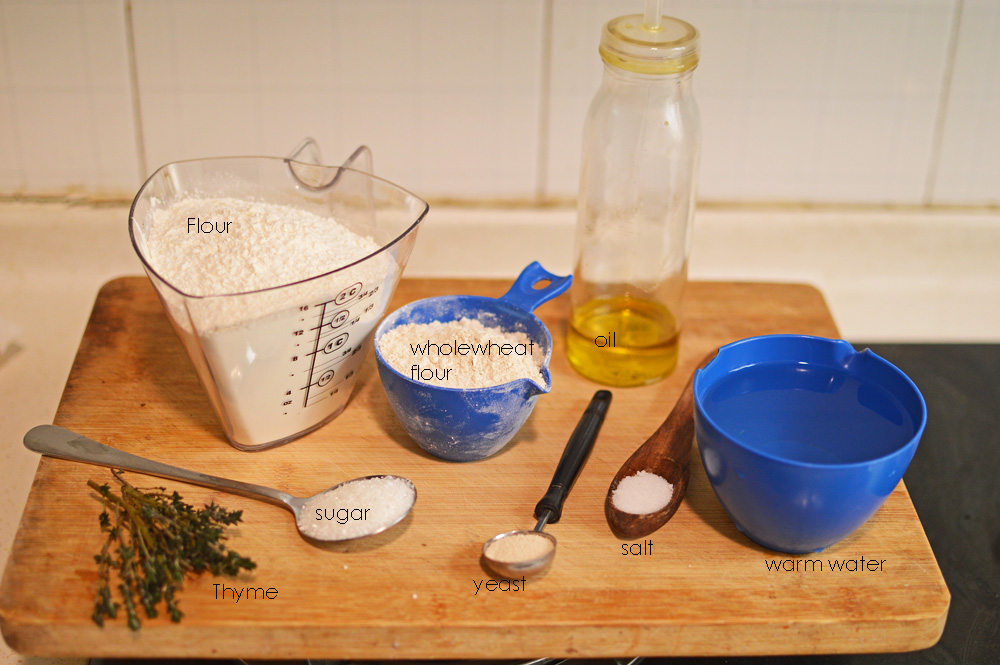
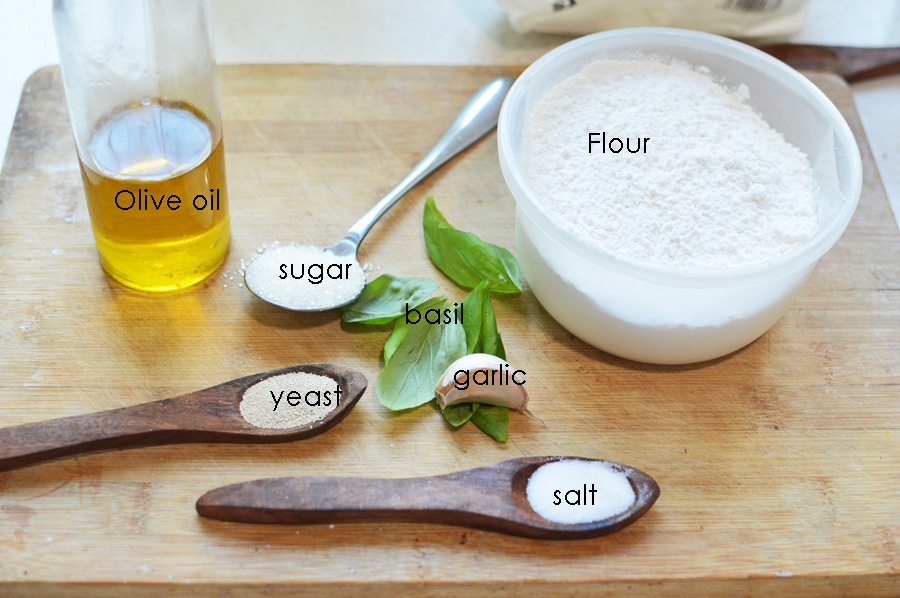
As all breads go, focaccia also begins life with flour and yeast and so here we have bread flour, tepid water, olive oil, yeast, salt, rosemary and olives.

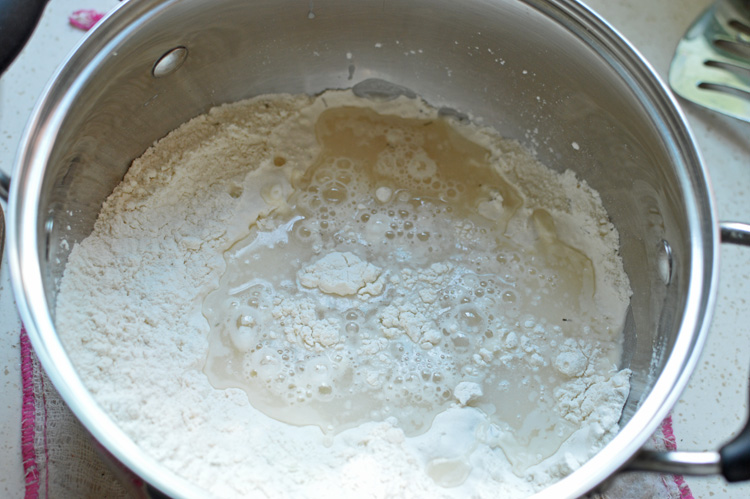
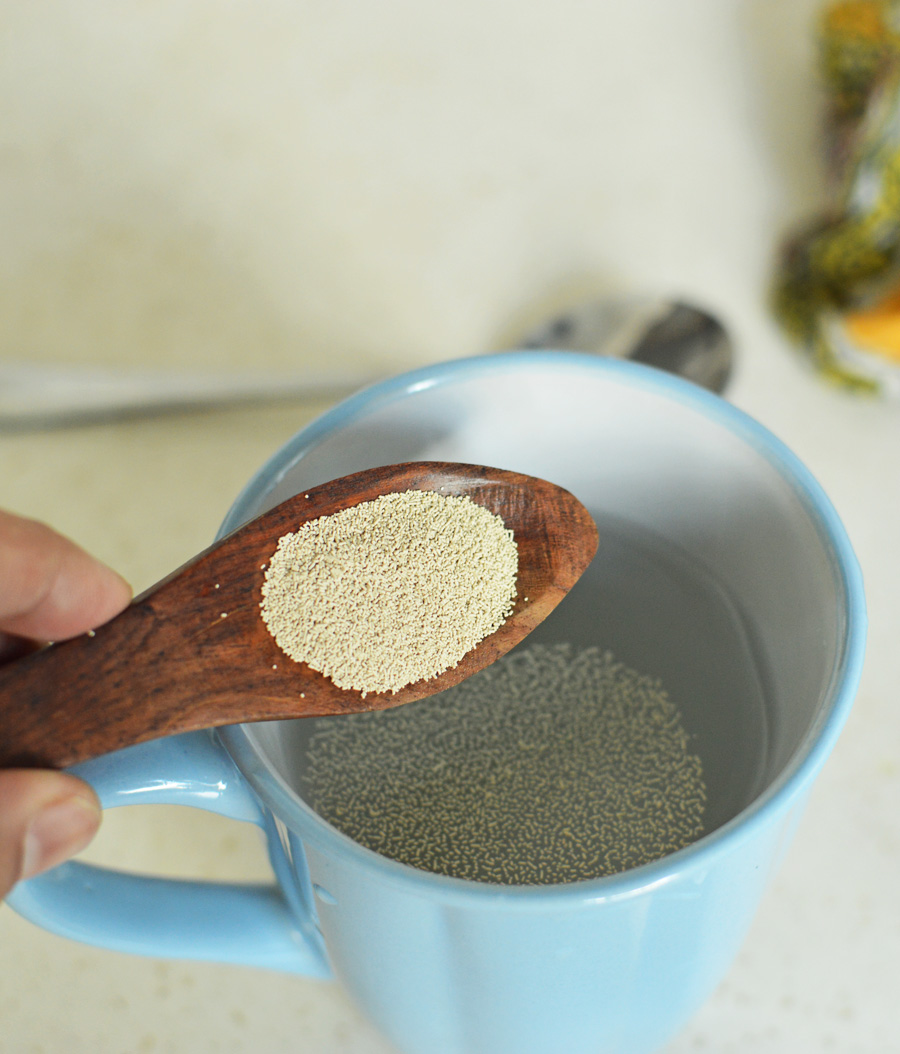
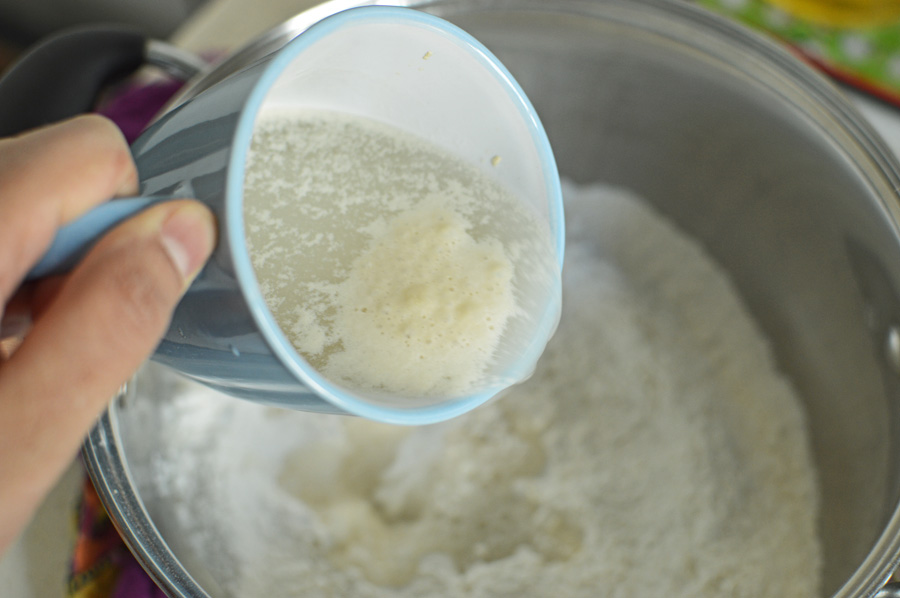
Begin by adding yeast into the water which is just warm to the touch and let it sit until it foams. You need good, fresh yeast for that or else the dough won’t rise.

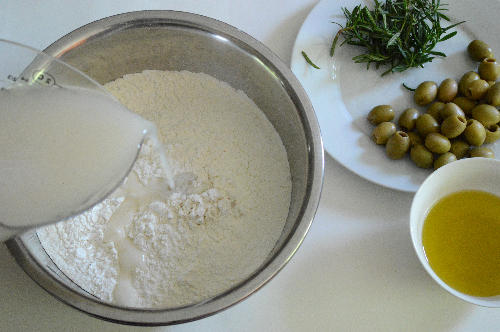
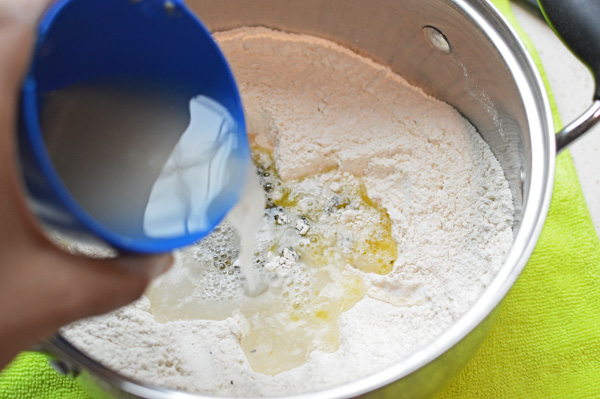
Once the yeast has nicely bubbled up, add it to the flour

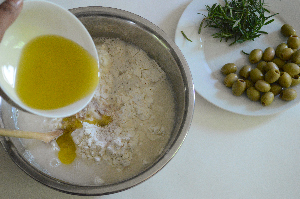
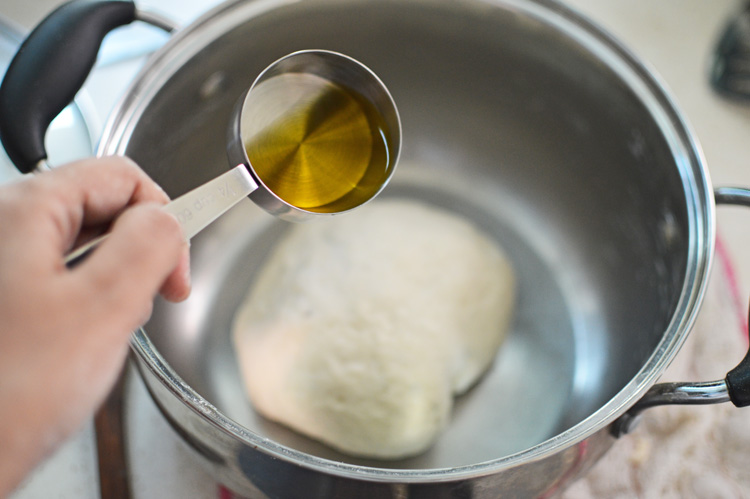
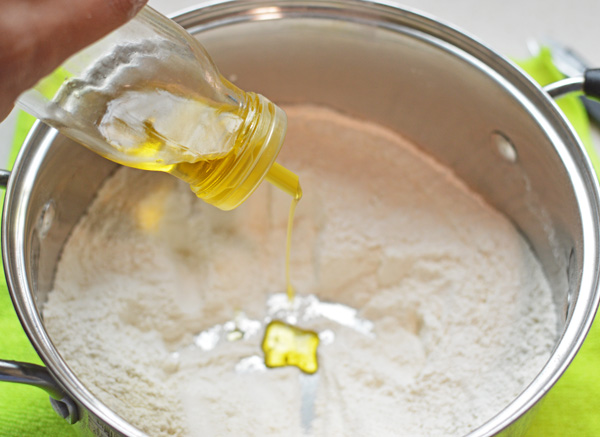
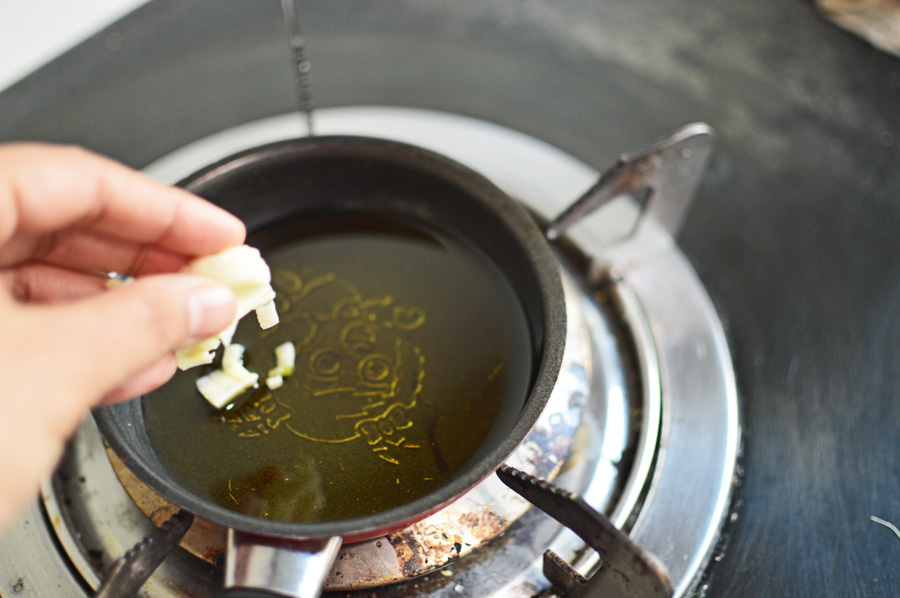
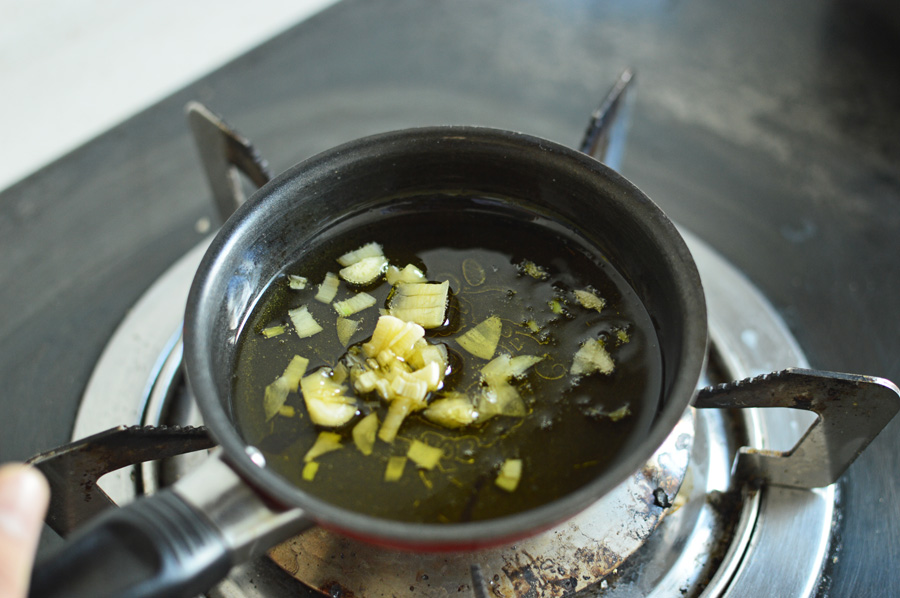
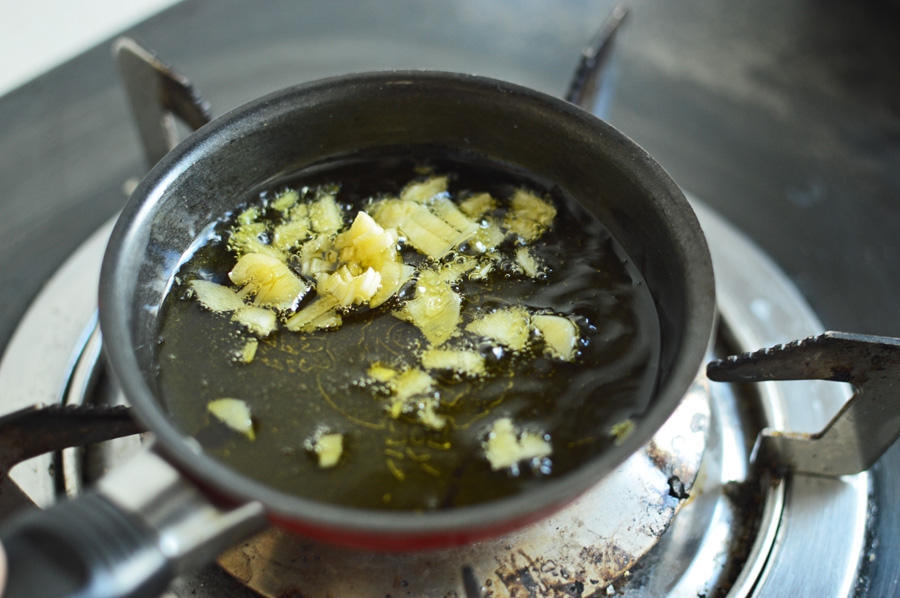
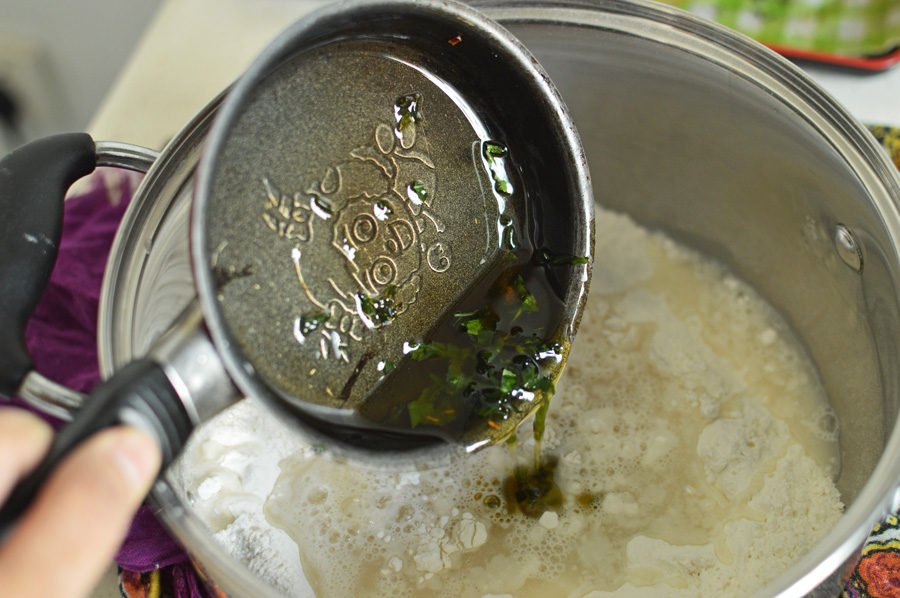
along with half the olive oil, reserving the rest for later

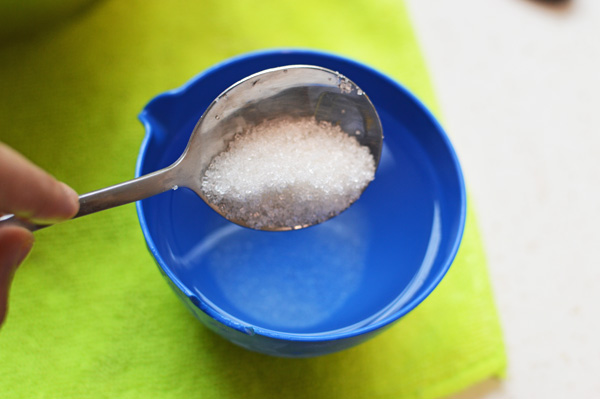
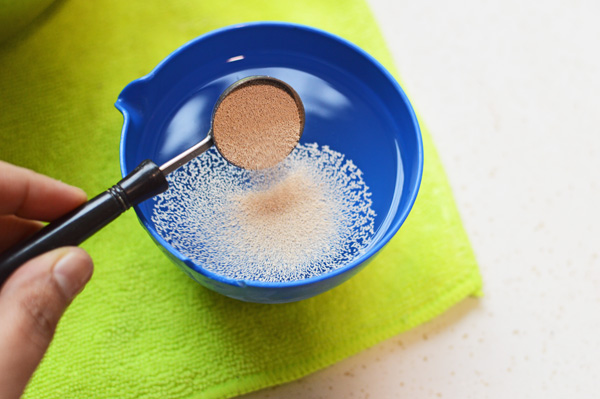
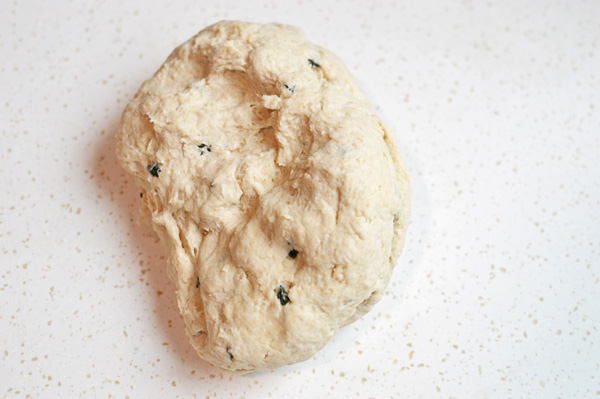
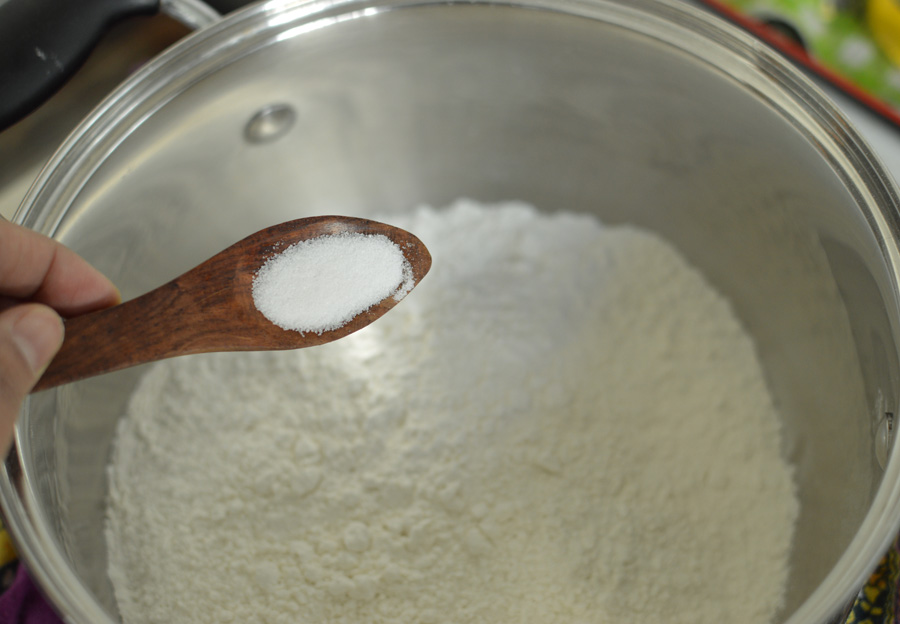
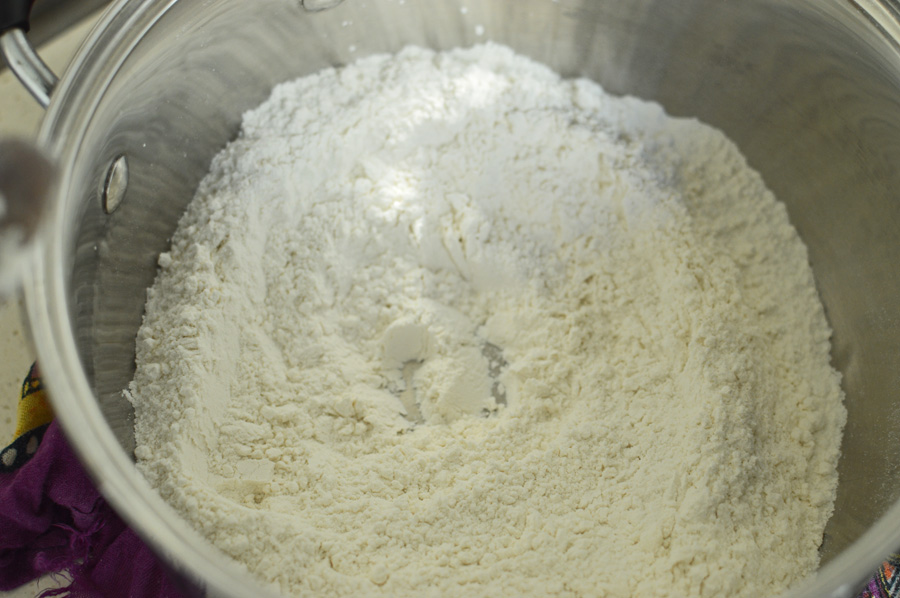
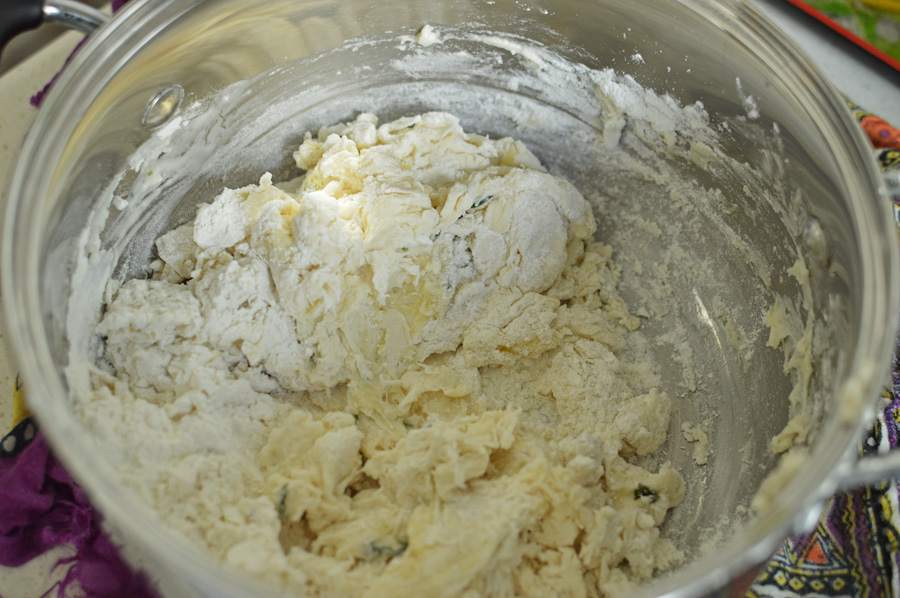
add salt and mix it with a spoon until it forms a shaggy dough

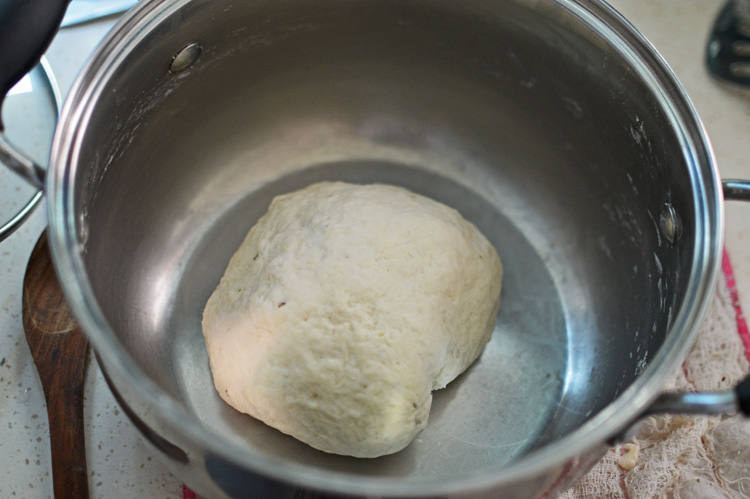
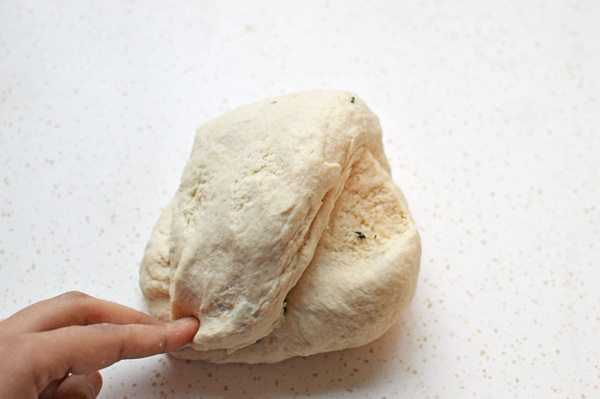
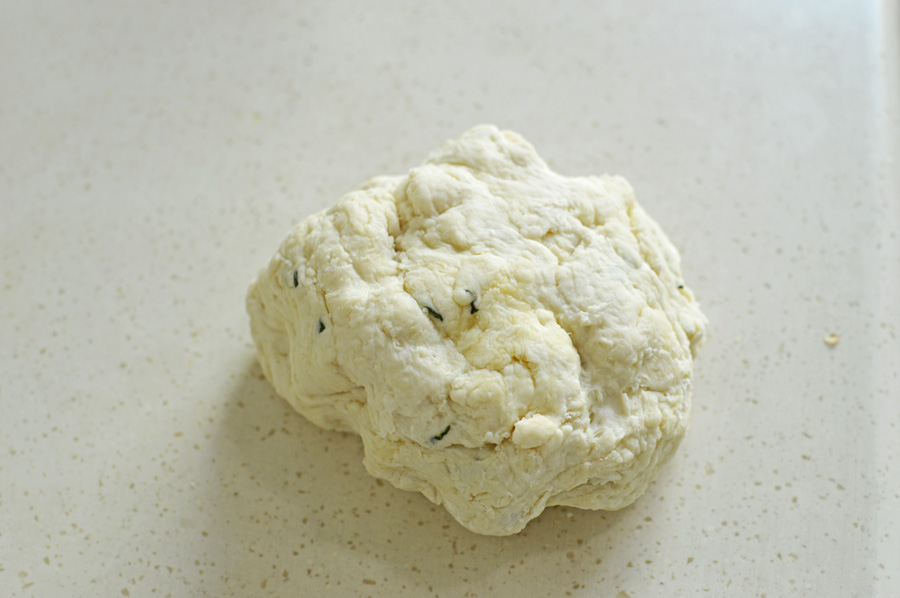
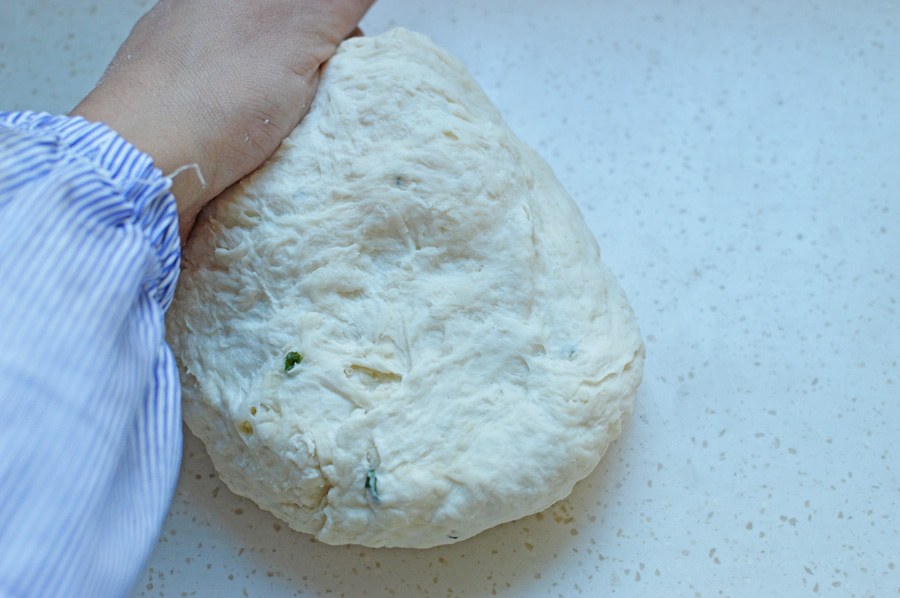
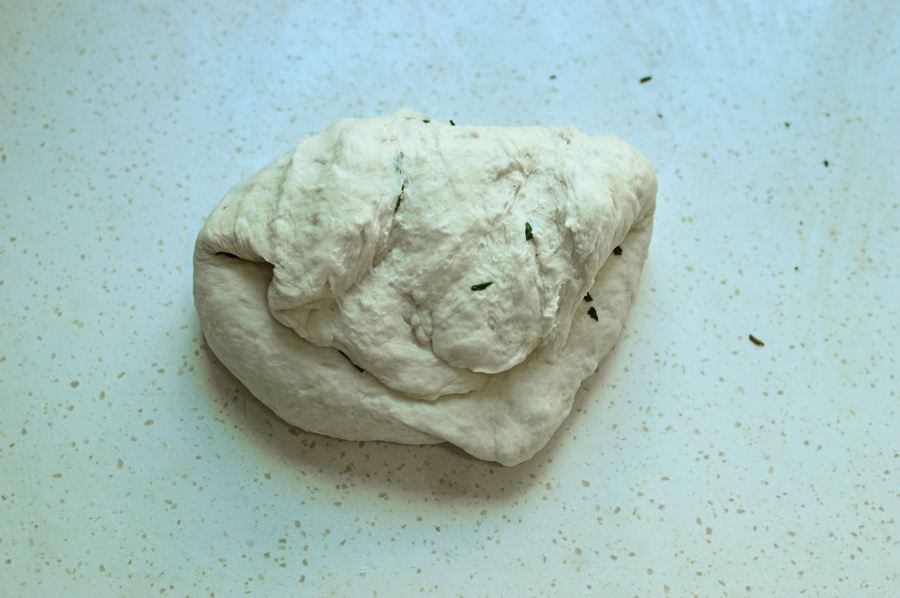
Transfer to the countertop and knead until smooth and pliable adding more water a little at a time without making it sticky.

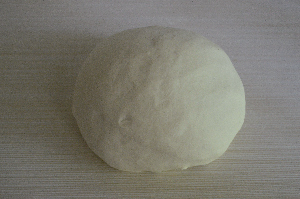
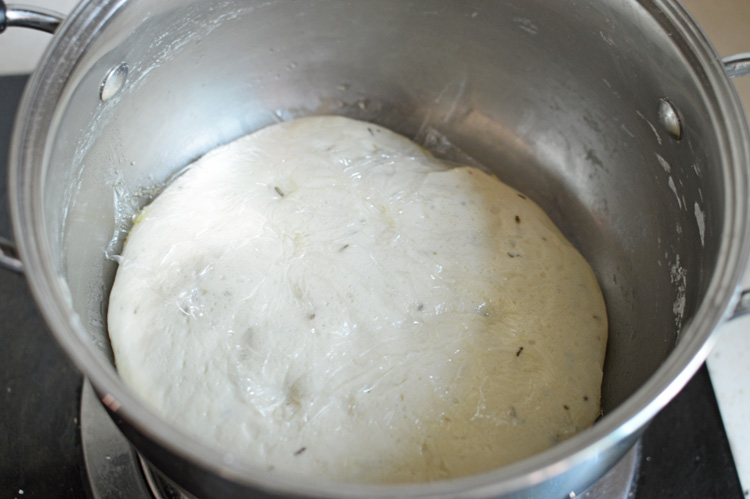
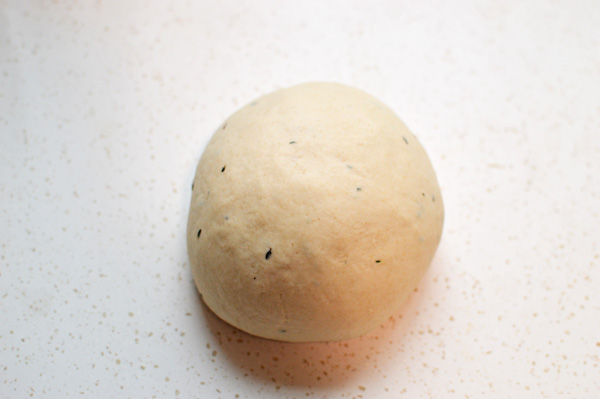
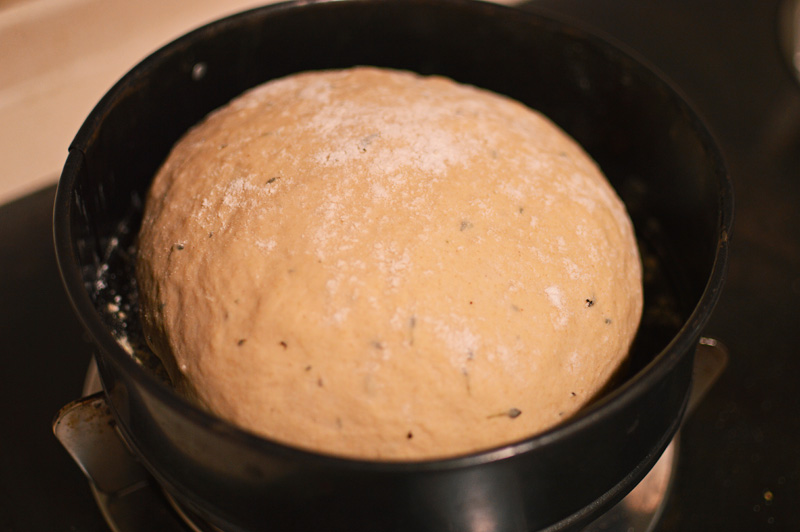
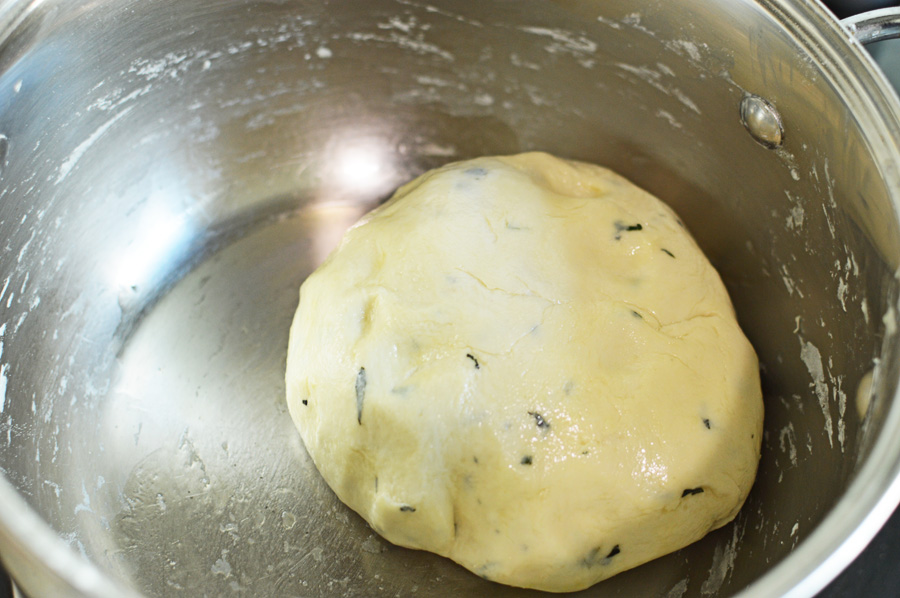
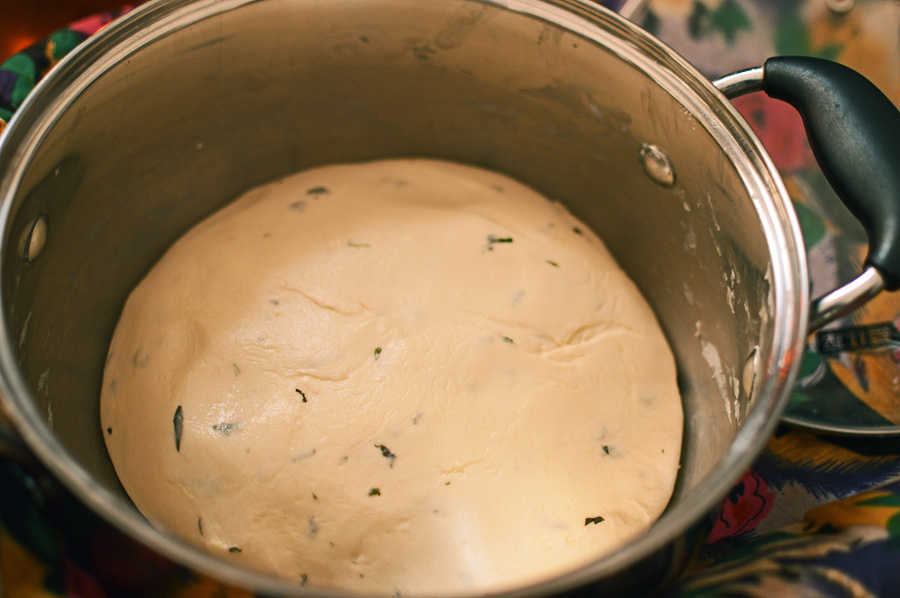
Let it rest in a warm place for a couple of hours until doubled in size. You can even leave it in the fridge overnight.

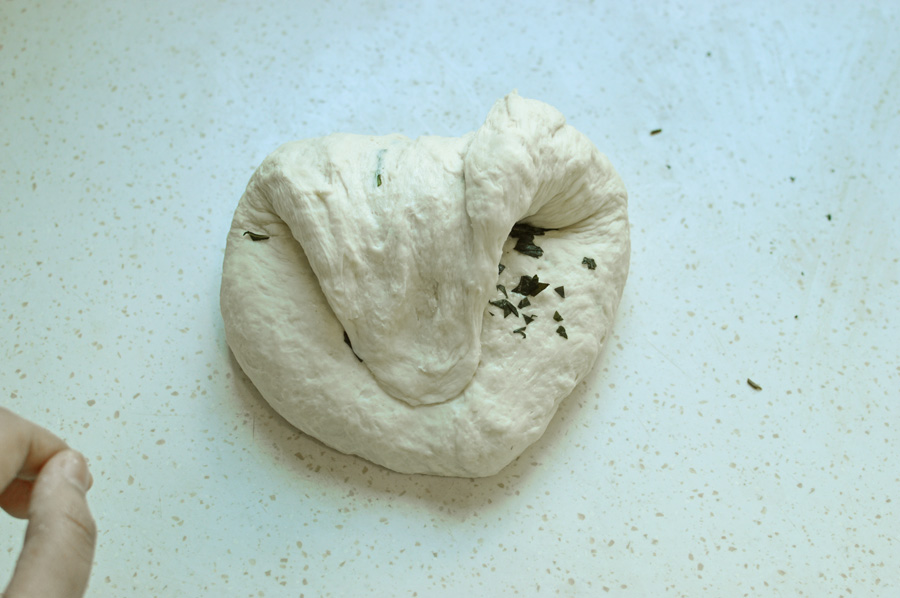
Once risen it is ready to be formed into bread.

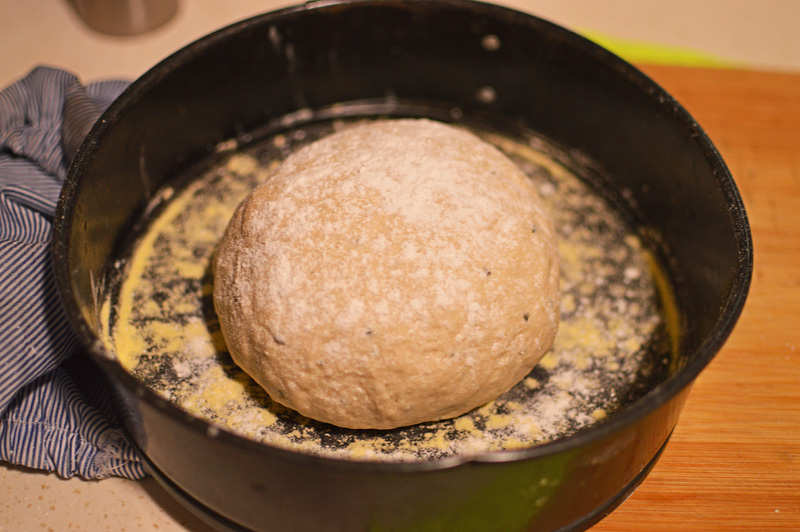
Punch it to deflate. Not only because it’s important but also because it’s fun.

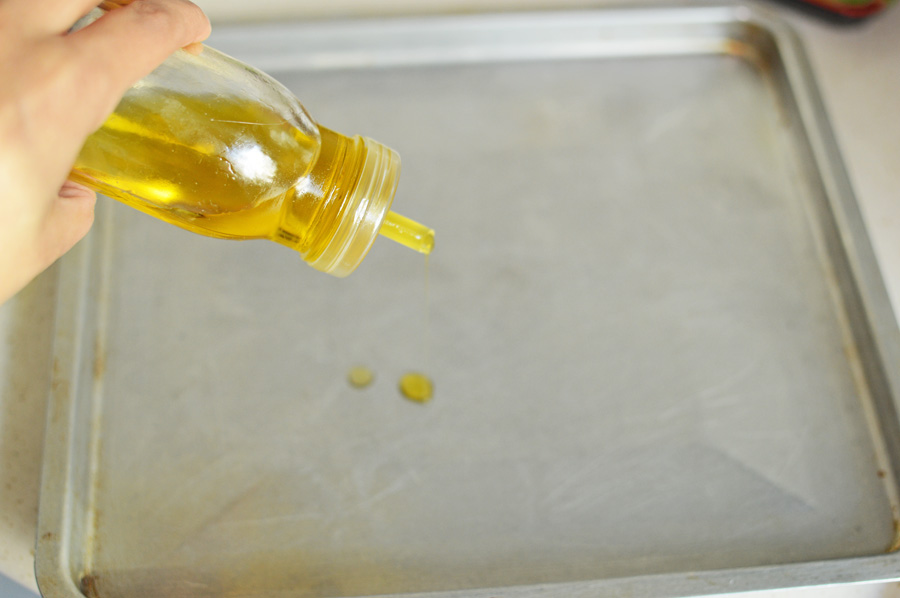
Prepare the baking pan by oiling it generously

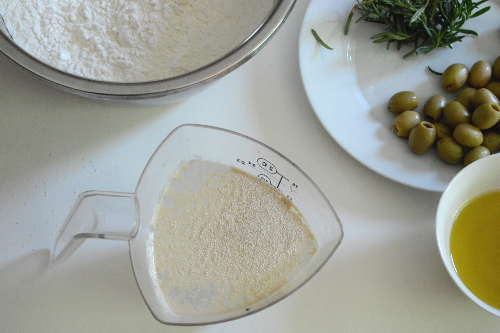
Sprinkle some semolina. This is an optional step but helps in the crisping of the bottom.

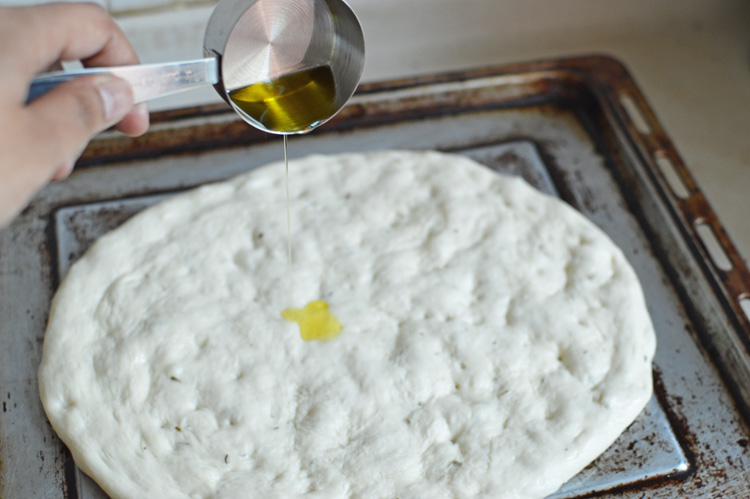
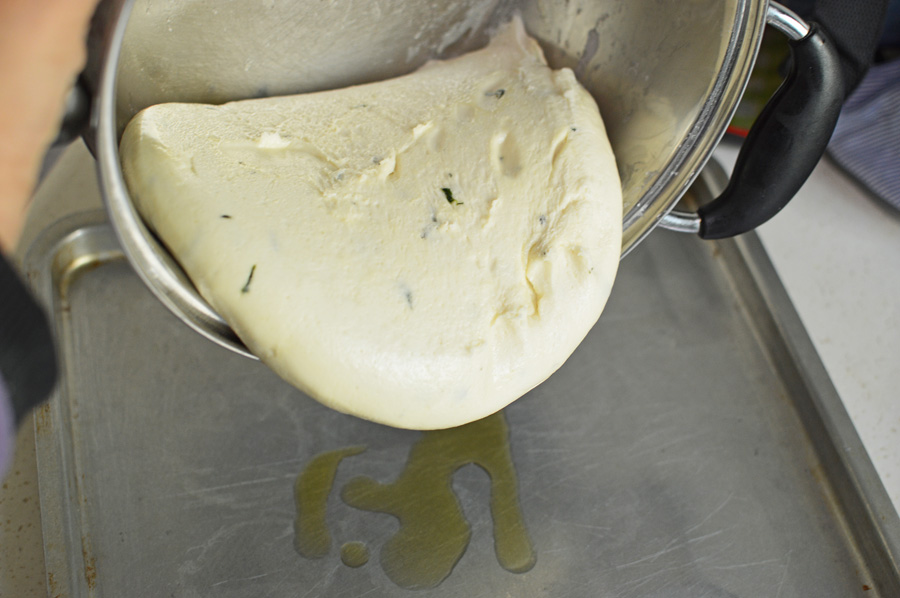
Scrape the dough into the tray

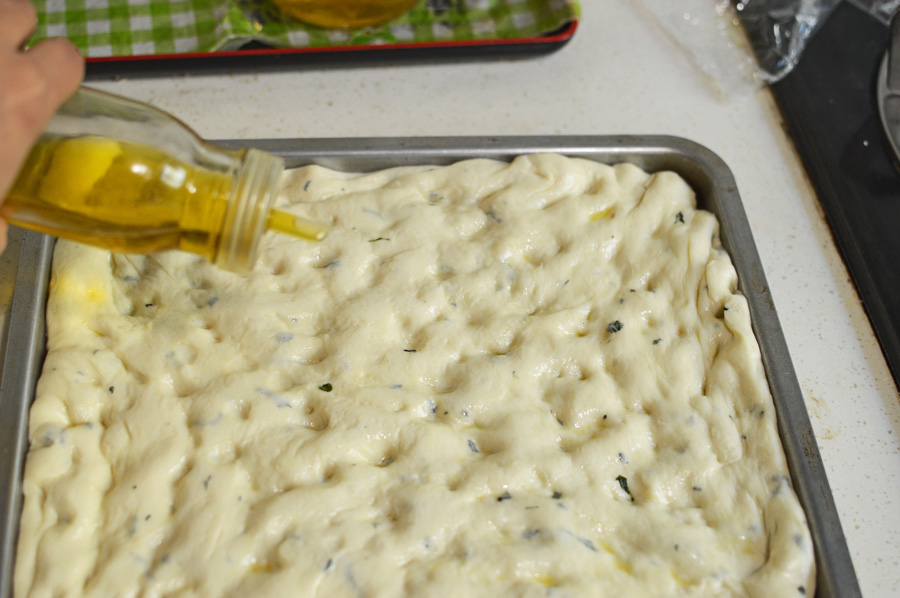
and brush the top with reserved olive oil. Be generous with the oil here. It’s crucial to this bread making process.

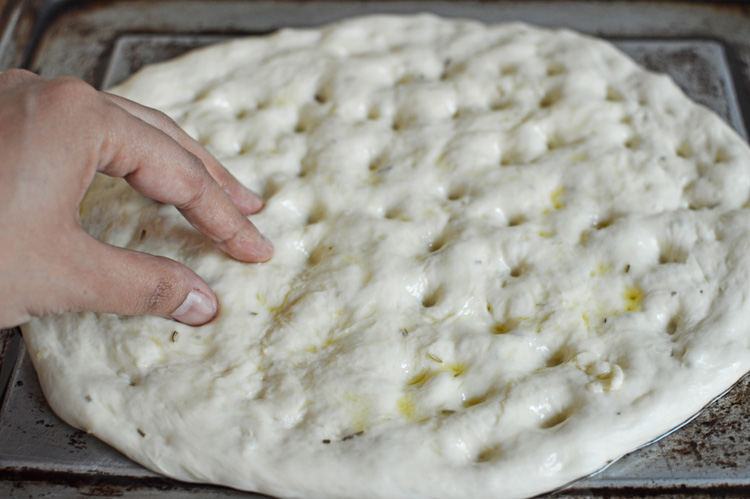
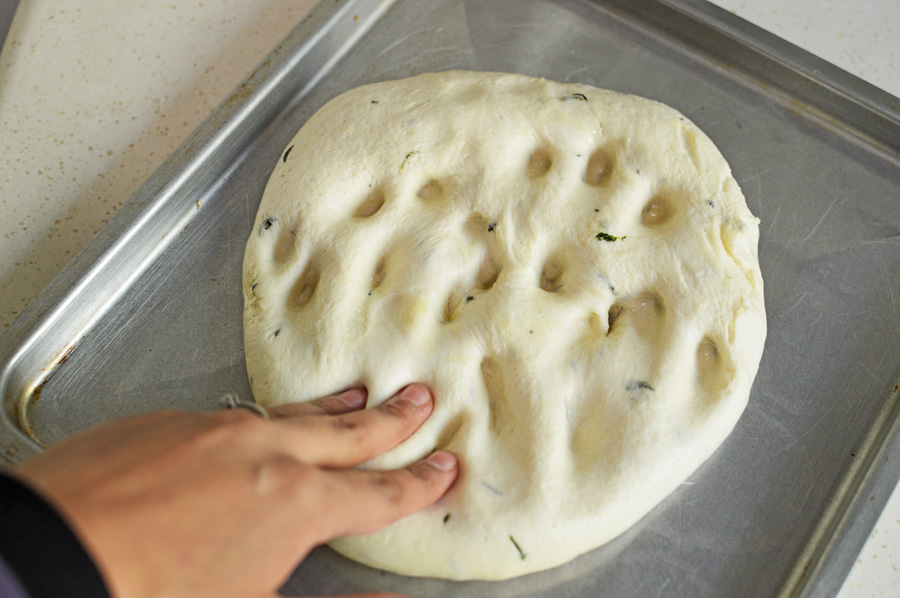
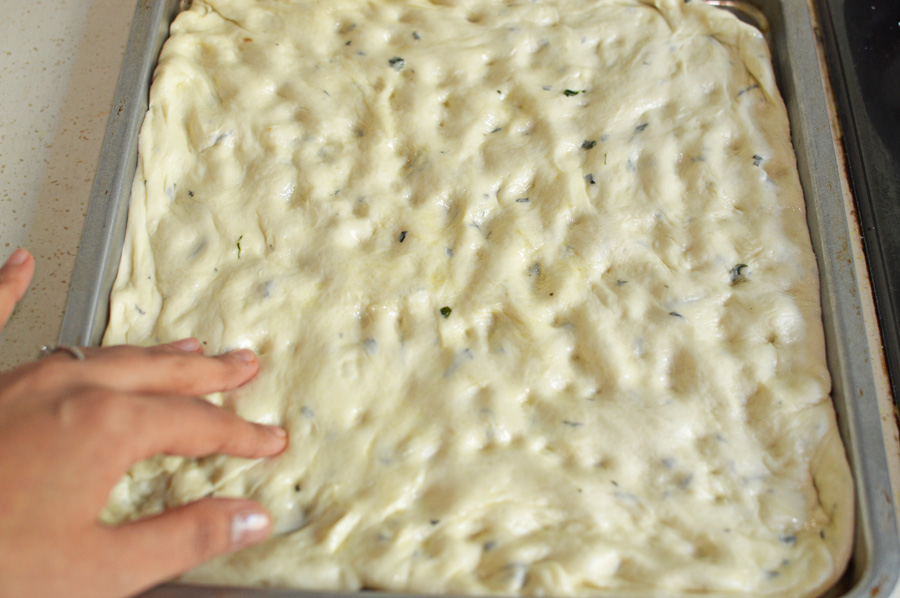
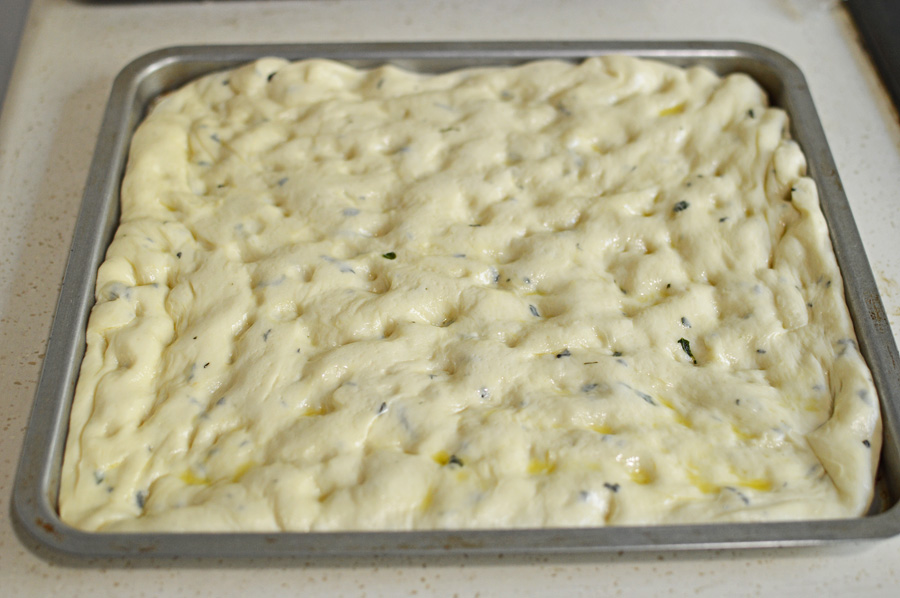
Push the dough with fingertips until evenly distributed in the baking tray, also giving it the typical focaccia dimpled look.

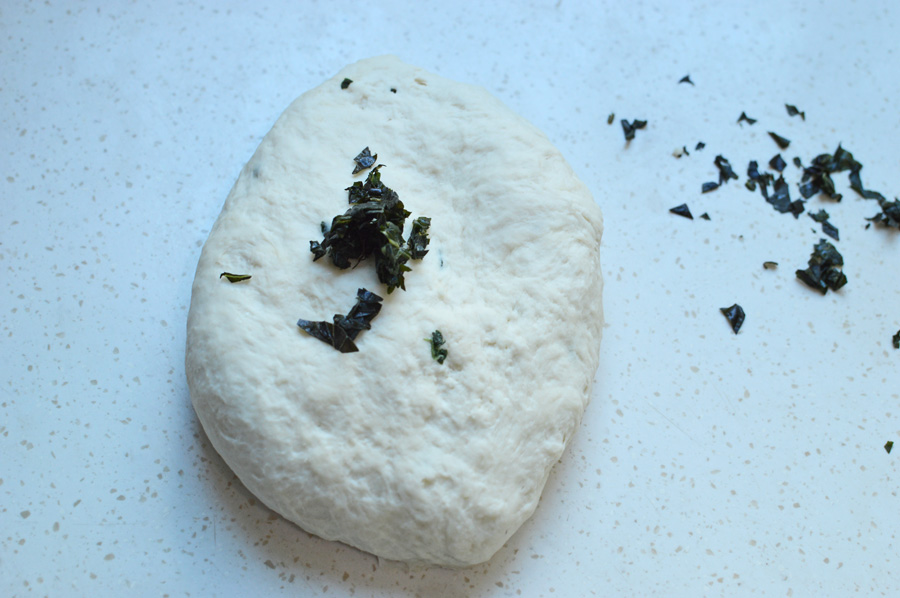
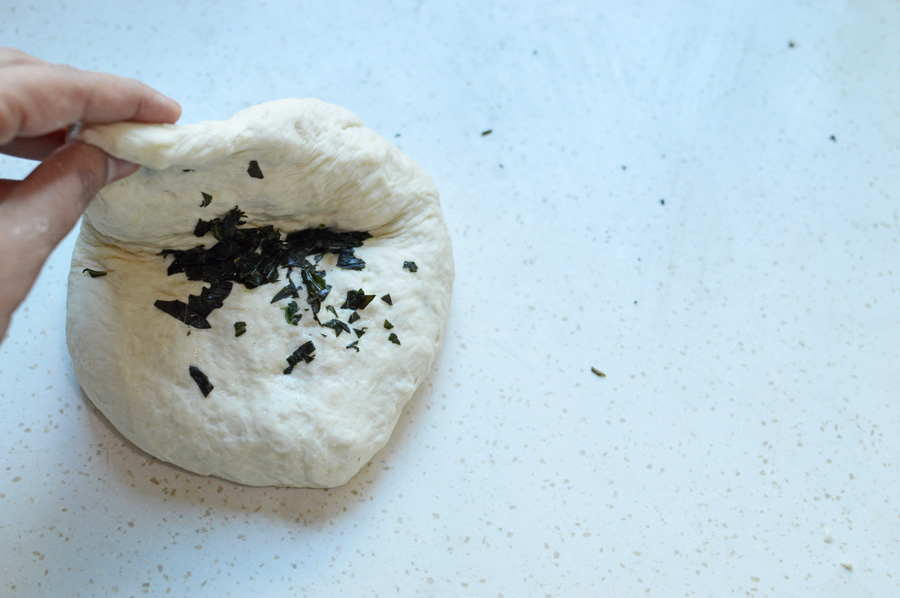
Stuff the dimpled surface with rosemary and olives and push them right into the dough.

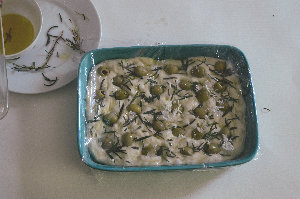
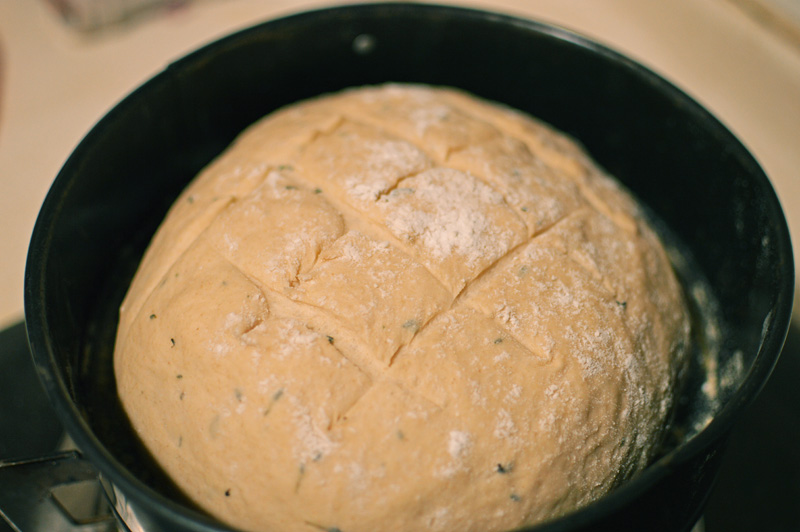
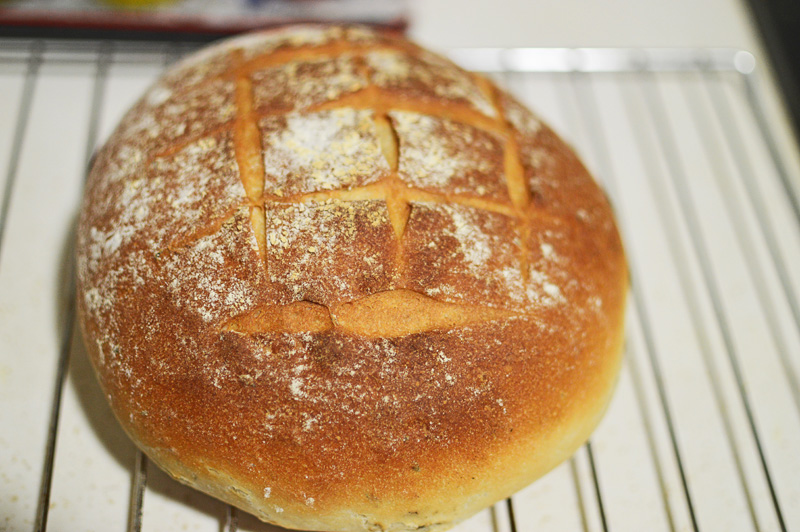
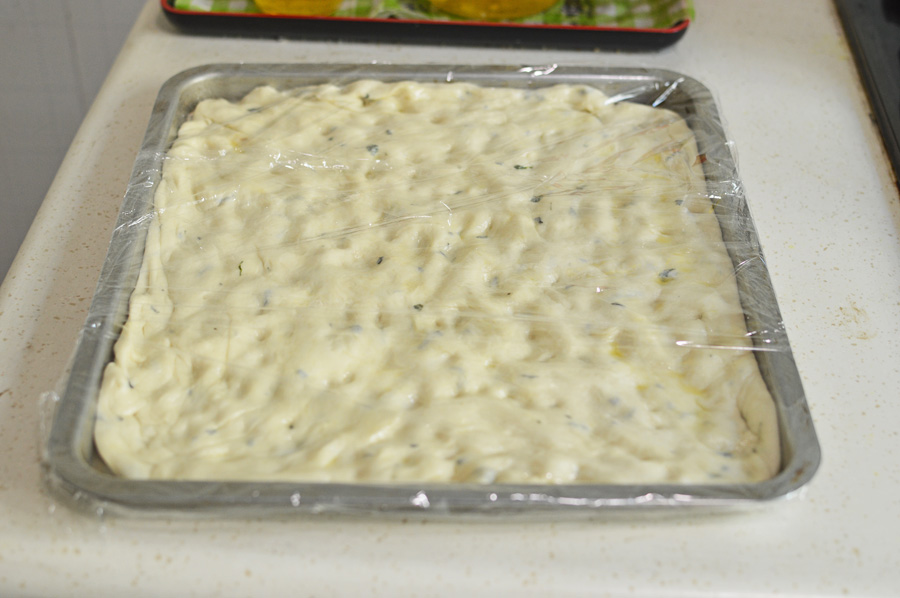
Cover and let rise for another hour before baking at 200ºC for 25-30 minutes or until the top is nicely browned and the bottom is slightly crisped up

Brush the just baked bread with olive oil and let it rest at least ten minutes before serving.

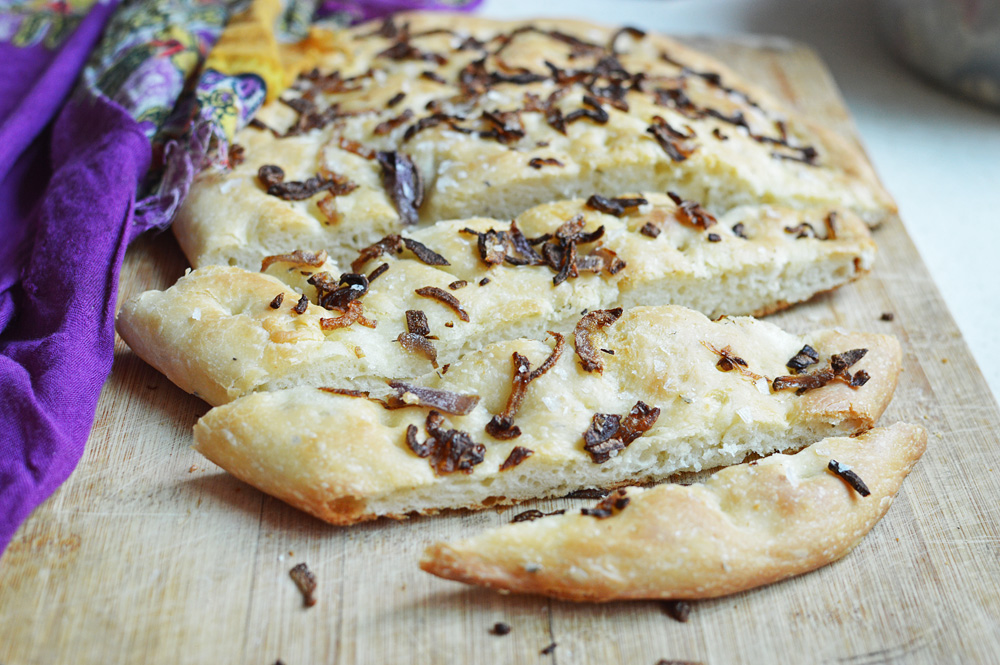
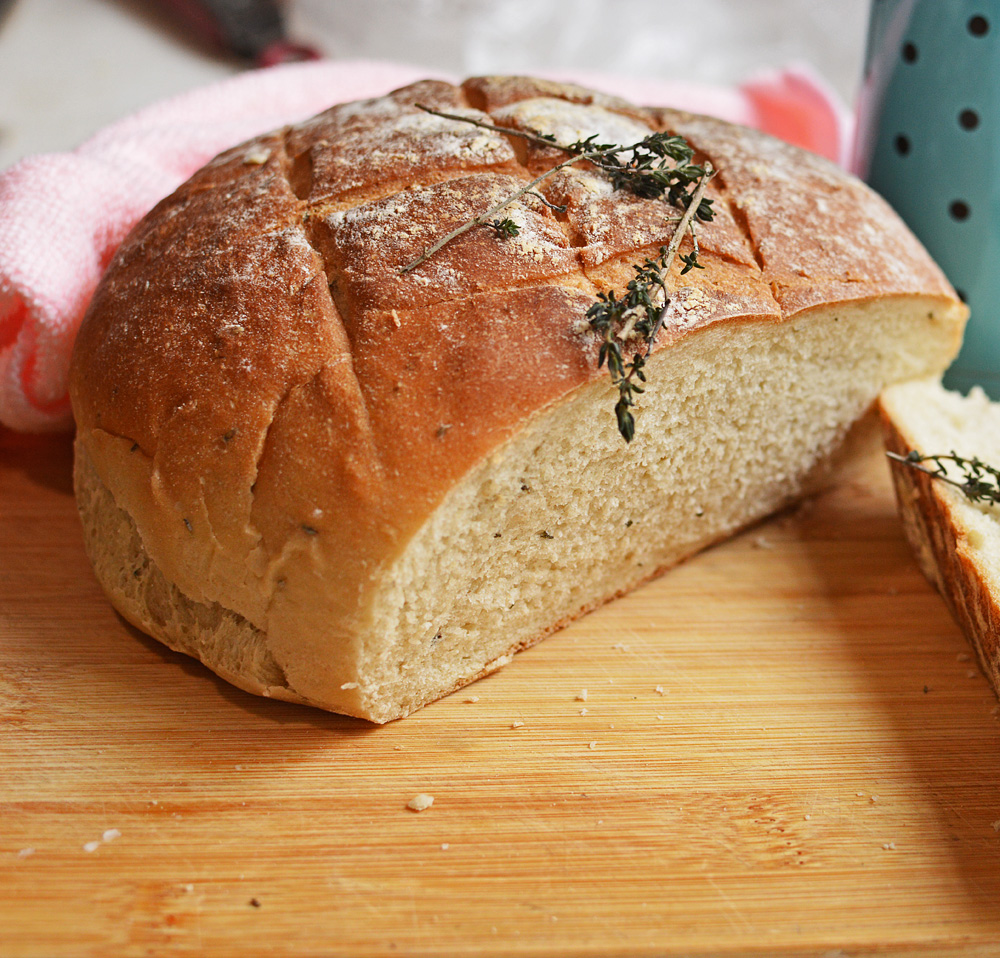
Here’s a cross section of this delicious focaccia. It’s soft, spongy and moist and deliciously satisfying.


Ingredients

  • Flour: 700g
  • Yeast: 2 tsp
  • Warm water: 300mls + more for kneading
  • Salt: 2 tsp
  • Olive oil: 50mls
  • Olives: 100g
  • Fresh rosemary: 10g
  • Semolina: 2 tsp

Recipe instructions

Add the yeast to warm water and let it bloom. Make sure the yeast is fresh and not expired or it will inhibit the rising of the dough.

Add the water to the dough along with olive oil and salt and mix with spoon until just combined to form a shaggy dough.

Transfer to countertop and knead to a smooth pliable dough. Add more water if need be but a little at a time to keep the dough from getting sticky.

Let the kneaded dough rest in a warm place for a couple hours or until doubled in size. You can even let it rest in the fridge overnight.

Once the dough had doubled in size, deflate by punching and scrape into a well oiled baking tray sprinkled with semolina.

Push the dough to fit into the tray with fingertips giving it the typical dimpled look and stuff the surface with rosemary and olives.

Cover and let rest for an hour before finally baking in a preheated oven at 200ºc for 25-30 minutes or until the top has bronzed and the bottom lightly crisped.

Brush with olive oil and let rest for at least ten minutes before serving.

Spicy eggy bread


DSC_0140When you get tired of your daily egg and bread breakfast and wish to twist it into a spectacular bronzed meal of cheesy topping, you make these babies; that in reality are nothing more than your daily fare of omelette and bread, all jeujed up into spicy fragments of burnished toasts. Not only do they take away from the mundanity of an everyday same ol’ breakfast but also kick it up a notch with flavours that feel just right for the most important meal of the day.

Also a good way to use up any leftover bread that you’ve been trying to ignore.


DSC_0100 copy

The ingredients are not much and can easily be improvised to suit your taste buds. Just butter, oil, pepper, paprika, milk, eggs, spring onions, cheese and bread.


DSC_0101

chop spring onions as fine as possible, or not. Totally depends on your morning mood.


DSC_0104

Shove it into a bowl and crack a couple eggs on top.


DSC_0105

add in the milk


DSC_0106

a few shakes of paprika, and at this moment this bowl feels like it’s got a face.


DSC_0108

scrunch in some black pepper. Don’t be shy, smatter generously.


DSC_0109

and finally salt. Not a lot.


DSC_0110

mix everything until it’s pretty well mixed.


DSC_0112

get onto a bit of bread knifing. Now this step could totally be dispensed with if you’re using stale sandwich bread like one should, but somehow I had this stale piece of baguette that no one wanted to touch with a ten foot pole and thus had to use it up.. how it crumbles. Domesticity you see.


DSC_0114

Take some time to chop, shred, grate some cheese. Any cheese you fancy. I’m using Manchego cheese because there were a few slices knocking about in my fridge.


DSC_0113

soak pieces of bread into the spicy eggy mixture


DSC_0116

in the meanwhile heat some butter in a bit of oil.


DSC_0117

flip bread on the other side so it soaks up all the eggy richness evenly.


DSC_0118

once the butter begins to froth, place bread slices onto the foamy fat. Don’t let the skillet get too hot, or else you’ll burn this artistic piece of heavenly breakfast. Dot the tops with whatever onions are let languishing in the bottom of the bowl.


DSC_0120

Turn them over a dozen heartbeats later, totally depending on the heat. Try and keep the heat towards medium.


DSC_0124

and immediately stick cheese on these bread slices


DSC_0129

like so. Well, the hardest part is all done.


DSC_0130

reduce the heat to low and cover the skillet with a lid for about thirty seconds or so.


DSC_0134

Voila! it’s like magic. A moment ago there was lid and now there’s melting cheese and an easy most delicious breakfast on your table.


Ingredients

Eggs: 2

Milk: 1/4 cup

Spring onions: 1-2

Cheese: 2 tbsp

Bread: 2 slices

Pepper: 1/4 tsp

paprika: 1/4 tsp

salt to taste

Butter: 1 tbsp

oil: 1 tsp


Recipe instructions:  finely chop spring onions and into a bowl with eggs, milk, paprika, pepper and salt. Mix well.

Coat slices of bread with eggy mixture on both sides and cook in foaming butter+oil mixture over medium flame on a skillet.

Turn over after half a minute and sprinkle cheese on the cooked part. Turn gas to low and cover the skillet with a lid for another minute.

Your spicy eggy bread is done!


Onion focaccia


DSC_0384As a lover of all things carbohydrate and more specifically bread, flavourful focaccia is probably among the top five things I want to be seen dead with. There’s an almost borderline obscene love that I treasure for this bread. I mean honestly, it’s flat, chic, flavoured, reeking of olive oil and begs to be torn mercilessly into choicest shards, to be shovelled into your mouth with absolutely no regrets.

This to me works as an appetizer, a full meal, a snack, a towel to wipe my tears, a snug bed that doesn’t judge me, a mop for gravies, a lover, a husband…..

This blog already has a garlic basil focaccia recipe, and the premises for this wonder are no different. Onion somehow lends a sublime sweetness and when it’s caramelized dark with crispy edges, it makes this bread go places…Basically my kitchen to my bed where I spend all night fighting my body image issues with this lovely bread.

So here it is.

DSC_0334nregular bread stuff; flower, olive oil, warm water,  yeast, salt, sugar, dried rosemary and sliced onions. I’m using dried rosemary because I have no fresh ones available, but if you do please go ahead and up the quantity a bit.

DSC_0335let’s get bread making first. Sugar into warm water

DSC_0336followed by yeast. followed by a ten minute wait to let the yeast foam up.

DSC_0339in the meantime dump your flour in a big bowl

DSC_0340followed by salt

DSC_0341and a blurry picture of rosemary

DSC_0342followed by the foamy water.

DSC_0344and our star of this show.. the studly extra virgin olive oil ( about half of the total quantity), that shies from rough handling. Knead to make a smooth dough.

DSC_0345something like this. I kneaded the dough for at least 10 minutes, but in case you have a mixer of sorts go ahead and make your work easier, only you won’t love this bread as much.

DSC_0347We have to let the bread rest to puff up and become more bread like. So back into the bowl smeared lovingly with some more olive oil. Cover well and let it rest for at least an hour or until the bread has doubled in size. Mine almost took two hours. It’s cold here.

DSC_0348in the meantime, let’s get cracking with the onions. a frying pan on medium heat and a tablespoon of regular olive oil, just to get the onions sweating.

DSC_0351in with the onions.

DSC_0352slick well with oil

DSC_0353a pinch of salt, just to get them nice and soft

DSC_0355Now we’re talking. This is after about five minutes of cooking. They’re perfect like this but I like them a bit more caramelized.

DSC_0356something like this.

DSC_0357Reserve until the dough is ready.

DSC_0359which might look something like this. It’s aromatic and gorgeously flecked with rosemary. Punch it down and knead for a minute.

DSC_0361some more olive oil on your baking tray

DSC_0363to have the kneaded dough sit on.

DSC_0364Now to turn this bread dough into focaccia. Flatten it down

DSC_0365like so, without making it too thin. Spread some more olive oil and..

DSC_0367give it that characteristic focaccia dimpled look, by simply pushing in your fingers deep to make pretty little dents and have the oil pool in them. so pretty!

DSC_0368like so. If at this stage you feel that there isn’t enough oil on top and that it looks dry, just pour in some more. This looked perfect, so onions now.

DSC_0369like so. Make sure to push them in, or else they won’t stick.

DSC_0370cover and let rise for another 45 minutes.

DSC_0371Now for some wonderful smattering of crunchy sea salt, for what is focaccia without a smear of sea salt?

DSC_0373It’s risen a bit more after the second rising, and you’ve to simply sprinkle the salt on top and bake at 200℃ for 30-35 minutes, or until the top is nicely browned and the onions caramelized to a devious crispy dark

DSC_0375like so,  but wait!

DSC_0377some more extra virgin olive oil for the top to gleam and glow.

DSC_0382apply to face. This bread is a breeze to make and a delight to eat. Dunk in more olive oil, or sauce of your choice and make a meal of it.

Ingredients

Bread flour: 300g (around 2 cups)

Warm water: 200ml ( a little less than a cup)

Yeast: 1 teaspoon

Sugar: 1 tablespoon

Salt: 1 teaspoon

Rosemary: 3/4th teaspoon

Extra virgin olive oil: 80ml (1/4 cup)

Onion: 1 medium sliced thin

sea salt: 1 teaspoon

Preparation Instructions: Dissolve the sugar and yeast in warm water and leave for 10 minutes to activate and foam.

In a large bowl mix flour, rosemary and salt. Once the yeast water has foamed, add into the mix along with half the quantity of extra virgin olive oil. Knead to form a smooth dough (if the dough is too dry add more water, if it’s sticky add some flour) and let it rise for at least an hour or until it’s doubled in size.

Cook onions on medium flame in some regular olive oil until soft and translucent. Reserve.

Once the dough has risen, knead it for another two minutes and flatten out on a well oiled tray (use a tablespoon of the remaining oil), making dimples with your fingers and add some more oil to the top.

Spread the cooked onions on the top evenly and push them in so they stick. Wrap and let rest and rise for another 45 minutes.

After the second rising sprinkle top with some sea salt and bake at 200℃ for 30-35 minutes, or until the top is nicely browned. Brush the remainder of the olive oil on top and let it rest for at least ten minutes before you dig in.

DSC_0387Enjoy!


Thyme scented bread


DSC_0599It’s been a while since I posted anything, but only because it’s been extremely, annoyingly, unbelievably, obnoxiously, stinging, frigidly cold. Yes it’s been very cold and some more. I don’t think there was ever a moment when it wasn’t snowing, or raining or hailing or a combination of all three. The weather is slightly better now. It’s not as frozen and water doesn’t seem all that spiteful but it’s severely cold still and of course there is nay a ray of sunshine.

What’s a carb loving gal to do in this hateful weather.. why of course bake some bread and shove it down in one big cartoonish gulp, because as I write I’m feasting on this ethereal scented bread, weighed down with copious amounts of butter and my computer has a severe case of the crummage.


Getting down to business, this bread is delectable, heavenly and all the good adjectives. It’s ever so slightly scented with thyme and this subtle perfume gives this bread an elevated elegance, which is so desirable in this weather. Also it’s easy and fun.

DSC_0542cBasic ingredients, except I wanted some heartiness to it, which is why I added whole wheat flour. It just takes the bread from mundane to exquisite. So..thyme, regular bread flour, whole wheat flour, yeast, sugar, salt, warm water and some oil.

DSC_0544into a large bowl, dump in your flours

DSC_0545add the salt and mix

DSC_0547into the warm water add in sugar

DSC_0548the yeast

DSC_0549mix and set aside to let the water foam in peace.

DSC_0550de-stalk the thyme in case you’re using fresh stuff.

DSC_0552once the yeast has foamed, make a well in the centre of your flour mixture

DSC_0553add in the oil

DSC_0554the thyme

DSC_0555yeasty water and mix together to form a dough. If your mixture is too dry add some more water, a teaspoon at a time, in case it’s a bit wet add some flour.

DSC_0557let it form a shaggy dough which has barely come together. Now start kneading. You have to knead for at least 10-15 minutes. It’s a good workout. You know you need it.

DSC_0558the best way to knead is to stretch it away from you.

DSC_0562then pull it back together. This gets the gluten going and the resultant dough is nice and springy. Repeat this step for at least 10 minutes and you’ll realize the dough has come to life. Trust me, you’ll just know it.

DSC_0563once it’s nice and soft and smooth and springy, form into a ball.

DSC_0567oil it slightly and let it rest for at least 1-2 hours depending on how warm your house is, making sure it’s doubled in size. 

DSC_0569once risen as you can see, it’s more than doubled, plop it out on your work surface.

DSC_0572punch it well to get rid of any air bubbles and knead again for another minute or so.

DSC_0573form into a ball.

DSC_0575and transfer on a baking sheet, bread pan or dish of choice. I dusted mine with some cornmeal but you can use semolina or flour.

DSC_0576dust some more flour on top. Cover and let rise again for another 30-45 minutes.

DSC_0578like so. mine took about 1 hour.

DSC_0580this step is completely optional, but I like doing it. I make some gashes or slashes to make it look like some artisan loaf. be careful while doing it, you do not want to deflate your bread so don’t Jackson Pollock it.

DSC_0582mmmkay!!  now bake at 200℃ for 20-25 minutes until the top is well browned and tapping the bottom makes the bread sound hollow.

DSC_0586like this!! you see this? So beautiful. You have to let it rest for at least 10 minutes. It’s going to be hellish hot.

DSC_0614ooooh mama!!! this bread is lightly specked with thyme, with a very subtle aroma. It’s soft and the whole wheat flour makes it a hearty mouthful.

DSC_0615this is what the interiors look like. It’s GORGEOUS!!!

Ingredients

Bread flour : 250 g ( 2 cups)

whole wheat flour: 70 g (about 1/2 cup)

salt : 1 teaspoon

sugar: 1 tablespoon

yeast: 1 teaspoon + a pinch

water (just warm to the touch): 250 mls (1 cup)

thyme : 1 tablespoon if using fresh or 1 teaspoon if using dried.

Oil: 2 teaspoons

Procedure: Add the sugar and yeast into the warm water and let foam. Add the flours into a large mixing bowl. Make a well in the centre and add in the oil, thyme and yeast water. Knead well for at least 10 minutes until the dough is smooth and springy.

Transfer into a lightly oiled bowl and let rise for a couple of hours until doubled in size. Once risen knead again for another minute and transfer into baking pan lightly dusted with flour. 

Dust the top of the bread with flour and let rise again for about 45 minutes. After the second rising bake at 200℃ for 20-25 minutes until the top is well browned and tapping the bottom makes the bread sound hollow.

Please give this bread a try, feel like a magician and feast like a Queen!!

DSC_0611another image to motivate you.. Enjoy!!!


Garlic basil focaccia


DSC_0616Focaccia sounds like an enigmatic lover. It’s the kind of romantic name that would roll off my tongue after going easy on the wine, when in the throws of passion I’d utter in a husky femme fatale voice and say ‘oh focaccia my love, I have killed Valentino to be with you forever’ or something idiotic like that.. except Focaccia isn’t some  chivalrous lover, it’s a chivalrous carb form, a wondrous bread if you must. A sort of flattened bread, slicked with olive oil and a treat to end all treats. Much like focaccia the lover, you’d want to take this bread back to bed with you.

Wonderful as it is, I decided to up the ante by adding in hints of garlic and basil, seeing that harsh winters were not too kindly with my basil plant I decided to experiment with focaccia and the results were nothing short of magnificent. It was delightful and not too overwhelming. The best part however, was that it was easy to make.

Not too fussy and without too many ingredients

DSC_0475Flour, sugar, yeast, salt, olive oil, basil and garlic.. also water which I forgot to picture.

DSC_0477Chop the garlic and basil not too fine.

DSC_0478we begin with the garlic part of focaccia and I do this by making some garlic oil. I didn’t want to put bits of garlic in my bread as I want the garlic flavors, but not too pronounced. Heat some olive oil in a pan or vessel of choice.

DSC_0480add in the chopped bits of garlic

DSC_0485let the oil heat up slowly sizzling the garlic

DSC_0486slowly as the oil heats the garlic will start oozing its flavours.

DSC_0487like so..

DSC_0488and when it just starts turning brown you turn off the heat because they will keep getting darker in the hot oil.

DSC_0489at this moment when the oil is really hot you also add in the chopped basil

DSC_0490 the basil will sizzle with the garlic and you’d wonder why this aroma has never been used for creating incense sticks.

Leave it to cool and start with prepping flour for the bread.

DSC_0491sugar into a cup

DSC_0493followed by warm water

DSC_0494followed by sprinkling of yeast. leave it to proof for about 10 minutes and enjoy the proofing show from afar without disturbing it please.

DSC_0495Use a big bowl or vessel of choice for the initial mixing of the flour. here is the flour in question.

DSC_0497sprinkle in the salt.

DSC_0498and mix and create a crater of sorts in the middle. This is where our liquid items will go i.e the yeasty water and the oil, and speaking of the oil..

DSC_0499aha!! it has cooled down and now we just have a small task at hand.. we need to get rid of these bits of garlic.

DSC_0500I use chopsticks, but please feel free to use fingers, spoon, fork.. it’s your oil.

DSC_0501chopsticks are efficient. this is in essence very good aromatic and strong-smelling garlic oil with a hint of basil. here is where I realized I need MORE BASIL!!

DSC_0502Back our yeasty water. see how well it has foamed.

DSC_0503Water into the flour

DSC_0504Garlic basil oil into the flour and get a mixing

DSC_0505mix with yer hands until it all just comes together.

DSC_0511you need space for kneading.. so dump it on a very very clean surface and start kneading.

DSC_0513I knead by pushing the dough forward and pulling it back. This is where I thought would be a good time to add some more basil.

DSC_0516Basil meet dough. Dough meet basil.

DSC_0517cover and knead

DSC_0518like so

DSC_0519and like this

DSC_0520keep kneading to form a smooth ball. I worked on this dough for about 10 minutes. It gives you serious muscles but if you’re not a fan of working out then by all means use your muggle gadgets.

DSC_0525Now this dough, like any other yeast dough needs to rest. I used the same bowl from the initial mixing and poured in some oil, because we do not want our lover to stick do we?

DSC_0527coat the entire dough with the oil and you can see that it’s a beautiful soft dough.

DSC_0528Cover and let rest for at least 1-2 hours or until the dough has doubled in size. If your house isn’t warm enough it might take longer but don’t fret.. it will get fatter.

DSC_0530there!! so big, so beautiful. Flecked so daintily with basil.. sigh!!

DSC_0531Now retrieve a pan or tin from the abyss of your pantry which you’d want the focaccia to bake in. Oil generously!

DSC_0533Pull your risen dough out of its hibernating vessel. You don’t need to deflate or anything, because we will soon be puncturing its smooth exterior with much-needed dimples.

DSC_0534Plop it on the oil.

DSC_0535and using your fingers, spread it to fit into the pan.

DSC_0537Like so. You only need gently coax it with your fingers and this smooth dough will fit beautifully. If you want a very fat focaccia please use a smaller, less wider pan.. however I like them lovers a bit lean so…

DSC_0539Now we oil it more, because it’s focaccia and it needs the good stuff. be sure to use good olive oil all the way.

DSC_0540Massage in the oil gently.

DSC_0543Cover well with a cling film and let rest again for another 45 minutes or until the dough has visibly risen and puffed up.

DSC_0544like so.

DSC_0546It needs some more olive oil. Don’t be shy and spread on. Don’t forget this is focaccia not some virtuous salad, so spread on the oil and do not feel ashamed.

DSC_0547like so. Make sure all it’s pretty dimples have some amount of oil pooling in it.

DSC_0549scatter some sea salt on top and now it’s ready for the oven.

DSC_0550Time for celebration!! a jubilant slab of exquisite focaccia to be feasted on. devour with your eyes for now and let cool a bit.

DSC_0566while it cooled I brushed some more olive oil because why not?

DSC_0608

There you go!! Dip in some more olive oil and enjoy!!!

The garlic and basil flavors were not overwhelming but very mild and subtle. If you want bigger flavors, by all means increase the garlic and basil amounts.

Ingredients

Strong bread Flour 250g (about 2 cups)

Warm water 200 mls (about 3/4th cup)

Yeast 1 teaspoon

Sugar 1 tablespoon

Salt 1 teaspoon

Basil 10-15 leaves or more for stronger basil flavour

Garlic 1 clove (more if you want a stronger garlic taste)

Extra virgin Olive oil 75 mls (5 tablespoons) + more

Sea salt (optional) 1 teaspoon

Recipe:

Heat the olive oil in a pan and add the chopped garlic until it starts turning brown. Turn off the heat under the oil and add the chopped basil. Let cool. Once cooled discard the garlic and retain the basil.

Mix the sugar and warm water and add the yeast. Let it start foaming on top. It takes about 5-10 minutes.

In a separate bowl add the flour and salt. Make a well in the center and add the yeast water and oil. Mix until it starts clumping together and knead to form a smooth dough. In case the dough is too dry add some more water a little at a time. Knead for at least 10 minutes until the dough is very smooth and slightly springy to the touch.

Let the dough rest in a well oiled bowl for at least 1-2 hrs or until it has doubled in size.

Once the dough has risen, tip it out on a well oiled baking sheet of your choice and spread using your fingers to give it the characteristic focaccia dimples.

Smear some more oil on top and cover with cling film and let rest in until puffed up (about 45 minutes)

Once it’s risen pour some more oil ( about 3-4 tablespoons) on top and let it pool in the focaccia dimples. Sprinkle some good sea salt on top or regular salt or none if you wish.

Bake at 190℃ for 25- 30 minutes or until the top has turned golden and the bread has risen gorgeously.

Let cool for a bit and brush again with some olive oil.

Serve with hummus (see recipe here) or just plain olive oil.

I eat mine with butter 😉

Enjoy!!

DSC_0616

Masala Pockets


A spicy alternative to the same old buns.. the premises are the same, only the ingredients slightly altered to give the most loved tea time a spicy twist. Easy and made within a couple of hours. These tasty treats don’t last too long.. addictive and yummy!!!

A humble line up of: Ingedients

1 tsp active dry Yeast

1medium size onion

2 cloves of garlic

1/4 tsp of red chilli powder

90 mls lukewarm water

1 tsp sugar

1.5 cups white flour

2 dried red chillies (of course)

1 tsp salt

1/4 tsp black pepper powder

1/2 tsp ground cumin

Dissolve the sugar into the lukewarm water and ad in the yeast and stir to mix it through and let it be for 15 minutes..

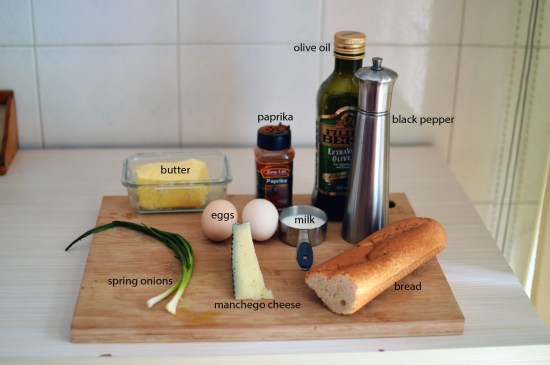
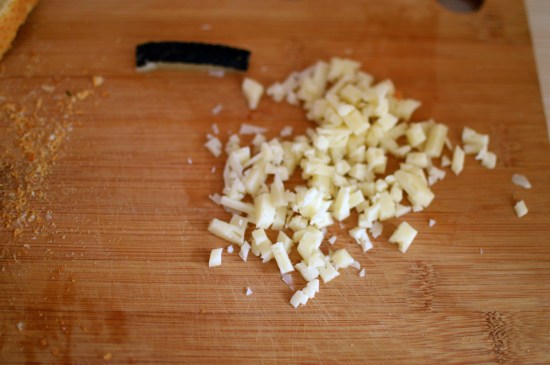
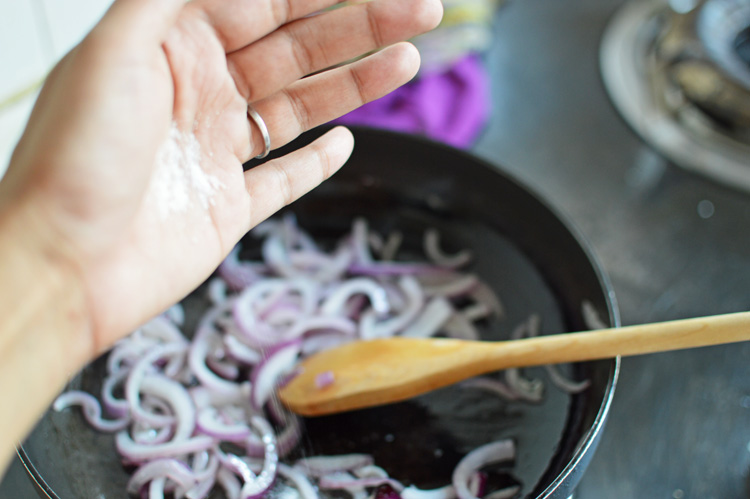
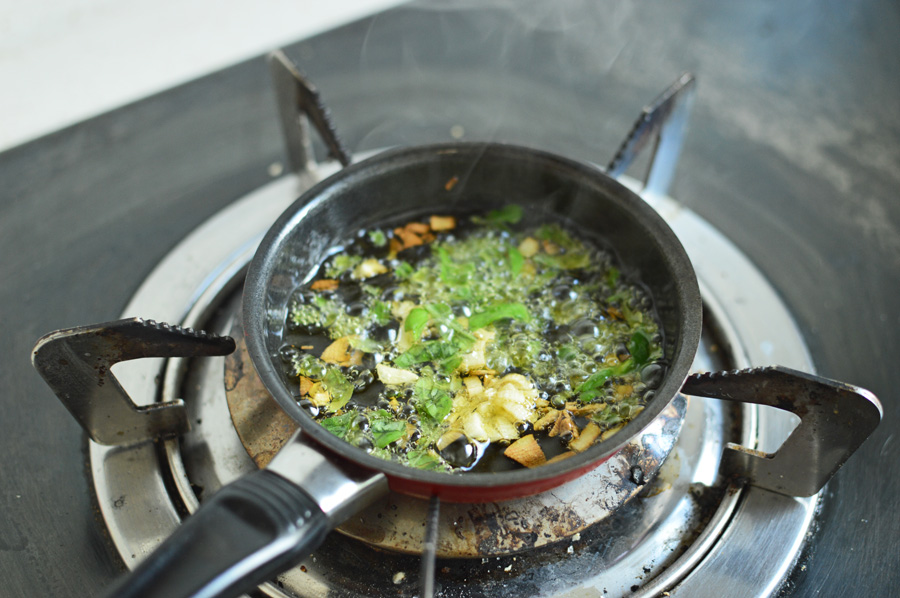
In the meantime get your onions, chillies and garlic chopped..

Mix these ingredients with the spices into the flour (no pictures my hands were covered with the goods)

You can use a mixer or simply use your hands if you need the work out.. apparentluy I always need the work out..

Once its all combined let it rest and a well oiled bowl for an hour until it starts poofing up and is almost ready to spill out of the bowl

Scoop out small balls from the dough, rolling and gently pressing to flatten out and let them rest again for 15 odd minutes to rise a bit more before you put them all into the oven.

15 minutes later, put these little babies in to bake at 195℃ for 15-20 minutes depending on your oven.. mine took exactly 18 minutes and came out this beautiful golden colour..

Let them cool before you start biting through.. make yourself a nice cup of tea and reflect when was the last time you had such beauties so bronze and spicy.. bliss !!!

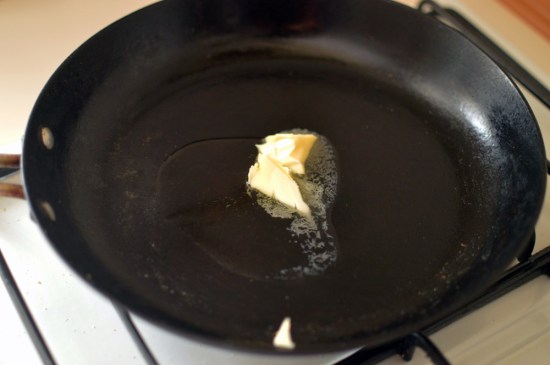
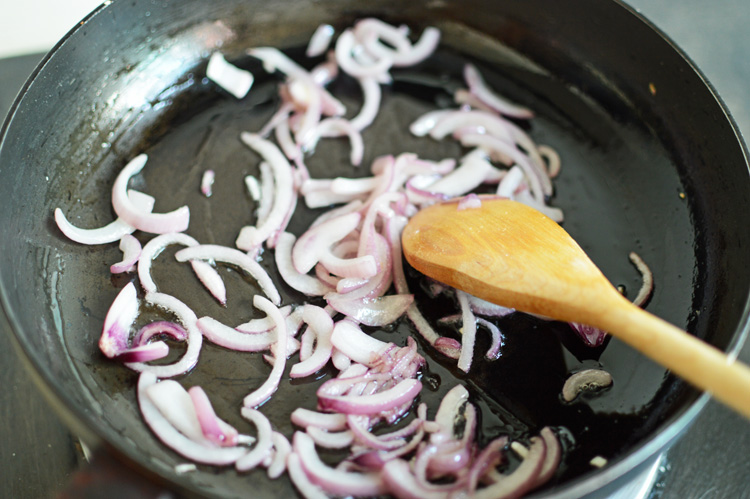
Here.. reflect on them from another angle…

Homemade easy crusty bread


Is there anything more liberating than baking your own bread? The moment you’re aware of the fact that you can bake your bread, you stop going to the supermarket to buy any.

We were facing a couple of problems with bread since as I have earlier mentioned that I’m living in a small town in China with limited options and availability, the breads available here though abundant aren’t the ones we’re specifically looking for. Mostly sweet or stuffed with meat, which puts me in a spot because hubby is a strictest of the strict vegetarian… sigh..

To resolve this situation and get custom made bread tailored to our needs (garlic/basil/cheese/oregano etc etc) I decided to cut to the chase and just bake one and finally omit the everyday early morning breakfast pop quiz.

Since it’s just the two of us I didn’t make a whole lotta bread, but the tiny loaf that I did make will last a almost 4-5 days by the end of which I’d be blogging about some other bread.

anywho’s.. the beautiful crusty bread.

Ingredients

1.5 cups white flour

1/2 tsp salt

1 tsp active dry yeast

90 ml lukewarm water

1 tsp sugar

2 tbsp olive oil

Incredulously easy bread making..

in a small bowl mix in the water with the yeast and sugar and stir all to dissolve. let it stand for 10-15 minutes until the water starts bubbling.

In your mixing bowl add the salt to the flour and mix it, gradually add in the yeasty water and start mixing either by hand or your mixer. I did it with my hand thinking I’d probably lose a few calories before eating the bread.

It should for a very nice smooth, and stretchable dough. That’s it, you need to now rest and put the dough in some place where it will start rising. oil that utensil with the olive oil and cover with a cling film also oiled well so the dough doesn’t stick to it. I love watching the dough rise in every half hour interval.. these little yeasts do a good job, don’t they?

well let it rise for 2 hours..I was impatient so let mine rise for 1.5 hours. Take it out of its bowl and form it into some ovalish shape you’d want your bread to be. I flattened mine a bit from the top and again let it rise COVERED for another 25 minutes.

That done.. just bung it into the oven at 200℃ for 20-25 minutes depending upon the oven and how hardcore you want its crust to be.

Once done, pull it out, resist the urge to munch through it, or run a knife through it or embrace it. You’d know your bread is done when you knock on it bottom side to hear a hollow sound. Let it rest and VOILA !!! ze bread of ze dreamz..

Enjoy..