Fish finger sandwich


DSC_0338A little backstory on fish fingers from my nostalgic archives. The first time I ever had these was when I was little, nay, wee, hardly a sapling of sorts and my dad had ordered a plate of fish fingers and it was the first time ever I’d set my eyes on something that literally looked like fingers, smelled like fried food and came crumbed in crunchy bits of golden deliciousness.

I had only to bite into them to begin a life long, albeit clandestine love affair with all things crunchy, fried and finger like.

I’d no idea something coming from the aquarium could ever taste so wonderful, and of course as I grew up I since learnt that fish from aquariums aren’t meant to be eaten (usually) and that ones that grow up in rivers and seas are far better, and I’ve since then had a good share of fish fingers tucked in my belly (they sometimes show on weekends) and also gained more insight that as wonderful as they are on their own, they taste even better sandwiched between slices of delicious bread. It could be a carb thing, but fish finger sandwich is a more complete meal, whereas fish fingers are, umm, finger food.

So, for days that need to be substantially filled with something comforting, something extravagant and something out of the ordinary, fish finger sandwich is the answer.


DSC_0292

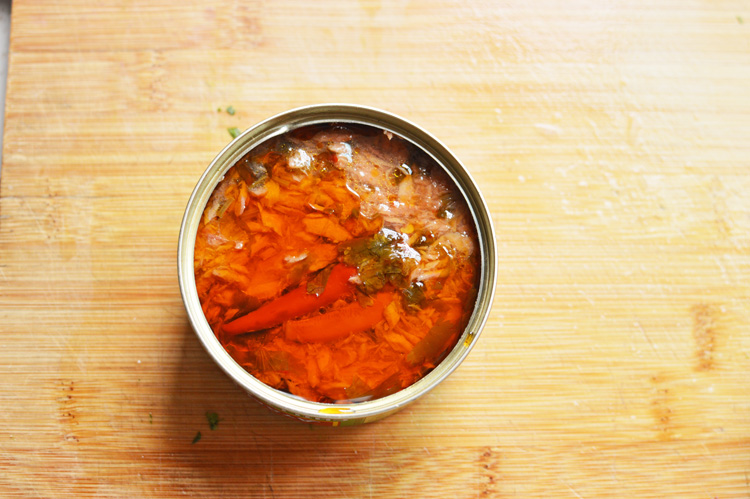
You need a boneless fillet of any sturdy fish. This is a commonly found basa fillet


DSC_0294

that I’ve cut into finger wide pieces and lightly salted on both sides. This not only flavours the fish from inside, since there will be many coatings on it, but also helps tighten the raw fish a bit, so it can stand the shallow frying without breaking apart.


DSC_0301

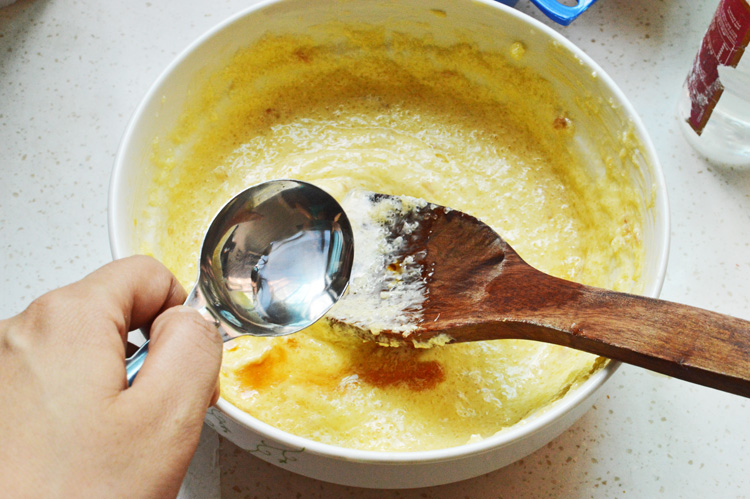
Now it’s just a question of assembly. Something of a conveyor belt procedure. I have here a plate of flour, eggs and breadcrumbs


DSC_0302

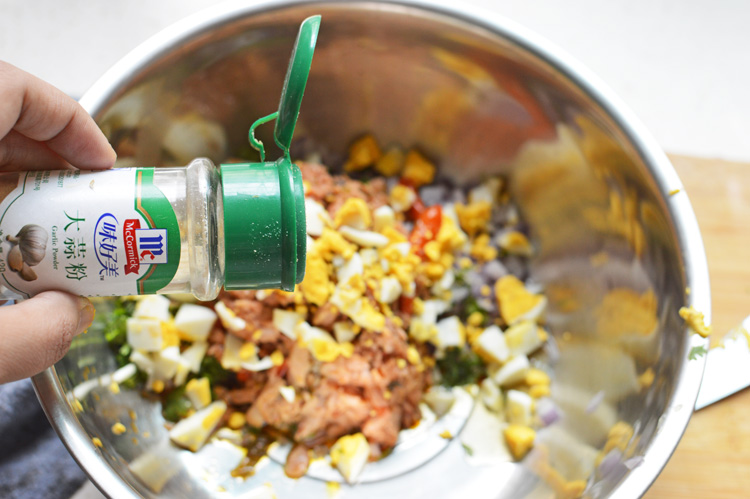
and this is also the part where you can season this dish. I like to season bread crumbs, because that’s the first element to come in contact with your mouth once you bite into these fish fingers. So a cracking rain of fresh pepper.

DSC_0303

imbued with the redness of smoked paprika. It’s these colour from paprika that’ll come through in tones of red orange once the fish fingers are fried.

DSC_0304

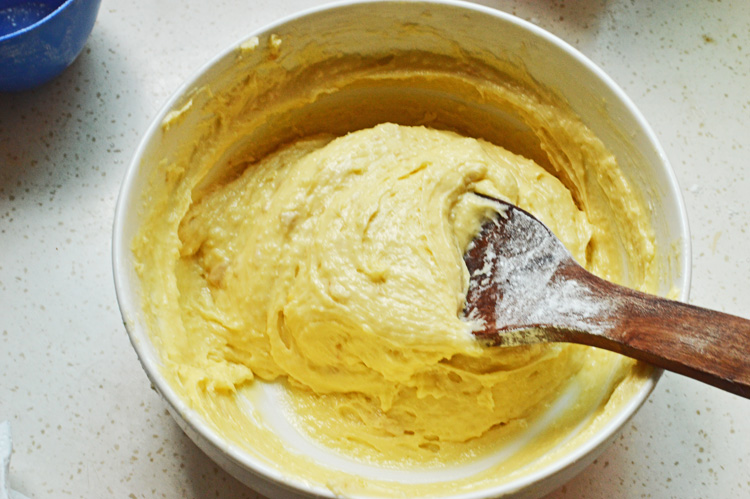
so the eggs are beaten, the crumbs are seasoned.


DSC_0305

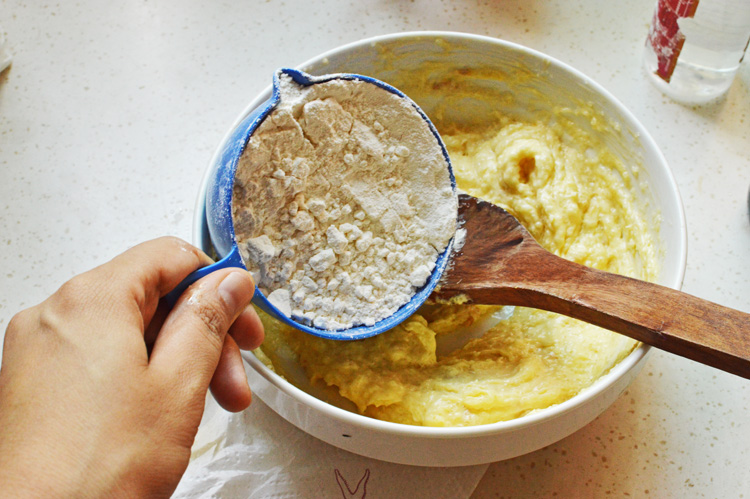
and thus begins the first layering, wherein salted fingers of sliced fish are first placed in flour


DSC_0307

to be coated generously on both sides, Be sure to shake off the excess flour


DSC_0312

and dip in beaten eggs for the second coating


DSC_0313

followed by a burial in gravel like seasoned breadcrumbs for the third and final coat.


DSC_0316

This is what all my fish fingers looked like, I let them sit before frying so the final stage could be executed with all the efficiency of a kitchen virtuoso, who could hardly wait to get her hands on these sumptuous  lovelies.


DSC_0318

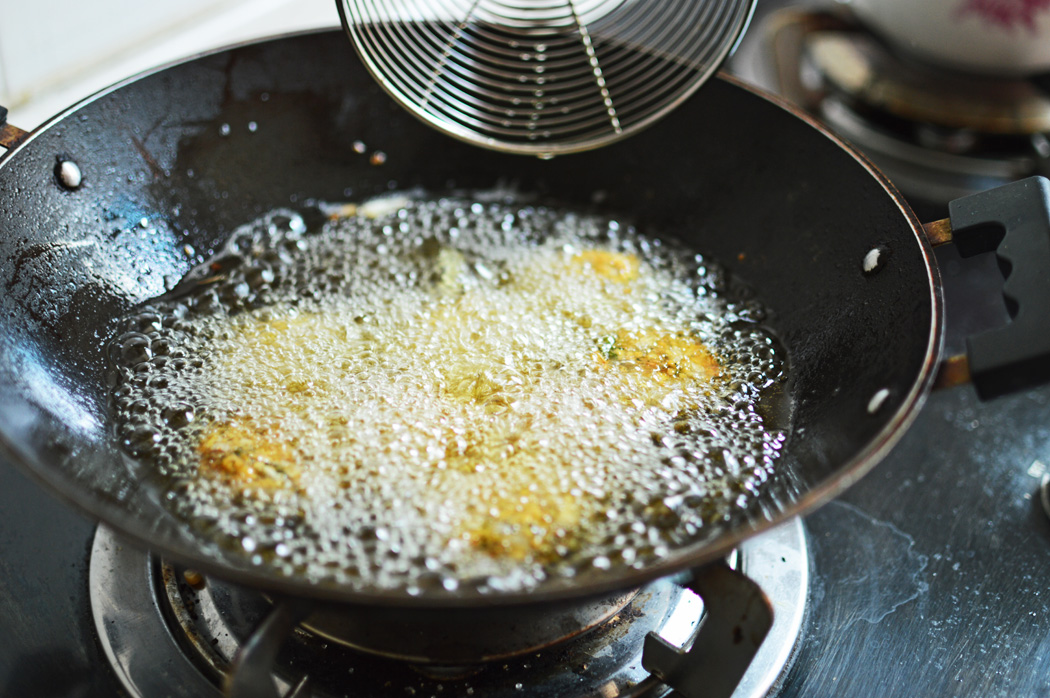
One could deep fry them, but shallow frying is just so much easier, not to mention safer. Fry in a couple tablespoons of oil on a medium high flame.

DSC_0321


I used a fork to turn them on all sides to get an even tan, and added more oil when needed. Never said it was a low calorie recipe.


DSC_0325

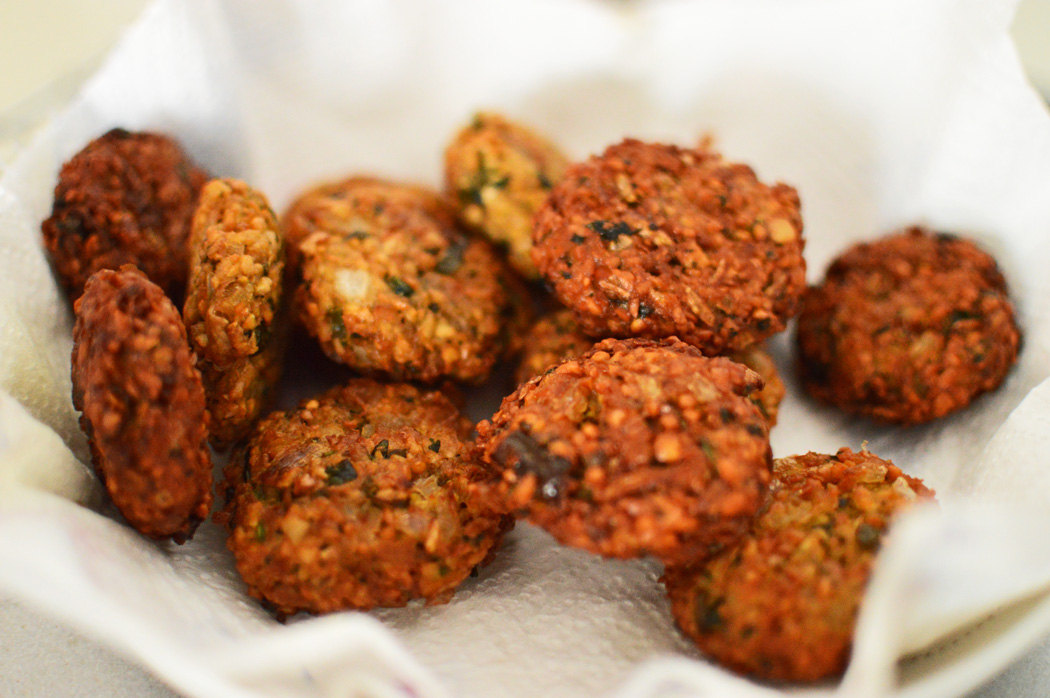
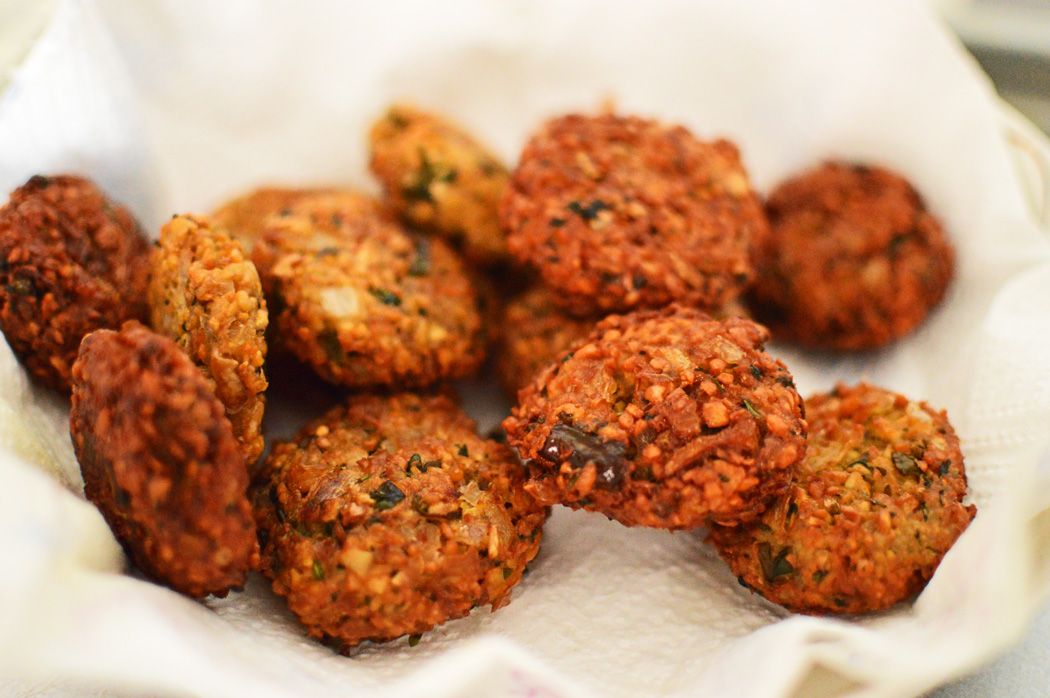
This was the first fried batch, and I let excess oil drain out on a paper towel. Somewhere around this time I also realized that one single fish fillet ended up making a good many fish fingers and that meant leftovers! Praise be lord.


DSC_0327

whip out your favourite bread. I used a whole wheat mini baguette for no reason other than I had this on hand. Spread copious amounts of butter. yes, butter is important.

Now if only someone had at this moment told me that my plate of choice is totally the colour of fish fingers and that it’s going to camouflage the entire sandwich in pictures, I’d have kissed that person on the mouth I tell ya..alas, no help was forthcoming since I was alone and my cat wouldn’t warn of incoming death let alone suitable plates.


DSC_0331

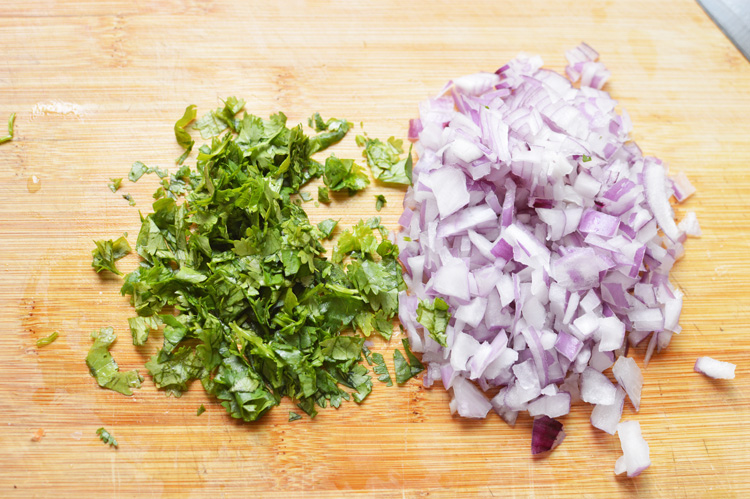
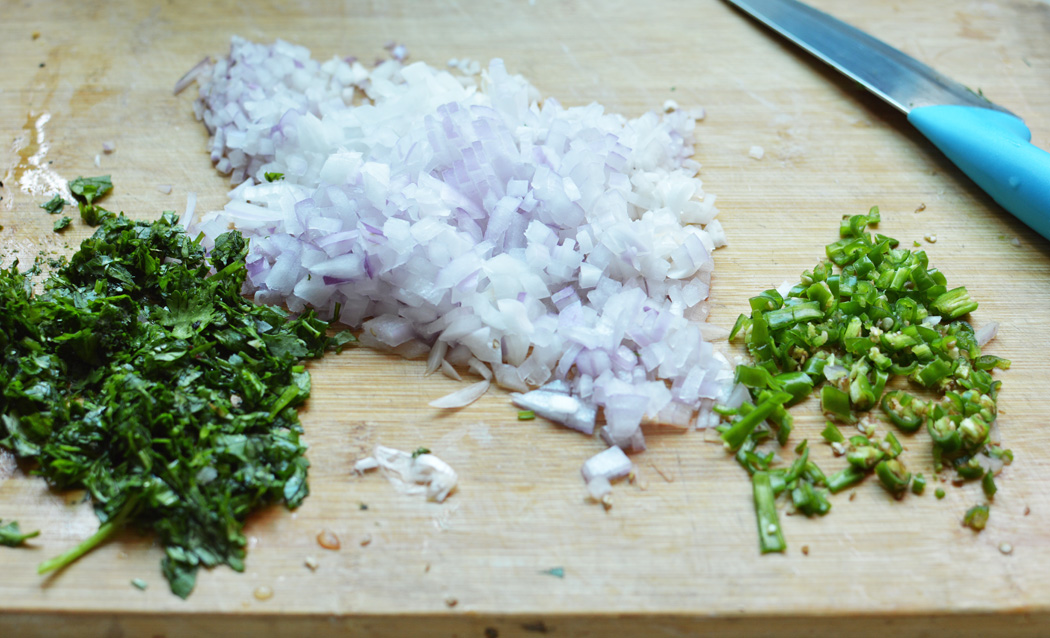
spread generously some mayonnaise, a layer of greens (spinach in my case) and tomatoes. In short get all the fixings you’d like in a sandwich. You could be as elaborate or minimal as you like. This is YOUR sandwich.

DSC_0337

layer on them fried fish fingers and voila! You have the most fabulous fish sandwich ever. It’s absolutely out of the world. Crunchy, filling with the distinct flavours of a well cooked fish encased in crispy crumbs entombed in buttery bread with all the fixings. This makes for such a lovely meal that you’d be left reminiscing this moment during your darkest hours. I speak from experience.

But wait! this isn’t the end. What do you do with the remaining fish fingers.

WEll, you can have them as is, or make another breakfast sandwich the next day.


DSC_0346

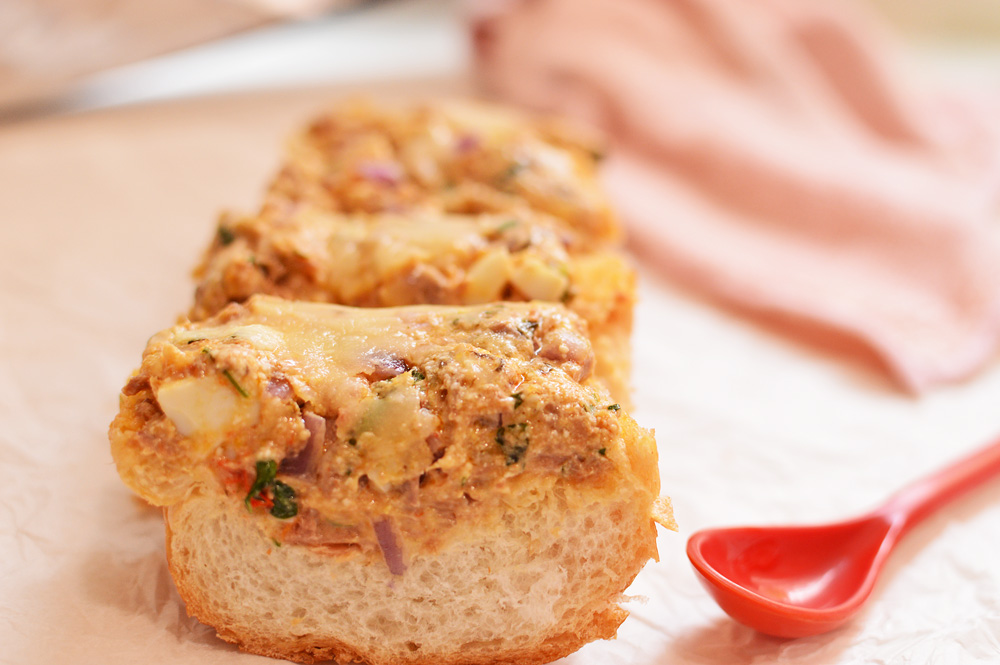
which is precisely what I did. A no frill white bread sandwich, with a layer of butter, a slice of cheese and remaining fish fingers.

DSC_0369

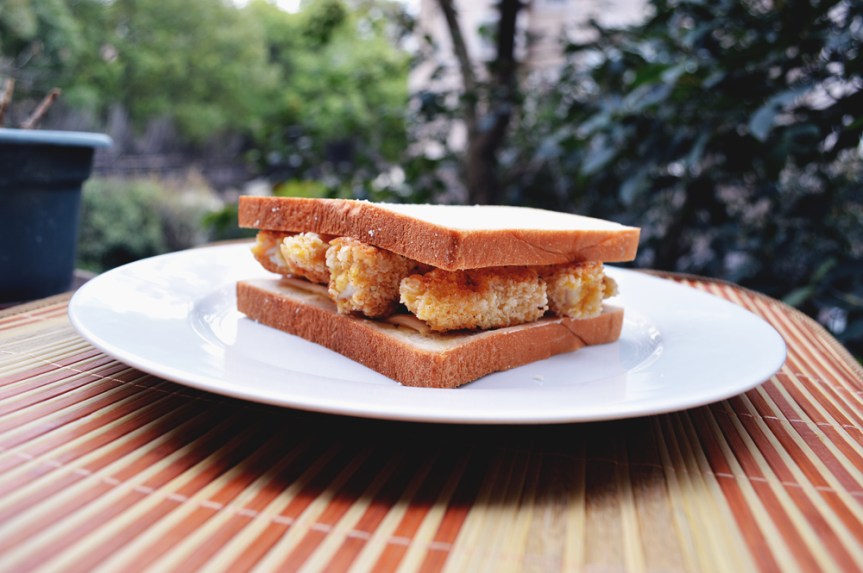
breakfast of ever fattening gods.

____________________________________________________________________________________________

Ingredients

Standard boneless fish fillet  : 1

Salt: 1/2 tsp (or more to taste)

Pepper: 1/2 tsp

Paprika: 1 tsp

Flour: 1 cup (120gms)

Eggs : 2

Breadcrumbs: 100gms (1 cup)

Oil for frying: 3-4 tbsps

For sandwich

Slices of bread or a baguette

Spinach or lettuce leaves: 3-4

Tomato: one small

Butter: 1/2 tbsp

Mayonnaise: 2 tsp

(you can customize this sandwich to your liking. Add mustard or cheese slices or pickles)


Recipe instructions

Cut finger wide pieces of fish and lightly salt on both sides. Keep aside.

Arrange three separate dishes for flour, eggs and breadcrumbs. Season the bread crumbs with paprika and pepper and beat the eggs well.

Coat each fish slice with flour. Shake off excess flour and dip into eggs until well coated and finally coat with seasoned bread crumbs till all fish fingers are well crumbed

Shallow fry on medium high heat in enough oil to make it golden and crunchy. Don’t add too many fish fingers in one pan. Add more oil as needed.

Once evenly fried and golden on all sides take them out and let drain on a paper towel.

Smother bread slices with butter and apply a layer of mayonnaise for sandwich. Add a layer of crunchy spinach and juicy tomatoes and top with as many fish fingers as your sandwich can accommodate.

Fish finger sandwich is now ready.

Enjoy!


Citrus butter cake


DSC_0427

It’s been a while since there’s been any sun in our frigid little Chinese town, but I’m not complaining.Maybe I am because everything is cold and freezing and butter at room temperature is a solid brick and my bread dough doesn’t rise and it’s always raining and everything is wet and it feels like I’m living in a glacier…..but there are moments when there’s plenty sunshine in my kitchen, courtesy this golden cake, that looks like sun-rays and tastes like sunlit oranges bathed in sweet butter and love.

I’m not exaggerating, ’tis true and you know it and not least because you can make this cake at the snap of your fingers and smugly too.

DSC_0390q

Yes there’s fanta and no shame. Regular stuff that is butter, sugar, vanilla extract, salt, lemon and orange zest plus extra for icing, a whole lemon, fanta, flour, baking powder and

DSC_0402

eggs that I forgot to include, but here they are.

DSC_0393

into the flour add salt

DSC_0394

and baking powder and keep aside for a while

DSC_0396

this is a citrus cake and we want every breath to speak of it, which is why into our sugar we mix in the lemon zest

DSC_0397

and orange zest

DSC_0398

and using our fingers we just mix it all in so every bit of sugar is infused with the citrus twang.

DSC_0400

in a separate glass juice your lemon

DSC_0401

and add in the fanta.

DSC_0403

beat together room temperature butter and zest mixed sugar until nicely mixed and kinda fluffy. It’ll only take a couple of minutes.

DSC_0405

crack in the eggs. one at a time and beat after each addition to mix thoroughly, so here’s the first

DSC_0406

and the second. It turns a fabulous yellow/orange after each addition.

DSC_0408

once it’s all mixed well in add the vanilla extract

DSC_0409

beat again and now it’s time for the flour which we will add in three additions. So here’s 1/3rd of our flour, mix briefly

DSC_0410

and 1/2 of our magic potion that is fanta and lemon juice. Mix after each addition just until the batter comes together

DSC_0411

another 1/3rd of flour, beat briefly.

DSC_0413

add the remaining fanta, lemon juice, and mix to combine.

DSC_0414

followed by the rest of the flour. Beat to make a smooth batter. It doesn’t take long.

DSC_0415

You’ll finally get this. A pool of sun in a steel bowl.

DSC_0416

Pour into baking tin of choice. I was too lazy to butter a loaf tin so I lined it with a baking sheet, but please feel free to butter and flour your cake tin. Bake at 180°C for 35-40 minutes or until a toothpick inserted in the center comes out clean.

DSC_0418

Like so. The kitchen at this point smells like orange marmalade doing a cabaret. You can eat it as it is but a bit of embellishment never hurt anyone.

DSC_0421

an easy glaze or make up if you prefer. add some reserved zest into icing sugar

DSC_0422

with a spoonful or so of leftover fanta in case you haven’t been too greedy.

DSC_0426

mix to form a pourable consistency like so.

DSC_0427

and let your cake have it, make sure it has cooled down completely.

This cake may look sober but it’s oozing with oomph. It smells like sun and tastes like light. Every bite carries a citrus hit and honestly any cake that uses a can of fanta cannot go wrong. it’s easy, delightful and a much desired change from everything boring these winters.

Ingredients

butter: 100 g (1/2 cup)

flour: 170 g (11/2 cup)

sugar: 110 g( about 1 cup)

fanta: 200 mls (3/4cup)

lemon juice: 1 tablespoon

eggs: 2

salt: 1/2 tsp

baking powder: 1 tsp

vanilla extract: 1 tsp

orange and lemon zest: 1 tablespoon + extra for icing.

For icing

icing sugar: 100 g (about 1 cup(

lemon + orange zest (1 tsp)

fanta: 1 tablespoon

Recipe instructions: mix flour, salt and baking powder and keep aside. add the lemon and orange zest in sugar and mix in with fingers until fragrant. In a glass squeeze in one lemon and mix with fanta.

In a separate bowl, beat room temperature butter and sugar until fluffy. Add in the eggs one at a time and beat for a minute after each addition. Add in the vanilla extract and beat again.

Add the flour in three stages alternating with fanta and juice mixture in two, and beat well after each addition until the batter is smooth.

Pour into a baking tin and bake at 180°C for 35-40 minutes or until a toothpick inserted in the center comes out clean.

Let cool completely.

For the icing mix in the zest, fanta and icing sugar until you have pouring consistency. Pour over the cooled cake and let set before serving.

DSC_0433

Make this now!

Tuna melts


DSC_0979For days when you are absolutely miserable and voraciously hungry, tuna melts is the answer! This happened to be a particularly divine answer this Sunday, as I was completely out of meal ideas and was dying to eat something decadent and indulgent. It’s quick, not fiddley and the portions are considerably large, which means you can eat the leftovers for dinner and not even complain.

This version is slightly different from most since I didn’t want to include mayonnaise. What can I say? I wasn’t in a very mayonnaise frame of mind. Also because I had bought a different can of tuna that happened to be chili tuna, and I was dying to try it out, but more of that later.

for now..

DSC_093m0not very basic tuna melts fare, but I wanted to mix up things a bit. so cream cheese, garlic powder, cheddar cheese, boiled egg, onion, coriander, tuna and french bread.

DSC_0933begin by chopping the onions and coriander as fine as you can. I know coriander isn’t a very common ingredient in tuna melts, but these are not common tuna melts/ Just believe me ok?

DSC_0934fling into a large bowl. I have a thing for using small-sized bowls and regretting later, but not this time!

DSC_0935this is the tuna in question. This is new for me, if you’re used to this stuff then good. I figured it has chilli, but what I didn’t know was…

DSC_0936that it really had chili. They were not joking about their chili. Can you see these two red chillies. My soul jumped out for a second, but I regained my composure. I will eat tun melts, even if it kills me.

DSC_0938in with the devil red tuna.

DSC_0940chop the boiled eggs as well as you can. I was still reeling from the chillies I saw in the tuna can.

DSC_0941ah! these gorgeous colours. I knew it instantly this would be something of an ecstatic albeit searingly hot sandwich.

DSC_0942a pinch of pepper, because I had decided this to have pepper, so here it is.

DSC_0943garlic powder. yes you need it. Don’t sneer

DSC_0944in with the cream cheese. Trust me!

DSC_0945and some grated cheddar. I know by now you’re doubting my pure intentions, but please don’t. You’ll see in a minute. Mix well.

DSC_0948Time to build up. Lay you bread lovingly in front of you.

DSC_0950anoint it rather generously with the tuna mixture, or rather slather it barbarously.

DSC_0952as if it wasn’t enough already. sprinkle on some more cheddar

DSC_0954put on a tray to bake. as you can see I have two and there was no leftover tuna mixture. I used up by generously heaping them on the bread. and why not? bake at 190℃ for 15 minutes, or until the top melts and starts almost bubbling and the bottoms turns slightly crusty.

DSC_0955feast yer eyes. Look at these babies. I had no words nor expressions. I was spellbound. This is what gluttonous heaven for chili lovers is made of. This is what starving dreams of degenerate souls look like.  This right here is the answer to every question you might have.

DSC_0966this is a slab of everything evil and look how it melts and oozes from the side. It tasted luscious and dreamily melty. It might have been all the cream cheese, but ooh, was it  immoral. It was spicy, yes it was! but addictively so.You want to eat this. Everyday!

Ingredients ( this isn’t something you can measure, it’s more of a go with the flow and really up to your liking, but I’ll give somewhat accurate amounts as I figured)

tuna can: 1

Bread: half loaf of french bread split into two (you can even use sandwich bread)

onion: medium-sized or half of a large one (chopped fine)

coriander: 2 tablespoon (chopped fine)

egg: 1 large hard-boiled (roughly chopped)

cream cheese: 180g ( a bit less than 1/2 cup)

cheddar cheese: 4-5 tablespoons + more for sprinkling on top (optional)

garlic powder: 1 teaspoon

pepper: 1/4 teaspoon

Preparation instructions:  Mix all ingredients in a large bowl and mix until well combined. Spread generously on bread. Top with some more cheese, and bake at 190℃ for 15 minutes until the cheese had melted and the bottom is slightly crusty.

Alternately you can also sandwich this filling to make a grilled cheese sandwich. It works beautifully both ways.

There really isn’t much to it, but the addition of coriander just ups the flavour ever so well and the cream cheese makes it wickedly melty.


DSC_0970Enjoy!!


Chocolate chip cookie bars


DSC_0878So here it is, the most luscious enemy you’d want to feast on. Chocolate chip cookie turned into bars; so now not only do you get to eat a cookie, you get to eat it in a crispy thick slab of voluptuous bar. It’s rich, moist and crunchy, loaded with chocolate.. in all it’s an orgy of scrumptious exquisiteness. You might die eating it, but oh! what a happy death will it be. I do not recommend making a lot of these, because sweet and rich as they are, they’re also too easy to eat, and while your mouth might say no, your soul will want it all. I promise!

What’s more, it’s tinted ever so lightly with salted peanuts, and this sinful pairing of sweet and salt will definitely bring all the boys to the yard. So let’s get cracking!

DSC_0828nbasic chocolate chip cookie ingredients: butter, flour, vanilla, chocolate chips, salted peanuts, egg, salt ,baking soda,light brown sugar, regular white sugar.

DSC_0830no heavy machinery needed. A friendly steel bowl and wooden spoon will do the trick.

DSC_0831cream the butter for about a minute. it’d help a lot if your butter is at room temperature.

DSC_0832in with the sugars..the white

DSC_0833and the brown.

DSC_0834beat it again till it takes on a fluffy appearance or looks something likes this. You needn’t worry about going wrong. it’s a forgiving recipe.

DSC_0835pour in the vanilla.

DSC_0836crack in the egg

DSC_0837and beat again.

DSC_0838dump in the dry ingredients. This is flour, salt and baking soda.

DSC_0839mix it all in till it just comes together.

DSC_0840finally the salted peanuts

DSC_0841….and the chocolate chunks.

DSC_0842mix until well combined and keep aside for a minute.

DSC_0844prepare your cake tin. I lined it with aluminium foil and buttered it generously.

DSC_0846pour it in, or rather gloop it in and level the top using back of a spoon and bake at 180°C for 35 minutes, or until the top is crisp and burnished and cracking brown.

DSC_0851like so! beautifully brown and crunchy looking. Let it rest and cool completely.

DSC_0859cut into bars and apply to face.

Ingredients:

flour: 130 g (1 cup)

salt: 1/2 teaspoon

baking soda: 3/4 teaspoon

butter: 110 g

white granulated sugar: 100 g (1/2 cup)

light brown sugar: 70 g (1/3 cup)

vanilla extract: 1 teaspoon

egg: 1 large

bittersweet chocolate: 60 g

dark chocolate : 60 g (or use any combination you want)

salted peanuts: 20 g (3 tablespoons)

Preparation instructions: cream room temperature butter until light and airy. add in the sugars and beat again until fluffy. add the vanilla extract and egg and beat again for about a minute.

Add in the dry ingredients except chocolates and peanuts and mix well together. Finally ad in the peanuts and chocolates and mix until just combined.

Prepare a cake tin of choice preferably square and line with a buttered aluminium foil. scoop in the cookie dough and even out the top to make it flat. Bake at  180°C for 35 minutes or until the top looks crisp and the batter has risen a bit.

Let cool completely before slicing into bars.

This recipe is not only easy to put together but also all too easy to devour as I already mentioned. So instead of making some mere cookies, glitz it a bit and turn into bars.

DSC_0865enjoy!!

Thyme scented bread


DSC_0599It’s been a while since I posted anything, but only because it’s been extremely, annoyingly, unbelievably, obnoxiously, stinging, frigidly cold. Yes it’s been very cold and some more. I don’t think there was ever a moment when it wasn’t snowing, or raining or hailing or a combination of all three. The weather is slightly better now. It’s not as frozen and water doesn’t seem all that spiteful but it’s severely cold still and of course there is nay a ray of sunshine.

What’s a carb loving gal to do in this hateful weather.. why of course bake some bread and shove it down in one big cartoonish gulp, because as I write I’m feasting on this ethereal scented bread, weighed down with copious amounts of butter and my computer has a severe case of the crummage.


Getting down to business, this bread is delectable, heavenly and all the good adjectives. It’s ever so slightly scented with thyme and this subtle perfume gives this bread an elevated elegance, which is so desirable in this weather. Also it’s easy and fun.

DSC_0542cBasic ingredients, except I wanted some heartiness to it, which is why I added whole wheat flour. It just takes the bread from mundane to exquisite. So..thyme, regular bread flour, whole wheat flour, yeast, sugar, salt, warm water and some oil.

DSC_0544into a large bowl, dump in your flours

DSC_0545add the salt and mix

DSC_0547into the warm water add in sugar

DSC_0548the yeast

DSC_0549mix and set aside to let the water foam in peace.

DSC_0550de-stalk the thyme in case you’re using fresh stuff.

DSC_0552once the yeast has foamed, make a well in the centre of your flour mixture

DSC_0553add in the oil

DSC_0554the thyme

DSC_0555yeasty water and mix together to form a dough. If your mixture is too dry add some more water, a teaspoon at a time, in case it’s a bit wet add some flour.

DSC_0557let it form a shaggy dough which has barely come together. Now start kneading. You have to knead for at least 10-15 minutes. It’s a good workout. You know you need it.

DSC_0558the best way to knead is to stretch it away from you.

DSC_0562then pull it back together. This gets the gluten going and the resultant dough is nice and springy. Repeat this step for at least 10 minutes and you’ll realize the dough has come to life. Trust me, you’ll just know it.

DSC_0563once it’s nice and soft and smooth and springy, form into a ball.

DSC_0567oil it slightly and let it rest for at least 1-2 hours depending on how warm your house is, making sure it’s doubled in size. 

DSC_0569once risen as you can see, it’s more than doubled, plop it out on your work surface.

DSC_0572punch it well to get rid of any air bubbles and knead again for another minute or so.

DSC_0573form into a ball.

DSC_0575and transfer on a baking sheet, bread pan or dish of choice. I dusted mine with some cornmeal but you can use semolina or flour.

DSC_0576dust some more flour on top. Cover and let rise again for another 30-45 minutes.

DSC_0578like so. mine took about 1 hour.

DSC_0580this step is completely optional, but I like doing it. I make some gashes or slashes to make it look like some artisan loaf. be careful while doing it, you do not want to deflate your bread so don’t Jackson Pollock it.

DSC_0582mmmkay!!  now bake at 200℃ for 20-25 minutes until the top is well browned and tapping the bottom makes the bread sound hollow.

DSC_0586like this!! you see this? So beautiful. You have to let it rest for at least 10 minutes. It’s going to be hellish hot.

DSC_0614ooooh mama!!! this bread is lightly specked with thyme, with a very subtle aroma. It’s soft and the whole wheat flour makes it a hearty mouthful.

DSC_0615this is what the interiors look like. It’s GORGEOUS!!!

Ingredients

Bread flour : 250 g ( 2 cups)

whole wheat flour: 70 g (about 1/2 cup)

salt : 1 teaspoon

sugar: 1 tablespoon

yeast: 1 teaspoon + a pinch

water (just warm to the touch): 250 mls (1 cup)

thyme : 1 tablespoon if using fresh or 1 teaspoon if using dried.

Oil: 2 teaspoons

Procedure: Add the sugar and yeast into the warm water and let foam. Add the flours into a large mixing bowl. Make a well in the centre and add in the oil, thyme and yeast water. Knead well for at least 10 minutes until the dough is smooth and springy.

Transfer into a lightly oiled bowl and let rise for a couple of hours until doubled in size. Once risen knead again for another minute and transfer into baking pan lightly dusted with flour. 

Dust the top of the bread with flour and let rise again for about 45 minutes. After the second rising bake at 200℃ for 20-25 minutes until the top is well browned and tapping the bottom makes the bread sound hollow.

Please give this bread a try, feel like a magician and feast like a Queen!!

DSC_0611another image to motivate you.. Enjoy!!!


Lemon bars


DSC_0472These winters when the sun is scarce and sky seems frozen, these lemon bars will inject that bit of sunshine and tang to your day. I had earlier been of the view that chocolate heals all ills, chocolate is the universal answer and that chocolate gives meaning to your life… however once I made these bars I realized It’s actually these sweet lemon bars that can actually bring about world peace. No seriously, its true!! These lemon bars aren’t just good they are dazzling with sexy oomph!

They are super chic, exquisite and the taste is like a mouthful of magnificent citrus love. It makes no sense because these bars make no sense. They are so ridiculously good, very zippy, tart, sweet and rich all at the same time. You have to MAKE THESE to believe it, and you’d say, that crazy internet girl was right about this one.

The best part about these is that they are easy to make. Not fussy like a lemon meringue pie. Easy to put together and easier still to eat. But careful, these yellow babies are rich!!

These bars are made of a shortbread base and a mouth-watering lemon filling. Here is how its done.

For the shortbread base

DSC_0402very easy. Just three ingredients. Butter, sugar and flour.

DSC_0403In a clean bowl with a hand mixer, cream the butter and sugar, until it’s umm creamed. It should resemble something like this or better.

DSC_0405Add in the flour and beat again

DSC_0406until it just starts clumping together. Once it starts coming together we stop.

DSC_0407Tip this shortbread mixture into a baking vessel of choice. Mine happened to be a square silicon mould (7 x 7 inches).

DSC_0409spread it around as well as you can and bake at 180℃ for 15-18 minutes or until the sides just start turning a shade brown.

DSC_0417like so. Leave this to cool and prepare the filling.

DSC_0414The filling is fairly straightforward. Just eggs, lemon juice, sugar, lemon zest and flour.

DSC_0420we start with eggs

DSC_0421followed by sugar

DSC_0423then light mixing.

DSC_0424and some lemon zest

DSC_0427add in the lemon juice

DSC_0428finally in with the flour and a good beat up.

DSC_0431Mix it until it looks something like this, which means stir without caution for a couple of minutes and you’re there.

DSC_0433tip this batter in the now cooled shortbread base

DSC_0435making sure it’s evenly spread and bake at 175℃ for 18-20 minutes

DSC_0439My oven got a little too hot, hence the tan, but if you think the top of the bars is getting browned too quickly then just tent it with silver foil. This tan is not going to affect the final outcome because it’s just pleasantly golden not overly burnished, so don’t worry. You will know the top is done when it’s just set and there’s a slight jiggle to it.

You have to let it cool complete before you do anything to it. Mine took about 45 minutes.

DSC_0441pass some powdered sugar through a sieve.

DSC_0444blanketing completely

DSC_0446cut into squares and thank Ma nature for creating lemons.

DSC_0448I cut mine into fairly small bars, simply because these are so rich and so sweet and citrusy that it’s all too easy to eat them.

You wouldn’t believe the smugness you’d feel after making these, because they come out perfect every single time, even if you’re making these for the first time. They work great as desserts and taste unexpectedly delicious. Make these Now!!


Recipe

For the shortbread

butter 110 g ( a little less than 1/2 cup)

powdered sugar 30 g (about 2 tablespoons)

flour 125 g (about a cup)

– In a clean bowl cream together the butter and sugar using a hand mixer.

add in the flour and beat until it just starts to come together.

Tip into a baking dish and evenly spread to form a base.

Bake at 180℃ for 18-20 minutes or just until the sides lightly brown

allow to cool.

For the lemon filling

Eggs 2

sugar 170 g (a little less than a cup)

lemon juice 70 mls (2.5 tablespoons)

lemon zest 1 tablespoon

flour 30 g (about 2 tablespoons)

– In a clean bowl beat the sugar and eggs until smooth.

add in the remaining ingredients and mix well.

Pour over the now cooled shortbread base making sure it’s evenly spread out.

Bake at 175℃ for 18-20 until just set with a bit of jiggle. If the top starts getting too brown, tint with a foil.

Allow to cool completely and sift some powdered sugar on top before cutting into bars.

DSC_0454You do not want to miss this.

Enjoy!!


Chocolate orange cake


DSC_0162Orange and chocolate when put together, open a portal of another dimension, which leads you into a parallel universe where there is endless happiness, where eating more makes you lose weight and where lemons give you life.

Orange and chocolate form something so deep, so intense and flavourful and so unbelievably delicious that you’d think the person who discovered this was given a nobel prize or at least he should be given one asap.

This cake is so rich, so damp, dense, dark and irresistible that you wouldn’t be able to stop yourself from devouring this completely. It’s almost impossible to put in words but it tastes like a mouthful of happy malevolence. Crazy right? but this cake has to be made to believe and this is one of the best desserts you could serve at a dinner party. It’s gorgeous and it has an air of elegant simplicity with the most aromatic and not so subtle flavours of orange and chocolate.

The other best part about this cake is that it’s easy and it can be made into just one bowl.


DSC_0090Just flour, salt, baking soda, butter, best quality dark chocolate, sugar, orange marmalade, vanilla, orange liqueur (optional), eggs.


DSC_0093I started by melting the butter and the chocolate into a microwavable bowl. You could by all means use a double boiler but this was easier and faster.


DSC_0095Stir together and exercise enough restrain to not dive into this dark pool of melted chocolate and butter. It’s so easy that I’m using a tiny wooden spoon and a bowl two sizes too small to make this cake.


DSC_0098Into this add in the orange marmalade


DSC_0099the sugar


DSC_0100the orange liqueur


DSC_0101the vanilla extract


DSC_0102and stir. You can see lumps of the marmalade I put in and this is what helps the texture of this cake making it moist with small pieces of marmalade studded in the chocolate.


DSC_0111In with the beaten eggs


DSC_0113and gradually adding a bit of flour and stirring to incorporate. Instead of adding in the whole heap, add in a tablespoon at a time and gently mix in without over beating.


DSC_0117like this


DSC_0120to finally get this.


DSC_0125Into a cake mould. You can also make cupcakes out of this and more often when I have a lot of people, I actually make these into small cupcakes and these need absolutely no frosting/icing of any kind… none!!


DSC_0138Now because this cake is damp, it takes a bit longer than usual cakes but this is so glorious and intensely aromatic. It’s fabulous.


DSC_01688You really have to make this cake and see for yourself how easy it is to create something so rich and elegant yet so simple. This cake is a hit and you’d be asked for seconds and thirds. You really have to make this..


Ingredients

  • butter 125 g (unsalted)
  • dark chocolate 100g (at least 60%cocoa)
  • Orange marmalade 150 g
  • Orange liqueur (optional) 30 mls/1 tablespoon
  • sugar 120 g
  • salt 1/4 teaspoon
  • baking soda 1/2 teaspoon
  • eggs 2 large beaten
  • flour 150g
  • vanilla extract 1 teaspoon

Recipe: Melt the butter and the chocolate. Add in the marmalade, sugar, liqueur and vanilla. Stir to combine

add in the eggs and mix thoroughly.

Add the flour slowly or one tablespoon at a time and mix completely without over beating.

The batter will be very moist. Bake at 180℃ for 45-50 minutes. Let cool completely.

This cake needs no icing or frosting at all.

Alternatively you can use this recipe and make cupcakes as well.

Enjoy!!!


Lemon meringue pie


DSC_0990

This is the official dessert served to all sinners in hell. It’s also known as crack for angels! This slice of sunny gold is actually all the happiness in the world bound into a pie. It’s sweet, lemony, buttery and guilt inducing. Guilt you would happily live with, guilt that would never weigh on your conscience, guilt that would force you to commit this sin over and over again. Lemon meringue pie is also a perfect substitute for love and all those carnal pleasure everyone keeps raving about.

This is a time-consuming recipe, but that does not mean it is difficult. It’s easy and the time that takes making this is more than worth it, because time hasn’t eaten this and if it had, time wouldn’t be such an ass at times.

So let’s get the basic first!

DSC_0992this pie has three parts. The bottom pie crust which is like the tissues & the muscle fibres of a body, then it has the lemon filling which is like the soul of a body and finally the meringue which is like skin and makeup. So there you have it. This is easy stuff! let us begin

DSC_0906Pie crust ingredients: flour, water, butter, sugar and salt.

DSC_0908Make sure the butter is very cold and cut into cubes. Then into a bowl with the flour, sugar and salt we need to work the butter into the flour until it resembles fat breadcrumbs. you can either use a food processor/pastry cutter/fork or just use your finger tips and mush the butter and flour together, making sure the butter stays cold at all times.

DSC_0910this is what you want it to look like. Form this into a dough by putting in a tablespoon water at a time until it comes together to form a dough. DO NOT KNEAD!! we don’t want any gluten formation. using a spoon or a butter knife make criss cross actions until you feel the dough starts clumping at which time you shall stop and very gently with your hands form into a ball.

DSC_0913Like so!

DSC_0915Divide into two parts, Wrap them in cling film and stick into the fridge for about 20-30 minutes.

I do not have the rolling out pictures of the dough because my hands were greasy and floury but it’s very easy.

You only need one dough ball for this. Freeze the other one for the next time you want to make a pie.Once you’ve retrieved the dough from the fridge just roll it out on a lightly floured surface and keep rotating it so that it doesn’t stick on the platform. Once it’s the size of your pie tin, you need to lay it on to fit and cut the excess from the edges.

Another simple way it to break small balls off your dough and line them in the pie tray and with the back of a glass just flatten them evenly so that all the sides are covered with the dough.

DSC_0919Once you’ve lined the pie crust in the pie tin, poke some holes into it so that it doesn’t rise while baking. We are going to blind bake this pie crust, which simply means this..

DSC_0920Line your poked pie crust with aluminum foil and fill with beans/rice or pie weights if you happen to have them. This will ensure that there is no silly rising in the oven. Bake for 15 minutes

DSC_0922After 15 minutes let the pie crust out and let cool.

Now for phase 2

DSC_0924The soul of the pie: Lemon filling. You don’t need egg whites for this but you need them for the meringue, also I forgot to mention that you also need some butter (not pictured) because it’s forever alone okay?

DSC_0927Into thick bottomed sauce pan, add the sugar and the corn flour/ corn starch whatever you call in your part of the world.

DSC_0929Mix to combine

DSC_0931add water

DSC_0932lemon juice

DSC_0934On a low flame start mixing without stopping for even a second. Thou shalt not stop, no matter what. Keep stirring with a whisk, your arms will be sore but the pie will be delicious.

DSC_0939After a few minutes of whisking CONTINUOUSLY this is what will happen. It’s called magic. The corn starch/flour will form this..

DSC_0938This is what you want!

DSC_0940Put a spoonful of this hot mess into your egg yolks to temper them. You don’t want lemony scrambled eggs, so do this!

DSC_0942Put these tempered eggs back into the saucepan where we have some weird magic going, and now look at this transform

DSC_0943Very quickly add in the zest and the butter (not pictured, it’s forever alone).

DSC_0945Whisk, whisk and whisk. Keep the flame low.

DSC_0947Lift your whisk and admire your handiwork, Turn off the flame and keep it aside to cool for a bit.

Let’s get on to forming the skin & makeup of this pie.. I mean the meringue. Feel like a god!

DSC_0949Egg whites and a faithful beater

DSC_0950Beat till it’s all foamy, and add in sugar

DSC_0952Keep beating until it looks like this. It resembles whipped cream, but it is actually whipped eggs! The should look nice & shiny ok?

Assembly!!

DSC_0954Lemon filling into the pie crust now completely cooled.

DSC_0955Even it a bit

DSC_0956Top with the meringue.

DSC_0960Take a good look. I made pretty peaks!! Push into an oven and wait patiently.

DSC_0962Once the meringue is nicely browned you know it’s done. Pull it out and let it COOL COMPLETELY! you have to wait for at least 2-3 hours before you push this in your mouth. The cooling step is absolutely essential if you want an awesome pie, and as I mentioned that wait is worth it. I went out for a movie while it cooled. Just giving you some ideas..

DSC_0967And once it’s cooled you can slice it and bathe in it.

DSC_0989This is how it looks from the top

DSC_0994and from the side. If you want to know what it tasted like, then let me tell you that you’d want to take it to bed with you.

Make it this weekend.

Ingredients

For the pie crust

Flour 350 g

Sugar 1 tablespoon

Salt 1 tablespoon

Butter 200 g (cold & cubed)

Cold water 3-4 tablespoon

For the lemon filling

 3 Egg yolks

sugar 100 g

cornflour/corn starch 5 tablespoons

Butter 30 g

Lemon juice 4 tablespoons

Lemon zest 1 teaspoon

Meringue

3 Egg whites

Sugar 50 g

Recipe Into a large bowl sift in the flour, salt and sugar and add the very cold butter and work into the flour until the flour resembles fat crumbs. You can also process it. Add one tablespoon water at a time until the dough just comes together or starts clumping. Do not add too much water to the dough.

Divide the dough into two balls and wrap and refrigerate for 20-30 minutes. I use only one dough ball since my pie tin is 6 inches and freeze the rest for next time.

Roll the dough on a floured surface making sure it doesn’t stick to the surface, rotating every few seconds helps. Line in the pie tin and cut off the extra from the edges.

Make holes all over using a fork and line with aluminum foil weighing down with beans or weights. Bake in a pre heated oven at 180℃ for 15-18 minutes. Remove the foil and let it cool.

Lemon Filling: In a heavy bottomed sauce pan add the sugar, corn starch, water and lemon juice. Whisk continuously over a low flame until it starts coming together and looks weirdly congealed.

Take a spoonful of this mixture and add into the egg yolks to temper them.

Add the now tempered egg yolks into the sugar mixture and whisk again, adding the butter and the lemon zest. keep whisking for another few minutes until the mixture is hot and then remove from the flame and let cool slightly.

Meringue: Into a very clean bowl, beat the egg whites to form a somewhat foamy mixture and gradually add in the sugar and keep beating until it starts resembling shiny whipped cream and holds peaks.

Assembly: Fill the pie crust with the lemon filling and smooth it out evenly. Top with the meringue and bake at 170℃ for 30- 35 minutes or until the top starts browning.

Let cool completely for at least 2-3 hours before slicing.

Enjoy!

Rose flavoured rose cookies


DSC_0851These are rose cookies! They smell of rose and they somewhat look like one. Okay they might not completely look like one, but the fact is that they smell so subtly rose perfumed that you might as well be reading Arabian Nights.

The scent of rose always evokes something so mysterious and heady yet lightly perfumed that I just had to make one of these babies for me.

Lately I’ve been so enamored by rose related food that I absolutely had to create something sweet. I was a bit skeptical at first, since I just wanted a subtle hint of the rose and not the full on heady perfumed punch, but once these were made, I knew this was a triumphant test recipe. It’s here to stay and I won’t make any changes to this. I stick to this rose cookie recipe, I do!!

Before I begin, let me just tell you how wonderful they tasted. They were sweet with a subtle rose flavour and absolutely perfect. These didn’t make through an entire day and were greedily devoured even before they could cool completely.

So here goes..

DSC_0801The ingredients were simple enough. Butter, flour, sugar, rose jam, egg, vanilla extract and rose-water. In case there is no rose jam available you can up the quantity of rose-water, however it wouldn’t be all that difficult to get rose jam around your area, I ordered mine online.


DSC_0802You don’t need any heavy machinery for this. A bowl and a wooden would just about do it. Begin by beating the butter until light and creamy.


DSC_0803Add in a tablespoon of the rose jam.


DSC_0805beat to incorporate the rose jam. Can you see the flecks of rose petals? well they are there somewhere.. did you see them? yes? good!


DSC_0806add the sugar and beat again.


DSC_0807This does not look pretty but it doesn’t have to.ahem!


DSC_0808In with the egg.


DSC_0809beat vigorously. This is a very good work out and you’d thank me later for all the muscles you’ve built.


DSC_0810I added in about a 1/4 tsp of vanilla and I didn’t take a picture. I’m pretty rebellious that way


DSC_0812In with a tablespoon of rose-water and I cannot tell you how beautiful it smelled. I have a good mind to actually dab this around my neck instead of perfume. I’m serious.


DSC_0814Finally the flour, and believe it or not but this right here is the cookie batter or dough. easy peasy.


DSC_0815You see this? this is everything mixed well. I’d show you all the muscles I’ve built in this process, but I’m too modest.


DSC_0816Now the fun part! Putting the second rose in the rose flavoured Rose cookies part.. just so you know, the cookie dough is made and of course you can scoop out the cookie dough or batter and bake it just as it is, but I’m fiddly by nature and I had too much time on my hands, so I pulled out my piping bag with a star tip and decided to make swirls.


DSC_0818Put your piping bag in a long glass and scoop in the batter. You have no idea, how difficult this was to photograph! Don’t fill it up to the top because you need enough space to gather the edges of the piping bag and with a twisting motion push the batter to the tip. Squeeze out a bit so that there is no gap or air bubbles and star piping your roses.


DSC_0827I lined my baking sheet with a parchment paper and went on to work. It’s completely up to you how you want the cookies to be. You can make them large or small, I went with the medium size. This is not a necessary step. As I mentioned you can just scoop out the cookie dough and make round cookies and completely avoid this piping madness.


DSC_0829Pretty cookies!!!!!!!! bake them at 180℃ for 12 minutes. If you want them a bit more tinted and browned you could probably do it for about 14 minutes. If you want them underdone then 10 minutes should be about alright.


DSC_0841Seeeeeee!!! pretty pretty rosy cookies. Remember to let them cool on a wire rack before you store them.


DSC_0851Here’s another picture..


Ingredients:

Butter 80g

Sugar 100g

Flour 125g

Egg 1

Vanilla extract 1/4 tsp

Rose jam 1 tablespoon

Rose water 1 tablespoon

Recipe: In a bowl beat the room temperature butter until light and fluffy. Add in the rose jam and beat to incorporate. Beat in the sugar followed by the egg until well combined. add in the vanilla extract and the rose-water and mix well. Finally add in the flour and mix.

The cookie batter is done. You can either scoop these onto the parchment paper and bake or you can put this into a piping bag and using a star tip or in fact any tip you wish, pipe out swirls to make it vaguely resemble a flower. Bake at 180℃ for 12 minutes.

DSC_0843

Enjoy!!


Falafel


DSC_0671Falafel!!!!! I love how it sounds, I love how it tastes, I love how easy it is to make. This is a very Middle Eastern fare, and I do admit that these might not be the most authentic falafel’s, but who cares as long as they taste good. In terms of taste, these babies were up there, no higher up, still higher up.. yeah right there in the taste chart. These are something of an art. They look good, they taste better and they give you such a feeling of accomplishment.. like ‘Oh my god, I made these, all on my own’. I could sing praises, write songs, devote a shrine to this food. My man loves it stuffed in a pita, although I ended up eating half this batch in the kitchen all on its own. My excuse? ‘I have to taste each falafel to know if it needs more seasoning.’

Falafel requires a bit of prep, but not some mind bending crazy preparation, it’s just a matter of soaking the chickpeas over night in some water. Sorry you can’t use canned chickpeas, absolutely not!! for they will disintegrate as you fry.. In the morning the chickpeas will be all sorts of fat and swollen, and you have to put them in a food processor and chop then finely to very nubbly bits.

DSC_0657while you have someone going at the chickpeas in the processor, chop some onions, coriander and chillies to really fine pieces.

DSC_0659see this is what the chickpeas need to look like. Season with some salt

DSC_0660Cumin powder

DSC_0662add the chopped onions, coriander, chillies to the mixture and mix well. You have to get in with your hands and mix. I couldn’t take pictures for the rest of the steps, because my hands were all sorts of covered in ummm.. stuff. Anyway, you mix well and form into flattish patties. In case you feel the mixture is too dry and not holding well together, add in about a tablespoon of flour and it will hold. You have to make sure that the patties form or else these will break while frying.

DSC_0663Once you’ve formed these into patties, go ahead and fry. I’m too scared of frying which is why I always have the man take the heat. There’s just something about frying that scares the rationality out of me.

DSC_0664See! aren’t these pretty? I couldn’t believe my eyes when the first one came out. How gorgeous is this? all this while I ate falafel’s outside which hardly tasted good, I made one on my own.. and boom!! it’s so much better and fresher than the ones you get at food chains and eateries..

DSC_0669How you eat these, is up to you. These taste best stuffed in a pita, slathered with hummus, topped with some potatoes and I also scrunch in some roasted red peppers (you can see how you can make them at home here), and cold beer.

So easy and the rewards are so high. You can plan the most stress free dinners with these falafel’s . Just lay out salads, hummus, pita breads, stuffings of your choice and these falafel’s and let the guests go berserk. They can stuff their pita’s and their faces as they want how they want, and you won’t be stressing about, running all over. Try.

Ingredients

Chickpeas 200g soaked over night

Onion (medium-sized)

Coriander (10 stalks)

green chillies (to your taste) . I used 1 green chilly

Salt 1 tsp

cumin powder 1/2 tsp

flour to bind 20-30 g (1 or 2 tbsp)

Oil to fry.

Recipe: Soak your chickpeas in cold water overnight. They should be swollen in the morning. Drain the water and wash them briefly. Chop them finely into very tiny nubbly bits in a food processor or chopper. DO NOT make in to a paste.

Chop the coriander, onion and chillies finely and add into the chickpeas along with salt and cumin. Mix them well and using your hands form them into patties. If you feel that the chickpeas aren’t coming together, add in a bit of flour and shape them. You might feel that it won’t come together but it will. You can increase the seasoning to your taste.

In a utensil of choice, heat the oil enough to fry these patties. Make sure the oil isn’t smoking. Fry the falafel patties and it will take about 2-3 minutes for them to turn into a golden brown colour. Remove them to paper towel or if you want them to stay crunchy for long then remove them on a wire rack to cool.

It’s easy, not fussy, and you’d love the taste, the texture and the above all, you’d be so please with yourself.

Enjoy!!