Bread Pudding


DSC_0704
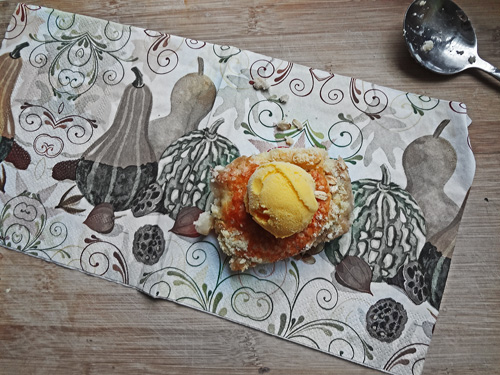
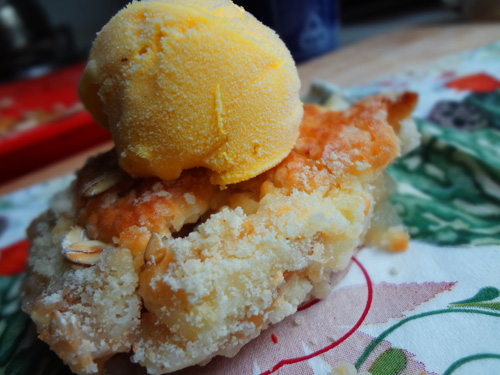
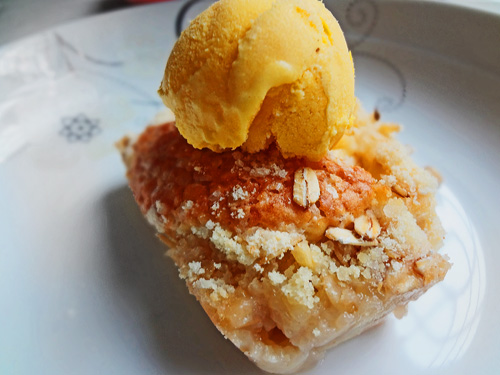
Feast yer eyes, for this is the easiest, most heavenly addictive dessert you’d make. Bread Pudding evokes everything that is homely, classic & decadent.

Put together in a matter moments, nothing gets easier than this dessert.

I haven’t got any step by step pictures for this recipe since there really weren’t too many steps and because I was making it to satisfy my man’s cravings for something outrageously weekend.

Did I eat this? Not a lot, since I’m 50 shades of Lactose Intolerant, but really I did sneak in a few bites here and there, and they were so gorgeous I could have kicked my system for hating on milk.

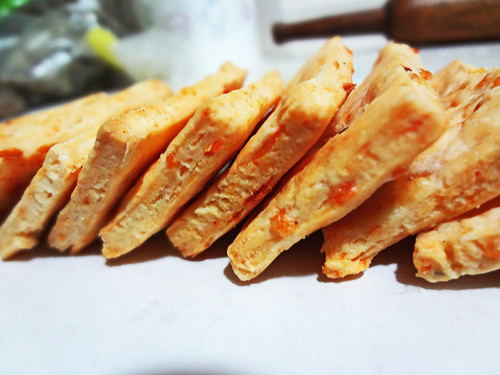
Also the bread pieces are slathered and sandwiched with orange marmalade and this is what gives it a different flavour with every bite, but of course you could as easily change that to any jelly or jam of your choice. From blueberry to ginger jam to pineapple to mixed fruit.. Suit yourself. It’s a very forgiving recipe
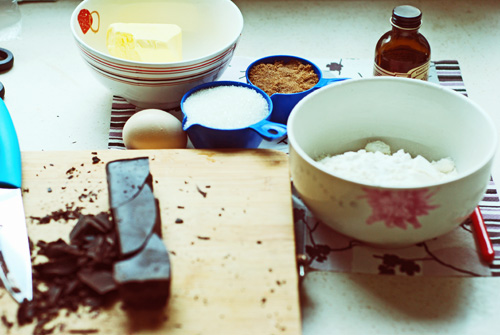
Ingredients

Milk 500 mls (2 cups)

Eggs 2 and 1 egg yolk

Sugar 50 g (3 tablespoons and 1 teaspoon) + extra for topping

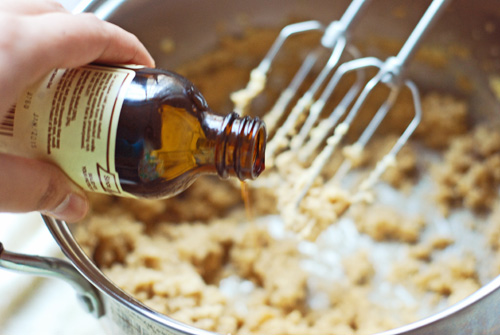
vanilla extract 1 teaspoon

Bread preferably stale (baguette would work great) or 6-8 slices of bread

Orange marmalade or jam/marmalade of your choice

Butter 20 g (1 tablespoon)

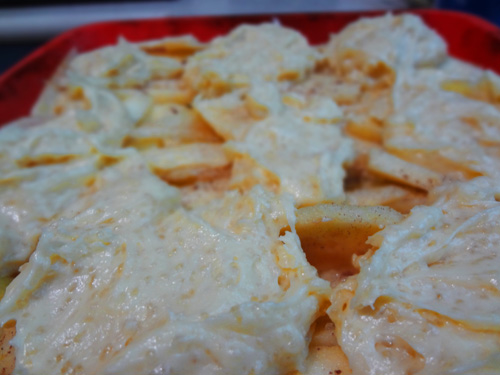
Recipe: Make sandwiches out of your bread pieces with jam of your choice. The bread amount can be varied. It could be 6 or 8 slices of regular bread or half a baguette as I used here. If your bread is too big you can make triangles out of them, if it’s the same size as the baguette here, then just cut about 1/2 inch thick pieces and slather them generously with the marmalade.

Fit them snugly in the oven dish of your choice, making sure it’s buttered well.

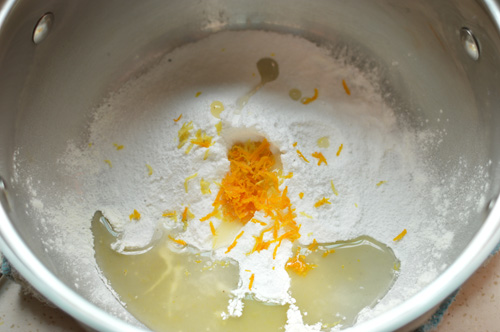
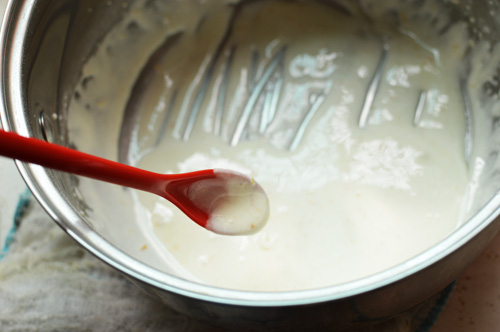
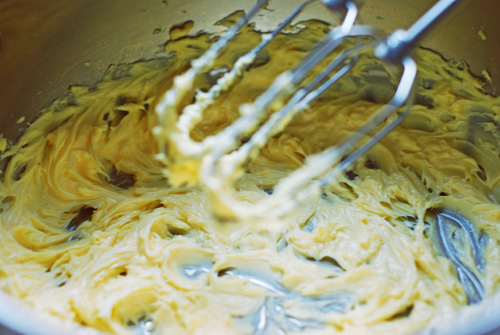
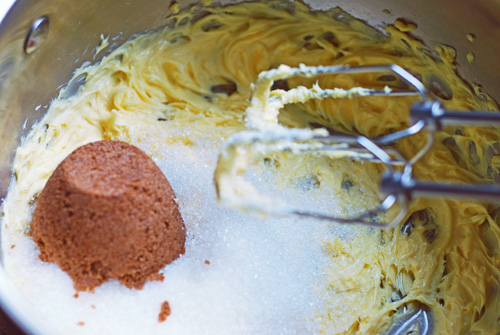
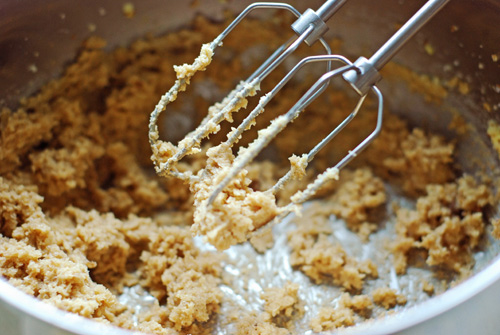
In a separate bowl, mix in the milk, eggs, egg yolk, sugar and vanilla. Mix well making sure the egg is incorporated.

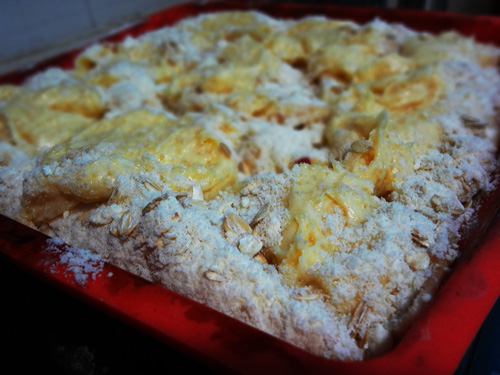
This batter now resembling the summer outside needs to be poured over the bread pieces in the dish. Pour it evenly so that no bread remains dry. Gently coax them into the eggy custard, do not mush them. Sprinkle some more sugar on top so that it caramelizes in the heat of the oven, bronzing the top and adding crunch.

Awesome, now let the dish stand this way for about 10-15 minutes and finally dot the top with some butter to make it golden and sunny and crunchy, after which bake it in a 190℃ oven for 15-20 minutes.

DSC_0704

The results are fabulous, every bite is a song and you’ll fall in love with how easy this recipe is.

Enjoy!!

Citrus butter cookies


DSC_0241

These citrusy buttery delights were something I’d been longing to make ever since I stumbled upon Pioneer Woman’s recipe (here)

For whatever reason’s I kept postponing because procrastination is one of my super powers. Somehow after my man nagged me for a batch of fresh cookies which weren’t chocolate, I figured this is the time I make these citrus drops.

I altered the original recipe a bit because in my remote Chinese town, where even blogging can become a problem, I didn’t have all the ingredients necessary, but somehow I tweaked a bit and these came out ,oh so fabulous, oh so mouth-watering and oh so citrusy, that I imagine the original recipe must have been absolutely off the charts.

This wasn’t difficult, in fact it was one of the easier cookie recipes and so much fun to make.. so here goes.

DSC_0190

The ingredients really easy and quick to assemble. Butter, sugar, orange juice, orange zest, egg yolk, lemon zest, lemon juice and flour.

DSC_0191

As with most cookies out there, it begins fairly easy by creaming the butter which becomes a lot harder if it isn’t at room temperature. Also you don’t have to cream it’s soul. Just a minute would do, or even less.

DSC_0194

In with the sugar

DSC_0195

followed by the egg yolk

DSC_0196

I’d really hoped the yolk maintained it’s integrity but NO!

DSC_0197

Beat the butter, sugar and egg yolk and add the zest of both lemon and orange, but also reserve a bit for later, which we will come to in a bit.

DSC_0198

now the flour

DSC_0199

beat that all together and you’d probably end up with a bit crumbly mixture. It’s really not a problem, because now you add some orange juice

DSC_0200

and some lemon juice

DSC_0201

Mix well and it shall all clump into this sunny yellow glorious dough. Just a faint whiff and you’d faint.

DSC_0202

Roll into balls. It’s almost as if I’m moulding a sun.

DSC_0203

this is just to let you know how big these were. I scooped out using my melon scooper. These were the prettiest things I saw all week.

DSC_0206

Lay them out on a parchment paper, so as to avoid any stick up that might happen.

DSC_0213

Behold the mighty yellow kisses of sun.. I baked mine for some 15 minutes at 190℃ . I also flattened their tops a bit using the back of a glass before pushing them in the oven. Can you see the orange specks of the zest? Let these cool, while we get on with the icing.

DSC_0214

The icing is simple enough. Lemon and orange zest, meringue powder, lemon and orange juice. It’s actually royal icing, but I’m not too sure about the eggs here, so instead of making them with egg whites, I used meringue powder instead. But if you have your own royal icing recipe using egg whites, please feel free.

DSC_0216

This is just Meringue powder, lemon and orange juice, the zests and powdered sugar, all beaten into a frenzy to create…..

DSC_0218

THIS!!! isn’t this beautiful? the consistency is really up to you, but i like thick fat icing ribbons so I didn’t let it get too thin a drizzle.

DSC_0229

Using a spoon,or a piping bag if you want more elegance, lay on the icing as you wish, however you want.

DSC_0231

Absolutely unsure fat patterns. Also before the icing dries don’t forget to put some more strands of zest on these babies.

DSC_0239

See??

DSC_0241

These are sugary, buttery bites of citrus in your mouth. Your cheeks will feel it, you will love it and your man, well mine kept lurking until the last pictures were taken, and then these were devoured rather mercilessly.

These have to be made to be believed, and you’d feel oh so competent about yourself..

Thanks a lot Pioneer Woman for these full flavoured bites of citrus love.

Ingredients

200 gms Butter

150 gms sugar

1 large egg separated

200 gms all-purpose flour

30 gms of lemon zest and orange zest (roughly 2 tablespoons)

40 mls each of lemon and orange juice

ICING

Meringue powder (as mentioned on the box)

30 gms of orange & lemon zest + extra for decoration.

30 mls tbsp orange and lemon juice

For the consistency I had, I used about 30 gms (around 2 tbsps) of meringue powder, 50 gms powdered sugar, scant amount of water and 30 mls (about 2 tbsps) each of orange and lemon juice. But really it’s up to you. You might want to go thicker or thinner with the icing.

Instructions

Cream the butter (make sure the butter is at room temperature), add in the sugar and egg yolk. Beat again to mix and add in the zest and the flour. Beat until it’s more or less mixed and finally add in the juice and beat to combine.

Scoop out equal sized balls using a melon scooper, or however your MO is and roll them into balls. Line on a parchment paper and slightly flatten their tops using the back of a glass. Bake at 190℃ for 15 minutes and let cool completely before icing.

Meringue icing as per instructions or as I mentioned above for the consistency I got. Decorate your now cooled cookies as you desire, or just go for a not so subtle pattern and drizzle the remaining zest before the icing dries off. Remember to let the icing set before unleashing yourself.

Chocolate, chocolate & more chocolate chip cookies


DSC_4984These are obscenely chocolate, and fit only for those who have some serious chocolate addiction. If you love the cookie part more than the chocolate part in chocolate chip cookies, then sorry !!!! THIS IS NOT FOR YOU!!! but if you love chocolate chip cookies not for the faint cookie base, but for its rich chocolate taste, then THIS IS FOR YOU and WELCOME TO THE CLUB! are you reading these caps while shouting out the words? sorry I didn’t mean to be weird and mean, but I’ve had 2 of these babies and Im feeling strangely buzzed. Perhaps it’s all the chocolate or perhaps its all the chocolate. I don’t know..

These are the delicious, fattening, pant tightening, addictive, chocolate oh yeah they’re chocolatey and you might want to go to the chocholics anonymous.. But if you make them, you will make them again and again and eat them and thank me. I’m serious.

One of the biggest reasons I made them is also because I happen to have a lot of chocolate on me now.. seriously good chocolate. The kind of chocolate you’d want to eat in heaven..but getting back to these cookies..

DSC_4939


You need flour(mixed with salt and baking soda), butter, sugar both white and light brown, egg, vanilla and obscene amounts of chocolate. Do you see that fat bar of chocolate.. yeah that amount..

CSC_5019


Cream the butter for a minute. make sure it’s room temperature. You don’t have to use mixers for this. A wooden spoon would suffice, but for these majestic cookies I brought out the big guns.

CSC_5018


In goes the granulated white sugar

CSC_5017followed by brown sugar

CSC_5016


This is for effects.. see how nicely packed my brown sugar was. Beat again for a minute until all the sugars are evenly distributed. We don’t ant any lumps

DSC_4955


Add the egg also at room temperature. You don’t want to put in anything remotely cold from the fridge okay?

DSC_4954Vanilla…

DSC_4953


Beat some more to mix in the egg and vanilla and let it look like this.

CSC_5014


In with the flour. I have already mixed salt and baking soda right into the flour.. I’m a visionary.. yes I am.. ok I’m not.

CSC_5013


Mix it again for a minute or until the flour is barely incorporated. You don’t have to mix it within an inch of its life. This is a step where you can easily use a spatula or a spoon.

DSC_4960


My favourite part. Dumping in the chocolate. See I wasn’t kidding about it at all.. It’s a lot of chocolate.

DSC_4964


This is eventually what it’s all going to come down to. Mix the chocolate into the cookie dough until it’s completely flecked with chocolate pieces, chunks, shavings & smithereens

DSC_4966


This is the dough that will eventually make cookies. It’s more chocolate less dough, just the way we like it aha aha. Now refrigerate for half an hour.

DSC_4967


Once out of the fridge, use an ice cream scooper to scoop out even sized cookies.

DSC_4972


Onto a sheet lined with parchment paper,line the cookies. These spread quite a bit so space them out more than an inch apart.

DSC_4992


Look at these.. just look at them. Every bite is sinfully good, seriously chocolatey and oh my god. It is not for the faint of heart but if you like your chocolate a lot then this is one of the best things you could make with them.

DSC_4994


Go on.. Make it already.. seriously you have to.. Enjoy!!

Recipe

125 gms flour

80 gms white sugar

60 gms light brown sugar lightly packed

130 gms good quality dark chocolate. Either chocolate chips or chocolate bars cut into pieces.

1/2 tsp salt

1/4 tsp baking soda

110 gms butter

1 egg

1 tsp vanilla extract

Recipe – In a bowl sift the flour, salt and baking soda, mix well and keep aside.

Begin with beating your butter which should be at room temperature for about a minute. Either with a mixer or a spoon or spatula until a bit light.

Add in the sugars and beat again.

crack in the egg, add the vanilla and beat for a minute or so again.

Add in the flour and beat until just incorporated. You don’t want to overmix at this point.

Now taking your spoon or spatula, scrape the sides of your mixing bowl and stir to mix in any stray bits of flour or sugar.

Now tip in the chocolate pieces and mix until  the dough is flecked with chocolatey rubble.

Refrigerate this dough for half an hour. For better results let it go in for 3 hours.

using an ice cream scoop, scoop the cookie mixture on a baking sheet, lined with parchment paper. Make sure there is enough space between ech cookie since they spread out.

Bake at 180℃ for about 12-15 minute or until they brown a bit at the edges.

NOTE You have to let these cookies rest on the baking sheet for at least 15 minutes or they will break when you transfer them on a wire rack to cool. These are very soft and gooey when just out of the oven. Wait for them to firm up slightly.

Enjoy with a tall glass of milk or senseless television..


Spicy masala cookies


CSC_4925


For some reason these harsh winters have put me in a cookie mode. I’ve been buying, eating and baking cookies. But aha.. these are not sweet cookies but salty spicy ones.. well not spiky salty like chips or crisps but very mildly saltish to the taste with a twang of spice. The spices being rather mellow, subtly biting and very addictive.

I had no recipe to start these cookies with so I was just trying and testing in the kitchen but accidentally or rather Fortunately these cookies turned out excellent. They tasted exactly how I wanted them to and I penned down the recipe and I’m sticking to it. I am !!!

Since these were just testing I didn’t bother with making a huge batch. You can easily double or triple the amount. These cookies are not thick and big, but dainty and petite which makes them all too easy to eat.

CSC_4917


see !! not fat at all..

Ingredients 

70 gms butter (you can also use salted butter for these cookies)

1 egg

1 tbsp sugar

2 tsp salt

125 gms flour

SPICES

1 tsp cumin seeds

1 tsp mustard seeds

4-5 curry leaves

1/4 tsp freshly ground pepper

1/4 tsp chilly flakes

RECIPE

In a dry pan fry the spices (except pepper and chili flakes) for a couple of minutes until browned. The mustard seeds will starts spluttering and you will get the most heavenly spiced aroma. Make sure the pan is dry. You don’t need to add any oil.

Once the spices are browned and giving off their aromatics take the pan off the heat and crush the spices. You can do these win a mortar & pestle. I used my rolling-pin. Keep these aside.

In a large bowl beat the butter with the sugar and salt for a minute or so. add in the egg and beat again.

Now add the crushed spices along with the pepper and chili flakes and beat until the spices have turned your beautiful yellow butter to tarnished brackish spiced goodness.  Add in the flour, and at this moment its best to use your spatula or wooden spoon to incorporate everything together.

Once it has formed a sort of dough and you can see the flecks of spices dotting your mixture, believe me it only gets better now.

Roll this cookie dough on a lightly floured surface. You can make these cookies fat or thin, depends how you like them. I roll them out quite thin perhaps 1 cm or less (you can see in the picture above)

Once they’re rolled out you can use any shaped cookie cutter and stamp out shapes. You can make them round or just basic square.

Place them on a sheet. These cookies don’t spread, so you can space them close.

bake in a pre heated oven at 180℃ for about 12-15 minutes, or until the edges have browned slightly. It also helps me to rotate the cookie sheet after 8 minutes or so.

Let them cool slightly and they are ready to eat.

You can either eat them on their on as they are or even use some dip or salsa or even this hummus

CSC_4913


Another picture to inspire you to make these immediately..

Enjoy !!!

Apple Cobbler Crumble


DSC02166


What what? a cobbler and a crumble together? Yes indeed.. for why just have a cobbler when you can also have a crumble and vice versa.

This idea happened not because I was feeling very inventive, well maybe I was.. I was greedy and the fat juicy apples sitting in front of me asked me how they’d like to be cooked.. now I’m just hallucinating. Actually I initially wanted to make a crumble but midway I started making a cobbler and then came back to crumble.. I’m confused that ways. But seriously, once you’ve had this divinity, you’d probably end up making this all the time.

Out of habit I always make a lot of crumble topping and freeze it for instant crumbles, so of course I had the crumble ready..  you never know there might be a surplus of fruits and you’d want to top them with crumble.. Be prepared in life I say.

Okay, so this is how I went with it..DSC02163

I know, I know.. I couldn’t resist another picture of the gorgeousness that was this crumble cobbler or vice versa.. yes it’s an ice cream atop that.. Yes it’s winters, and yes its French vanilla ice cream.. thank you.

DSC02137


These are 3 apples. Peeled, cored and sliced. Use whichever ones you want. In your baking dish try to pile them evenly.. I did say TRY !!

DSC02138


Sprinkle some sugar. I used about 3 tablespoons of granulated white sugar

DSC02140


Sprinkle some cinnamon.. you can be a bit more generous.. I couldn’t because le huzbend don’t like no cinnamon very much (cry a little)

DSC02141


Set the apples aside and start with the crumble topping. I have flour and salt (mixed), sugar, baking powder, butter, egg and vanilla.

Sift together the dry ingredients and in a separate bowl melt the butter, add the vanilla, and bet in the egg.. so basically a bowl of dry ingredients and a bowl of wet ingredients.

DSC02142


Mix in the dry ingredients into the wet one or vice versa. and mix till all’s well mixed. It’ll be a thickish batter. If your batter doesn’t get to a dropping consistency then add 1 tablespoon of milk.

Spoon the batter over the apples.

DSC02145


I spooned over the batter in 9 uneven albeit somewhat pretty dollops. Don’t laugh.

DSC02144


Here’s another close up..

DSC02146


Here’s the crumble part. I added a bit of rolled oats to the crumble. As I said I had this crumble ready in the freezer for any passing fruit might need it..

DSC02147


Now sprinkle the crumble over the exposed apple parts. Honestly I didn’t mean for it to sound dirty. Sprinkle the crumble over the non cobbler parts and bake @ 180℃ for 20-25 minutes.

DSC02149


the baked result.. Let it cool a bit.  Cut a generous slice, top with vanilla ice cream and please eat it already..

DSC02157


Le another picture.. ok no more.. Enjoy !!!


Ingredients & Recipe

3 Apples

2 tbsp granulated sugar

1/4 tsp cinnamon powder

For the cobbler

1/2 cup flour

1/4 cup sugar

1/2 tsp baking powder

1/4 tsp salt

2 tbsp butter melted

1 egg

1/2 tbsp vanilla

For the crumble 

1 cup flour

1/4 cup sugar

1/3 cup almond flour

1 tsp baking powder

1/3 cup cold butter cut into cubes

2 tbsp rolled oats.

Recipe

Peel core and slice the apples and line into your baking tray. Try to make them even.

Sprinkle the sugar and cinnamon and set aside.

For the cobbler, mix all the dry ingredients into a bowl. In a separate bowl mix the melted cooled butter with the vanilla and egg and mix.

Add the wet ingredients to the dry and form a batter. If the batter is too thick add in 1 tbsp of milk. Spoon the batter over the apples.

For the crumble sift together the flour,sugar, almond flour and baking powder. Cut the cold cubes of butter. You can either use a food processor, pastry cutter or simply your fingers. Once your mixture reaches a porridge like consistency add in the oats. Let there be clumps of butter since these will brown and give your crumble a burnished look.

Sprinkle this crumble mixture over the apples which do not have any cobbler on them. Make sure your apples are mostly covered with either cobbler batter or crumble mixture.

Freeze the remaining crumble mixture and use them as and when needed..

Bake 180℃ for 20-25 minutes.


Cheddar & cream cheese crackers


cheesy crackers

Yes these are crackers full of cheese and yes they are fattening, which is why you don’t make too many of these and eat them all at once. I made that mistake, you don’t have to.. but if you don’t then you’ve not lived.

These are crackery, as in crispy and have faint hits of paprika and cheesy.. yes cheesy. The worst part is that they’re all too easy to make and sinfully addictive.

Ingredients

1 cup flour

4 tbsp cold butter

150 gms grated cheddar cheese

75 gms cold cream cheese

1 tsp paprika

1/4 tsp freshly ground pepper

1/2 tsp baking powder

3-4 tbsp cold water.

In a processor mix all these ingredients until they’re just about to clump. In case you don’t have a processor just cut the cheeses and the butter into the flour mixture much like you do while making a pastry, you can use a pastry cutter, fork or your finger tips. Once the flour mixture resembles a coarse oat meal mixture, combine using water forming into a rough ball.

Wrap in plastic and chill in the fridge for about 25 minutes.

Once its slightly cooler roll it out to about 1/8th of an inch and cut into any shapes you want.

I was lazy, so I just took a knife and scale and made 2cm X 4cm rectangles.

Make a hole in the middle of your crackers before baking.

Bake at 180℃ for 12-15 minutes.

Let cool before popping one in your mouth..

You can eat these just as they are, or with your favorite dips, drinks.. etc etc..

cheddar & cream cheese crackers

Feast ye eyes on another picture..

Enjoy !!!!

Pretzels with beer cheese sauce


IMG_20120930_152543

Not exactly a revelation but a suggestion from my dear friend Aarti who replied to my desperate tweets on a Sunday afternoon, answering my “what should I eat today” question. She sent me this beautiful link from Curvy Carrot adding that If I was up for something elaborate then this is what I should make.

Looking at the blog’s beautiful pictures and totally mesmerized by the words ‘Pretzels’, ‘beer’ & ‘cheese’ in one sentence I knew this is what I would make.

I tweaked the recipe a bit to suit whatever ingredients I had handy that afternoon, but the results were nothing short of ecstatic. Once the pretzels were hot out of the oven and the beer cheese sauce gooey and warm, I nestled myself on the couch in front of the television, refusing to acknowledge this world or any other existence. For 20 minutes until there were but crumbs on my plate did I lift my head up to realize, the television was on, playing something absolutely unnecessary.. but did I care? No!!!.. this sauce is a fuzzy warm beery heaven, a grotto of pleasure worth visiting every time you can make any excuse for a dip.. at least I do..

I adapted my earlier Pretzels recipe already on this blog and instead of making miniatures, made two fat patties and continued with the recipe here

as for the beer cheese sauce…

Ingredients for the beer cheese sauce (adapted from curvy carrot)

6 tbsps butter (I used salted)

1 cup spring onion

1 bay leaf

4 tbsps flour

1.5 cups beer (any beer is fine)

3/4 cup cream (I used single cream)

1 tsp fresh ground pepper (not so fine pieces)

1/4 tsp allspice

nutmeg (a pinch)

1 cup cheddar cheese

1/2 cup cream cheese (room temperature)

Salt to taste

a dash of cayenne

Making this sauce wasn’t difficult at all. In fact I started making it once the pretzels were popped in the oven.. working fast I melted the butter on medium heat in a pan of choice.

Add the onions and salt and cook until translucent. Add in the bay leaf, pepper and mix for a couple of minutes.

Add the flour and mix for a bit, the roux will look all sorts of lumpy and dry but really it’s a good thing.

Slowly start adding in the beer, and keep mixing constantly to remove any lumps and, watch it all thicken.. apart from the beer facial you will get when you keep smelling it constantly. I did this for a couple of minutes .. kept smelling along with mixing.

Now add in the cream and stir as usual. add in the nutmeg, allspice and cayenne. Cook and stir and mix and let it lightly simmer. ensure that this mixture thickens as you’re cooking it on slow heat. Mine took about 15 minutes.

Just as it has thickened add in the cheese, turn off the flame and let it all melt and meld together.. of course keep whisking and stirring and mixing until all cheese has melted in it.

Serve warm ..

This is it.. beer cheese sauce. You can adapt, make changes to suit however you want your dip or a sauce to be. you can use all cheddar or any other cheese you fancy. I used whatever I had on me that time and it turned out fabulous.

The point is, when you have beer, cream and cheese all together you can’t really go wrong with it.

Enjoy !!!


Cheesy pizza.


Excuse these latest pictures, and feast ye eyes on this hunk of a cheesy pizza. Hot out of the oven and made from scratch. It’s fresh and it’s fast and it’s a feast.

This dainty little thing fed about 5 people. It’s not exactly thin crust, though you could make that if you wished. This was a fat, almost focaccia like base with tons of toppings and cheese.

Ingredients 

for the dough base:

500 gms strong flour

1 packet active dry yeast.

230 mls lukewarm water

1 tbsp sugar

2 tsp salt

20 mls olive oil.(regular olive oil)

Toppings

300 gms of good mozzarella cheese

diced and chopped vegetables/meats of your choice.(billions of combinations, have fun with your food)

– I used peppers, onions, tomatoes, garlic, chillies diced thin.

Pizza sauce- my recipe

4-5 medium-sized blanched tomatoes.

1 tsp oregano

1 small chopped onion

3-4 garlic cloves

1 tsp salt

2 tbsp olive oil (regular not extra virgin)

1 tbsp butter

1/2 cup red wine (any good red wine)it really brings in the flavours.

1/2 tsp crushed black pepper.

DOUGH BASE

Firstly dissolve the sugar in the lukewarm water and keep aside.

Sift the flour, salt and add in the yeast. mix well. gradually add in the warm water to the flour and knead well to make a smooth, stretchy dough. If you need a mixer for the this, go ahead and knock yourself out. I love a bit of intense labour work and made a dough simply using my hands.

Once the dough is nice and smooth, and I kneaded for a good 10-15 minutes, add in the oil and knead again. Once done, leave it to rise in a warm place, cover with a well oiled cling film or moist tea towel. This rising will take about an hour.

PIZZA SAUCE 

in a food processor give the tomatoes a few pulses so that they size down a bit and are quicker to cook.

In a saucepan, heat oil and butter and add the minced garlic cloves and onions. add a pinch of salt and cook until translucent. Tip in the tomatoes and cook until softened and thickened about 10 minutes. Once the gloopy sauce has turned into a thicker paste and you see bits sticking into the saucepan add in the wine stirring continuously ensuring that all the caramelized pieces are deglazed and mixed into the sauce. Once the wine starts bubbling out and reducing, start adding in the oregano, salt and pepper. Let it all cook till it’s no longer watery and looks spreadable.

Leave it to cool, and check out your pizza dough. give it a couple of good punches, once you see it has doubled in size and let it deflate. Leave it to rise again for another 15 minutes and get on with the pan/tray you want to make your pizza in.

I used a jelly roll pan which was about 12X12X1 inch and generously oiled it.

Tip in the dough into the pan and start stretching it to fit completely. It might not look like it will fit, but yes it will. make sure that it’s not uneven. keep smoothening it out and make it fit well.

Once done spread the pizza sauce leaving at least 1/2 inch along the border of the pizza. sprinkle with half of the grated mozzarella cheese and adorn with toppings. Mound the remaining cheese on top and bake for 25 minutes in a  hot 200℃ oven.

Slice it into the pan, don’t even bother taking it out. Feed as many or reserve for a delicious cold breakfast next day.

Cheesy stuffed potato jackets


The pictures aren’t really great this time. I decided to make these one evening, when I was both hungry, bored and craved something EVIL. These fat beauties are so luscious and filling and cheesy that the guilt doesn’t stay too long.

The stuffing is actually entirely up to you and what you happen to have on you at that moment . I had some mozzarella leftover from a few days, and well that’s how I decided to use it. So here goes.

I had a few medium-sized potatoes, which I baked for 45 minutes at 220℃. Yes I inserted a very thin knife to check for doneness. You can see the surgery mark in the second potato.


oil the baking tray and the set these cut up potatoes, skin side down.

Scoop out their innards as much as you can without really tearing up their skins. You don’t have to be overly careful or scoop within an inch of their lives. The green tinge is from a tinted window, I know these aren’t the most fab pics. I have made peace with it.

here’s the filling. It has the scooped out potatoes, 1/2 cup mozzarella cheese, crushed garlic, mayonnaise, a dash of salt and a bit of crushed red chillies.  These have to get a mixing and smoothed together until its come to a consistency where it somewhat resembles a thick paste of gloriousness.


The hollow potatoes are now stuffed. It took about a tablespoonful in each, and then topped off with more grated mozzarella. I also drizzled some olive oil on top to make them a bit more brown, burnt and oozy.

Bake them at 200℃ for 30 minutes, or until you can see the cheese swell up, and tan.

This came out smelling hot and so gorgeous. It was practically oozing all over the tray. A bit of mustard and you’re done. You might not fit into your pants the next day, but it’s totally worth it.

Ingredients

– 3-4 medium-sized potatoes

1/2 cup mozzarella cheese

1 tablespoon mayonnaise

1/2 tsp salt

1/2 tsp crushed red chillies

2-3 cloves garlic (crushed.)

2 tbsp olive oil (any regular oil will do)

You know the rest.. right.


Orange muffins


These plump beauties, with the right notes of orange are not only fresh tasting but also serve as such a delightful post meal dessert. In fact I ate them instead of a meal but that’s only because they don’t feel overly heavy or dense. Delicate flavours, that orangey tang and all in a form of cake. It doesn’t get better than this.

These muffins are actually a spin on Dorie Greenspan’s lemon and poppy-seed muffins. Since they called for fresh lemon and poppy seeds, both ingredients strangely absent from my local walmart (I live in China), I decided to play with oranges, and believe me, I wouldn’t have has it another way. This has tasted better than any orange related confectionery, dessert, cake I have ever had.

Ingredients

3 tbsp sugar

zest and juice of a small orange

1 cup flour

1 tsp baking powder

1/4 tsp baking soda

1/4 tsp salt

1/2 cup yogurt

1 large egg

1 tsp pure vanilla extract

4 tbsp melted and cooled butter

In a large bowl, mix together the sugar and lemon zest with your finger tips, until the sugar is moist and the fragrance of orange is strong.

Whisk in the flour, baking powder, soda and salt.

Now, in another bowl whisk the yogurt, eggs, orange juice, vanilla, and melted butter together until well blended. It will smell heavenly.

Pour the liquid ingredients over the dry ingredients and stir to blend. Do not over mix, just stir in until it all just comes together. Lumpy muffin batter makes for the lightest muffins.

Divide the batter in the muffin trays and bake for 18-20 mins @ 200℃

makes 6 muffins..

Another pic for the morale boost..