


Pumpkin soup has a special place in my repertoire and I’ve been dabbling with a lot of different recipes and ways to make this soup and not that I’m trying to be smug or anything but looks like I’ve finally perfected a recipe that I might sick to, and that it needs no pottering over a stove really does help.
The thing about soups and pumpkin soup, in general, is that it’s a very non-fussy way to create deliciousness from a rather humble looking vegetable and it’s versatile in a way that there’s never just the one way of cooking it just like there’s never one way of eating something and this particular recipe can be adapted to make pasta sauce, pizza sauce and curry base as well. Just a question of thinning or thickening it to your liking and I like it on the thicker more velvety side of things and that’s what I said and say.
Right, this blog is no stranger to pumpkin soups and in fact, I’m linking a previous pumpkin soup recipe here as well which is just as delicious but not nearly as quick and mad with flavours.

Did I mention it was simple as simple as can be? The taste and colour are amped up with spices and how much or how little you add is up to you but I like it very spicy especially in this weather and turmeric helps with the goldenness of it all. Like molten sunshine on a chilly afternoon. There’s pumpkin, onion, garlic, salt, turmeric, cinnamon, paprika, nutmeg and black pepper.

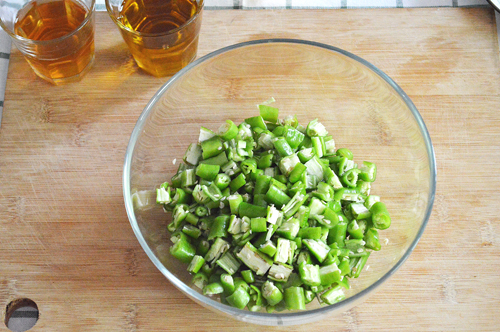
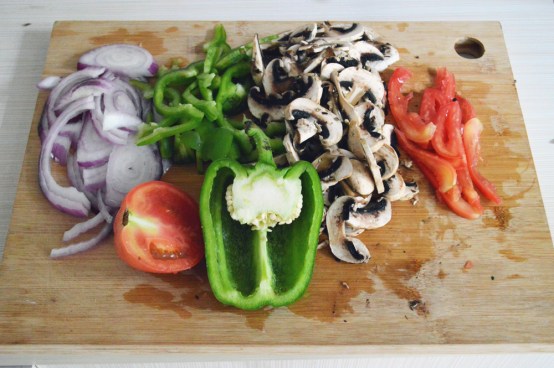
Chop the vegetables to an almost equal sized thickness and add some oil. The amount of oil you want to add is up to you. It could be a drop, a drizzle or a glug. Did I mention this is an atrociously healthy recipe as well?
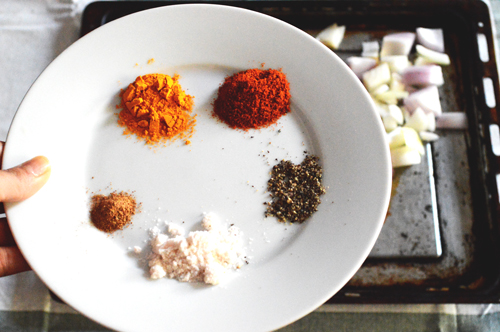
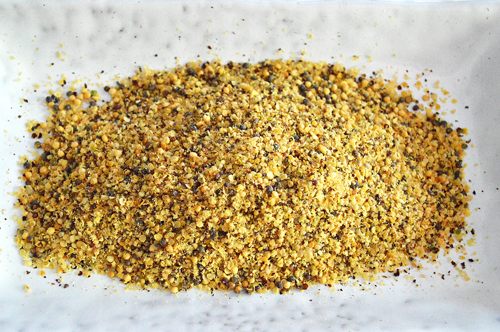
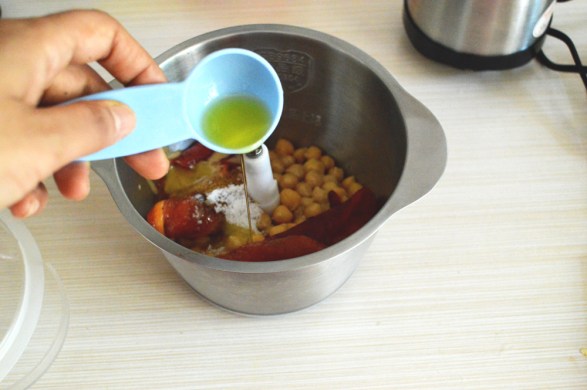
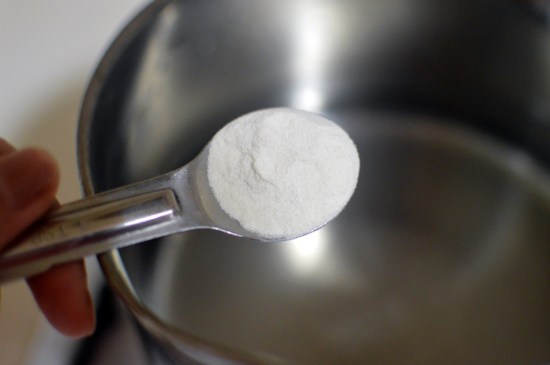
Next, come the spices and this is really what maketh the soup. I’ve been known to add almost three times the amount of pepper I show here and so can you. The spiciness is really a personal choice and so is salt. No nutmeg at this stage. It comes in later.

there you go. All in.
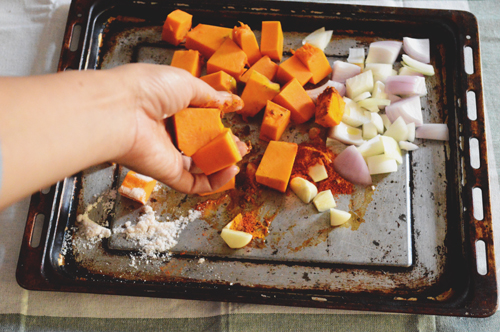
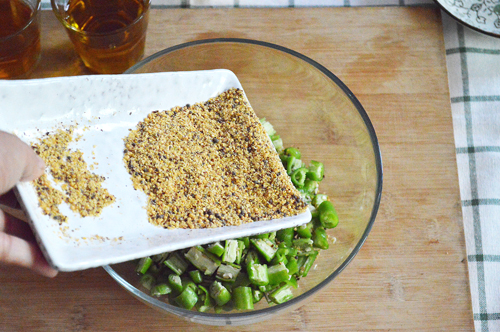
Time to smoosh it all together. Coating the vegetables with spices and oil.
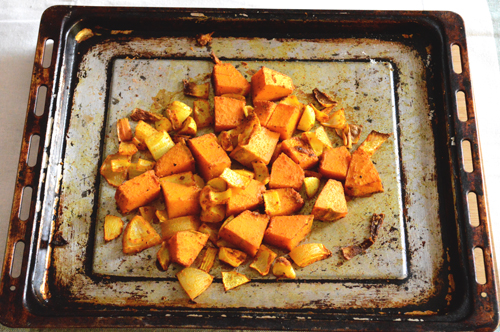
Bake at 190º for 15-20 minutes until the pumpkin is almost falling apart and the onions and garlic have softened but not burnt.

At this stage, you can modify it to how you’d want the final results to be. You can add stock, cream, coconut milk, regular milk or just plain water which is what I’m doing because it’s choke full of flavours but having said that I do add coconut milk to it on days when I’m in an altogether different mood.
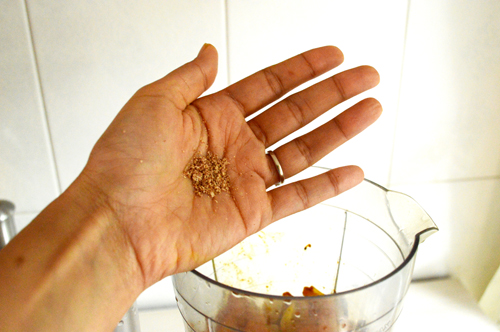
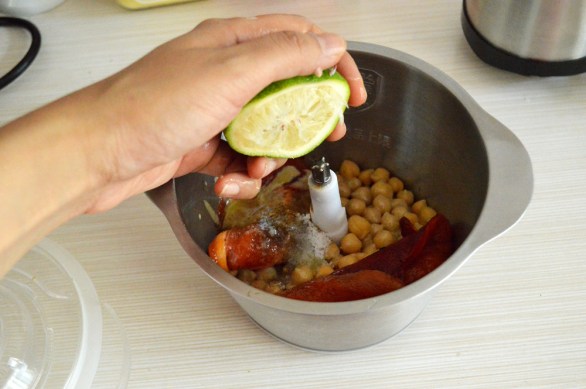
grate in a bit of nutmeg and add that as well. Not too much or it’ll overpower. Just enough to haunt the soup with a peripheral kiss of the exotic and blitz.
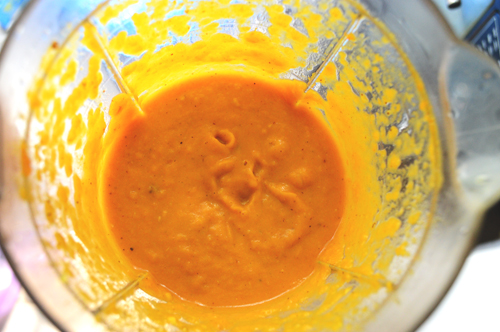
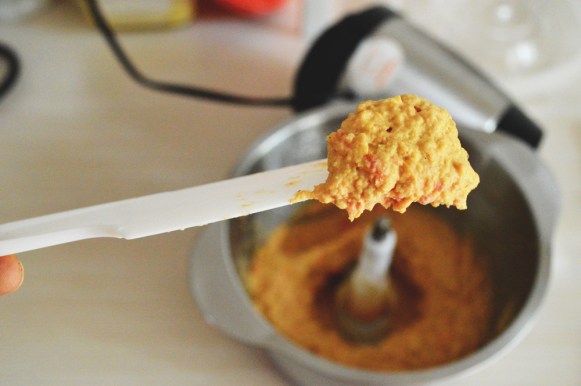
Pulse until it’s all emulsified and you have glorious golden soup. Oh, how it glows. taste for seasoning and thickness and adjust by adding more of whatever is required.

and lo and behold!
Ingredients
Pumpkin: 250g
Onion: 1 small
Garlic: 3-4 cloves
Turmeric: 1heaped tsp
Paprika: 1tsp
Black pepper: 1/2tsp
Salt to taste
Cinnamon: 1/2tsp
Nutmeg: 1/4tsp
Oil: 2tsp
Water: 200mls
Recipe instructions
Chop the vegetables into equal sized portions and drizzle over oil and mix in the spices and salt except for nutmeg. Place in a baking tray and bake at 190º for 15-20 minutes or until the pumpkin is very tender and the other vegetables softened.
Add the vegetables to a mixer, grate in the nutmeg and add hot water and blend to a smooth puree.
Serve hot with bread or even rice.


 These symmetrically gorgeous yellow and white pieces of soft squares are the stuff of dreams most soothing and calm. As lovely and mysterious as these are to look at, they taste almost as tranquil and smooth.
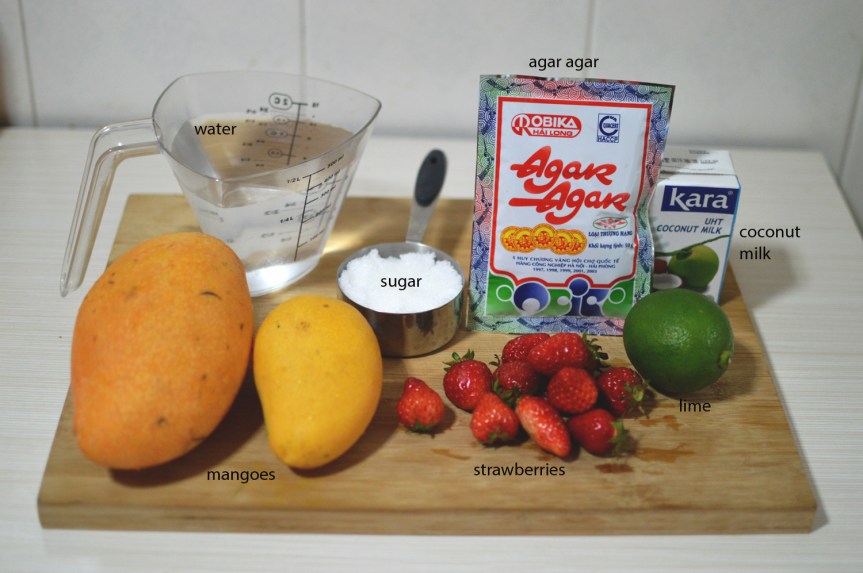 the ingredients are mangoes, sugar, lime, strawberries, coconut milk, water and agar agar.


 cut into squares and serve chilled.

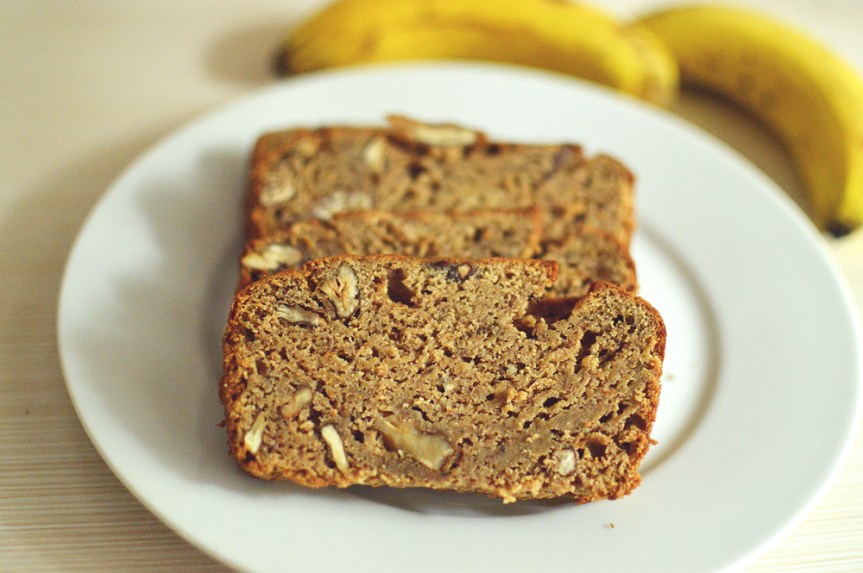
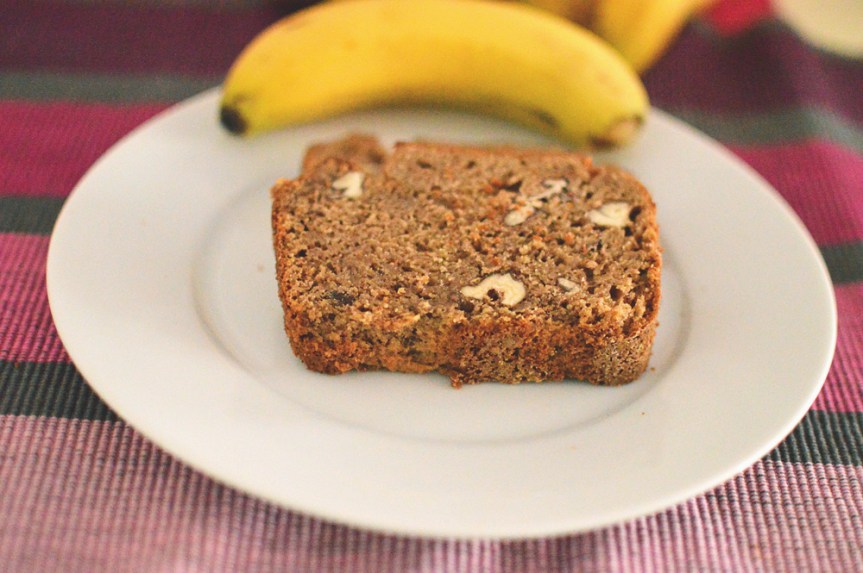 Most beguiling, calling this a bread, when in essence, it actually is a cake. I guess it’s probably called a bread because it’s baked in a loaf tin. Ah, well.. ‘a rose by any other name’ and all that jazz. So indeed, this rather bashful, withdrawn looking cake/bread is exactly that. An air of polite modesty about its person, this cake doesn’t pretend to be a showstopper, or a stunner, gracing the high tables of a luxurious dinner party.
 The ingredients are simple enough. mashed bananas, brown sugar, coconut oil, soy milk, eggs, wholewheat flour, vanilla, ground spices and nuts.


 and Voila!!
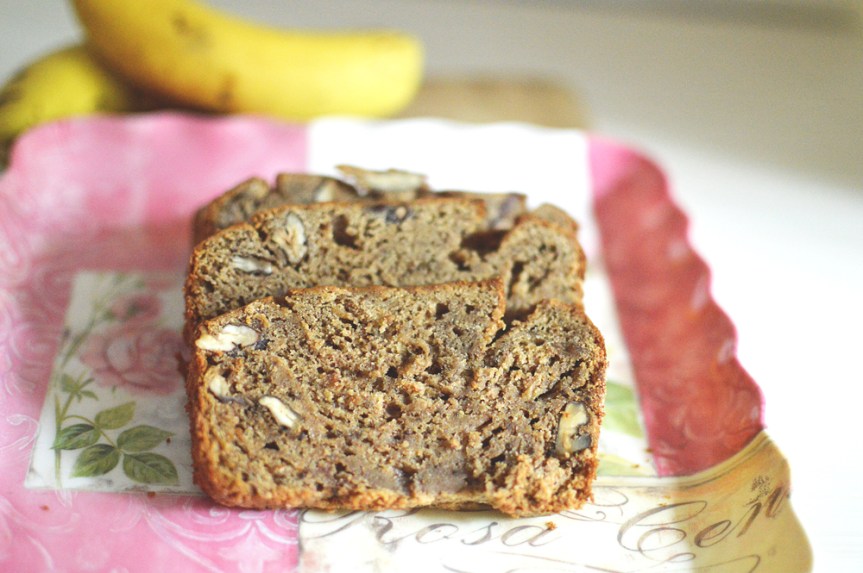 Enjoy
Enjoy

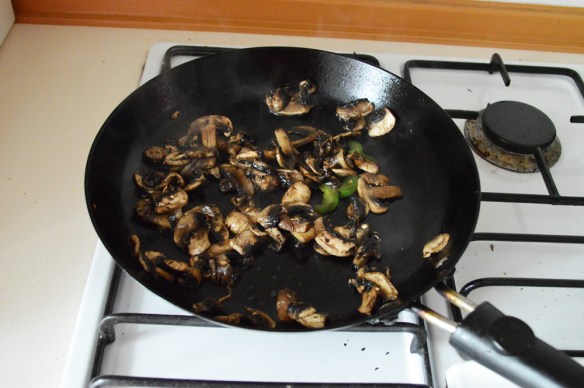
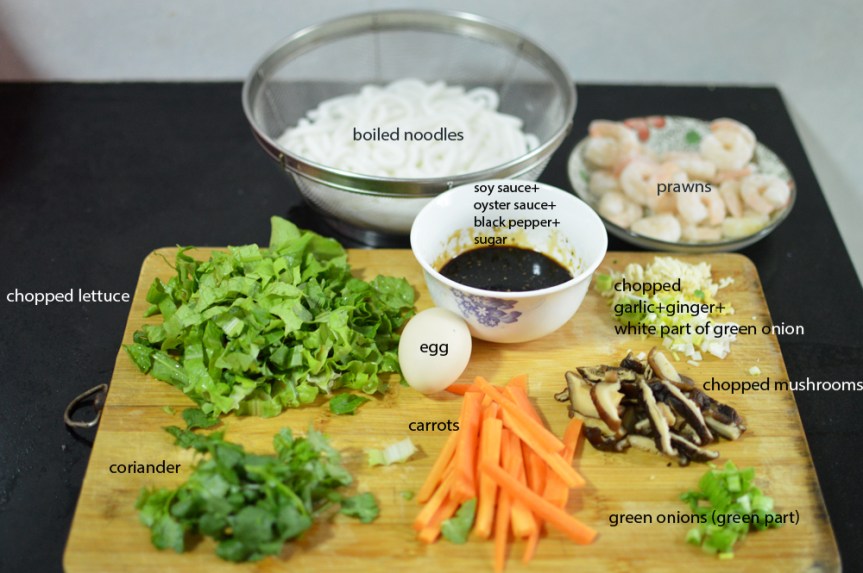 The ingredints do look like a lot to take in but they can be as many or as few as you want. For the flavour base-chopped garlic, ginger and white part of spring onions. For the sauce-soy sauce+oyster sauce+black pepper+sugar. Vegetables -lettuce, mushrooms, carrots. Cooked noodles of your choice, prawns (optional), egg. For garnishing-coriander leaves and green part of spring onions.
 First, lets just scramble that egg in a bit of oil and set aside.
 Once that’s done..heat some more oil in a pan on medium high heat.
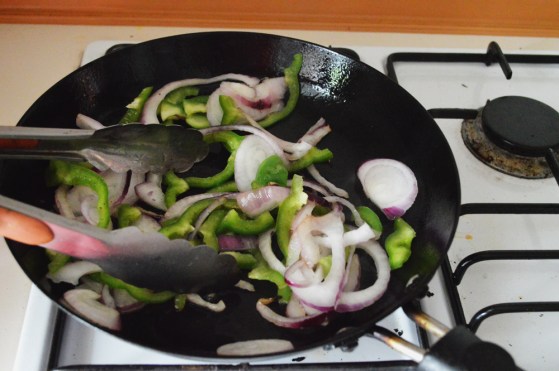
 and add in the chopped garlic, ginger and white part of the spring onion
 stir it around a bit till its fabulously fragrant, but not brown.
 in with the prawns and stir them around for a minute
 add in the carrots and mushrooms and saute for another minute
 and finally in with the lettuce. They’ll wilt in seconds
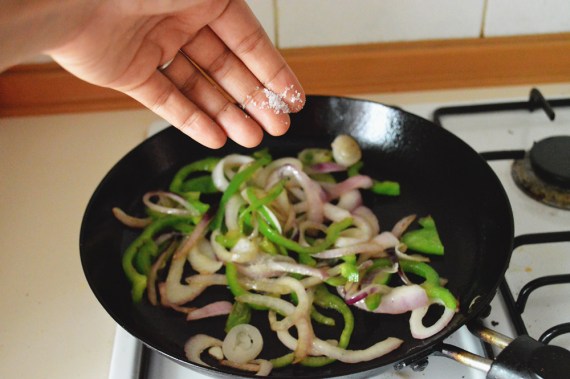
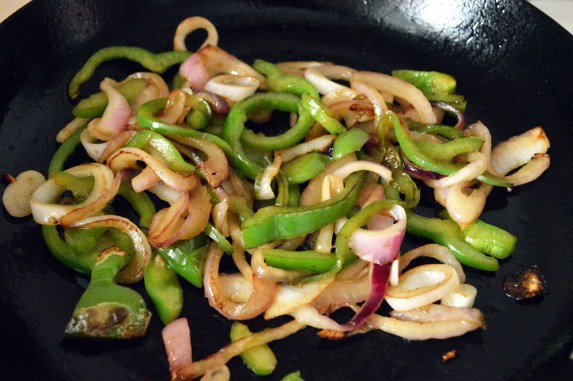
 add in a bit of salt (not pictured) and stir it around till the lettuce wilts and the vegetables are nicely coated with fragrant oil.
 add in the sauce mixture
 and stir around a few seconds until all’s coated with these lovely salty sweet juices
 finally, tip in the noodles. I’m using potato noodles and stir them around
 That’s it, nearly done. Top with chopped greens of the green onion and coriander.
 oh and don’t forget to add in the scrambled eggs.
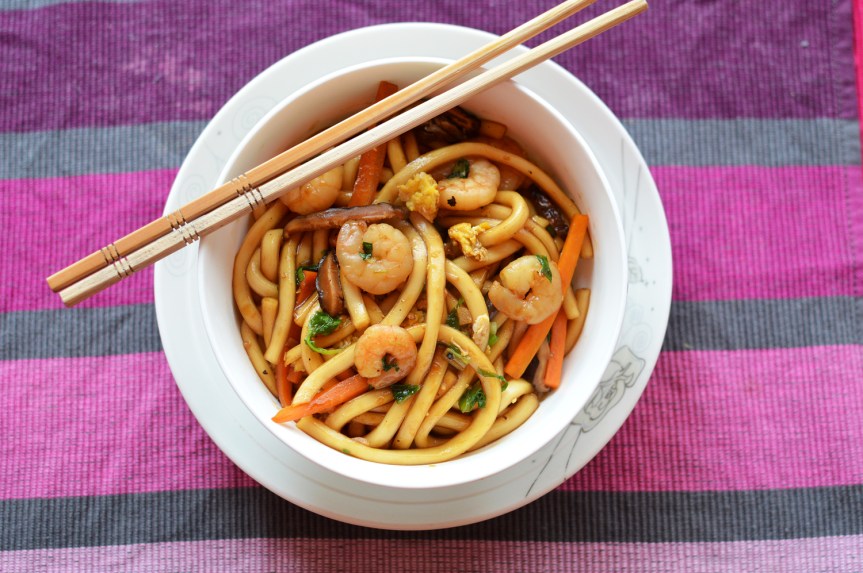
 Voila. Breakfast noodles!

 A bit many ingredients, but they’re not a whole lot.paprika, black peppercorns, cumin seeds, salt, lemon zest and lemon juice, chopped onions, ginger and garlic as the flavour base. Salmon, peas and spinach, hard boiled eggs and that’s really it. (psst. use any fish you have available)
 dry roast the cumin and peppercorns, until they’re just fragrant
 These need to be crushed along with other spices
 In with the salt and paprika
 and you crush it within an inch of their existence, or until they’re nicely crushed
 like so..
 now for a gentle massage or rub..however you prefer
 an now for a bit of tasteful dismemberment..or you can just cut in to chunks
 In a pot of choice, heat some oil and add in the chopped onions
 casually throw in the chopped ginger
 followed closely by lemon zest
 and in with the fish chunks. Cook for a few minutes, until the fish is more or less cooked.
 Add in the chopped garlic and stir for a minute more.
 Plonk in all the vegetables (peas and spinach) and stir for just another minute until the spinach wilts. (I’m using frozen peas, so it takes just a minute for them to cook. If you’re using fresh peas, you might want to add them a bit earlier or pre cook them)
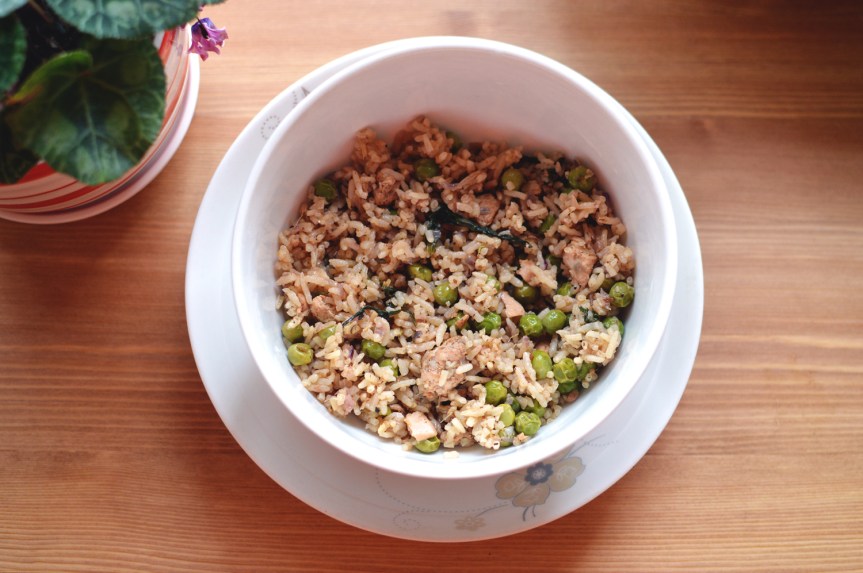
 now for the rice. I used a rice cooker and steamed the rice with a clove and black cardamom pod (totally optional)
 In they go
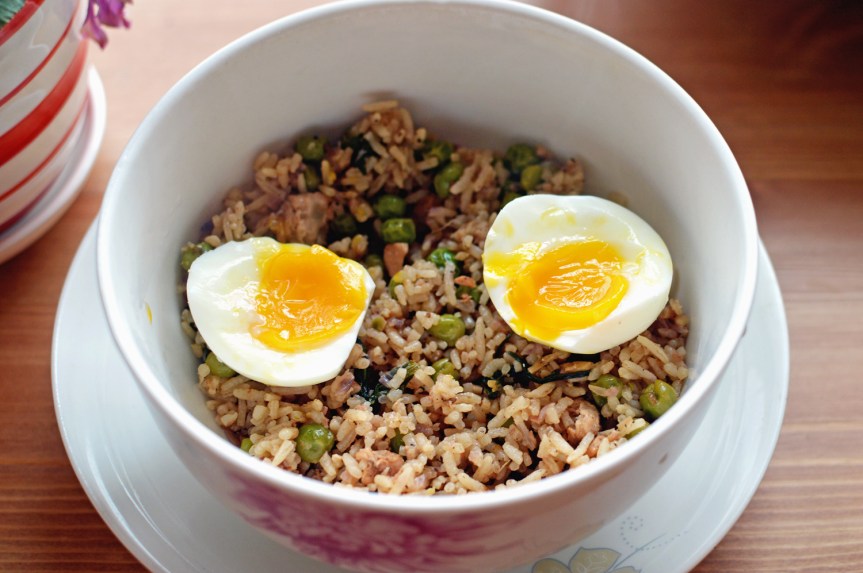 Embellish with eggs if you please. This recipe has real oomph and wow factor. It looks simple, and it is simple, but the flavours manage to hit all the right spots without jarring your senses.
