Rose flavoured rose cookies


DSC_0851These are rose cookies! They smell of rose and they somewhat look like one. Okay they might not completely look like one, but the fact is that they smell so subtly rose perfumed that you might as well be reading Arabian Nights.

The scent of rose always evokes something so mysterious and heady yet lightly perfumed that I just had to make one of these babies for me.

Lately I’ve been so enamored by rose related food that I absolutely had to create something sweet. I was a bit skeptical at first, since I just wanted a subtle hint of the rose and not the full on heady perfumed punch, but once these were made, I knew this was a triumphant test recipe. It’s here to stay and I won’t make any changes to this. I stick to this rose cookie recipe, I do!!

Before I begin, let me just tell you how wonderful they tasted. They were sweet with a subtle rose flavour and absolutely perfect. These didn’t make through an entire day and were greedily devoured even before they could cool completely.

So here goes..

DSC_0801
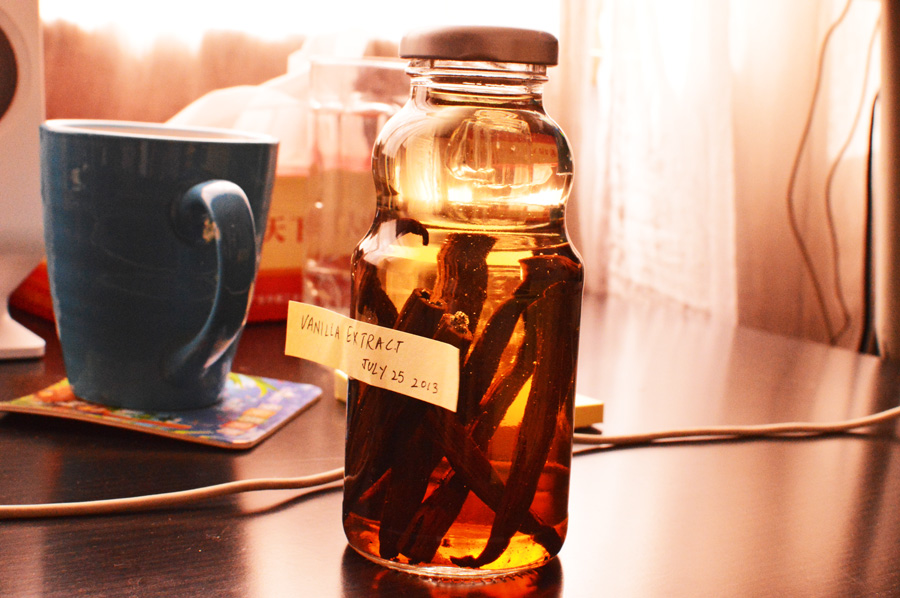
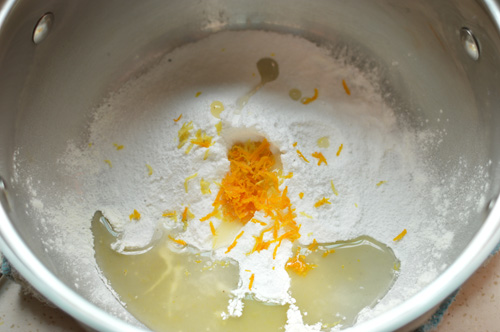
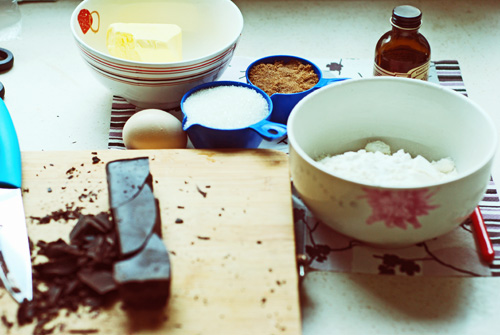
The ingredients were simple enough. Butter, flour, sugar, rose jam, egg, vanilla extract and rose-water. In case there is no rose jam available you can up the quantity of rose-water, however it wouldn’t be all that difficult to get rose jam around your area, I ordered mine online.


DSC_0802
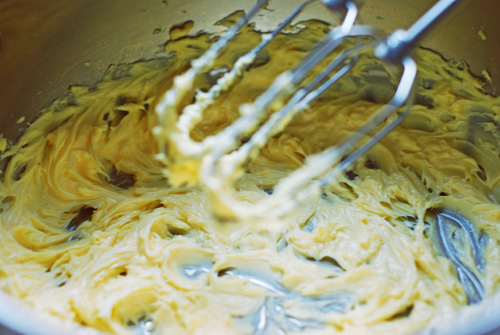
You don’t need any heavy machinery for this. A bowl and a wooden would just about do it. Begin by beating the butter until light and creamy.


DSC_0803
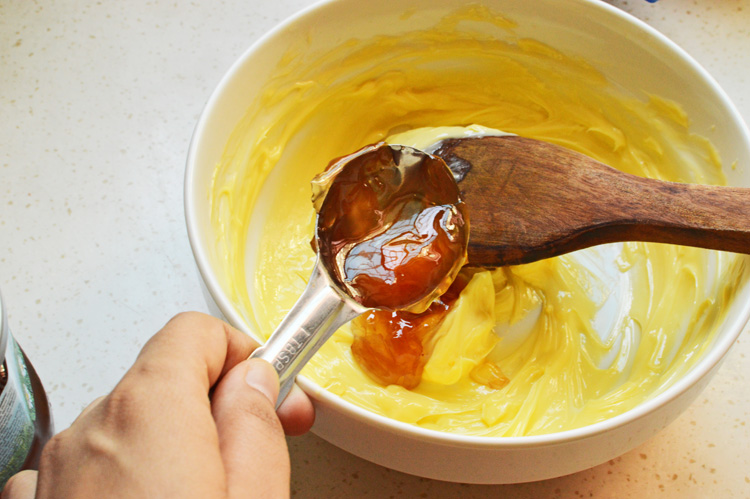
Add in a tablespoon of the rose jam.


DSC_0805
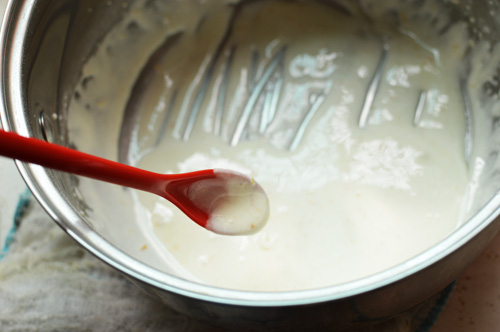
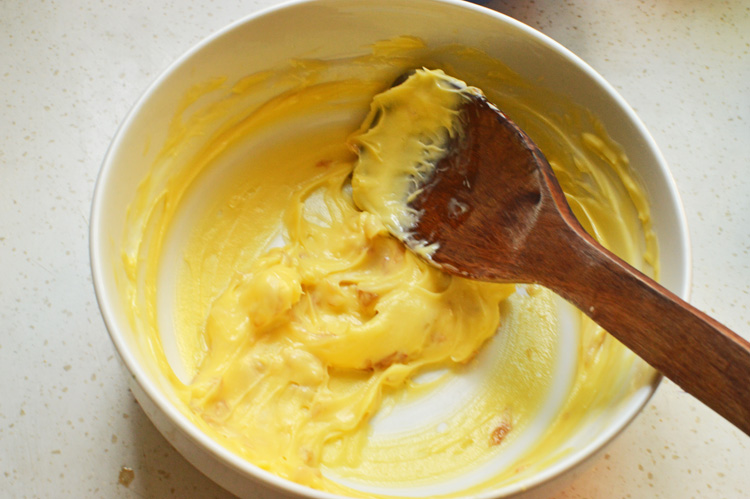
beat to incorporate the rose jam. Can you see the flecks of rose petals? well they are there somewhere.. did you see them? yes? good!


DSC_0806
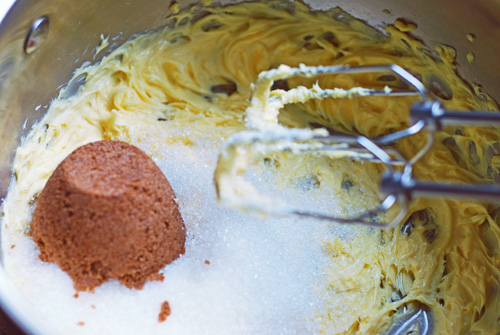
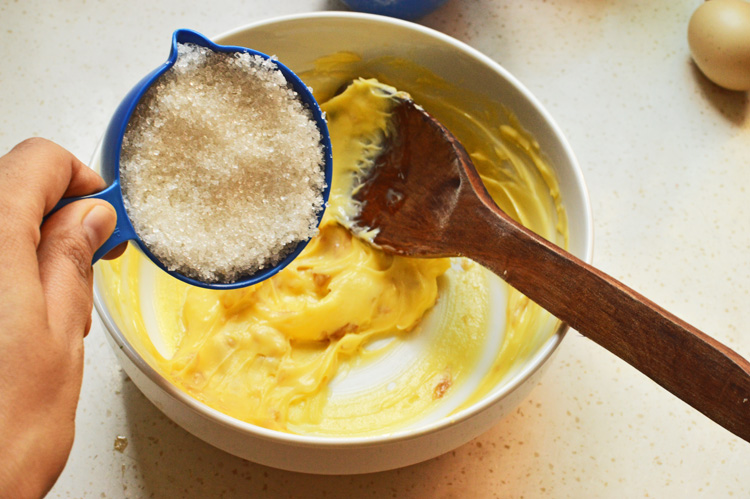
add the sugar and beat again.


DSC_0807
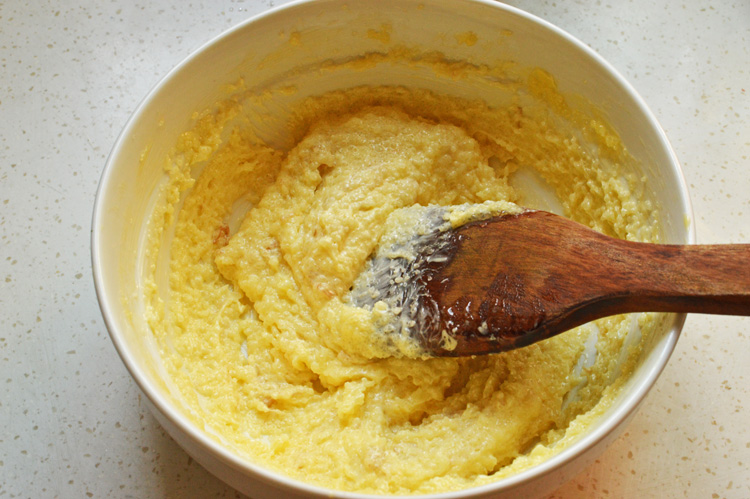
This does not look pretty but it doesn’t have to.ahem!
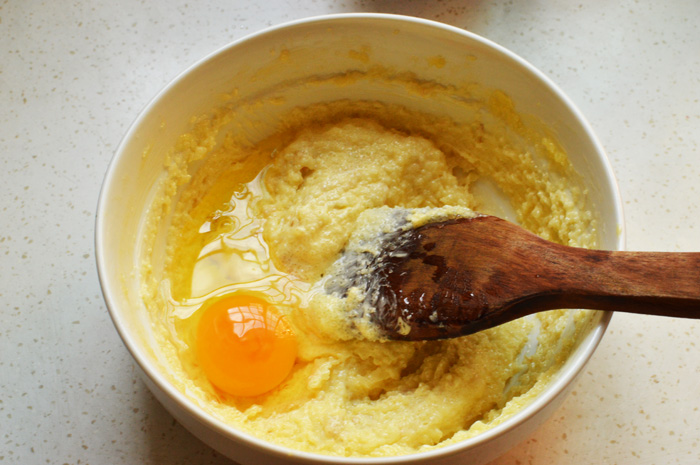
 

DSC_0808In with the egg.


DSC_0809
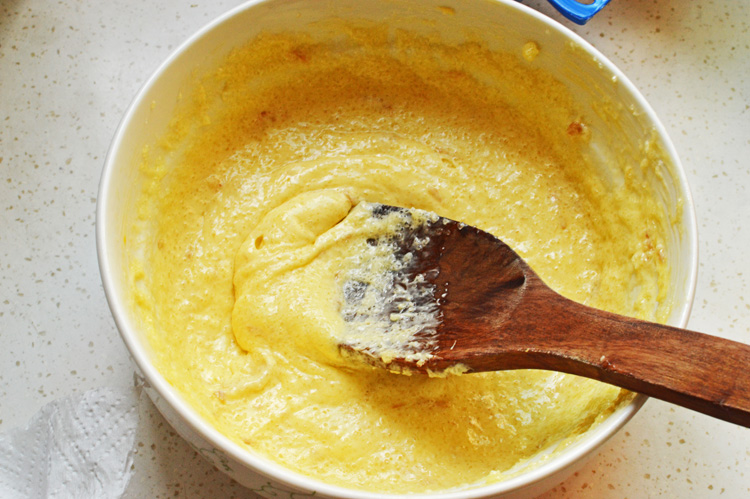
beat vigorously. This is a very good work out and you’d thank me later for all the muscles you’ve built.


DSC_0810
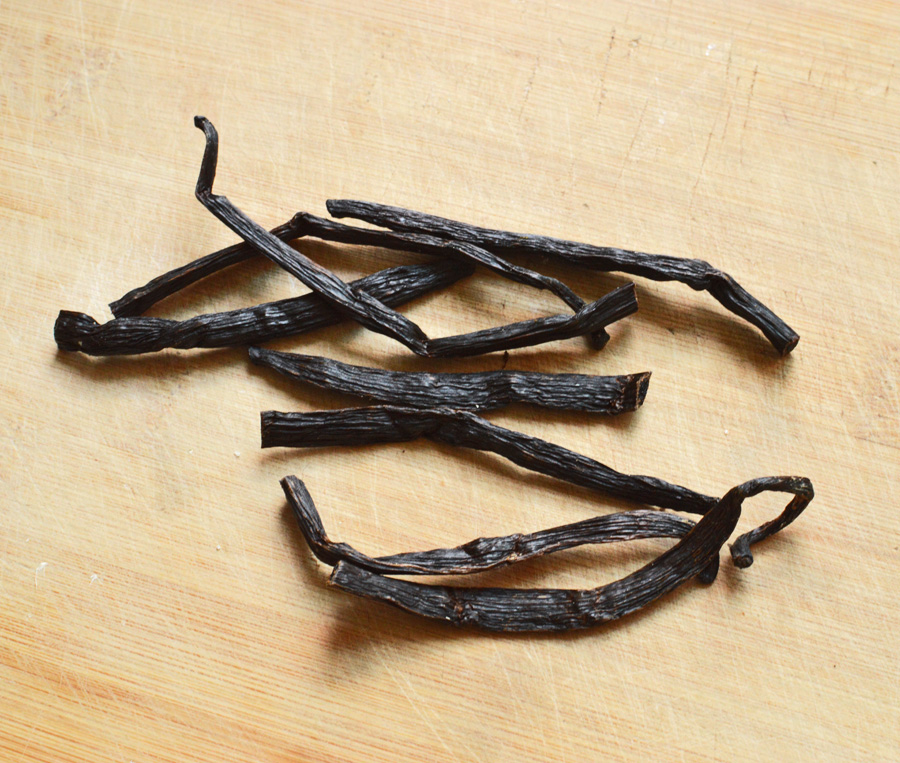
I added in about a 1/4 tsp of vanilla and I didn’t take a picture. I’m pretty rebellious that way


DSC_0812
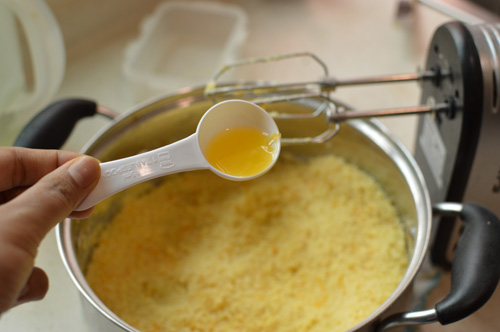
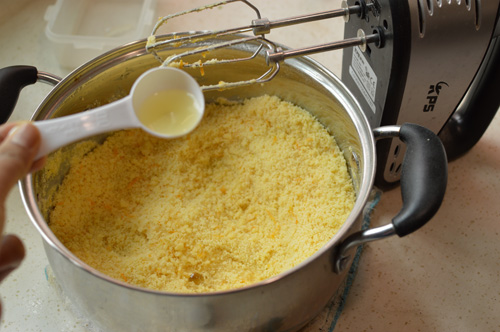
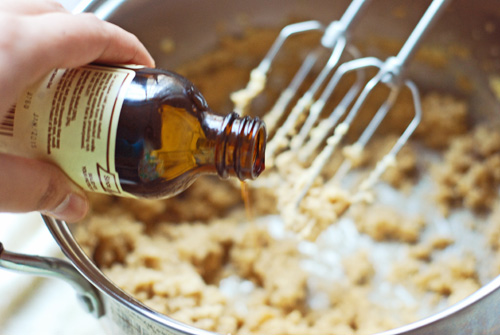
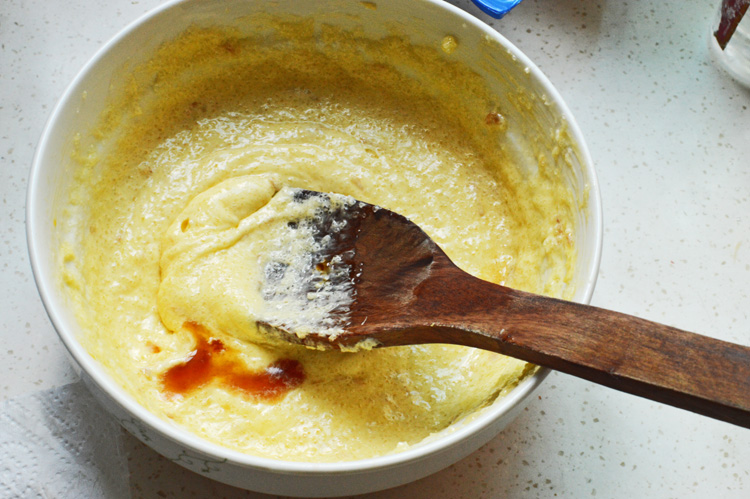
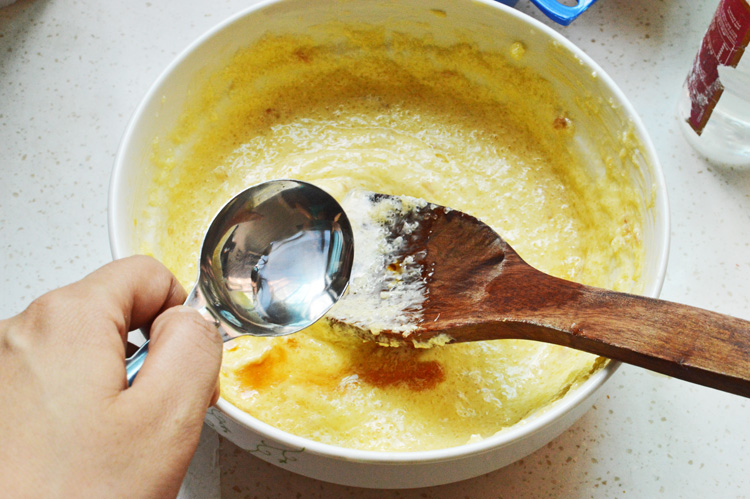
In with a tablespoon of rose-water and I cannot tell you how beautiful it smelled. I have a good mind to actually dab this around my neck instead of perfume. I’m serious.


DSC_0814
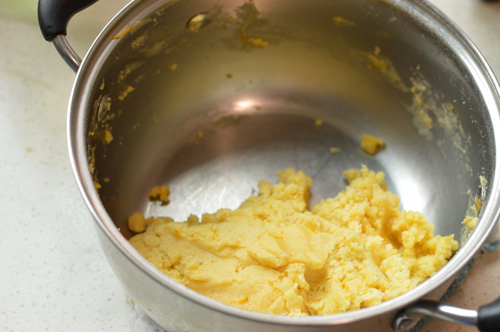
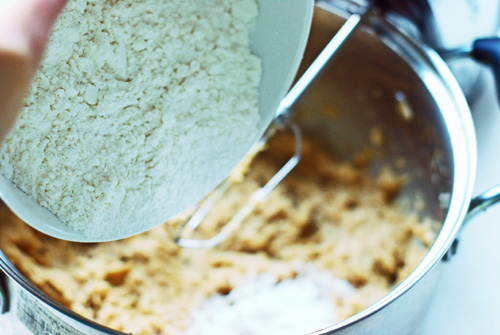
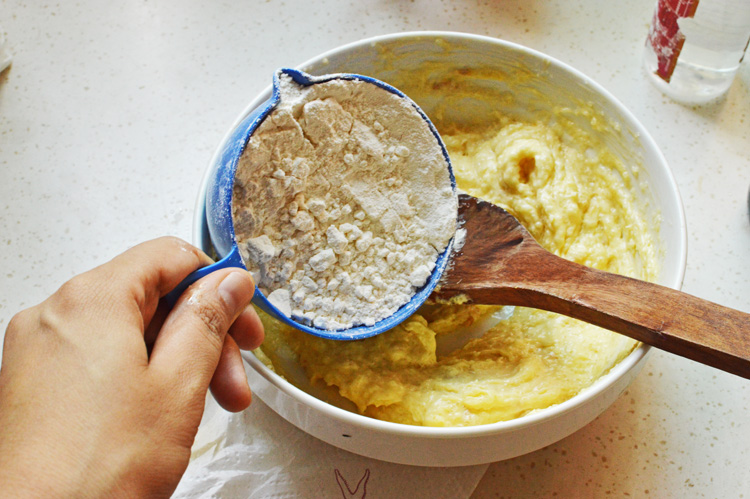
Finally the flour, and believe it or not but this right here is the cookie batter or dough. easy peasy.


DSC_0815
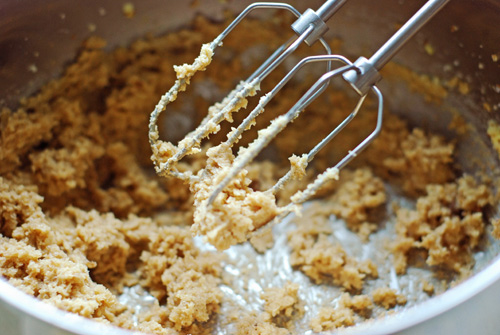
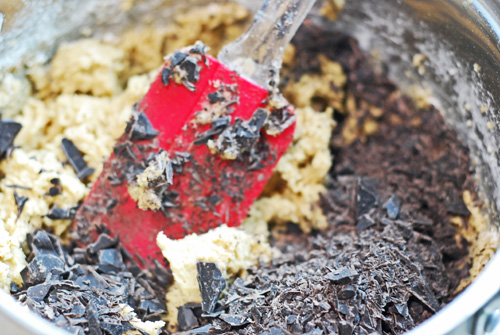
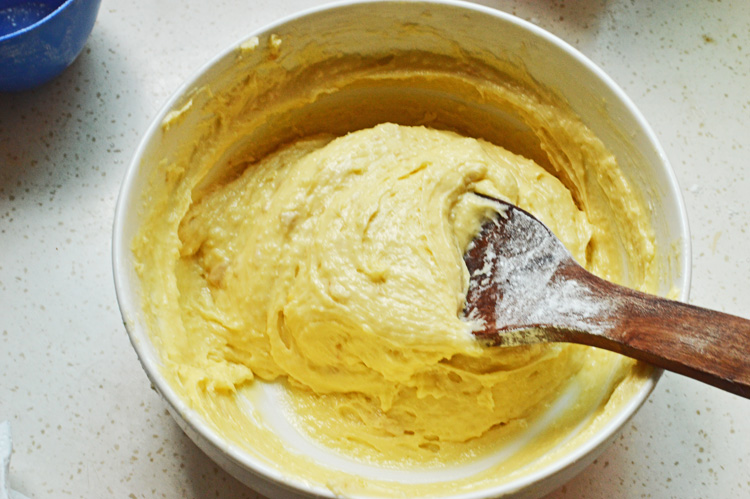
You see this? this is everything mixed well. I’d show you all the muscles I’ve built in this process, but I’m too modest.


DSC_0816Now the fun part! Putting the second rose in the rose flavoured Rose cookies part.. just so you know, the cookie dough is made and of course you can scoop out the cookie dough or batter and bake it just as it is, but I’m fiddly by nature and I had too much time on my hands, so I pulled out my piping bag with a star tip and decided to make swirls.


DSC_0818
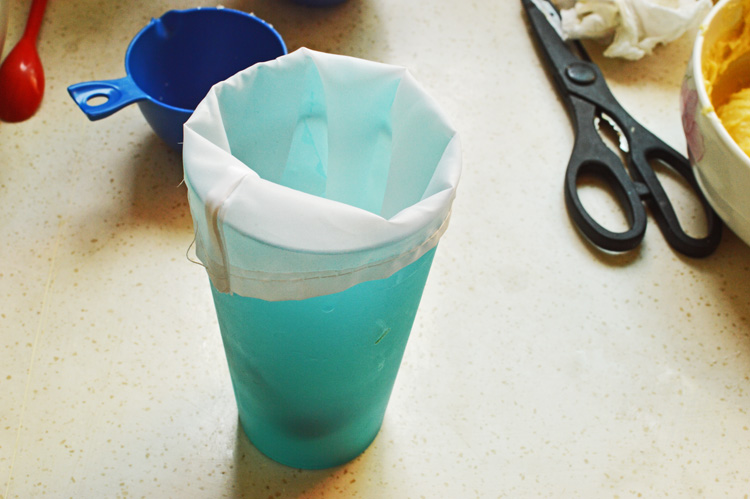
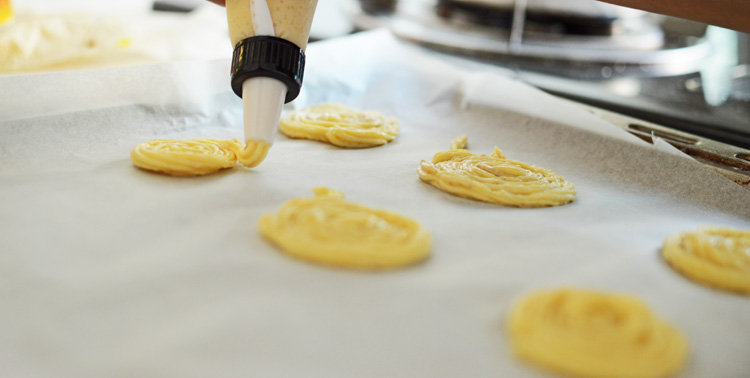
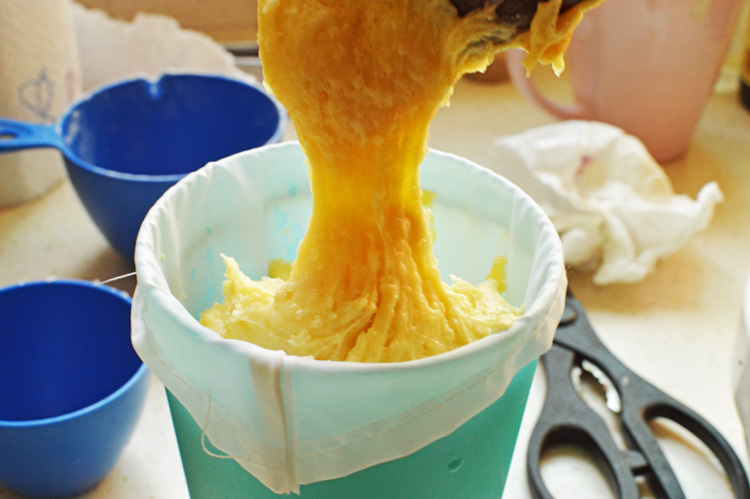
Put your piping bag in a long glass and scoop in the batter. You have no idea, how difficult this was to photograph! Don’t fill it up to the top because you need enough space to gather the edges of the piping bag and with a twisting motion push the batter to the tip. Squeeze out a bit so that there is no gap or air bubbles and star piping your roses.


DSC_0827
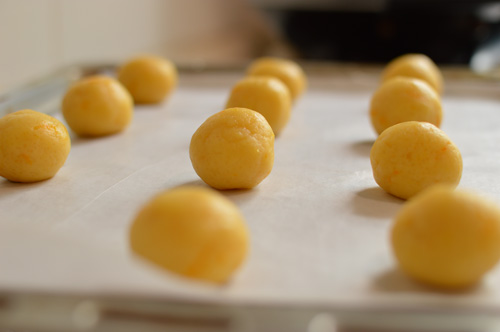
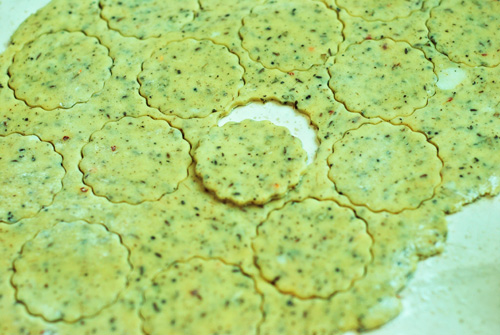
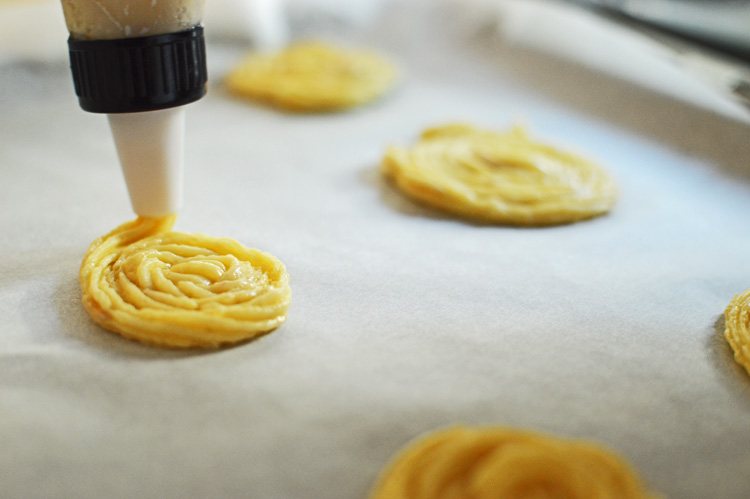
I lined my baking sheet with a parchment paper and went on to work. It’s completely up to you how you want the cookies to be. You can make them large or small, I went with the medium size. This is not a necessary step. As I mentioned you can just scoop out the cookie dough and make round cookies and completely avoid this piping madness.


DSC_0829
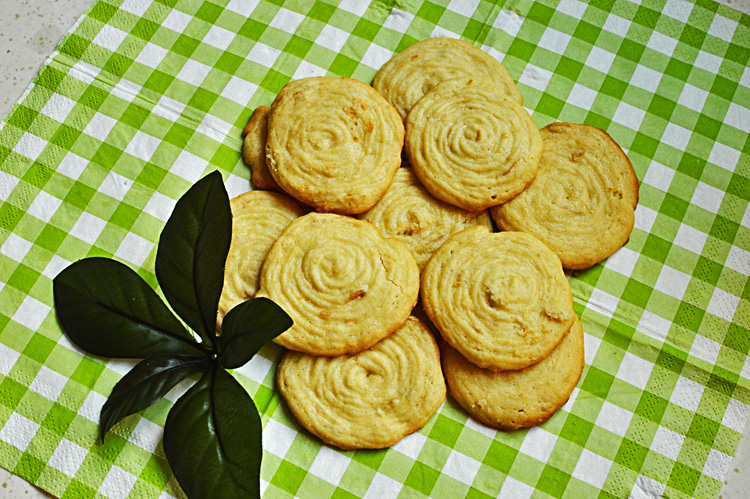
Pretty cookies!!!!!!!! bake them at 180℃ for 12 minutes. If you want them a bit more tinted and browned you could probably do it for about 14 minutes. If you want them underdone then 10 minutes should be about alright.


DSC_0841
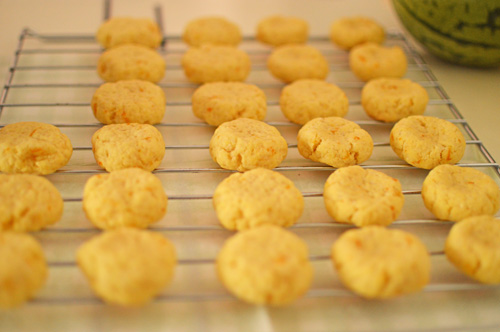
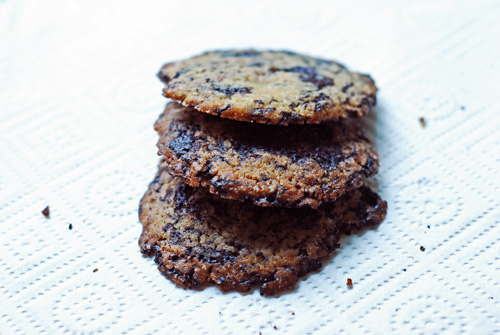
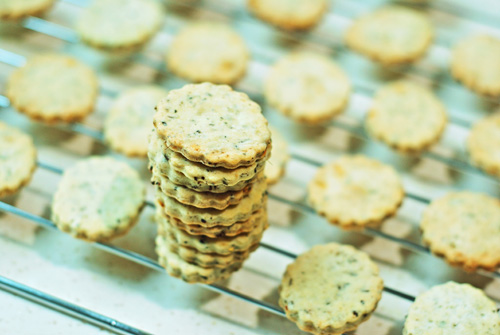
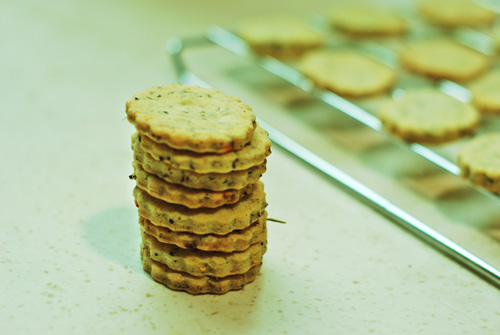
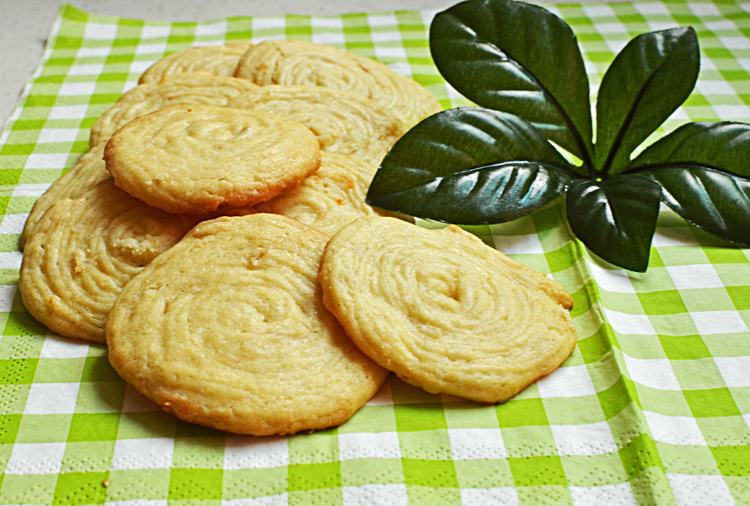
Seeeeeee!!! pretty pretty rosy cookies. Remember to let them cool on a wire rack before you store them.


DSC_0851
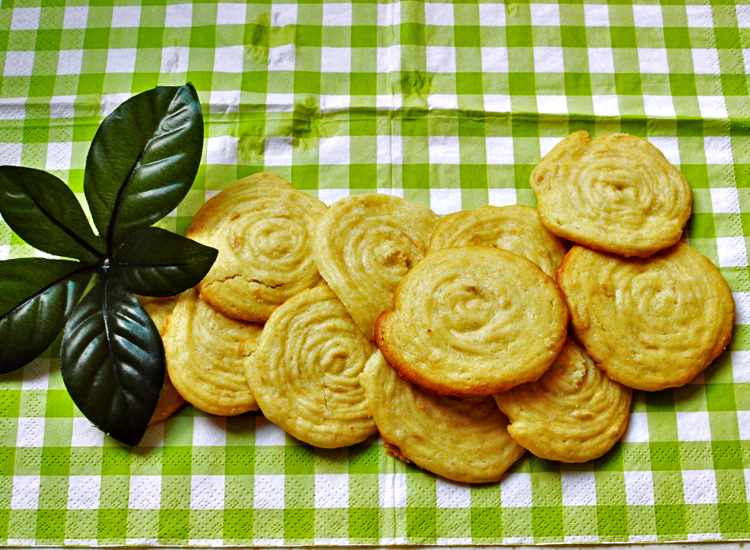
Here’s another picture..


Ingredients:

Butter 80g

Sugar 100g

Flour 125g

Egg 1

Vanilla extract 1/4 tsp

Rose jam 1 tablespoon

Rose water 1 tablespoon

Recipe: In a bowl beat the room temperature butter until light and fluffy. Add in the rose jam and beat to incorporate. Beat in the sugar followed by the egg until well combined. add in the vanilla extract and the rose-water and mix well. Finally add in the flour and mix.

The cookie batter is done. You can either scoop these onto the parchment paper and bake or you can put this into a piping bag and using a star tip or in fact any tip you wish, pipe out swirls to make it vaguely resemble a flower. Bake at 180℃ for 12 minutes.

DSC_0843

Enjoy!!


DIY: Make your own Vanilla extract


DSC_0799Vanilla.. this smell defines sheer heaven for me. There is something so soothing about the way it wafts into your being. Vanilla has helped many a boring desserts become something of an urban legend, lent its perfumed fragrance to many a custard, ice creams and puddings and made them that much easier to devour.

Everything that I’ve mentioned above only and only implies to vanilla EXTRACT!! not ESSENCE!! for vanilla essence is vile, disgusting, synthetic and can only bring out feelings of deep loathing and hatred.

This aversion to essence doesn’t come from any food snobbery on my part, but the bad flavour on the part of essence. I have watched many cakes falling prey to its stench. The synthetic flavour of the essence just does not help any dessert.

Vanilla extract is a bit pricey if good, but it’s all worth it. It’s not always easily available, and I say it with good authority for none of the stores in and around my town or even within a few hundred kilometer radius keep anything even remotely resembling a vanilla extract.

My only options are to order it online or make it at home. Of course I stack my pantry with the best extracts I can get my hands on.. you never know when the proverbial apocalypse might strike, and all you’d want to do in those last hours is eat butter and make desserts smelling of vanilla.

But a couple of days back, overcome with a sense of DIY, I decided to make it at home. I know I won’t be able to reap the fruits of this process until a few months from the time I make it, but what the heck? It can sit serenely in a cool dark corner, and one day I will be making desserts with my vanilla extract!! So there!!

The  process is extremely simple.. It’d the waiting that’s a bit hard. YOu need only 2 ingredients.

DSC_0782Vanilla beans, vodka, a clean jar/bottle. try to get the best quality vanilla since the quality of the extract will depend on the vanilla beans you’ve used.

DSC_0783I halved these beans to fit into the bottle. If your bottle is long enough you don’t really need this step.

DSC_0785Split these beans down the middle so as to expose the caviar (vanilla seeds).

DSC_0787LIke so. Take a minute and inhale deep. your kitchen, your hands, your knife, your kitchen shears all smell of divine vanilla.

DSC_0790Put all these split beans into the bottle.

DSC_0792They should fit in without difficulty.

DSC_0793In with the vodka. This can be any generic inexpensive vodka. It’s the beans that matter.

DSC_0796Admire your handiwork. Slap on a sticker mentioning the day and date you made it and store in a cool dark place.

DSC_0799This picture was taken mere hours after steeping. Make sure the vodka is poured in generously. Don’t be stingy with the alcohol and make sure you drink the rest.

I’d be updating almost every week with the changes in the extract.

Ingredients

Vanilla beans (4-5) or depending on how big your jar/bottle is

Vodka (nothing expensive)

a glass bottle/jar

How To: Split the vanilla in the middle to expose the vanilla seeds. Put these into your glass bottle and top it vodka. Make sure the bottle cap is on tight. Store in a cool dry place, away from any direct sunlight. A pantry or as in my case some space in the bookshelf works best.

This extract will take anything from 3-4 months before you can use it, and the best part is that you can keep replenishing it as you use it. Just keep adding vodka.


Falafel


DSC_0671Falafel!!!!! I love how it sounds, I love how it tastes, I love how easy it is to make. This is a very Middle Eastern fare, and I do admit that these might not be the most authentic falafel’s, but who cares as long as they taste good. In terms of taste, these babies were up there, no higher up, still higher up.. yeah right there in the taste chart. These are something of an art. They look good, they taste better and they give you such a feeling of accomplishment.. like ‘Oh my god, I made these, all on my own’. I could sing praises, write songs, devote a shrine to this food. My man loves it stuffed in a pita, although I ended up eating half this batch in the kitchen all on its own. My excuse? ‘I have to taste each falafel to know if it needs more seasoning.’

Falafel requires a bit of prep, but not some mind bending crazy preparation, it’s just a matter of soaking the chickpeas over night in some water. Sorry you can’t use canned chickpeas, absolutely not!! for they will disintegrate as you fry.. In the morning the chickpeas will be all sorts of fat and swollen, and you have to put them in a food processor and chop then finely to very nubbly bits.

DSC_0657while you have someone going at the chickpeas in the processor, chop some onions, coriander and chillies to really fine pieces.

DSC_0659see this is what the chickpeas need to look like. Season with some salt

DSC_0660Cumin powder

DSC_0662add the chopped onions, coriander, chillies to the mixture and mix well. You have to get in with your hands and mix. I couldn’t take pictures for the rest of the steps, because my hands were all sorts of covered in ummm.. stuff. Anyway, you mix well and form into flattish patties. In case you feel the mixture is too dry and not holding well together, add in about a tablespoon of flour and it will hold. You have to make sure that the patties form or else these will break while frying.

DSC_0663Once you’ve formed these into patties, go ahead and fry. I’m too scared of frying which is why I always have the man take the heat. There’s just something about frying that scares the rationality out of me.

DSC_0664See! aren’t these pretty? I couldn’t believe my eyes when the first one came out. How gorgeous is this? all this while I ate falafel’s outside which hardly tasted good, I made one on my own.. and boom!! it’s so much better and fresher than the ones you get at food chains and eateries..

DSC_0669How you eat these, is up to you. These taste best stuffed in a pita, slathered with hummus, topped with some potatoes and I also scrunch in some roasted red peppers (you can see how you can make them at home here), and cold beer.

So easy and the rewards are so high. You can plan the most stress free dinners with these falafel’s . Just lay out salads, hummus, pita breads, stuffings of your choice and these falafel’s and let the guests go berserk. They can stuff their pita’s and their faces as they want how they want, and you won’t be stressing about, running all over. Try.

Ingredients

Chickpeas 200g soaked over night

Onion (medium-sized)

Coriander (10 stalks)

green chillies (to your taste) . I used 1 green chilly

Salt 1 tsp

cumin powder 1/2 tsp

flour to bind 20-30 g (1 or 2 tbsp)

Oil to fry.

Recipe: Soak your chickpeas in cold water overnight. They should be swollen in the morning. Drain the water and wash them briefly. Chop them finely into very tiny nubbly bits in a food processor or chopper. DO NOT make in to a paste.

Chop the coriander, onion and chillies finely and add into the chickpeas along with salt and cumin. Mix them well and using your hands form them into patties. If you feel that the chickpeas aren’t coming together, add in a bit of flour and shape them. You might feel that it won’t come together but it will. You can increase the seasoning to your taste.

In a utensil of choice, heat the oil enough to fry these patties. Make sure the oil isn’t smoking. Fry the falafel patties and it will take about 2-3 minutes for them to turn into a golden brown colour. Remove them to paper towel or if you want them to stay crunchy for long then remove them on a wire rack to cool.

It’s easy, not fussy, and you’d love the taste, the texture and the above all, you’d be so please with yourself.

Enjoy!!

Roasted Red Peppers : How to


DSC_0654What can I say about roasted peppers, except that they are divine. They’re the equivalent of a food poetry. They bring to life anything they are added in. Their subtlety of flavour livens up even something as meagre as a stale slice of bread. It’s like the rhyming word which makes a verse all the more interesting.

The slightly smoky, charred flavour is harmonious with almost everything.You can add this to a sandwich, throw it in a bowl of pasta, puree into a soup or just drizzle it with olive oil and serve as a side dish. This is guaranteed to brighten your table, your mood and your food. Also it’s really easy, and you could do this in a matter of minutes.

You don’t need a whole list of ingredients, except perhaps some peppers. You can roast any pepper of your choice, I’m doing red peppers, but you can go ahead with whatever suits your preference and your colour of the day. yellow, orange, green.. whatever coloured pepper is available.

I’m a stove top girl, when it comes to roasting peppers. You could just as easily pop this in a hot oven, but for me, this technique is better suited since it’s charred and burnt evenly on all sides.

DSC_0637Place the pepper on stove top like so. The flame should be high enough to not only roast it but blacken it.

DSC_0638Time for tong action!! You really do need a tong for this. keep rotating on all sides until it’s seriously blackened. Leave no side even a bit coloured, including the tip. You really need to blacken up these babies.

DSC_0642Once it’s coal-black, lose no time and put the peppers in a ziplock bag and seal it. This step makes it easier to take the skins off, and makes these peppers juicy. Let them be in the ziplock for at least 15 minutes, and you can get on with your life till then.

DSC_0651See!! I wasn’t kidding about roasting them to a nice shade of Hellish black. These peppers have had their 15 minutes in the ziplock, and it’s time to reveal the divinely delicious peppers that have metamorphosed into food poetry.

DSC_0653You need to get your hands dirty, and you won’t even complain. Just peel the skins and they will come off real easy. I do not like to be too fastidious with the skinning process, since a bit of charred remain is desirable, as it’s the bits of charred skin that gives these peppers their characteristic smoky flavour.

DSC_0656This is what I as talking about. Lipstick red but tastier, aromatic, jewel bright and oh so delicious. Just de-seed them before serving, also a few seeds don’t hurt nobody..

There are millions of serving suggestions:

-tear into shreds, drizzle some olive oil, crumble some feta and eat.

-tear them and throw into a bowl spaghetti lightly drizzled with olive oil and parmesan

– add it to your sandwich and watch the flavour go up a hundred notch

– puree along with some sour cream, salt and garlic and make a delightful pasta sauce.

– add it to your hummus, and make an electric red coloured bowl of greed.

Once you’ve made these at home, you wouldn’t want to buy an expensive jar of roasted peppers. It’s an easy process and it’s so much better when you do it yourself.

—–

Recipe: On a medium high flame of your stove top place the peppers and keep turning them every 30-40 seconds until they are all evenly charred. Make sure to roast the tip as well.

Once you’re satisfied with the colour, place in a ziplock bag and seal it. Let these peppers sit for 10-15 minutes.

Finally just peel off the charred skin, making sure some skin remains to ensure a smoky flavour.

De-seed before serving.

Enjoy!!!!

Bread Pudding


DSC_0704Feast yer eyes, for this is the easiest, most heavenly addictive dessert you’d make. Bread Pudding evokes everything that is homely, classic & decadent.

Put together in a matter moments, nothing gets easier than this dessert.

I haven’t got any step by step pictures for this recipe since there really weren’t too many steps and because I was making it to satisfy my man’s cravings for something outrageously weekend.

Did I eat this? Not a lot, since I’m 50 shades of Lactose Intolerant, but really I did sneak in a few bites here and there, and they were so gorgeous I could have kicked my system for hating on milk.

Also the bread pieces are slathered and sandwiched with orange marmalade and this is what gives it a different flavour with every bite, but of course you could as easily change that to any jelly or jam of your choice. From blueberry to ginger jam to pineapple to mixed fruit.. Suit yourself. It’s a very forgiving recipe

Ingredients

Milk 500 mls (2 cups)

Eggs 2 and 1 egg yolk

Sugar 50 g (3 tablespoons and 1 teaspoon) + extra for topping

vanilla extract 1 teaspoon

Bread preferably stale (baguette would work great) or 6-8 slices of bread

Orange marmalade or jam/marmalade of your choice

Butter 20 g (1 tablespoon)

Recipe: Make sandwiches out of your bread pieces with jam of your choice. The bread amount can be varied. It could be 6 or 8 slices of regular bread or half a baguette as I used here. If your bread is too big you can make triangles out of them, if it’s the same size as the baguette here, then just cut about 1/2 inch thick pieces and slather them generously with the marmalade.

Fit them snugly in the oven dish of your choice, making sure it’s buttered well.

In a separate bowl, mix in the milk, eggs, egg yolk, sugar and vanilla. Mix well making sure the egg is incorporated.

This batter now resembling the summer outside needs to be poured over the bread pieces in the dish. Pour it evenly so that no bread remains dry. Gently coax them into the eggy custard, do not mush them. Sprinkle some more sugar on top so that it caramelizes in the heat of the oven, bronzing the top and adding crunch.

Awesome, now let the dish stand this way for about 10-15 minutes and finally dot the top with some butter to make it golden and sunny and crunchy, after which bake it in a 190℃ oven for 15-20 minutes.

DSC_0704

The results are fabulous, every bite is a song and you’ll fall in love with how easy this recipe is.

Enjoy!!

Chinese spicy fish Hunanese style


DSC_0136

This right here is a fish. This fish is adorned with everything chili. The reds and the greens are just variants of chili.

Before I begin this post, let me tell you exactly why there are so many chillies in, and on the fish. I live in the wonderful Hunan Province in China, where the food is soul witheringly hot. It’s so spicy that your intestines beg for mercy, your tongue commits hara kiri and your lips give up on you. It’s so maddenigly hot that the tears from your eyes are just the beginning. It’s the food that all Hunanese people take pride in and the unbelievable part is that it is absolutely addictive. Once you’ve eaten a tear inducing morsel, you wouldn’t stop. You would be in danger of being disoriented but you will keep shoveling it in your mouth. It’s a perfect blend of extreme spice, vinegar, salt and LOVE. Of course you’d hate your macho instincts next morning.. just saying…

This fish and a lot of other Hunanese speciality was  prepared by my dear friend ‘Nana’ and her husband ‘Mr. Ye’ who always invite us (i.e le moi and the vegetarian husband) to treat us to some of the most extreme yet exciting and delicious food.

DSC_0072My friend Nana

DSC_0088her husband Mr. Ye aka the talented cook

DSC_0099the poor dead fish that was to be cooked. It was a huge monster really.

DSC_0095industrial quantities of dried red chillies (incidentally also the name of this blog)

DSC_0094Enough garlic is also not enough. as many garlic cloves you can find

DSC_0090Green chillies, as many as you can feats your eyes on. this recipe has no moderation. You can make it as spicy or as non spicy as you want. Though the spicier the better.

DSC_0102the fish had to be cut, because it was too big for even the big wok.

DSC_0103Into a very hot wok with a generous amount of oil.

DSC_0104It sizzled I tell you, it sizzled so loud I couldn’t her my phone ring. This was cooked for about 5-7 minutes per side

DSC_0112Cooked side up. All this was happening pretty fast though. The wok was being shaken, the fish being rotated, the sizzling and the smoke and the typically Chinese expertise in lifting the wok every some time from its extremely high flame.

DSC_0116The fish is almost done on both sides.

DSC_0118The mangled fish. Admittedly not so pretty but this isn’t nearly done. The tail is given the same treatment and removed on a plate.

DSC_0124This is the seasoning, the spice, the soul of the fish.

Once the fish including the tail was entirely cooked, it was removed to a plate and into the remaining hot oil some water was added along with the dried red chillies, salt, some chicken stock granules and garlic

DSC_0126A good stirring and some soy sauce, vinegar

DSC_0127back in with the fish and the tail

DSC_0128making sure the fish is well rested on the chillies.

DSC_0129 Mr. Ye added a big of glug of ‘baijiu’ which is a Chinese alcohol (it’s 51% alcohol), extremely strong and crazy. He told me Vodka would work just as well, and I believe a man who handles a wok on fire with such grace.

DSC_0130Soon enough the lid was clamped on for about a minute, nothing more.

DSC_0135Unveiling of the done fish. He didn’t think there were enough chillies, so he added another 30 grams worth vinegary red chillies.. For aesthetic purposes you see.

DSC_0136This is the fish now done. Oh so spicy, so colourful, so wonderful, so bold and so addictive.

This recipe is really nothing defined, once can actually prepare according to your love for the spices. In case if you’re not into chillies then really this isn’t for you at all. However if you happen to love the hot stuff, by all means make it and you will not regret it.

Ingredients

whole fish of your choice. (cleaned and deboned mostly)

dried red chillies chopped coarsely 20-25 pieces

garlic crushed and sliced thin 8-10 cloves.

green chillies sliced thin 10-12 in nos.

Spring onions cut thinly 2-3 in nos.

oil at least 40 mls ( roughly 2.5 tablespoons)

salt to taste

water or chicken stock 100 mls

Chicken stock granules 15 gms (omit if using chicken stock)

vinegar 10 mls (2 teaspoons)

soy sauce 10 mls

baijiu or vodka 30 mls

Recipe:  in a large wok enough to accommodate the fish, heat the oil on a high flame. The oil should start smoking, then add in your fish and cook both sides until almost done.

remove the fish on a plate and in the oil add the chillies followed by the water or chicken stock and let it heat. Add in the garlic, salt and chicken stock (if you are using water). Stir around and don’t let the heat drop, the wok should be fairly hot at all times. If the water evaporates add in more but keep enough to not let anything burn.

Put the fish you’d removed back into the wok, placing them atop the chillies and the thin coating of sauce.

Pour in the alcohol and let it bubble and catch fire.

Clamp on the lid for roughly 1 minute, throw the spring onion on top and serve hot and eat with rice.

Disclaimer: Prepare this fish at your own peril, for this is ferociously hot. Keep a very cold beer upon your person while feasting on the beast. A tub of ice cream is highly recommended post this debauchery.

– Also you can adapt this recipe to suit your spice needs, you can go for mellower chillies, reduce the quantities of chillies etc., but for the full on flavour and a kick to your senses prepare it just the way Mr. Ye did.

Enjoy!!

Citrus butter cookies


DSC_0241

These citrusy buttery delights were something I’d been longing to make ever since I stumbled upon Pioneer Woman’s recipe (here)

For whatever reason’s I kept postponing because procrastination is one of my super powers. Somehow after my man nagged me for a batch of fresh cookies which weren’t chocolate, I figured this is the time I make these citrus drops.

I altered the original recipe a bit because in my remote Chinese town, where even blogging can become a problem, I didn’t have all the ingredients necessary, but somehow I tweaked a bit and these came out ,oh so fabulous, oh so mouth-watering and oh so citrusy, that I imagine the original recipe must have been absolutely off the charts.

This wasn’t difficult, in fact it was one of the easier cookie recipes and so much fun to make.. so here goes.

DSC_0190

The ingredients really easy and quick to assemble. Butter, sugar, orange juice, orange zest, egg yolk, lemon zest, lemon juice and flour.

DSC_0191

As with most cookies out there, it begins fairly easy by creaming the butter which becomes a lot harder if it isn’t at room temperature. Also you don’t have to cream it’s soul. Just a minute would do, or even less.

DSC_0194

In with the sugar

DSC_0195

followed by the egg yolk

DSC_0196

I’d really hoped the yolk maintained it’s integrity but NO!

DSC_0197

Beat the butter, sugar and egg yolk and add the zest of both lemon and orange, but also reserve a bit for later, which we will come to in a bit.

DSC_0198

now the flour

DSC_0199

beat that all together and you’d probably end up with a bit crumbly mixture. It’s really not a problem, because now you add some orange juice

DSC_0200

and some lemon juice

DSC_0201

Mix well and it shall all clump into this sunny yellow glorious dough. Just a faint whiff and you’d faint.

DSC_0202

Roll into balls. It’s almost as if I’m moulding a sun.

DSC_0203

this is just to let you know how big these were. I scooped out using my melon scooper. These were the prettiest things I saw all week.

DSC_0206

Lay them out on a parchment paper, so as to avoid any stick up that might happen.

DSC_0213

Behold the mighty yellow kisses of sun.. I baked mine for some 15 minutes at 190℃ . I also flattened their tops a bit using the back of a glass before pushing them in the oven. Can you see the orange specks of the zest? Let these cool, while we get on with the icing.

DSC_0214

The icing is simple enough. Lemon and orange zest, meringue powder, lemon and orange juice. It’s actually royal icing, but I’m not too sure about the eggs here, so instead of making them with egg whites, I used meringue powder instead. But if you have your own royal icing recipe using egg whites, please feel free.

DSC_0216

This is just Meringue powder, lemon and orange juice, the zests and powdered sugar, all beaten into a frenzy to create…..

DSC_0218

THIS!!! isn’t this beautiful? the consistency is really up to you, but i like thick fat icing ribbons so I didn’t let it get too thin a drizzle.

DSC_0229

Using a spoon,or a piping bag if you want more elegance, lay on the icing as you wish, however you want.

DSC_0231

Absolutely unsure fat patterns. Also before the icing dries don’t forget to put some more strands of zest on these babies.

DSC_0239

See??

DSC_0241

These are sugary, buttery bites of citrus in your mouth. Your cheeks will feel it, you will love it and your man, well mine kept lurking until the last pictures were taken, and then these were devoured rather mercilessly.

These have to be made to be believed, and you’d feel oh so competent about yourself..

Thanks a lot Pioneer Woman for these full flavoured bites of citrus love.

Ingredients

200 gms Butter

150 gms sugar

1 large egg separated

200 gms all-purpose flour

30 gms of lemon zest and orange zest (roughly 2 tablespoons)

40 mls each of lemon and orange juice

ICING

Meringue powder (as mentioned on the box)

30 gms of orange & lemon zest + extra for decoration.

30 mls tbsp orange and lemon juice

For the consistency I had, I used about 30 gms (around 2 tbsps) of meringue powder, 50 gms powdered sugar, scant amount of water and 30 mls (about 2 tbsps) each of orange and lemon juice. But really it’s up to you. You might want to go thicker or thinner with the icing.

Instructions

Cream the butter (make sure the butter is at room temperature), add in the sugar and egg yolk. Beat again to mix and add in the zest and the flour. Beat until it’s more or less mixed and finally add in the juice and beat to combine.

Scoop out equal sized balls using a melon scooper, or however your MO is and roll them into balls. Line on a parchment paper and slightly flatten their tops using the back of a glass. Bake at 190℃ for 15 minutes and let cool completely before icing.

Meringue icing as per instructions or as I mentioned above for the consistency I got. Decorate your now cooled cookies as you desire, or just go for a not so subtle pattern and drizzle the remaining zest before the icing dries off. Remember to let the icing set before unleashing yourself.

Chocolate, chocolate & more chocolate chip cookies


DSC_4984These are obscenely chocolate, and fit only for those who have some serious chocolate addiction. If you love the cookie part more than the chocolate part in chocolate chip cookies, then sorry !!!! THIS IS NOT FOR YOU!!! but if you love chocolate chip cookies not for the faint cookie base, but for its rich chocolate taste, then THIS IS FOR YOU and WELCOME TO THE CLUB! are you reading these caps while shouting out the words? sorry I didn’t mean to be weird and mean, but I’ve had 2 of these babies and Im feeling strangely buzzed. Perhaps it’s all the chocolate or perhaps its all the chocolate. I don’t know..

These are the delicious, fattening, pant tightening, addictive, chocolate oh yeah they’re chocolatey and you might want to go to the chocholics anonymous.. But if you make them, you will make them again and again and eat them and thank me. I’m serious.

One of the biggest reasons I made them is also because I happen to have a lot of chocolate on me now.. seriously good chocolate. The kind of chocolate you’d want to eat in heaven..but getting back to these cookies..

DSC_4939


You need flour(mixed with salt and baking soda), butter, sugar both white and light brown, egg, vanilla and obscene amounts of chocolate. Do you see that fat bar of chocolate.. yeah that amount..

CSC_5019


Cream the butter for a minute. make sure it’s room temperature. You don’t have to use mixers for this. A wooden spoon would suffice, but for these majestic cookies I brought out the big guns.

CSC_5018


In goes the granulated white sugar

CSC_5017followed by brown sugar

CSC_5016


This is for effects.. see how nicely packed my brown sugar was. Beat again for a minute until all the sugars are evenly distributed. We don’t ant any lumps

DSC_4955


Add the egg also at room temperature. You don’t want to put in anything remotely cold from the fridge okay?

DSC_4954Vanilla…

DSC_4953


Beat some more to mix in the egg and vanilla and let it look like this.

CSC_5014


In with the flour. I have already mixed salt and baking soda right into the flour.. I’m a visionary.. yes I am.. ok I’m not.

CSC_5013


Mix it again for a minute or until the flour is barely incorporated. You don’t have to mix it within an inch of its life. This is a step where you can easily use a spatula or a spoon.

DSC_4960


My favourite part. Dumping in the chocolate. See I wasn’t kidding about it at all.. It’s a lot of chocolate.

DSC_4964


This is eventually what it’s all going to come down to. Mix the chocolate into the cookie dough until it’s completely flecked with chocolate pieces, chunks, shavings & smithereens

DSC_4966


This is the dough that will eventually make cookies. It’s more chocolate less dough, just the way we like it aha aha. Now refrigerate for half an hour.

DSC_4967


Once out of the fridge, use an ice cream scooper to scoop out even sized cookies.

DSC_4972


Onto a sheet lined with parchment paper,line the cookies. These spread quite a bit so space them out more than an inch apart.

DSC_4992


Look at these.. just look at them. Every bite is sinfully good, seriously chocolatey and oh my god. It is not for the faint of heart but if you like your chocolate a lot then this is one of the best things you could make with them.

DSC_4994


Go on.. Make it already.. seriously you have to.. Enjoy!!

Recipe

125 gms flour

80 gms white sugar

60 gms light brown sugar lightly packed

130 gms good quality dark chocolate. Either chocolate chips or chocolate bars cut into pieces.

1/2 tsp salt

1/4 tsp baking soda

110 gms butter

1 egg

1 tsp vanilla extract

Recipe – In a bowl sift the flour, salt and baking soda, mix well and keep aside.

Begin with beating your butter which should be at room temperature for about a minute. Either with a mixer or a spoon or spatula until a bit light.

Add in the sugars and beat again.

crack in the egg, add the vanilla and beat for a minute or so again.

Add in the flour and beat until just incorporated. You don’t want to overmix at this point.

Now taking your spoon or spatula, scrape the sides of your mixing bowl and stir to mix in any stray bits of flour or sugar.

Now tip in the chocolate pieces and mix until  the dough is flecked with chocolatey rubble.

Refrigerate this dough for half an hour. For better results let it go in for 3 hours.

using an ice cream scoop, scoop the cookie mixture on a baking sheet, lined with parchment paper. Make sure there is enough space between ech cookie since they spread out.

Bake at 180℃ for about 12-15 minute or until they brown a bit at the edges.

NOTE You have to let these cookies rest on the baking sheet for at least 15 minutes or they will break when you transfer them on a wire rack to cool. These are very soft and gooey when just out of the oven. Wait for them to firm up slightly.

Enjoy with a tall glass of milk or senseless television..


Spicy masala cookies


CSC_4925


For some reason these harsh winters have put me in a cookie mode. I’ve been buying, eating and baking cookies. But aha.. these are not sweet cookies but salty spicy ones.. well not spiky salty like chips or crisps but very mildly saltish to the taste with a twang of spice. The spices being rather mellow, subtly biting and very addictive.

I had no recipe to start these cookies with so I was just trying and testing in the kitchen but accidentally or rather Fortunately these cookies turned out excellent. They tasted exactly how I wanted them to and I penned down the recipe and I’m sticking to it. I am !!!

Since these were just testing I didn’t bother with making a huge batch. You can easily double or triple the amount. These cookies are not thick and big, but dainty and petite which makes them all too easy to eat.

CSC_4917


see !! not fat at all..

Ingredients 

70 gms butter (you can also use salted butter for these cookies)

1 egg

1 tbsp sugar

2 tsp salt

125 gms flour

SPICES

1 tsp cumin seeds

1 tsp mustard seeds

4-5 curry leaves

1/4 tsp freshly ground pepper

1/4 tsp chilly flakes

RECIPE

In a dry pan fry the spices (except pepper and chili flakes) for a couple of minutes until browned. The mustard seeds will starts spluttering and you will get the most heavenly spiced aroma. Make sure the pan is dry. You don’t need to add any oil.

Once the spices are browned and giving off their aromatics take the pan off the heat and crush the spices. You can do these win a mortar & pestle. I used my rolling-pin. Keep these aside.

In a large bowl beat the butter with the sugar and salt for a minute or so. add in the egg and beat again.

Now add the crushed spices along with the pepper and chili flakes and beat until the spices have turned your beautiful yellow butter to tarnished brackish spiced goodness.  Add in the flour, and at this moment its best to use your spatula or wooden spoon to incorporate everything together.

Once it has formed a sort of dough and you can see the flecks of spices dotting your mixture, believe me it only gets better now.

Roll this cookie dough on a lightly floured surface. You can make these cookies fat or thin, depends how you like them. I roll them out quite thin perhaps 1 cm or less (you can see in the picture above)

Once they’re rolled out you can use any shaped cookie cutter and stamp out shapes. You can make them round or just basic square.

Place them on a sheet. These cookies don’t spread, so you can space them close.

bake in a pre heated oven at 180℃ for about 12-15 minutes, or until the edges have browned slightly. It also helps me to rotate the cookie sheet after 8 minutes or so.

Let them cool slightly and they are ready to eat.

You can either eat them on their on as they are or even use some dip or salsa or even this hummus

CSC_4913


Another picture to inspire you to make these immediately..

Enjoy !!!

Hummus


CSC_4927Yes!!! I love ze hummus. I love hummus on bread, on crackers, on everything that can be dipped. I love absolutely love hummus. Thank you Middle East for giving us the gift of hummus.

What I don’t love is the hummus you find in jars. Ewww.. its everything thats hummus shouldn’t be. Making your own hummus will give you an air of smugness and a feeling most satisfying.. You’re creating hummus.. at home.!!!!

After many try outs, recipes, and taste tests, I finally figured a hummus recipe which is loved in my house. Easily devoured and makes a decent quantity. It’s just a bread away from being a supper in it’s entirety. Works fabulously as a crowd pleaser and a party piece. Just put this on a table with torn pieces of  breads, and you’ve got yourself a fantastic appetizer..

CSC_4933


Chickpeas, garlic cloves. tahini paste,Extra virgin olive oil, salt and coriander powder.

I don’t use canned chickpeas, though if you wish you can use those. I soak the chickpeas for 6-10 hours. Overnight works best and boil them till they are tender.

CSC_4931


Dump everything together in a food processer, you can use a blender of you wish. for me this ferocious little chopper works best.

DSC_4832


Add in the extra virgin olive oil and whizz to a paste. If you feel it’s too dry you can add a bit of water, though this won’t happen if you dont go too easy on the oil.

Garnish with some more lovely green olive oil and paprika..

CSC_4929


such miraculous, gratifying results.. This is the kind of hummus you just can’t go wrong with. Of course there isn’t a set recipe for anything. It’s always to your taste, so play with it. Adjust quantities and seasonings to your liking and the results are highly rewarding…….. Enjoy !!

Ingredients

150 gms chickpeas (cooked and drained)

4 garlic cloves

25 gms tahini paste

1/2 tsp coriander powder

1 tsp salt (adjust to taste)

75 mls extra virgin olive oil + more for drizzling before serving

1/2 tsp paprika (optional) for sprinkling before serving.

additionally you can also use some lemon juice about 1 tsp if you wish

Recipe:- In a food processer or a blender process together the chickpeas, garlic, tahini, salt and coriander powder with the olive oil. If it’s too dry or thick add in 1 tsp water or olive oil until you get the consistency you want. Keep tasting for salt. It should be according to your taste.

To serve drizzle some olive oil and some paprika for a burst of colours. Serve with pita, baguette or even crackers..